https://www.youtube.com/watch?v=RB2BcHoNn60
How To Tie A Chicken For Roasting

Welcome to the butcher of Kingsville .
Today , we are going to be learning how to take your chicken and tying it up and preparing it for an oven roast .
The reason we're doing this is to make sure those breasts are plumped up nice and exposed so that they will cook .
It's the thickest piece of meat on the animal .
So we want to make sure that that's going to cook all the way through .
If you just put your bird in like this , it would still cook , of course , but it wouldn't cook as evenly .
So we're just gonna go and tie it up to make sure that it cooks nice and evenly .
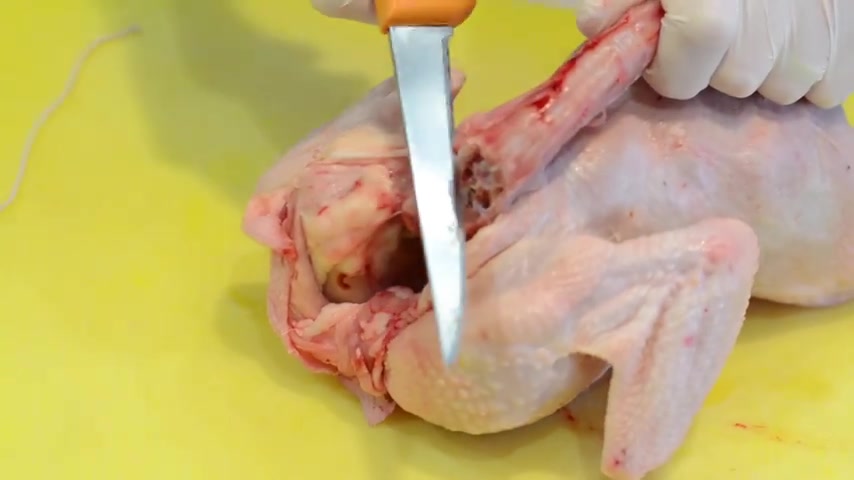
First thing I'm going to do is remove the neck .
So now when you're going to be cutting through a chicken neck , you have to remember you're cutting through a bone , so you have to use some level of force .
But , you know , don't be afraid to put a little bit of force behind it .

Also , as you know , a lot of meat wants to separate naturally , just a little bit of a cut and then a pull sometimes is all it takes , the neck is fantastic .
If you want to reserve that and keep it for , um , stocks , you can make stock , you could make , uh , chicken soup with it .
You can even give it to your dog as a treat .
Um , uncooked .
Of course .
Now to tie up the , the chicken , the whole chicken we're going to get , let it relax a little bit .
So we're going to take its legs , hold it nice and firm and kind of push it into its body here , that's going to make sure it again , pushes those breasts up .
Now , these little guys here , the wingtips are going to have a tendency to burn .
So if they're left out like this , they're just going to block in and burn .
What we like to do then is instead take those wingtips and push with your thumbs , push it right underneath the breast and they'll actually stay nice in place like that .

And then we've got uh for the most part , a relatively consistent and evenly shaped bid and I'm going to take our string , which I've precut what it is about the length of my wingspan and my wingspan is a little bit longer than most .
So I've cut it a little bit shorter , but that's about as long as you're looking for .
Put it right in the middle underneath the breast right here , doesn't really matter because you'll be surprised how well it holds on to it .
It doesn't matter exactly where it comes .
So right underneath there through the wings over top of the legs , wrap it underneath the drumsticks here .
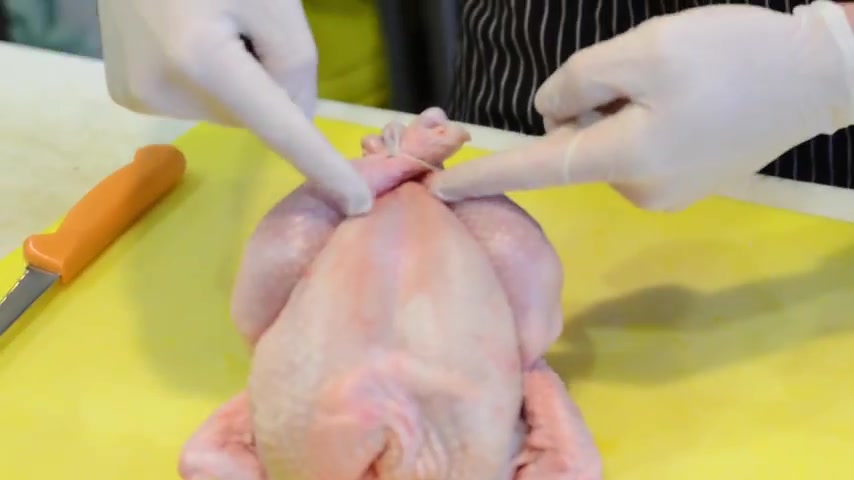
And now it's actually just a very simple knot .
It doesn't have to be fancy , nice and tight because we do want to make sure that those breasts are nice and plucked up .
Just another regular knot to close it .
Get rid of the excess .

Now , the very final thing we can do is take the tip of the breasts here , which are , now they've been kind of covered up and we'll put these legs underneath to just expose that .
So what I'm going to do here is just kind of in the cavity , put my fingers with my thumbs , I'm just going to kind of do this kind of motion and make sure that that breast comes up nice and that would be an oven ready .
Um , chicken .
Are you looking for a way to reach a wider audience and get more views on your videos?
Our innovative video to text transcribing service can help you do just that.
We provide accurate transcriptions of your videos along with visual content that will help you attract new viewers and keep them engaged. Plus, our data analytics and ad campaign tools can help you monetize your content and maximize your revenue.
Let's partner up and take your video content to the next level!
Contact us today to learn more.