https://www.youtube.com/watch?v=UDkIeRCeLfE
How to Make Stickers with Cricut 😍 – Kiss Cut and Die Cut Stickers on Shipping Label Stickers
Are you wanting to learn how to make stickers using your cricket machine ?
Well , stay tuned because I'm gonna show you how easy it is to make your very own stickers .
Hi , I'm Crystal .
Welcome to the design by youtube channel .
If you guys are new here , make sure you guys hit that subscribe button as well as the notification bell down below .
So you don't miss any of our crafting tutorial today .
I'm gonna be using the Cricket Explorer three , but you're gonna be able to accomplish this whether you guys have the newer cricket explore three or maker three or any of the older cricket models , you guys are gonna be able to follow along .
Even cricket has their very own sticker paper .
So as you guys can see here here , just two of those , I've got some white ones as well as these clear ones here .
So you can definitely pick those up from cricket .
When it comes to sticker paper .
There is so many different ones to choose from .
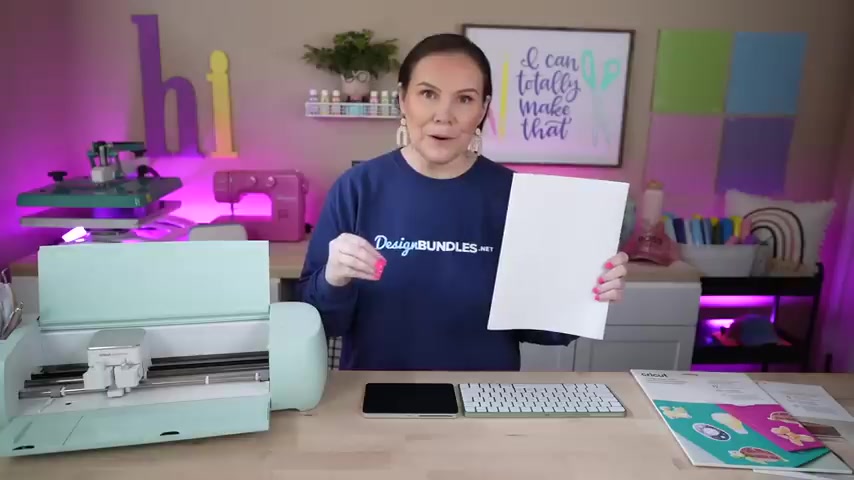
Like I said , this is just a couple whether you're using white clear or something with a gloss on it or even a holographic or sparkly glitter there's just so many different ones .
So definitely make sure you check that out .
Now , for me , my personal preference , whenever it comes to making stickers is actually using shipping labels , there are so much cheaper and you can get way more bang for your buck than purchasing something that is specifically made for making stickers .
So these are shipping labels .
I grab mine over on Amazon .
I actually get like a box of 500 for around 30 bucks or so .
You could definitely get a smaller account if you want .
I think it's like 50 of them for around $8 .
So you could definitely get a smaller one just depending .
I bought mine several years ago .
They're still good .
I keep them in the same box and just pull them out as I need them .
I just have saved so much money on it and you can actually even spruce this one sheet up .
So right now , if I print this , this is going to make me just some plain jane stickers that I could put in my planner and do all sorts of different fun things .
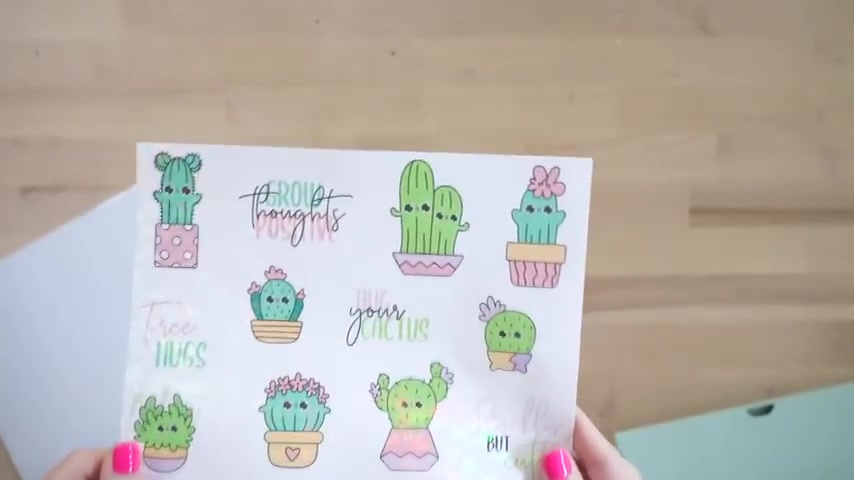
But these are just gonna be white basically like a paper sticker .
A normal standard sticker if you will .
But if you want to spruce it up , you can definitely add a laminate sheet to these to make them more sparkly or even just give it , um , that high sheen gloss .
So if you ever look at somebody that's making stickers and you're like , are you sure you made that with your cricket ?
Because these look really , really good .
I'm actually gonna show you guys here these stickers .
They're so much fun and you guys can see the sparkle and you guys can really just see how gorgeous these stickers are .
So for these stickers , I added on top , a glitter laminate .
Now I have a video coming up really soon because I actually purchased a entire set of these different sticker ones from tech wrap that have heart so and butterflies and all sorts of fun stuff .
So I've actually found some , I'm going to put to the test to make sure you guys stay tuned for that one .
But there's a lot of different ones out there on the market .
I'll link these ones as well as the one I was talking about from Tech Rock down below .
But if you guys want to see how I made these stickers , definitely check that video out .
I'll have it linked above so you guys can see how easy it is to spruce your stickers up and bring them up a whole new level .
The next important thing that you're gonna need beside your cricket and your sticker paper is going to be an ink jet printer .
You can definitely use a laser printer if you wanted to .
And one really cool thing that you can do with a laser printer is you can actually run it through a foiling machine .
So , you know , those laminating machines where you add foil and that's another way to spruce up your stickers even further as well .
So that's just another idea when it comes to a laser printer .
If that's something you guys want to see , make sure you guys comment down below so we can make it happen for my printer here .
I've just got a cheap one from Walmart .
It was around $40 or so and it is a cannon and it's been really good to me .
I really like it .
It's an ink jet .
It's simple , affordable and it's perfect for making stickers .
All right .
So now that we've went over , what do we need when it comes to making stickers ?
Let's go find our design for today .
I wanted to show you guys a couple of different sticker bundles , whether you guys are making these to just have some really cute stickers for your tumblers or maybe you're making them for your laptop or you're going to be selling them .
I'm gonna show you a few different ones that we actually currently have for free .
If you guys did not know , we actually have a freebie section , which is right here at the very top .
So when you come to design bundles dot net , you can actually come right here where it says free designs and then you can go down to free svgs so on and so forth .
Once you get there , you can simply type in stickers and you're gonna get so many different ones for free .
So this one is loaded , it is 60 designs , 60 free stickers scrolling through here .
You can see there's so many cute ones .
These are adorable .
Perfect .
Once again for throwing on laptops um in the kid stuff , you can make these for the kids to play around with um put them in your planners or if you have a small business or even any sort of business , these are the ones that you could die cut and throw into your packaging .
So if you ever see that or you are selling individual die cut stickers too or sticker sheets either way .
Perfect .
Perfect , perfect .
There is over 60 designs in here .
Here's another free sticker bundle .
This one is perfect for a small business as well .
I would say small business .
I don't think any business is small , ok ?
It could be a small business , big business .
You just starting out any sort of business .
These will be perfect for you as well to put on your packaging and all those kind of fun things completely free .
These are really fun .
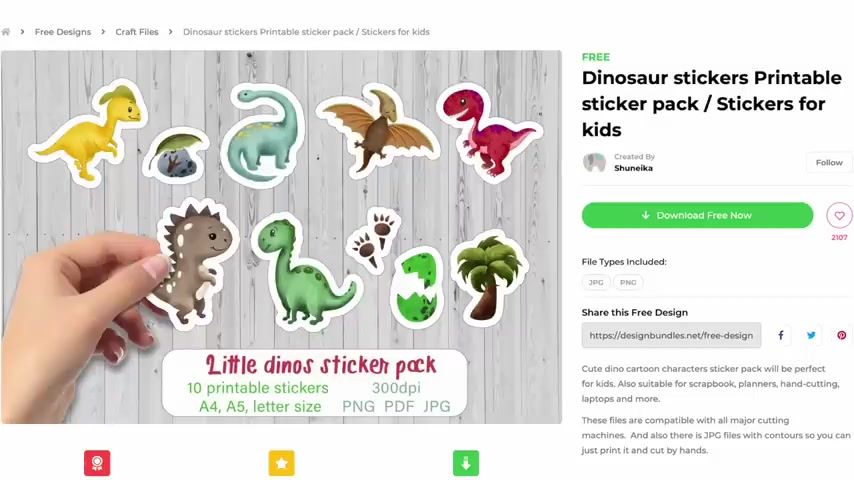
Dinosaurs , maybe you're a kindergarten teacher or once again , you got a small kid at home and you want to make some stickers for them to play around with .
Um or maybe you have a doctor's office and you like to personally make your own stickers for the kiddos .
Once again , maybe you're going to sell these stickers , you're going to make and print the stickers and sell them .
These are adorable who does not like a dinosaur .
And last , but not least here's another little set of stickers , which I think would be perfect .
Any sort of planner , maybe you do some Bible journaling or maybe even once again , adding these in your packaging or on your packaging for a business , once again , completely free .
Now , coming back over here to the really fun character ones um to download these , all you simply have to do is you see where it says download free .
Now , all you're gonna do is click on that and it's going to add it to your car .
So it's downloading it right now .
That is it .
That's how easy it is to download those .
You don't have to add it to your card completely , check out , give us your email and all of those things all you gotta do is download it , jumping into cricket design space .
We're gonna start out here on the canvas and then we'll work on bringing in the upload .
One of the very first things that I want to do when it comes to creating sticker sheets is starting out with my printing cut area .
So you guys know whenever it comes to cricket , you can only print to cut print and cut if you will um a certain area .
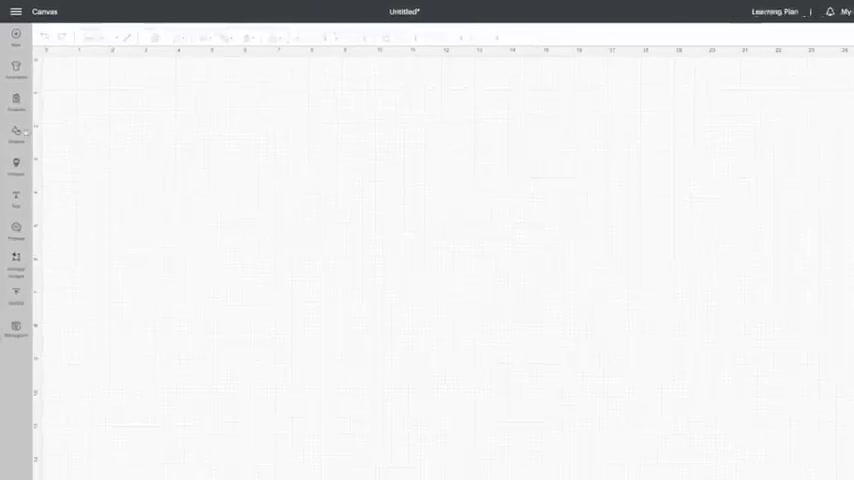
So I believe it is 6.75 by 9.25 and the way to figure that out is like this .
So we're gonna come over here because the very first thing I like to do is bring in a square .
So I'm gonna go ahead and come over here to shapes .
We're gonna click on that and then I'm just gonna simply grab a square from here .
We're going to just grab our square and we're going to resize this guy out .
So first thing I'm gonna do just to show you how to get that number is I'm going to drag this out .
Nice and big .
Then I'm going to change this to a print and cut .
All right .
So now that we've got this sized out , we've changed it to a print and cut , you guys are gonna notice this warm right here .
If you're bigger than that print area , you are going to get a red little dot Like this , all you gotta do is click on it and you're going to now see .
So it is 6.75 by 9.25 .
So you cannot um , cut anything bigger than that .
So that's what you have to work with .
So that's what I like to do first for my sticker sheets .
So now that I've got that number , I'm ready to go .
So I'm gonna go over here and I'm gonna hit the unlock button .

I'm going to change this to six , 6.75 and then I'm gonna change this side .
That's why it's important to unlock .
So that way I'm giving that square my own dimensions and I'm gonna do 9.25 enter .
So once we've got that , you wanna go ahead and hit that lock button back and we have our perfect sticker sheet .
So say , for example , that I'm actually going to slice this in half and I'm actually gonna do two sets of sticker sheets , you could do that as well .
So if I wanted to come in here and add a line right in the center , I'm just gonna come up here .
So I can visually see something .
I'm gonna go in here and grab this line .
I'm gonna rotate it like , so get it at that 90 degrees just like that , I'm gonna size it out .
So that way I can see visually what I'm doing and then I can go ahead and center this guy up on here to center this .
All we simply have to do is select both of these layers here .

We're gonna come up here to a line and then I'm just gonna go to center .
So that is perfectly centered now , so that way I can create two separate sticker sheets if I was going to work with those little ones .
And then when I'm done with this , which I'll show you guys in a minute , we're gonna do that today .
We're gonna do it today just so you guys can visually see creating two separate little smaller sticker sheets .
All right .
So we're gonna leave that .
So we are ready to upload our designs to do .
So you're gonna simply come over here to upload .
You're gonna click on that .
We're gonna go to upload an image and then we're gonna go to browse .
So what I'm gonna do is go to my downloads , find the exact bundle that we're using today and then I can start to click on these and figure out which ones I want to use .
So we're gonna go into this first one here and then we're gonna choose crickets .
We're gonna go in here and we're gonna choose that PNG version and we're gonna click on open .
So from here , we're gonna hit complex .
That's just personally what I like to use .
I'm gonna hit continue and then this area right here is gonna allow you .
So for these sticker sheets in particular , they're not individual .
Now , when you get stickers from us , sometimes some of those stickers are going to be individual so you can bring those in one at a time or for something like this , they're all together , which is personally what I love because I'm creating sticker sheets and not just one individual one .
But if I was , I could actually go in here and I could choose this erase tool right here and I can make my eraser as big as I want to , I'm gonna go in there really big .
So that way I can go in here and erase .
So I can actually go in here and I can say I'm only wanting to bring in that top one .
I'm gonna go in here and I can just simply erase all of these things .
Now , you may say what if we had it on the select and we clicked it here .
It's only gonna erase just a tiny piece .
So you definitely want to stick with that eraser tool and just go over everything until it's completely gone and you're gonna end up with just one or two or whatever you simply want .
So that's just another little tip for me .
So now what if I change my mind ?
I started in this and then I'm like , you know what I want just in case for today's video , you guys can hear a noise in the background .
Somebody wants to be played with .
He keeps bringing his ball in here and sticking it under the table and really clawing at it and trying to get it .
So how to take the ball .
So now he's down there sneezing and twisting his head and , and making me look at him .
So if you guys hear anything down below and see he's sort of it .
He's like I want the ball .
Where's that ?
He also does this , he makes me claw , he calls my life and it makes , makes you hold them like that .
So if you guys ever hear anything in the background , it's probably this guy and in case you're wondering his name is Kota .
We call him , but he's gonna go now and we're gonna finish the video .
Now , if you've changed your mind and you decide you want to bring those pieces back in , all you simply have to do is go to restore , then you can adjust the brush size once again and you're going to go over those areas again .
As you can see , it's bringing it right back in .
So you're just painting that little guy back in there .

Another thing that you can definitely do is use the undo tool here .
So it's gonna undo that , but then it's gonna bring it back like this .
So you can definitely use that tool as well .
So that's just another tip here .
When it comes to uploading your own designs , you can customize these in this little area of how you want those uploaded .
And I absolutely love that feature .
So now let's go ahead and say it .
So we're gonna go down here and hit apply and continue .
And so from here , we want to choose print and cut .
So you notice the cut image on the left that's just gonna cut your outline of it and that's not going to give you any sort of the color .
So you wanna make sure that you choose the print and cut , you can tell that it's highlighted with green .
We can rename this if we want to .
So we can put in stickers and you can specifically name that if you want to put in tags and add them to whatever folder that you have .
I'm gonna go ahead and hit upload and we're gonna add this to our canvas .
All right .
So now that we've uploaded it , it is here in our uploads .
So I'm gonna click on that design right here and we're gonna hit add to canvas .
All right .
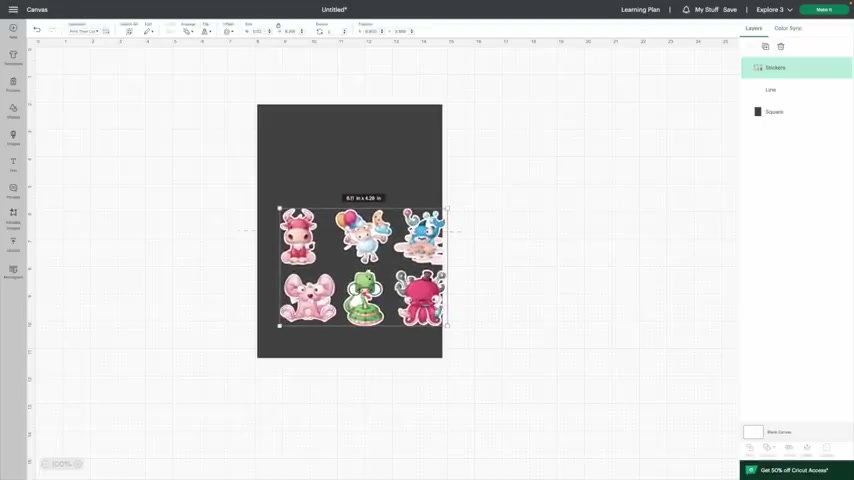
So you're gonna notice it's gonna come in quite large .
I'm just gonna go ahead and start to zoom this guy down .
I want this guy to fit on one side of this .
So we're gonna do this and I'm gonna start to get this guy up here .
So perfect .
It's fitting right inside of there .
So if I actually wanted to create two sheets of this , I can definitely just come over here hit duplicates and now I have the exact same size and I can line it up just like .
So now if you specifically want these perfectly lined up , you could go ahead and select the first one , select the second one , I'm holding down the shift key here and then we're gonna come over here to a line and then we're just going to a line left .
So those are going to be perfectly cut out and then whenever we cut them out , I'll show you guys how to make those perfect little sticker sheets .
Now , if you wanted to bring in any other designs and you wanted two different ones , you can definitely continue to repeat that process with how I uploaded and brought them in .
All right .
So now that these are ready , let's go ahead and get rid of our square .
You can simply do that by just selecting right over here .
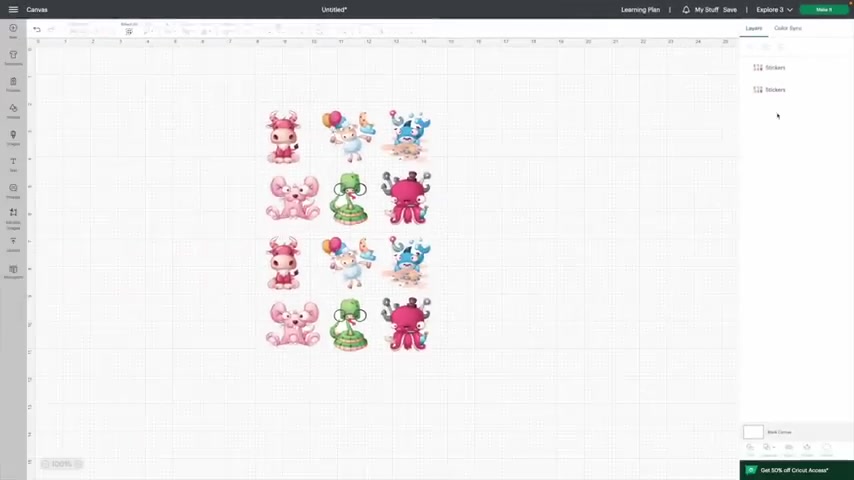
So instead of trying to fuss and trying to click on this behind , just select it right here , you can see that it's highlighted in that green and then hit the delete on your computer .
Next , we're gonna delete that line .
So we're gonna go ahead and hit delete and now the line's gone .
Now , if you wanted to do um a print and cut where it cuts around the border for you , you can definitely do that .
But today we're gonna do that with a paper trimmer .
So let's go ahead and get going .
So you want to go ahead and select both of these because I want them to be attached and stay right where they are for when we do that printing cut .
So now that we have them selected , we're gonna come down here and hit attach .
All right .
So now that we have those selected , it's going to keep them together in this position when we take them over to cut them out .
So let's go ahead and make it to do .
So we're gonna come right up here , we're gonna click on and make it if you guys are new to cricket and you're new to print and cut and you're seeing this for the first time .
What you're seeing is a print and cut .
Um And this black line right here is designed for the cricket to read it .
So there is actually a little laser in there and when we load it , it's going to read this and it's gonna tell it exactly where it needs to cut all of these guys out .
So you should have something that looks just like this .
Next .
We're gonna go ahead and hit , continue .
When it comes to printing , cut , you actually have a two step process for one .
We're gonna have to send it to the printer and then we're gonna cut it out .
So you may see a different screen here compared to sending it over and seeing to pick your uh materials , which we'll get to here in just a second .
All right .
So now we're ready to send this over to the printer .
I've turned on my printer and I've loaded it with sticker paper .
So we're gonna go ahead and hit send to printer .
So from here , you're going to tell it what printer you're gonna send it to .
And right now it automatically turns on vine , but I turn mine off .
Since it's just white , we're not adding color to make sure it's not , you know , getting white into where the color should be .
We don't have to worry about that .
So I like to just turn mine off right away and we're gonna go ahead and hit print .
All right .
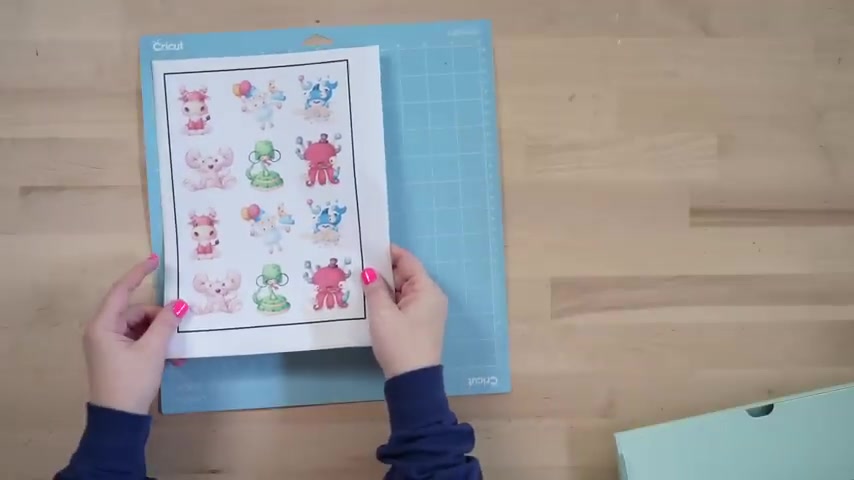
So now that it's printed it for us , we have our printed out stickers right here .
So all we gotta do is cut them .
So you should have something that looks like this .
You're gonna have your print board for your cricket to cut it out and then it's gonna cut all of these little guys for us .
So now we're ready to load it on the mat .
So we're just simply going to load it right up here .
You want to make sure that you're loading this in the exact same direction that you have it loaded on cricket design space .
So what you can do is hover right over here on your mat .
It's going to make it so much bigger so you can see everything .
So this is loaded correctly .
It's very easy to put this upside down or turn it and you don't want to mess that up .
All right .
So we've got it loaded on our mat and we are ready to go for our materials .
We're simply going to come over here to browse on materials and search whatever we're looking for .
Now for me , I'm going to show you a little trick in case you guys are using shipping labels .
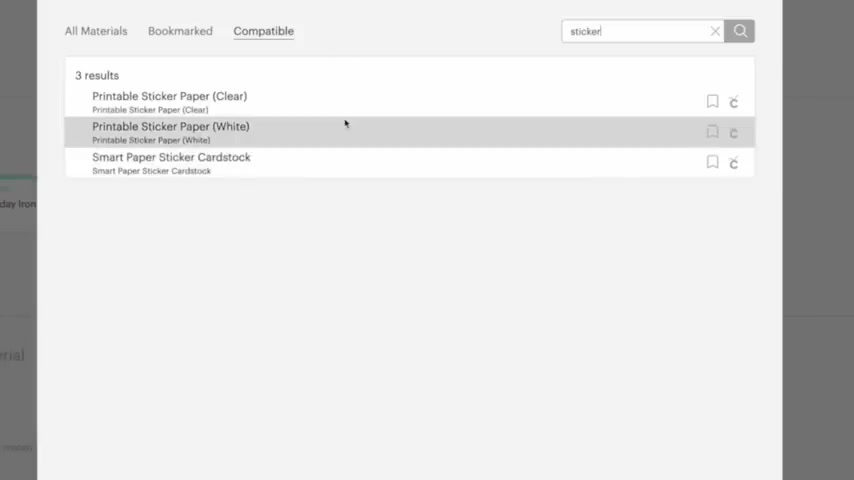
But if you guys are using the cricket brand specifically , you could come up here and type in sticker , you're going to get the variety of stickers so you can choose whichever one that you have .
So that way it's gonna cut out precise .
So cricket has these nailed down and they're perfect and ready to go .
Now for me , since I'm using a shipping label , I'm gonna be going over here to washy and hit inner .
So I'm gonna go ahead and use the washy sheet .
So cricket , I don't think they sell them anymore if they do , they might , they had washy sheets .
So you , you know what washy tape is ?
It's the exact same thing .
This stuff is very thin .
So you wanna make sure you're not cutting all the way through or you're gonna get a dye cut sticker , which I'll show you guys here in just a bit .
But when you're making sticker sheets , what you're looking for is a kiss cut where it's not cutting the backing , just the sticker .
So we're gonna go and do this washy sheet and we're ready .
So we're gonna go ahead and get this guy .
We're going to load it in the machine .
All right .
So now we're done cutting out our stickers .
We're going to unload it and the way that I like to unload my stickers from the mat is flip your mat .
Uber and you're simply going to remove your sticker sheet from your map .
All right .
So there we have it .
We're gonna get this guy out of the way and get ready to cut it down with our paper trimmer .
All right .
So first things first , we want to go ahead and remove our borders .
So that's what I like to do is just get it in here and just remove that entire print border all the way around .
So you wanna make sure that you're keeping it nice and straight and we're just gonna go and get it right .
So , and just continue to go all the way around , like I said , so this is super duper easy .
Now , once again , you can definitely create a box around these inside of crooked design space and have it create those sticker boxes for you .
So as soon as it was done cutting these out , it would then cut out those boxes as well .
So we are gonna go ahead and trim down our last one just like .
So , so now we have our border gone .
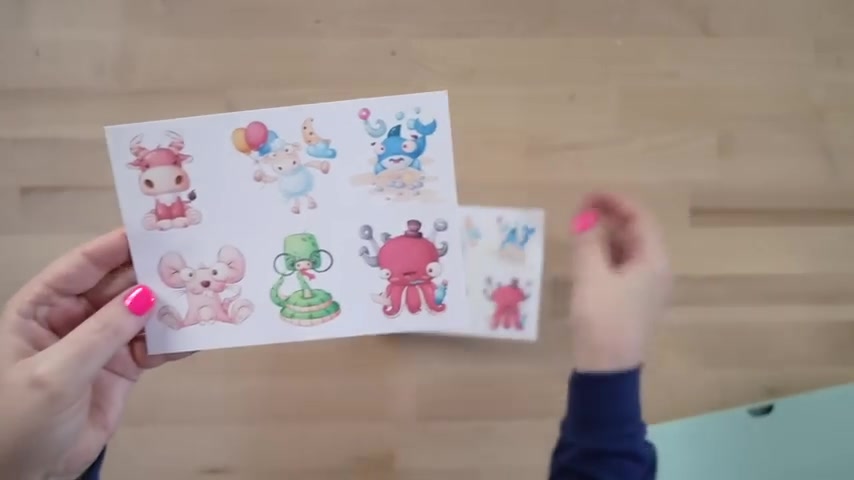
So to make these sheets individual , we're just gonna get right up here , get it nice and even in the middle there and trim it and we printed out two sticker sheets .
So these are perfect whether you guys are making them for yourself , for your planner , you're sticking them on your laptop or maybe you're going to be selling these things .
So that is how easy it is to make your stickers .
Now , for these stickers here , these are called a kiss .
So whenever you go to peel it off , it's going to come off the sticker sheet just like .
So , so this is a kiss cut sticker so I can have this loaded in my planner , carry this around and take them off like that .
So these are considered kiss cat stickers .
Check out that washy tape setting .
It is absolutely perfect .
Um But once again , if you're using the cricket materials , use their settings by simply searching sticker and you're going to get those to pop up .
Now , I used to use a sticky note setting , but the last time I went to go look for it wasn't there , but they do still have the washy tape setting .
So that's absolutely perfect .
So this is a kiss cat .
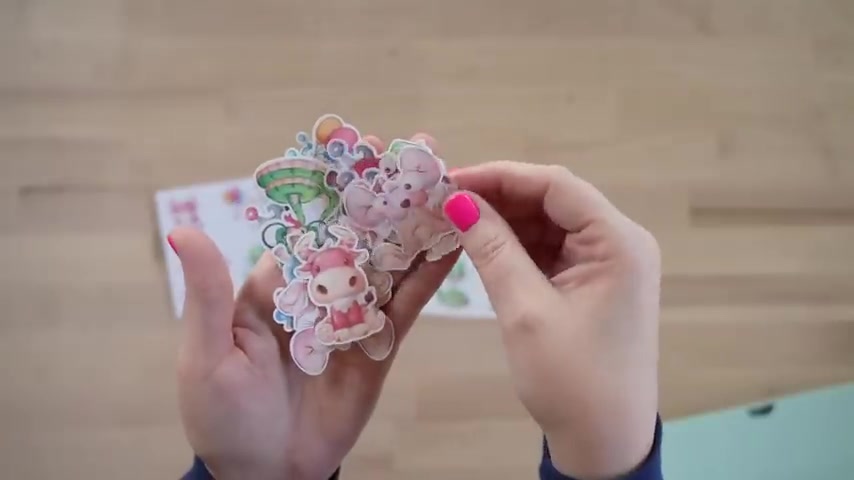
Now , let me show you a so they look like this , but they are cut all the way around , they have their backing on them and so you can put these individual in things so you can give these to somebody , maybe hand these to the kid individual or maybe you're going to once again include them in your packaging as a little freebie , but they are so so sweet .
I love these designs and these are completely free stickers , you guys so definitely make sure you check them out .
So these are dye cut stickers and what I did for these to be dye cut using the shipping labels .
I chose the sticker setting for the white sticker paper for cricket .
So I put in sticker and then chose that one and that completely dy cut those out .
Um So you guys can definitely see that it is so , so easy to make your dye cut versus your kiss cut .
I love it .
So , whichever preference you want .
You can also sell these , whether you're going to be selling these as sticker sheets .
A lot of people even like to buy dye cuts .
So maybe they're going to buy 100 dye cut stickers that are in individual of this same exact guy .

Um Once again , I showed you guys how to bring these individual if they are already connected as a sticker sheet and there you guys have it .
It is so easy to make your very own stickers using your cricket .
I hope you guys have found this helpful , whether you guys are new here and you just learned how easy it is to make your very own stickers or maybe you guys got some inspiration today to get out and make some stickers using your cricket .
Maybe you're going to start a small business or maybe you even realize that we have free designs .
You guys let me know in the comments below .
What did you guys learn that was new today or if you guys are just now starting out .
Let me know what machine did you guys go with ?
Was it the cricket explore three , the cricket export two or maybe even one of the makers .
Let me know in the comments below .
I hope you guys have enjoyed this .
If you did , please hit that like button .
And if you guys are new here .
Please consider hitting the subscribe button as well as the notification bell down below .
So you don't miss any of our crafting tutorials .
Bye for now .
Are you looking for a way to reach a wider audience and get more views on your videos?
Our innovative video to text transcribing service can help you do just that.
We provide accurate transcriptions of your videos along with visual content that will help you attract new viewers and keep them engaged. Plus, our data analytics and ad campaign tools can help you monetize your content and maximize your revenue.
Let's partner up and take your video content to the next level!
Contact us today to learn more.