https://www.youtube.com/watch?v=vahW_FJgLoA
Proper Tie Length of a Full Windsor Knot

Achieving proper tie length is a very difficult process and this can realistically only be done using trial and error along with three tips I will provide for you before we start .
Please review one of the videos listed in the description to learn about what I call the tie hole , tip , one , the magic button , create the tie hole XX over this button here .
And yes , we're gonna call it the magic button .
I couldn't come up with anything better .
This is to have a frame of reference for when we tie the tie a second or third time or fourth or fifth or sixth crossing here or here on subsequent tries will affect time length dramatically .
Also take note which side of your neck , the fat side of the tie is on to start line up the skinny end of the tie about at your rib cage when tying a full Windsor a little lower for other knots like the half Windsor pratt or four in hand .
I'm dying .
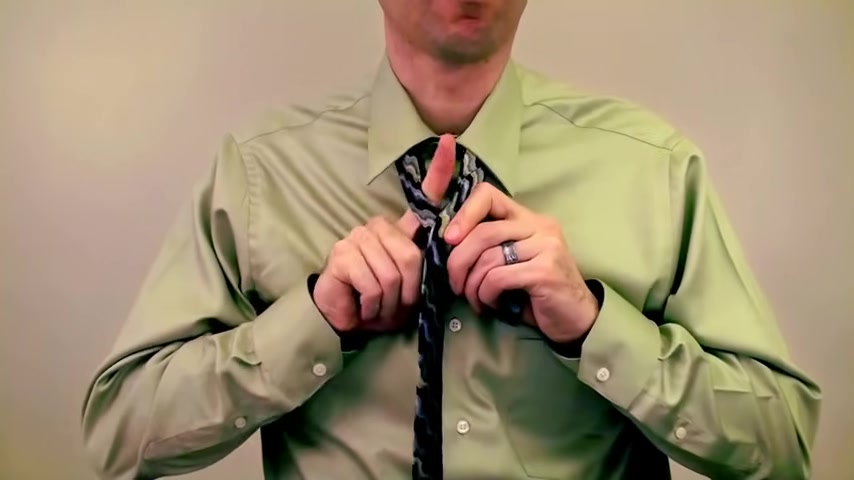
The full Windsor make the X over the magic button , creating the tie hole .
We now take the fat end and go out of the hole behind the hall in across and out , then finish it up .
Taking a look at the belt cam .
We can see that this time the tie is too long by about two inches or five centimeters .
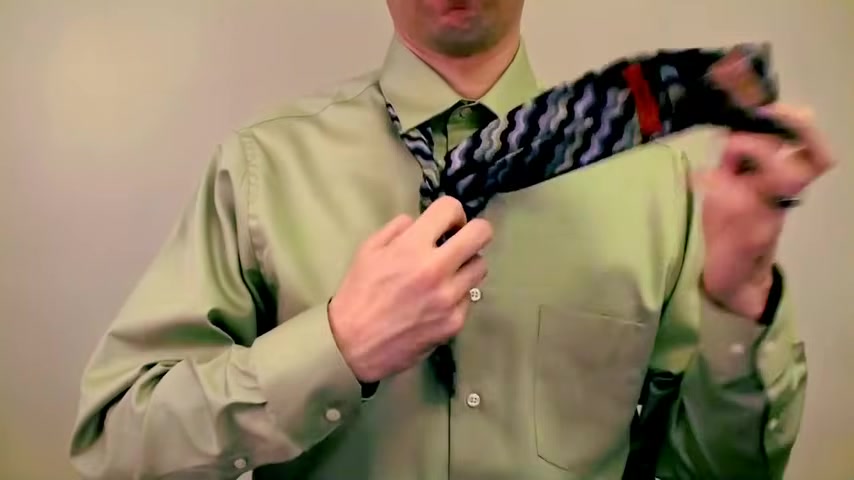
Now , before you take the knot apart and try again , recall which side of your neck has the fat end of the tie tip .
Two , drop a breadcrumb on the fat side , grab and hold the tie above the knot here .

Keep holding this spot as you pull the knot apart .
When making the X again , line up the spot you're holding over the magic button .
So now you'll be pretty close to where you started the first time .
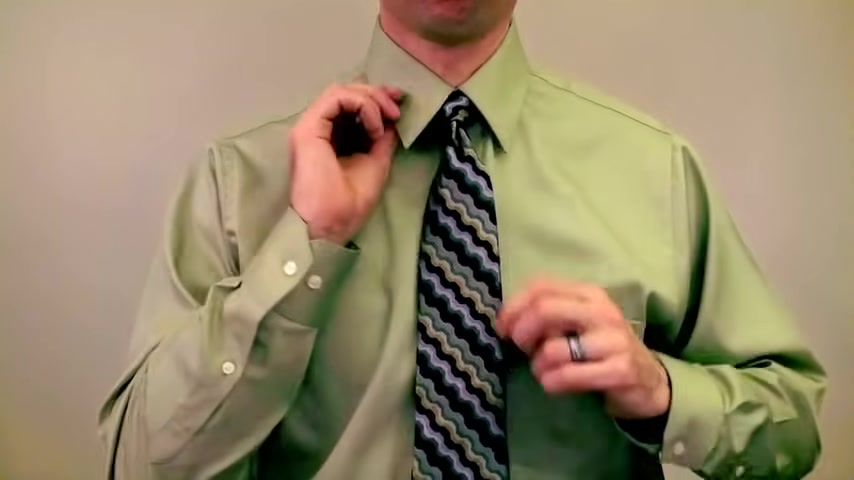
Here's where we're gonna change the tie length .
Remember how much you want to shorten or lengthen the tie and mark a new spot for me .
That's about two inches or five centimeters .
When shortening the tie , mark the new spot below the knot and above the knot to make it longer wherever you place your new mark , make sure it's on the fat end side .
Just for an example , I'm going to go shorter than I need to .
We tie the tie again by going out behind n across and out , then finishing it up .
We can see that we are now too short .
Well , I kind of did that on purpose .
Too short is actually better than too long because it allows us to use tip three .
Pull on the fat end with both hands .
Grab the fat end of the tie and tug gently .
You may need to reshape the knot as you go by squeezing on the bottom of the knot and or pulling the top two ends apart , the fat end may also shift to the side .
So feel free to readjust that as well by pulling on the fat end from side to side .
Now you can pull on the skinny end and tighten the knot around your neck , checking the belt cam again .
We can see that we are still too short .
You can try using tip three again , but pulling on the fat end will only get you so far .
Well , if at first you don't succeed , tie tie again .
Yeah , I just came up with that .
Are you looking for a way to reach a wider audience and get more views on your videos?
Our innovative video to text transcribing service can help you do just that.
We provide accurate transcriptions of your videos along with visual content that will help you attract new viewers and keep them engaged. Plus, our data analytics and ad campaign tools can help you monetize your content and maximize your revenue.
Let's partner up and take your video content to the next level!
Contact us today to learn more.