https://www.youtube.com/watch?v=hdUggFMHrwQ
How To Make Stickers with Cricut and Procreate (Die Cut & Kiss Cut)

In today's video .
I'm going to show you how you can make vinyl die cut stickers like these as well as these Kiss cut sticker sheets at home using procreate on the ipad and a cricket .
I'll be using the ipad pro 12.9 inch .
This is a Gen 4 2020 model along with the gen two apple pencil .
The app is procreate along with cricket design studio .
The sticker paper we're using today is printable vinyl from the paper studio .
This comes in 10 sheet packs available at Hobby lobby .
The model , the cricket is the maker and the printer is a Canon MG 6200 .
As an artist stickers are a great way to connect with your fans and as a side hustle .
Of course , there's a lot of companies that you can order stickers from like red bubble or sticker mule .
But as an artist , nothing beats the feeling of making something yourself by hand .
Offer them for sale on your website , use them as Patreon tier rewards or sell them on sites like Etsy .
The possibilities are endless .
So if you want to see how I make these stickers and the process that I use , keep watching .

All right guys , let's go ahead and jump into the video .
Then the first thing we're gonna talk about is how to make a die cut style sticker using procreate and the cricket .
I'm using this design .
Of course , this is something that I already made previously .
This was from a previous time lapse video that I had on the channel .
If you guys are interested in how to draw something like this using sketching and how to ink it , colors shadows , highlights , you can definitely hop back and watch one of my previous videos .
I've covered that a lot in previous videos .
This one , I'm gonna keep it short and kind of just use this premade one to save some time .
We're just going to talk about how to prep a finished design before you get to this part starting out though .
Definitely make sure you're starting with a large canvas .
This one's a 4000 by 4000 pixel , 300 DP I canvas , you want it big .
So once you start to scale these down , you don't lose any .
So the first thing we need to do is add a nice white stroke around our design .
So to do that , we're going to go ahead and add a new layer here .
We're going to drag and drop this layer down underneath this layer .
One of course , I've got all these layers merged .
So I've got these pinched together if you're using , you know , a different layer for lines and colors , shadows and highlights , just make sure that this is your very bottom layer .
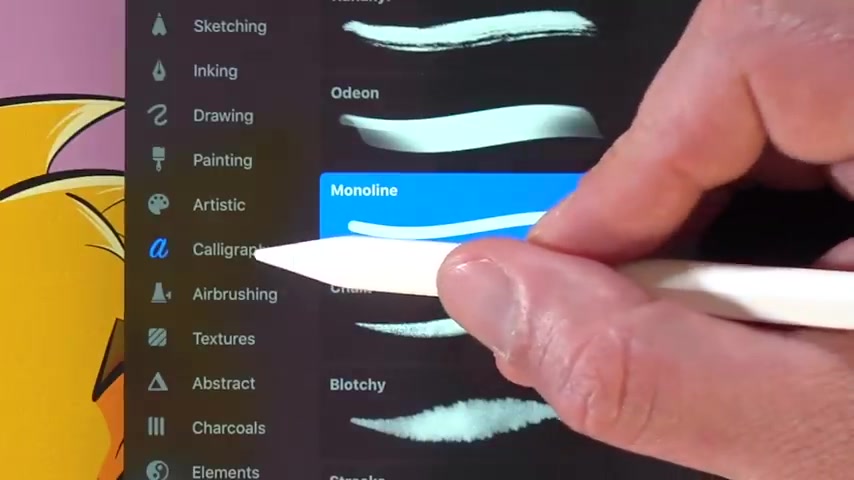
Now , for our brushes , we're gonna go ahead and go into our calligraphy set and we're going to choose Monoline clicking mono line .
We want to make sure that our streamline on this under our stroke path is turned up to Max Monoline is nice because no matter how hard you press , the size of the line stays constant and streamline allows you to kind of remove the shakiness .
Since we're going to go around this kind of slow , we want to make sure our line does not shake .
So that's what Streamline is gonna do .
So we're just gonna go ahead and go around here .
Anybody watching this that might feel the need to comment .

I did a previous video about how to outline with procreates and the comment that constantly came in said doing it like this is a waste of time and I'm doing it all wrong and you need to actually just go ahead and duplicate your layer , fill that layer with white and do a uniform transform and drag it out and around .
And the reason why I don't do that is because that doesn't work .
So all the people that left comments before are saying that's how you do it .
They obviously have never tried it because with a complicated shape like this doesn't work , works with circles , works with squares but does not work with complicated shapes like this .
So there's that little tidbit of information for you .
Then I'm just gonna add these little side parts here where the whiskers come out like .
So , so there we go .
We've got our stroke here .
I'll turn off the background so you can kind of see what we're left with really nice white stroke around here .
So we're gonna go ahead and save this to do that .
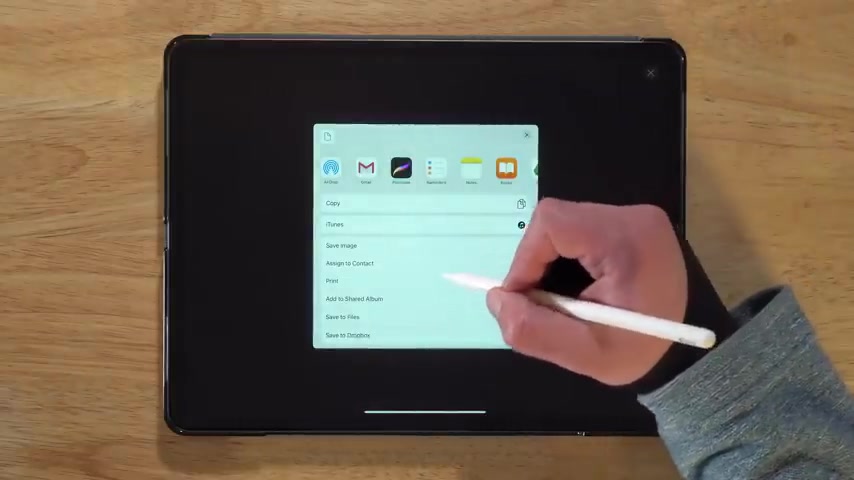
We're going to go up to our Wrench icon and go to share and we're going to select P and G .
This is gonna save this with that transparent background .
Make sure your background is turned off and then we're gonna go to save the files and then wherever you want to save it .
I've got a new folder made down here called save files .
You can make a new folder if you need to up here and let's just change this to cats and we will save it and there we go exported successfully .
Now , we're gonna move over to cricket Design studio , ok ?
So from here we need to jump over to cricket Design studio .
You can download this from the App store .
It's a free download when you first launch it , you do need to set everything up .
So you will have to do machine set up and do the machine selection .
I've got the maker , it's gonna walk you through all of it , really self explanatory .
Everything sets up through blue too .
I can't show you here because it's already set up .
But like I said , super easy .

So once you have that done , definitely come back and we can go ahead and get our cat uploaded into the program .
It's one thing I love about the ipad .
The fact it's got procreate and this cricket design studio in one , no need to transfer over to the computer .
You can do all this from the ipad .
So now that we're here , we can go down here to upload .
We're going to select that and we're gonna go to browse files .
This is going to bring up our locations on our ipad .
We're on , on my ipad and save files brings up our cat .
So we're gonna click on that guy there and you'll see the first thing that it shows is it brings up this version , which is the colored version , this one in the window here is the cut version gives you the silhouette we can hit next and you're gonna see that silhouette's there as well here .
What you're really looking for is to make sure that there's no dots outside here .
Uh If you're doing the creation process , you might have some little faint lines around that you missed seeing and the cricket is gonna pick that up and want to cut around those too .
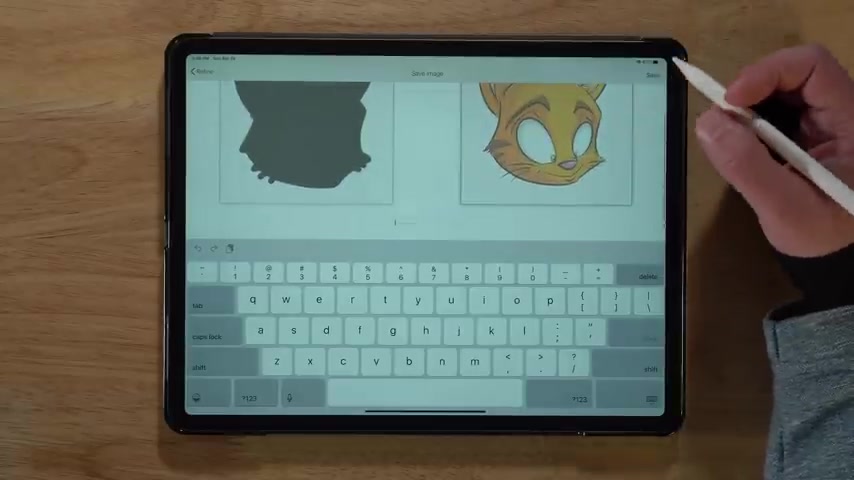
So make sure that you're looking out for those and then we're gonna go ahead and hit next from here .
This side is gonna be the cut image side .
This is the and cut .
We want to make sure that this side is selected .
This is going to send it to the printer first and then it's going to allow us to cut it .
So we want to make sure that that one is selected .
That's our sticker one .
We're going to call this cat and hit done and it's gonna save and there we go .
So we can go ahead and select this guy and hit insert and it's gonna put it on our canvas here .
So you'll see .
We've got the , this is all in inches , the dimensions of everything here kind of zoom in a little bit here .
We're gonna select him and of course , we need to make him quite a bit smaller .
I wanna get probably about six of this guy on a sheet .

So gonna do probably about , let's see when we go three down , probably about there .
We'll see here in a second .
Uh So we've got him , let's go ahead and go to our actions and let's hit duplicate .
Then we're gonna select him , slide him over right there and you'll see the lines , let you know that everything's in place .
And then if we just drag kind of highlight both of them , we can duplicate those again , we'll drag those down here .
Make sure there's enough gap in between here , even though uh you know , you can see it here .
You gotta think that white line is gonna be there as well and then we're gonna duplicate that one and drag that one down , making sure we got enough room for those lines there .
Ok ?
So we've got our six heads here .
Let's go ahead and go to make it and check and see if these are gonna work .
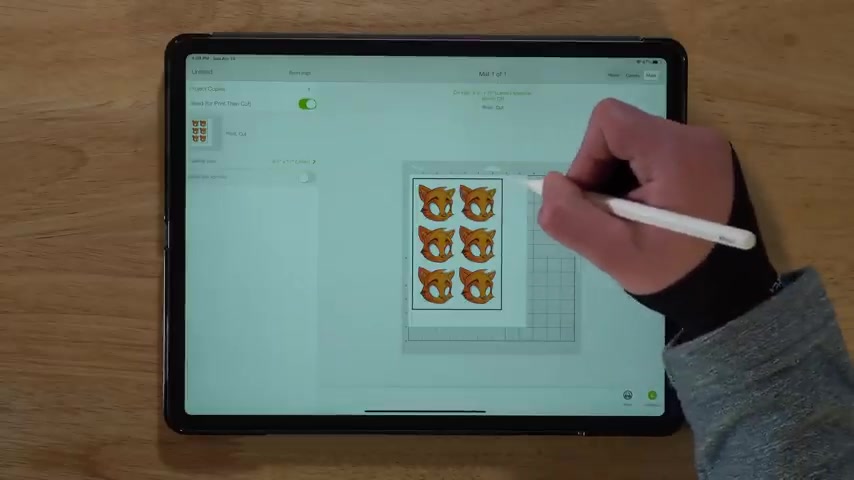
Sometimes if you've got too many on a page , it's gonna want to print out on double pages , you know , page one and page two and we don't want that , but you'll see it works here .
One thing you will notice when you kind of play around with this , this black line is basically how the cricket determines where the paper is at and where to cut at .
That's kind of like a guideline that it sees .
Uh this will not fill up the entire page .
So you're not gonna be able to use this entire white section .
So we've got everything set up like we need to .
So let's go ahead and hit print and then it's gonna ask for your printer .
So we're gonna go ahead and select a single sided color .
This is really going to depend on your printer right now that we're over to our printer .
We're going to throw our vinyl sticker paper in face down .
Like , so then the cricket design studio , we're just gonna go ahead and go to print .

Yeah .
Now that we've got our sheet printed , we need to attach it to the cricket cutting mat .
Really important thing here is to make sure this top left hand corner matches and goes right and centered in there as the sheet comes down the page .
You want to make sure it runs perfectly with the line here and then perfectly with the line on top .
If anything is off during this process , it's going to affect how the cricket cuts your lines and everything might not be lined up perfectly on the cut .
So it's really important to get this as accurate as possible .
Now that we've got that on there , it's ready to go in the cricket .
You'll see here , our cricket machine is ready , the load button is flashing .
So what you need to do is make sure the mat slides into the guides there on the left and right and hit the arrow there to load .
Let's go back in the cricket studio and finish everything up .
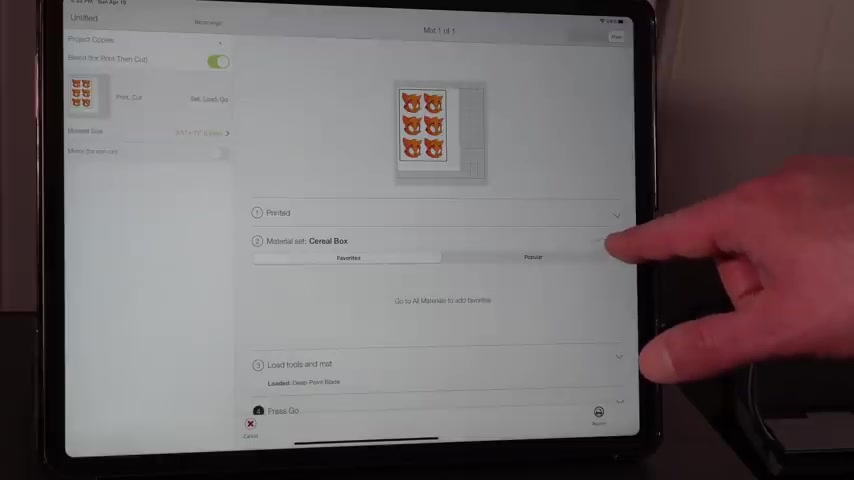
First thing we need to do is set the material and you'll see if you go to all materials , there are just an absolute ton of presets in here to speed this up .
Let's just go to the search bar and type in sticker and you'll see these come up .
You're gonna be using sticker paper a lot .
So I would recommend going ahead and hitting that star there .
That's gonna allow that to come up in your favorites and let's click on that and you'll see it adds the sticker paper in there .
We've already got everything loaded .
So now we just need to press , go on the cricket and start to cut .
All right .
So we are ready to cut .
All we have to do is just hit the flashing cricket logo here and everything is gonna start .
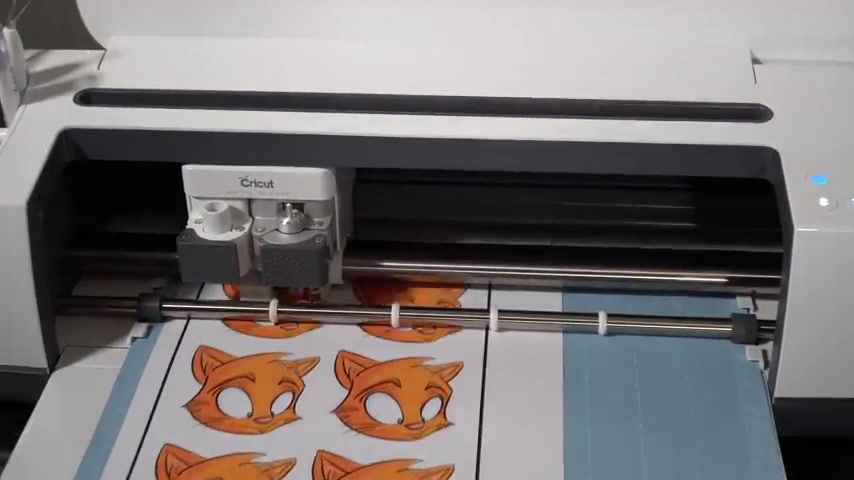
Yeah , now that the cutting process is finished , we just have to hit the flashing arrow button to unload the sheet from here .
We're gonna turn the mat over and we're gonna kind of bend and peel the mat back as we keep the sticker sheet flat .
Like .
So our stickers are stuck on the mat .
Next , using our scraping tool , we can get underneath the stickers and just pop them right off the mat .
Here's a close up of how the dye cut stickers turned out as you can see these things really pop color accuracy on this paper is just fantastic .
The cuts are just super clean .
You can just see how well that stroke forms around there and just how clean that cut is just really , really nice and the backs pull off super easy too .
I really like the vinyl that stickers are made out of .
It's very flexible and it's just got a really nice professional feel to it .
So next up , we're gonna talk about how to make kiss cut sticker sheets .
These are gonna be a sheet , a collection of stickers .
When you peel off the sticker , the back remains intact to the whole sheet .
And I've got this cute little Kawai sushi that we're gonna work with here .
So you can see this time around .
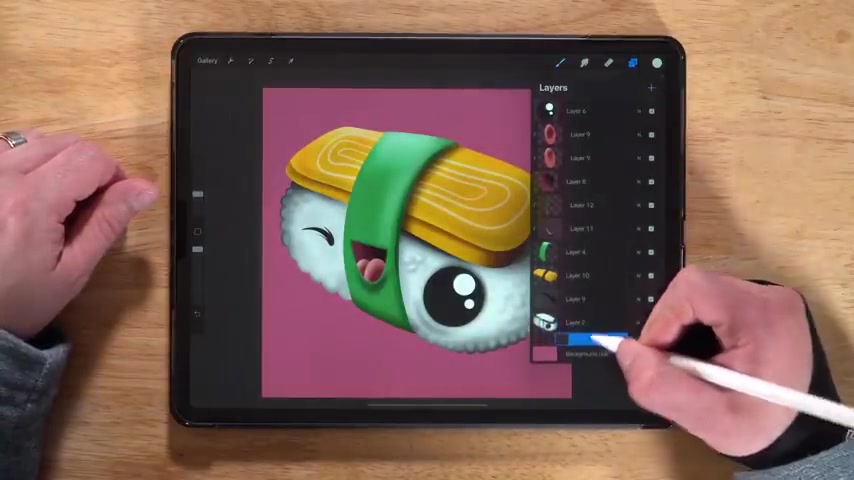
I've got all separate layers .
So I'm gonna make a new layer and drag it underneath here .
Once again , white selected and calligraphy Monoline selected with Monoline turned to streamline .
Let's go ahead and add the stroke right now that we've got our stroke added .
We want to go ahead and turn our background off and then we're going to go up to our Wrench icon .
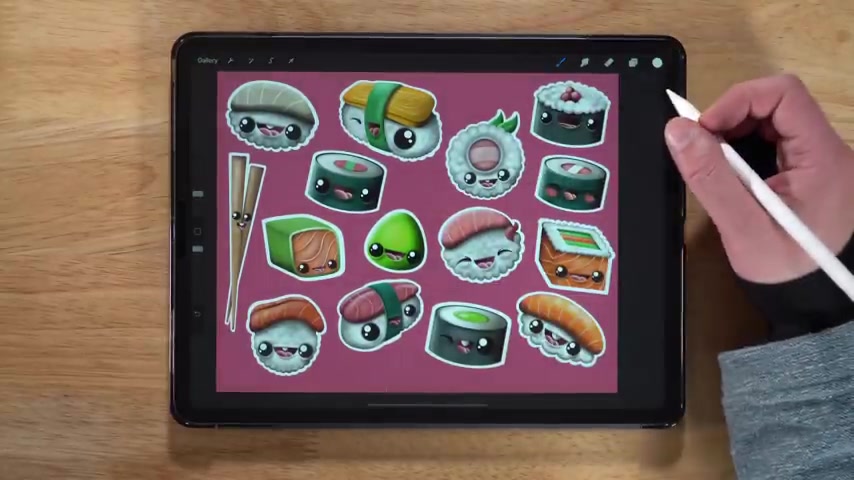
We're going to go over to copy canvas now that we've got that selected , we're going to go back to gallery and I've already got this kind of started to save some time .
You'll see .
This is my sticker page here .
This is a 3000 by 2400 pixel canvas 300 DP I , so let's go ahead and open that up and basically , I pre loaded all of these in .
Now , we need to go up to the Wrench icon and we need to go to paste .
This is gonna load this in and then we're just gonna go ahead and shrink that down and fit it in here at the top .
And basically , that's what I did with every single other one of these on here , just basically added them in and then moved them around and got them resized .
Now , we've got a really nice sticker sheet that's ready to send over to cricket .
So let's go ahead and turn off our background color So we're left with that transparent background .
Let's go up to our Wrench icon .
Go to share once again , wanna share it as a PNG .

And then once again , we're gonna save it to our files , save files .
And let's just call this one sushi .
Well , there we go .
Done and save .
That's gonna save to our files .
Now , let's go back over to Cricket Design studio .
Let's open this up .
Once again , we're going to go ahead and start a new project just like we did before .
We're going to replace our old project that saved in there .
So we've got that done .
Let's go ahead and upload our sushi here .
Once again , we're gonna go to browse files , upload our sushi here .
And once again , we just need to walk through these steps making sure that everything is perfect .
You'll see that there's no extra lines or anything .
We are good to go .
So let's go ahead and hit next .

Once again , we need to make sure that the print and cut is the one that's selected .
The green needs to be around that .
Let's just save it as sushi and safe .
Let's go ahead and select our image .
We're gonna shrink this down just a little bit .
Bring it up here into the corner .
Once again , you don't want to get too close to the corner because you don't wanna have that edge of the stroke chopped off there .
So we'll shrink it down here .
Just a little bit more .
It's about right there .
And then let's go ahead and once again , go to our actions and duplicate .
We're gonna bring this one down .
We're just gonna do two per page on this .
Let's gonna make it .
And once again , we're gonna make sure that this fits all in one page .
We're gonna make sure that it doesn't take two pages and you'll see that this does actually take two pages because it's not fitting on one .
So let's go back one more time here to our canvas and let's delete this one .
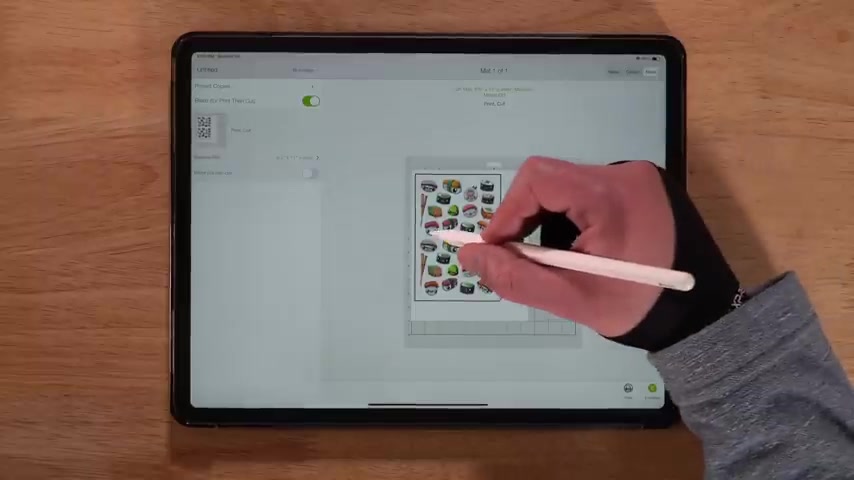
We'll shrink this one down just a tad , then we'll duplicate it and move it down again .
We'll see what we're left with here .
Like I said , sometimes it is a back and forth process to make sure that you've got it sized correctly and there you'll see they are both on the page .
I wanna make sure that they're both kind of away from each other .
Once again , we want to be able to cut these in half .
So there we go .
The black binding box here .
That's what the cricket's gonna read to know exactly where everything's at .
So let's go ahead and continue .
Our printer is already selected .
So let's go ahead and print now that we've got our printed sheet , we can go ahead and attach it to the cricket mat once again , making sure that it's in the corner and lined up perfectly with those edge lines .
So now we need to make some changes since we're switching from Dy Cut to Kiss cut and that's gonna come in with our material setting .
So we're gonna click that go to all materials again .
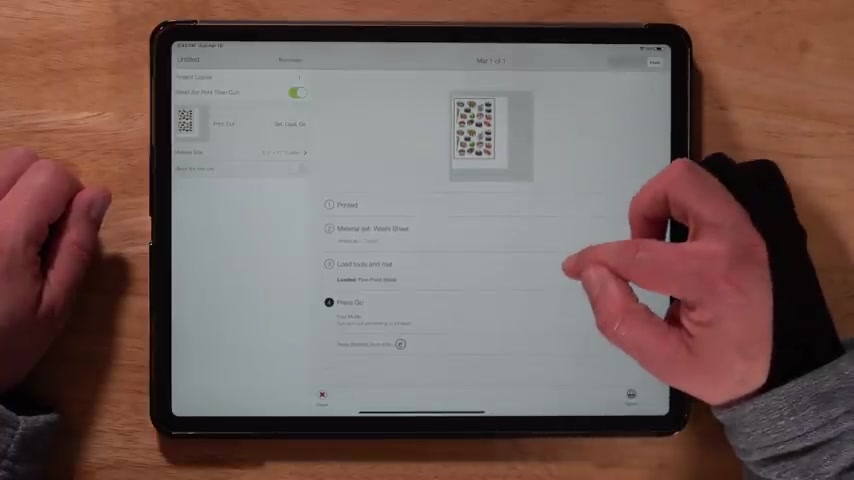
And if we type in wash , it's gonna bring up washy sheet , we're going to select that one .
What this is gonna do is gonna allow the blade not to go all the way through the entire paper .
It's gonna leave that backing intact .
Now that we've got everything loaded , we can go ahead and go back to the cricket and press .
Go .
All right now that our sheet is printed .
Once again , we're ready to peel this thing off .
Like I said previously , you want to roll the back of the mat rather than the paper itself .
And you'll see this time , the stickers are not peeling off onto the mat .
And this is the difference between dy cut and kiss cut and we are left with our sticker sheet like this next up .
We wanna go ahead and cut these out .
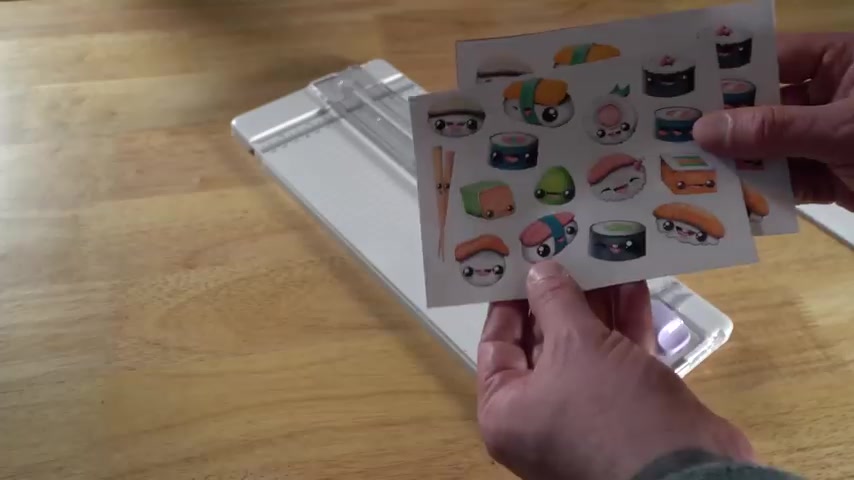
So we've got the official cricket paper cutter here and we're just gonna use the black lines as our guide for where to cut .
And here you'll see we're left with two super cute sticker sheets .
When you go to remove these from the page , they're going to have the sticky part ready to go since kiss cuts are just light surface cuts and don't go all the way through your material .
So there you go .
Two different ways to make awesome stickers at home , using your ipad and a cricket .
All right guys , that's it for today's video as always .
Thank you for watching .
I appreciate it .
If you like today's video too , if you got some value out of it , make sure you give it a thumbs up .
Subscribe to the channel .
If you haven't already and hit the bell for notifications , you can get alerted when I post new videos and I'm sure you're probably sitting there thinking to yourself .
OK , here's where he's gonna tell me where to go to buy his stickers .
This is one big sales pitch and that's not the case .
This video is just for information .
It gets you thinking about a different way to make money with your art .

Honestly , I've got nothing to tell .
I've got no website to share because I'm redoing the entire way that I sell stickers right now .
So this is not a sales pitch .
There's nothing to sell .
It's just to give you guys some information .
But there is one website I will send you to and that's over to Facebook to join the group .
Keep creating a learn draw , share art community .
I will link it in the description below .
It's an art group I started over there for like minded artists who can share their work , meet new friends .
It's an awesome place to be and want you guys to join if you haven't already as for me , I can be found online BJL dot com as well as on Instagram and Twitter at BJ Dell .
So until next time , keep creating .
Are you looking for a way to reach a wider audience and get more views on your videos?
Our innovative video to text transcribing service can help you do just that.
We provide accurate transcriptions of your videos along with visual content that will help you attract new viewers and keep them engaged. Plus, our data analytics and ad campaign tools can help you monetize your content and maximize your revenue.
Let's partner up and take your video content to the next level!
Contact us today to learn more.