https://www.youtube.com/watch?v=Aah49Zda0bA
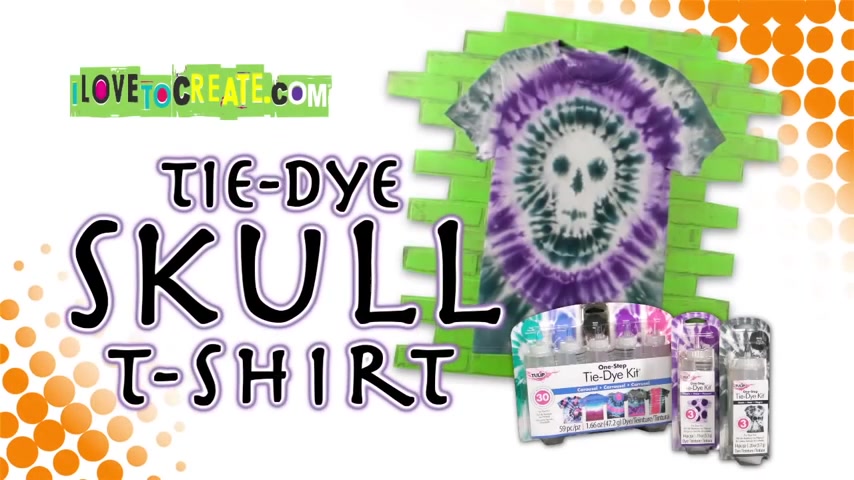
How-To Make a Tie Dye Skull Shirt
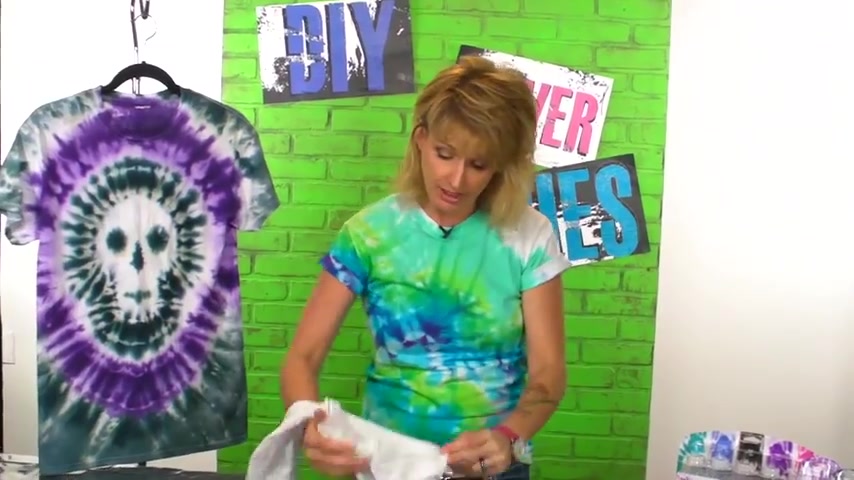
Hi , I'm Laurie and I love to create studios with the I Never Dies .
And today we're going to play with some tie dye .
Halloween is right around the corner and it inspired me to create a school tie .
And I'm going to show you how to do that today as well as give you some helpful hints and tips that will help you get a great tie dye result every time , first thing we're going to do is get our shirt ready .
This is a shirt that I've already washed and left damp .
And so first we're going to fold it lengthwise .
You want to make sure you get all the wrinkles out .
You want a nice smooth fold right down the center .
Now we have our shirt folded lengthwise down the center .
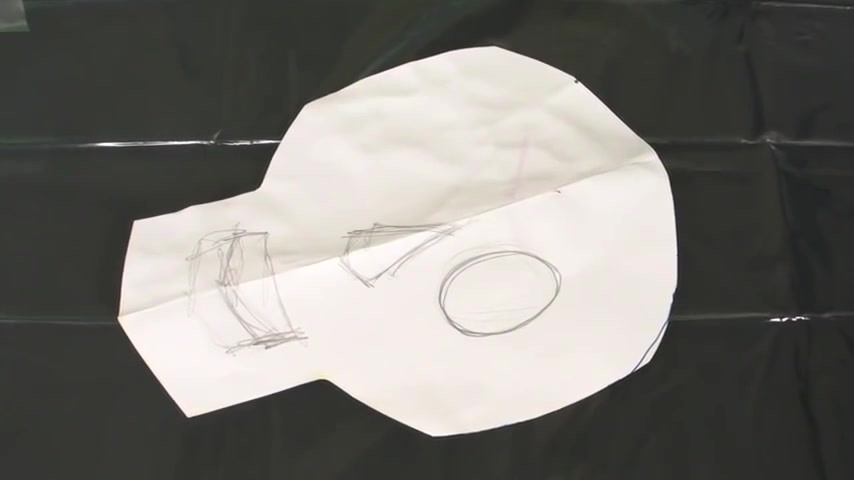
I have my skull pattern .
When you're tying a pattern like this , you want to kind of exaggerate your curves .
So here I've made a very defined curve and a very defined line and that just helps you to get a more finished look when you're done .
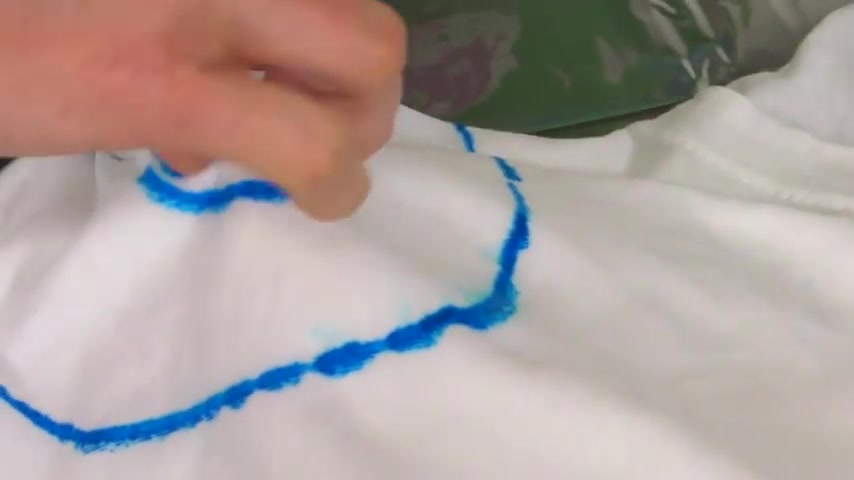
So we fold it in half and we place it right along that center line and then we're going to use a washable marker to outline our design .
I like using a washable marker better than chalk because the chalk tends to , it can sometimes blur or , or get washed away .
And this way you have a nice clean line .
So we just trace right around our skull and then his eye is gonna be right there .
So we draw that in and half of his nose and a little line to let you know where his mouth is going to be for most of the tie dye work that I do .
I use zip ties .
That's just a personal preference .
You can use rubber bands , you can use sine , whatever works best for you for this particular tie .
I use a combination of rubber bands and zip ties because some of the things that we're going to be tying up are small and delicate and so need a smaller rubber band .
So first thing we're going to do , we're just gonna pleat his nose and you just plead it and little small pleats till your line is a straight line and tie it off with a small rubber band .
Take your time on these steps .
This is the most important part of your design .
So take your time and really try to get those lines , those pleaded out straight .
Next , we're gonna do his eye .
It's kind of a modified bull's eye .
We're just going to pull it all up into a tube shape like that .
And again , trying to keep the line as straight , all the way around as possible .
You can see that I've got it fairly straight and tie up with another small rubber band .
So now you have his eye and his nose tied off .
So we're gonna go ahead and do the outline and it's the same technique .
We're just going to pleat the fabric into a straight line , twisting it as you need .
It helps to do your pleating with one hand underneath the T shirt .
So that way you be sure and get all of the fabric into the pleat .
And as you can see here , I have my skull shape in a straight line for this .
I'm going to use a zip tie and there's our skull face .
I prefer to do my dying on a baking rack .
It helps to keep the dyes from pooling and muddying up your shirt , the colors mixed together and sometimes the result isn't as clean and as nice as you would like .
So by dying your shirt on a rack , it helps to get rid of all the excess dyes .
So it doesn't end up on a new project .
We're just going to arrange this .
Now , there's his mouth right there .
This , we're not going to tie , we're just going to kind of pinch it up again , making sure you have both thicknesses of the fabric with the line on top like that .
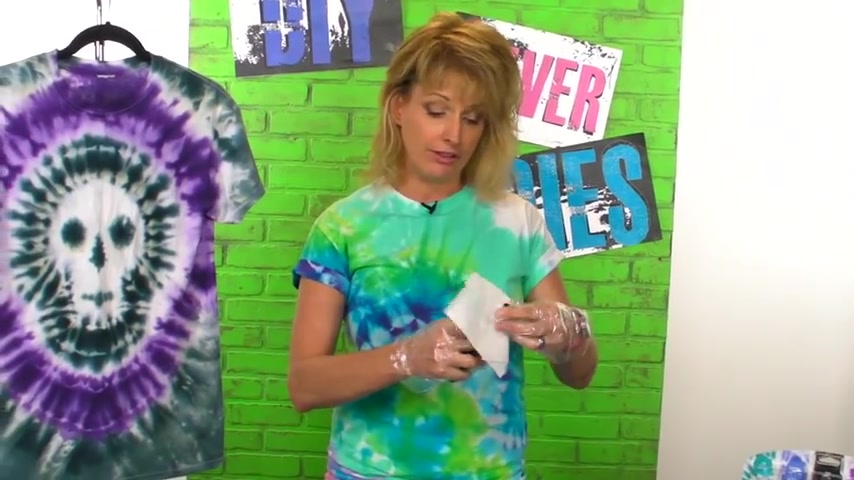
You always want to wear gloves when you tie dye because although tie dye looks really good on the shirt , it doesn't look so great on your hands today .
I'm using two colors .
We're going to use purple and black .
All right , let's do some tie dye in .
You want to make sure your dyes are mixed .
Well , when you shake them , be sure to put your finger over the cap .
I like to use a paper towel over the lid of the bottle when I open it just to avoid any overspray .
This is our black dye and we're going to dye our face .
Now , we want to make sure that the eye is up nice and tall .
So you only get the dye on that area , same thing with the mouth portion and his nose as well .
So we're just gonna slowly and carefully apply a little black dye , make sure that I nice and saturated and then just a little bit here for the nose .
How nice the dye just runs right off cools down below and it's not going to muddy up our shirt .
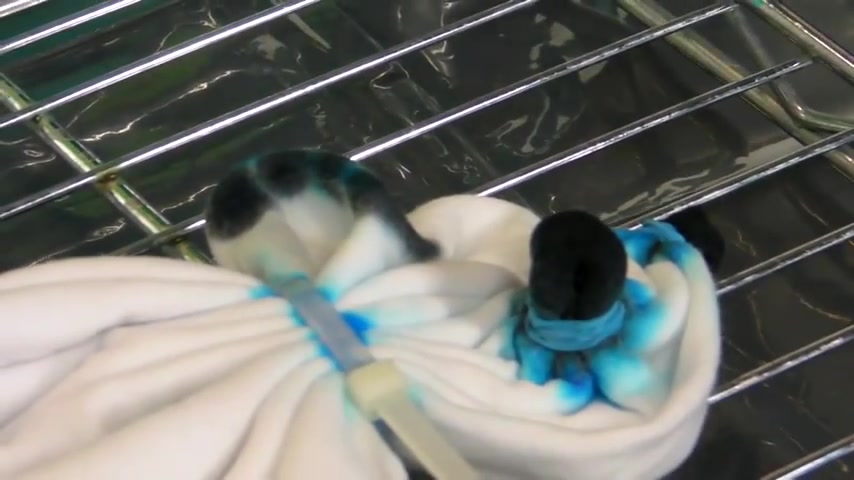
Now for his mouth , we're just going to apply a few dots of color right along that line .
I want him to be outlined so that you see the outline of the face .
So I'm going to go ahead and continue with my black tie outside of the zip tie .
I've left a small amount of white along that zip tie because the dye will want to bleed over and I want to keep a nice clean border .
So we'll just apply as much die as we like .
I'm going to accent my design now with purple dye , if you wanted to , you could also add consecutive zip ties outside this first one and you would get consecutive skull shapes .
But for this one , we'll just have our one skull guy .
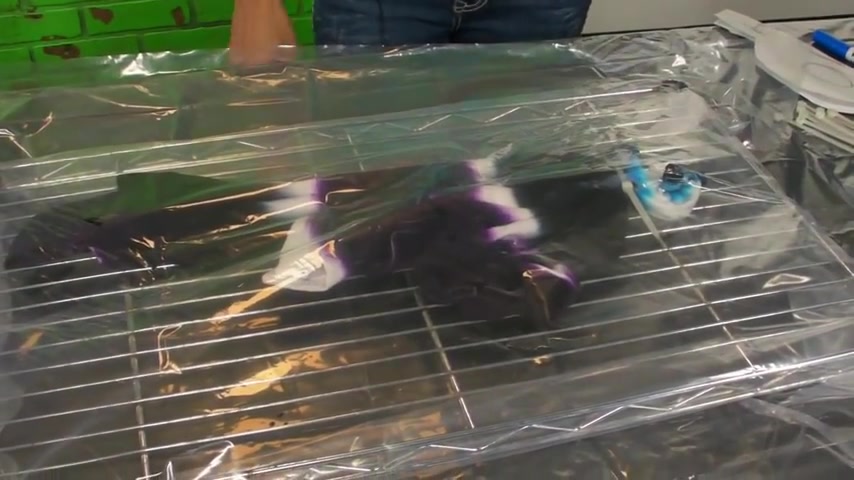
So now that we've got our shirt dyed and the colors and patterns that we want , we're going to wrap it in plastic and allow it to sit 6 to 8 hours or overnight .
Today , we just use the two colors , but we have an endless variety of dye colors that you could use to really personalize this shirt and make it your own .
You're on your way to some fun Halloween times and I'm Laurie and I love to create studios and Diy never dive .
Are you looking for a way to reach a wider audience and get more views on your videos?
Our innovative video to text transcribing service can help you do just that.
We provide accurate transcriptions of your videos along with visual content that will help you attract new viewers and keep them engaged. Plus, our data analytics and ad campaign tools can help you monetize your content and maximize your revenue.
Let's partner up and take your video content to the next level!
Contact us today to learn more.