https://www.youtube.com/watch?v=KGf1NVnxL4s
How To Tie An Ascot (2 ways for different neck sizes)
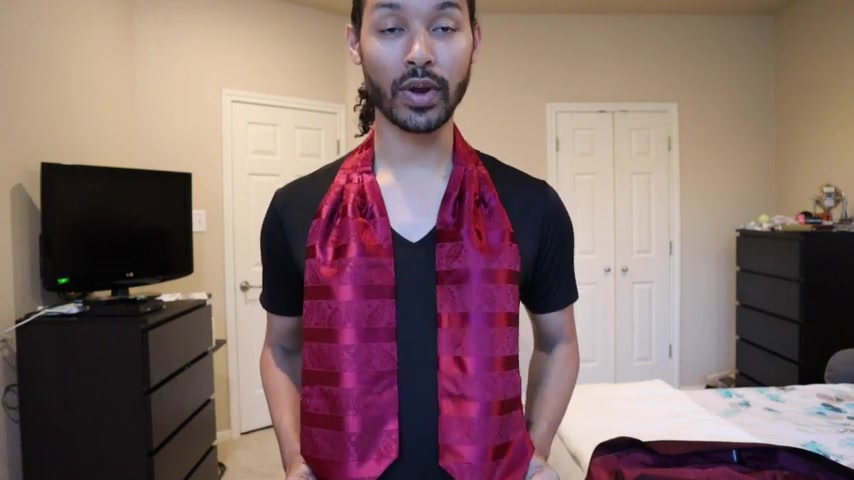
Hey there Lynnwood here and today I'm going to be showing you how to tie an Ascot or a .
So if you're interested , stay tuned , thumbs up if you like it .
And if you haven't seen my last video , you can do so by clicking the eye in the top right corner .
Now , before we begin , you'll wanna make sure uh that , you know , a couple of things .
The first of which is that I have flipped the image on this .
So when I say right , it will also be your right .
And when I say left , it will also be your left .
It just makes it a bit easier for people to follow along in the instance of a tutorial like this here .
Uh For the first way , I'll show you to tie it .
You'll want to make sure that one of your sides , whichever side you plan on tying with .
In this instance , it will be my right is about two inches longer than the other side .
Now , I'm gonna be showing you guys two different ways to tie it because if you have a slightly larger neck , they don't make these in extendable lengths like they do for bow ties , things like that .
So I wanna show you guys a way to do it if you have a larger neck as well as if you have a smaller neck like mine .
I have a 15.5 neck size .
We've got the back portion across the neck here .
Now , if you don't want that to show as much , you can take that and fold it in half and that way , it's less noticeable there .
Uh So I'll go ahead and show you how to do it like that from there .
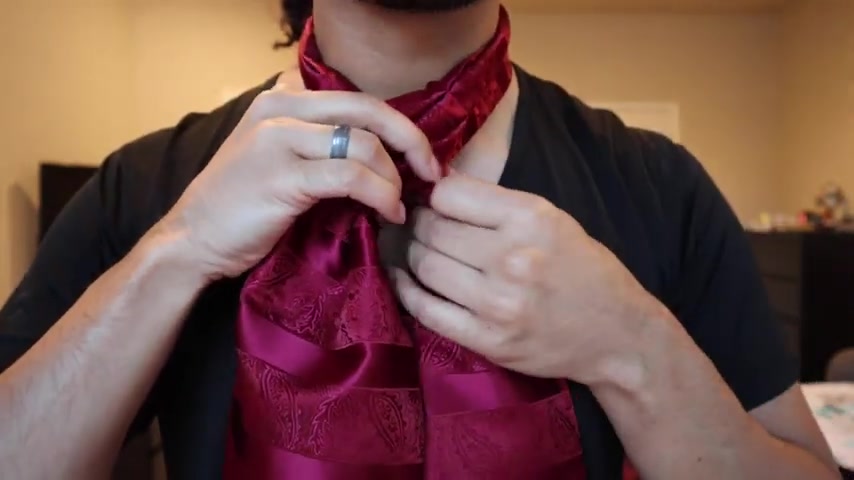
I'm going to go ahead and bring the right side over the left like so , and I'll just hold the left side of my hand here .
Once I've done that , I'm going to wrap around the back and come back to the right side where I started .
We'll then bring it around to the front again and I'm just keeping my finger in here .
This is basically , if you're familiar , this is like a standard four in hand knot from there .
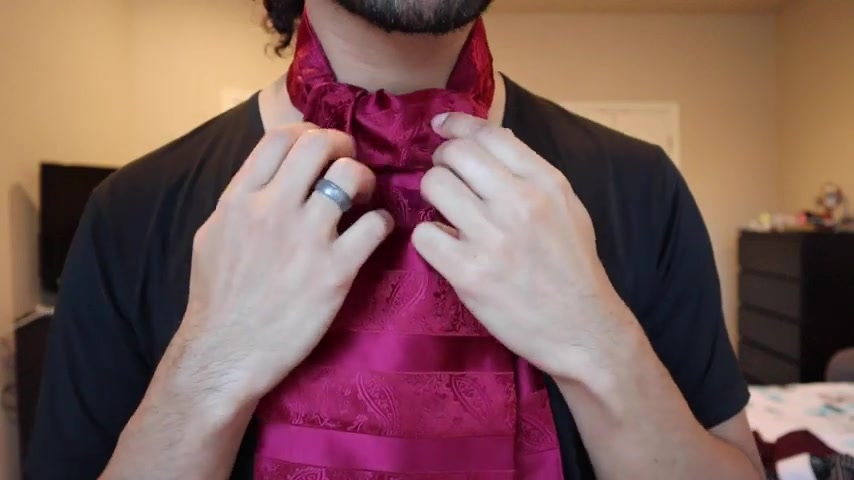
Once you've done that , you'll go ahead and bring it up and through the center like so , ok , once you have that portion of the tie done , you'll just take the tip of the tie here or one of the blades and you're going to feed it down through that loop that you just created with your finger .
Was now , I like this method just because it leaves a bit of bulk here .
It causes that Ascot to kind of fill out when you do it .
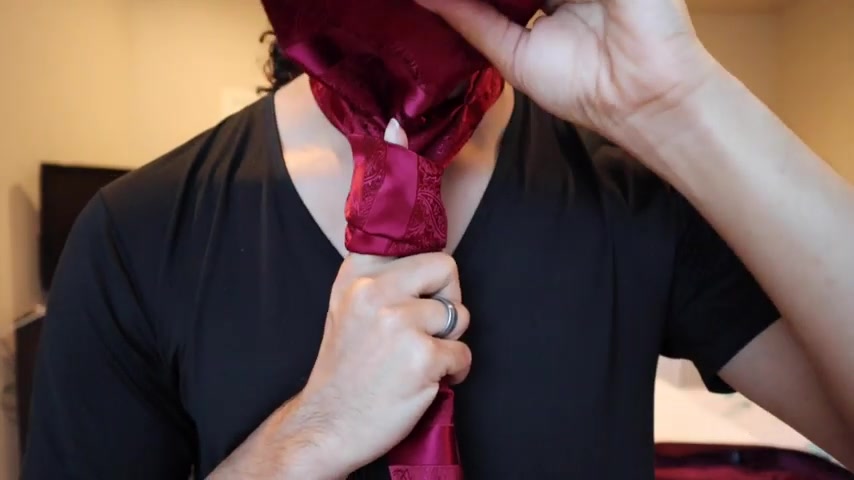
Uh , so once you've done that , you'll notice you have the other blade that's still rather long back here .
So , what I'm going to do is I'm going to take that blade .
We'll turn to the side so you guys can see a bit better here and we're just going to feed it up through the back .
So I'm gonna take the tip of that blade , we'll feed it up through the back space and then out like this here .
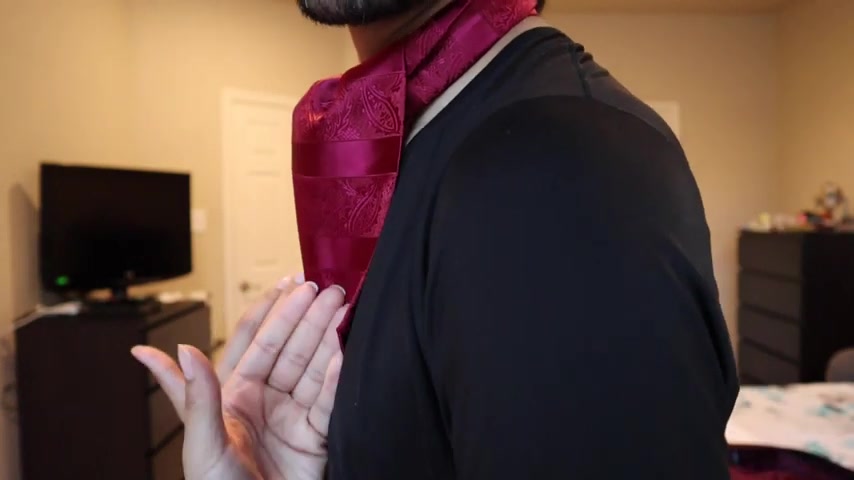
So you guys can see it gives a nice full look , but you can still have your creasing and things in there .
It also gives some volume this way .
So if you're looking to have that more voluminous look to it , this will give you that .
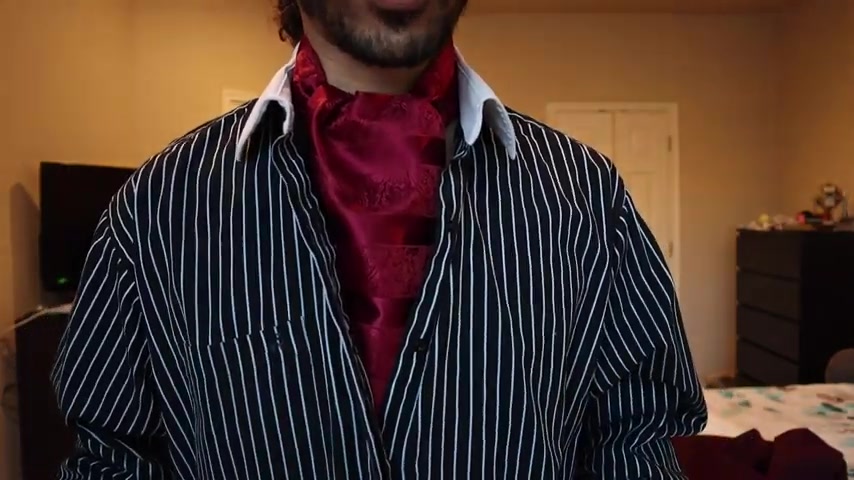
Now let me throw a shirt on so you can see what it looks like when it's composed .
I didn't put the shirt on with this just because I wanted you guys to see as much detail as possible .
All right .
So once I have my dress shirt on , you guys can see how much fullness this creates where it just kind of comes on out and gives you a lot more visual instead of it just kind of sinking into the shirt .
So that's what I like about this .
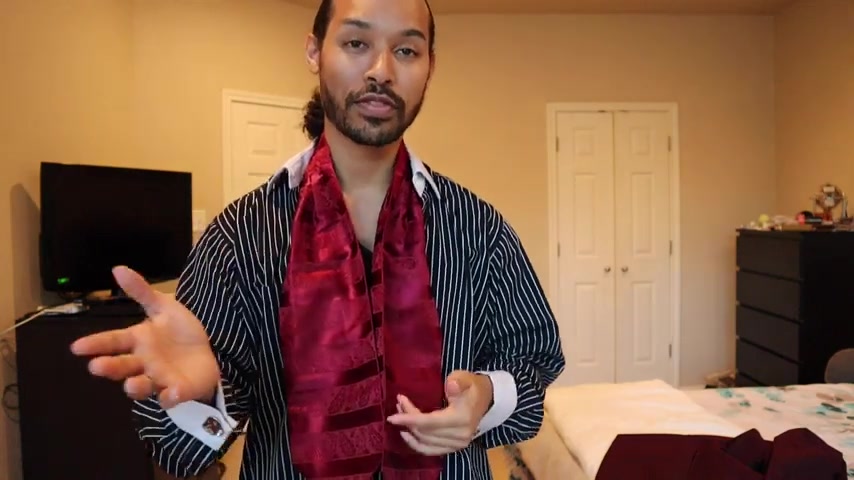
Not , you can even take it a step further and dress it up with a sport coat or with a suit jacket .
So I'll go ahead and show you what that looks like as well .
I prefer it like this just because it just gives you an extra something .
Let me go ahead and pull out the cuffs here and that way you guys can kind of see how it goes from being able to be a bit more casual to a bit more dressy .

Uh , just kind of gives you that cavalier type of look , you know what I'm saying ?
So this is the first method that you would use here .
OK .
I'm gonna go ahead and take all of this back off .
So I can show you the other method in case you have a larger neck size or , uh in case you're just not wanting quite as much fullness here .
The nice thing about this not here is that it does stay in place , it does not slide .
So that's a plus , but I will tell you you have to take it down the same way that you put it up .
So feed it back through the back again , then come back up here and pull the tip of that first blade out and it'll come right undone .
OK ?
So if you have a larger neck , what honestly is , the easier method is still keeping us a slight difference here , only like an inch this time .
And then from there , I'm going to take my longer end , I'm going to tie it around under and we'll go through the middle one just like a standard shoelace knot , right .
So I'm gonna go ahead and tighten that up .
I don't want it too , too snug .
Then from there , I can just begin to unfold and shape .
Now you'll notice this doesn't create quite as much fullness up here .
Um It lays a lot more snug and flat , but it gives you quite a bit more tying space on both ends .
So if you have a larger neck , uh or if you just wanted a more voluminous look , if you wanted to be able to button on or unbutton down further , it would give you that option .
So just to show you how it looks different in the shirt , I'll go ahead and edit to the portion where I have my shirt on .
Ok .
So you can see this gives you much more coverage here .
So if you , for some reason decided I wanna have my shirt wide open , you know , quite a bit more , you could easily do that .
Um You could also then go ahead and button it this way , but it doesn't give you as much volume here .
You can see with having it widened out here .
It does give you a bit more exposure around the neck there .
Uh which if you're not accustomed to wearing an ascot , you'll find that this can feel somewhat abrasive to the neck .
So that's why I showed you that first step with folding .
And of course , you can do that with this method as well .
Downside of this method is it does more easily slide and come undone as the day goes about .
So , if you're moving a lot things like that , you can notice some shaping and some movement going on , you guys can see just simple movements like that can easily loosen it up , which of course , you're not gonna be doing that throughout the day .
Uh But this , this method requires more adjusting .
However , if you have more of a uh thicker neck , it allows you to do that .
Another benefit is that you can easily untie it and you're done .
So let me know in the comments below which method you prefer or if you could even see yourself wearing an ascot or a if so , let me know until next time you guys take care and God bless .
You're fancy now .
Bye .
Are you looking for a way to reach a wider audience and get more views on your videos?
Our innovative video to text transcribing service can help you do just that.
We provide accurate transcriptions of your videos along with visual content that will help you attract new viewers and keep them engaged. Plus, our data analytics and ad campaign tools can help you monetize your content and maximize your revenue.
Let's partner up and take your video content to the next level!
Contact us today to learn more.