https://www.youtube.com/watch?v=s-S1WSFTpuU
How To Tie a Tie - Rose Bud Knot

Hi , everybody .
I'm Patrick Noni .
I am the guy .
This is my youtube channel and I'm doing how to videos on every single neck tie knot known to man .
And I'm bringing that to you .
So if that's the kind of thing you're looking for , then please subscribe .
All right .
This time , I've got another Rose Bud knot for you .
And this time it's invented by a guy named Jack Robertson and you can check out his youtube channel for the original video if you like , but I'm gonna show you how to do this Rose Bud Knot right now .
OK .
So this is a little end knot .
It's tied with a little end .
So it's the long end .
The big end is uh just a little bit above my belt line .
So when it's done , it's gonna fall exactly at my belt line .
All right .
So taking the big end , we're gonna put a dimple in there and bring it to the middle .

This is pretty much gonna be tided like a Windsor knot , but with the little end , so I'm going to move speed along through this part and uh explain it as I go .
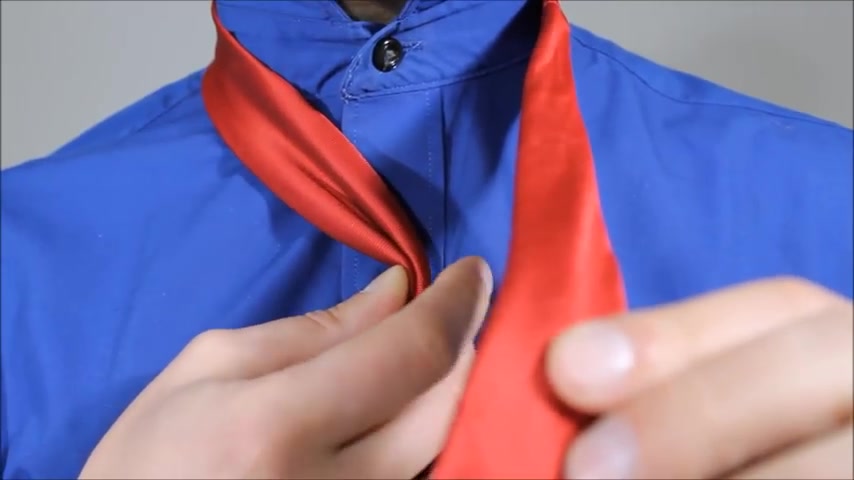
So , taking the little end cross over the front of your neck tie , feed it up through the back of your neck hole and across .
Like .
So taking it from here , we're gonna take the little end around the back and feed it up through your , up to the front of your neck hole and across again , crossing the front like , so I wanna put my finger in here .
You could either , you could either do it all the way up and then feed it through .
I'm just gonna leave my finger in here so I can feed my little end through that little hole .
So taking a little end up through the back of your neck hole .
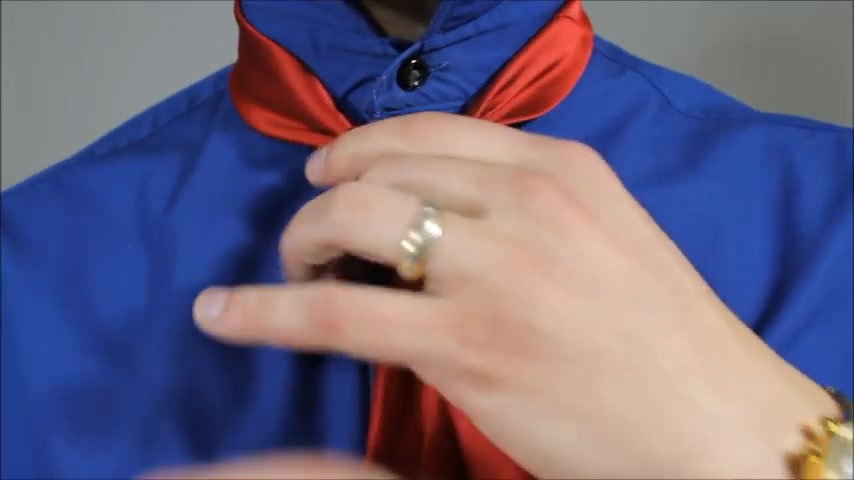
And now where your finger is , I'm going to pinch it with my thumb and forefinger and now I sort of have a reversed .

Well , I have a Windsor knot with a little end .
So then from here , this is where the rose bud part comes in .
So you're gonna fold your neck tie in half like so , and you're gonna feed it up through the front of your neck hole and back down .
So you can see my seam , you could see sort of , it's not even .
So I want to just fix that with my thumb and bring that over here .
So the back is gonna cross this way and I'd like to tighten this part up just a little bit and then , um with the little end , keeping it folded , I'm gonna bring it underneath the whole knot and then feed it up through the back of my neck hole on this side , even though it's gonna wrap all the way around .

So now , now , now , now that I have it behind my , uh , my knot , I bring it all the way back around .
I don't want to cover up this first end .
Here .
There we go .
And we're gonna do the same thing across the front and then we're gonna tuck it in behind our , our uh color here and wrap it around this end .
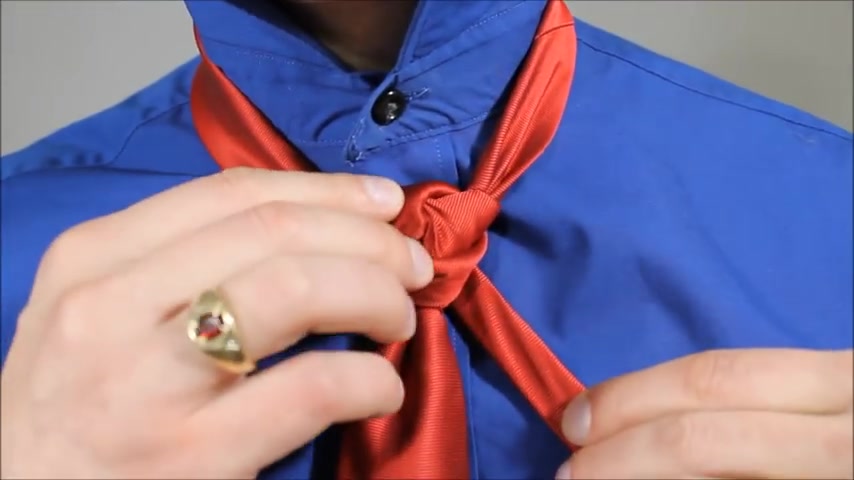
So holding onto your knot , pull on the big end , we can cinch it up at this point .
You could flare , you can flare up a little bit of an opening .
If you want , you can open these up a tiny bit .
You have to see how you like to have that .
All right , pull your color down and you're done .
That's how you do the rose .
But knock .
That is how the Rosebud knock is done .
Thank you very much Jack Robertson for inventing that and sharing that with everyone so I could learn it .

And uh if you guys are taking any knocked pictures of your own , uh you could share that tag me on Instagram or put that on my Facebook page .
So I can see that .
Uh If you got any inventions of your own , please share that again .
You can email me directly or make a video and you could do that on my Facebook page or on my email .
Uh Thank you so much for watching .
I have so many more coming for you guys .
Stay tuned .
Are you looking for a way to reach a wider audience and get more views on your videos?
Our innovative video to text transcribing service can help you do just that.
We provide accurate transcriptions of your videos along with visual content that will help you attract new viewers and keep them engaged. Plus, our data analytics and ad campaign tools can help you monetize your content and maximize your revenue.
Let's partner up and take your video content to the next level!
Contact us today to learn more.