https://www.youtube.com/watch?v=idRv29MhQ74
How to solve the Rubik's Cube blindfolded
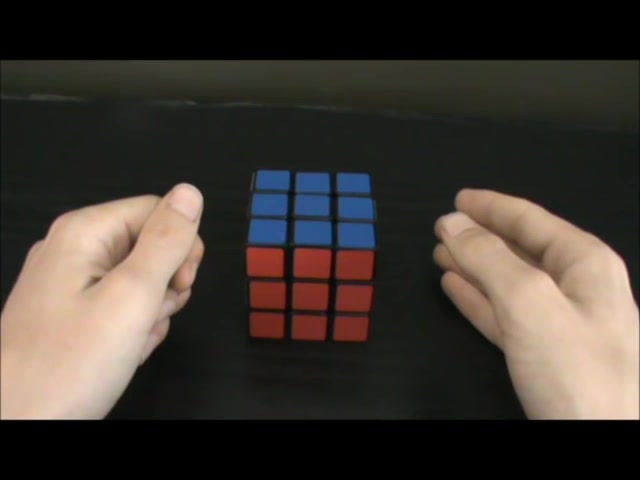
Hi , imagine taking off a blindfold to see this in front of you .
It's an awesome feeling and a really great accomplishment .
This video will explain how to solve this blindfolded using a method called Classic Pochman invented by a guy called Stefan Pochman .
Many people don't attempt to solve the Rubik's cube blindfolded because it seems way too difficult .
But it is actually nowhere near as complicated as people think there's a misconception that you need to have insane memory or even photographic .
That's a lot of crap .
This video is broken up into sections first , I'll discuss the concepts and terminology , then I'll move on to the solving process and then a little bit on memorizing techniques and progression .
This tutorial is not something you should expect to understand straight away .
So there's no need to get frustrated .
I strongly encourage you to rewatch the parts you find confusing , it will eventually come clear .
So you don't get let down halfway through watching this .
I'll tell you the most off putting aspect of this method right now .
You have to memorize five algorithms .
I'll show you what they are .
Now , if you don't already know them , you can still watch and understand this tutorial .
You just have to memorize them afterwards .
They're in the video description , by the way , the first one is called T perm which swaps these two corners and these two edges see then there's Jeer which swaps these two corners and these two edges .
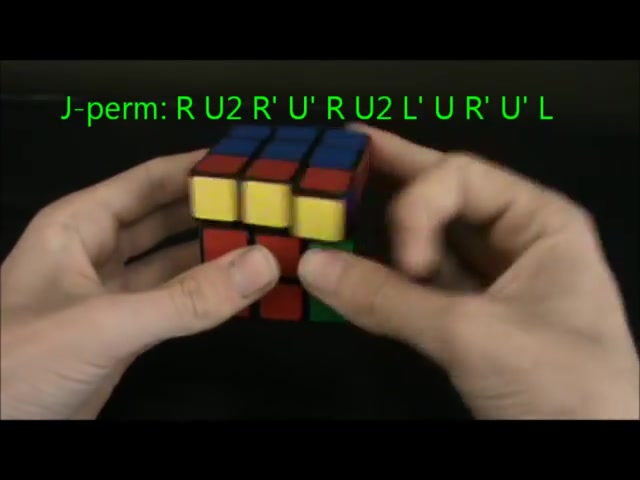
Instead , the next one is the mirrored version of J perm .
It's called L perm .
So that swaps these two cars and these two edges , then there's Y perm .
It's the normal Y perm .
It just doesn't have the last and first F turn .
So it swaps these two edges and these two corners .
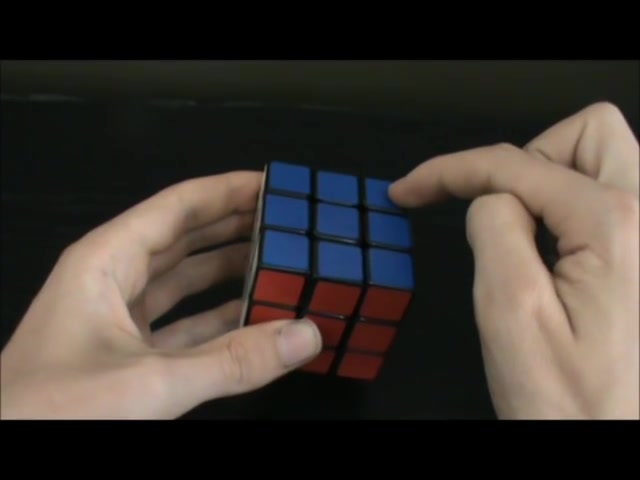
The last algorithm you need to know is called a , it swaps these two corners and these two edges you don't have to know Jan Alper .
But knowing them will suddenly make it easier for yourself .
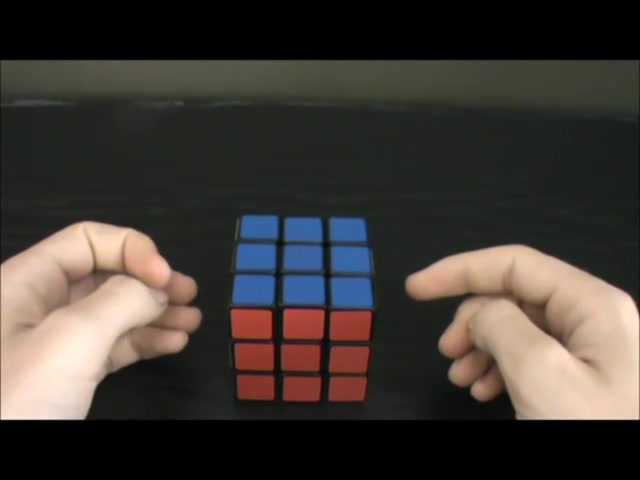
I'm always going to hold the queue with blue on top and red in front .
This is because it's my blind orientation .
It makes things a lot easier if you always hold the cube in the same orientation because you get very familiar with where all the pieces go .
There is a convenient way of labeling pieces and it's important that you understand it .

It means I don't have to say stuff like this piece goes to that piece which goes to there , which goes to there , which goes to this piece .
That's just stupid as you may already know .
This is the U face F face , L face B face , R , face and D face with blind solving .
It's best to explain the position of pieces in terms of stickers .
So if I say UL I'm referring to the upper left sticker .
So this one here , if I was to say RF I'm referring to the right front sticker .
So here any sticker that's described by two letters is an edge sticker , whereas anything described by three letters is a corner sticker .
If I was to say Ulb , I'm referring to the upper left back sticker .
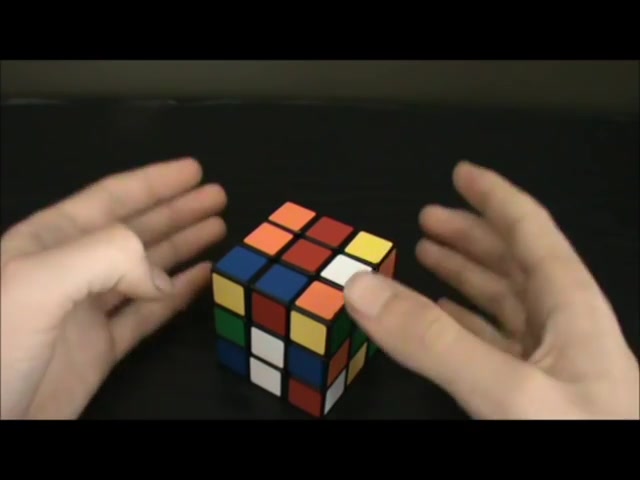
So the sticker here , if I was to say RFD , I'm referring to the right front down sticker .
So this one here , OK .
Moving on , I've heard people say , oh damn , I can't even solve the cross blindfold .
So there's no way I could solve the entire thing blindfolded .
That doesn't matter at all because when you solve the cross blindfolded , you do something called tracing .
This is what I mean by tracing .
If you were to solve this white cross blindfolded in your head , so you wouldn't actually make any moves .
This is what you'll be thinking you would go , ok ?
This white green edge is gonna go down in here .
And when I do that , this white blue edge is gonna come down to here .

And when I move this edge down to there , this white one's gonna go over to there and then that one's gonna be there , obviously .
So you can move this white blue edge down to there and it's solved .
Now .
So again , you wouldn't have actually done any moves , then you would have done that in your head and then done the moves .
But can you imagine doing this with the entire cube ?
It wouldn't be just tracing the white edges through each turn .
It'd be tracing eight pieces on each layer after every single turn you make .
So unless you want to make things really confusing , tracing is a big , no , no in blindfold solving the idea behind solving a Qaq blind is to move very few pieces at a time .
That way , there's no need to worry about this tracing nonsense .
So how do you solve a cube by moving very few pieces at a time without any tracing ?
I'm now going to introduce you to conjugates .
A conjugate is a sequence of moves in the form of A B A prime .
Let me show you what I actually mean by that .
If we were to take a look at the T perm , it swaps Ur and Gl and these two corners try not to take any notice of these two corners being swapped .
It would be nice if I had an algorithm that swapped just these two edges , but that's impossible .
So for this demonstration , you can just forget about these corners being swapped .
What if before I did the tea PM , I did an L two .
Well , the same thing would happen .
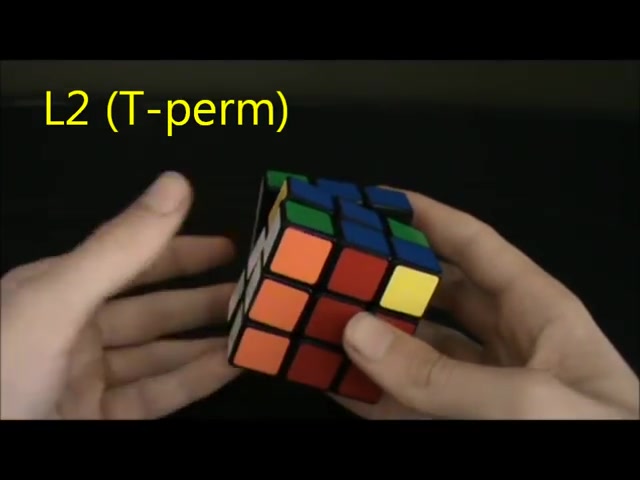
These two edges will be swapped and they did just that .
Now why do the altar ?
Everything has been restored except for the effects of the , that was a conjugate .
The IPOD was ulcer .
The B part was T part and a prime was undoing the L two made at the start .
The A part of a conjugate is also referred to as the setup move .
And from now , I'm always going to refer to it as the set up move .
So to clarify , in order to swap UL and DL , I must apply the setup move alter then and undo the set up , move two .
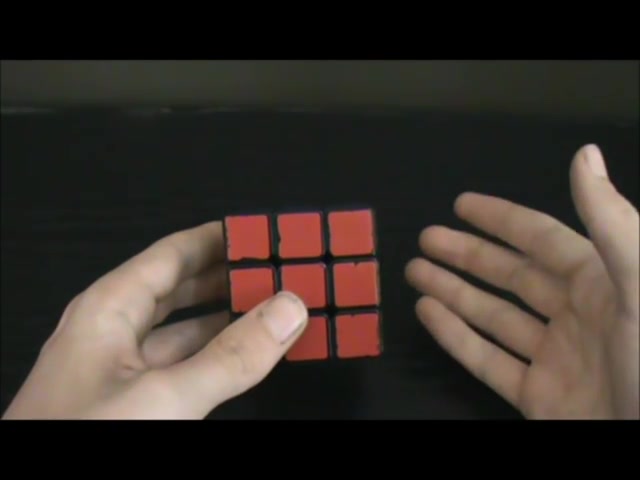
I'll gradually explain , set up and moves in more detail throughout this video .
This part is crucial .
You really have to pay attention to this because this part will lead on to how to solve the edges and the corners will be the same concept with this method .
Ur is what you call a buffer with blindfold , solving all pieces are solved from the buffer , the piece in the buffer goes to its correct spot and then a new piece becomes the buffer to give you the gist of it .
I'm going to solve these three edges using UR as the buffer .
The first thing to do is look at the buffer .
You are now find where that sticker needs to go , it needs to go to UL , then you need to find where UL needs to go , it needs to go to DL .
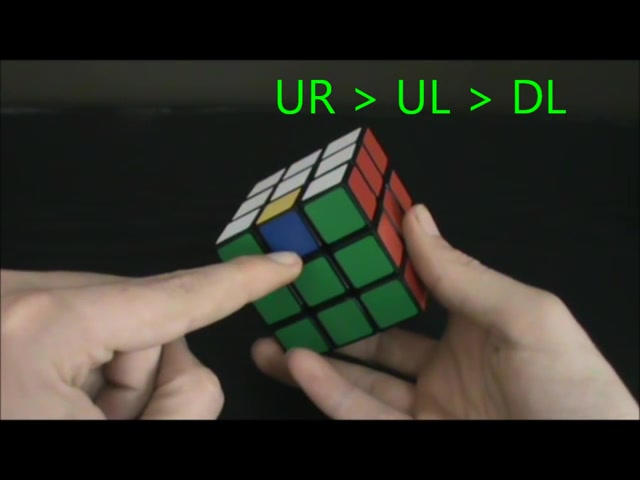
So the cycle is UL to UL to DL .
Once DL is solved .
The blue yellow edge here will become the buffer piece .
Thus , the cube will automatically become solved .
So the first target is UR this can be done with TPA as as sharing before .
Now the next sticker in the cycle is do .
Therefore , we must shoot to DLDL is the target we had this case before to set this up to A T perm , we must apply the set up , move L two .
Now we do and undo the setup move .
Here's a quick recap .
You don't need a good memory to learn .
This .
Conjugates are used to make very small changes in the position of pieces .
They consist of a setup , move an algorithm and then the undo of this setup move all pieces are solved from the buffer and a target is where the buffer needs to go .
That concludes the intro .
Now I'm going to explain how to solve all the edges .
OK .
Where do we start ?
Well , the very first thing you have to do is memorize the cycles , but I'll talk about that later .
First , you need to know how to execute the solve with blindfold , solving the edges and corners are solved separately .
I'll first show you how to solve the edges , then move on to explaining the corners .
And later , I'll do a full example walk through blind solve .
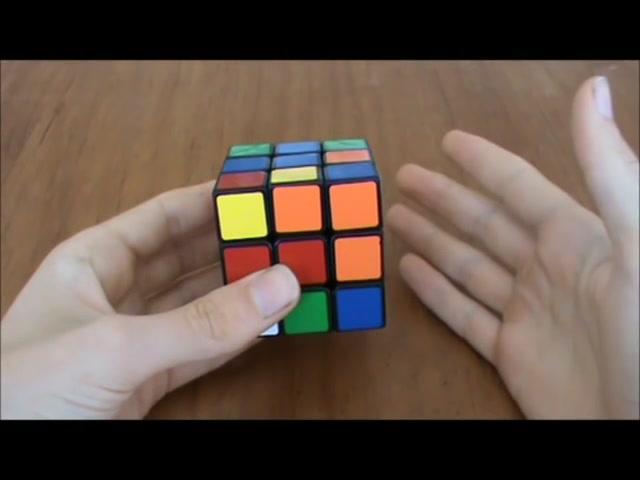
Earlier , I demonstrated how to solve a couple of edges using setup moves and you can actually solve all the edges by doing this .
And if you also know Jan Alper , it's easier and faster .
The purpose of using TJ and L per is it gives you the freedom of setting up the edge target to not only U but also UF or UB .
The thing TJ and have in common is they'll swap these two corners .
That means after each edge , you solve these corners get swapped and then after the next edge you solve , they get swapped back , swap , swap back and so on .
But in order for this to work , you have to make sure that your set up move doesn't affect these two corners nor the buffer , these corners and you are must be preserved again .
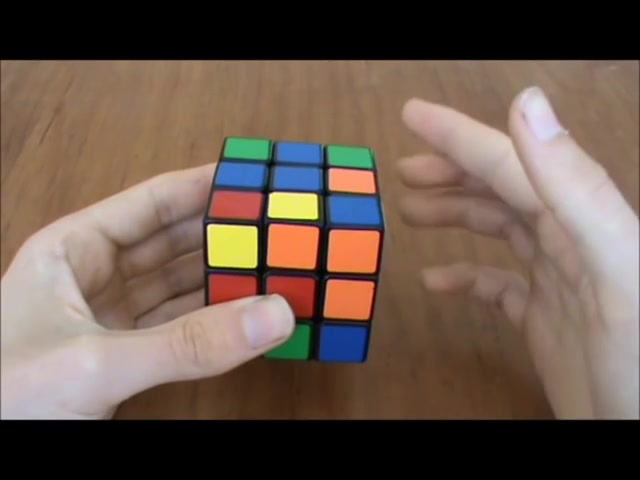
After you've applied the setup move , these three pieces must be in the same spot .
OK ?
I'm now going to solve these six edges using classic Pochman .
Once I've solved these edges , the corners will still be in the same spot because after all , we are just swapping these two corners then swapping them back .
Let's get to it in case you forgot , we start off by looking at the buffer .
You are .
Now , where does that sticker need to go ?
Well , white , blue , white , blue , it's the white sticker .
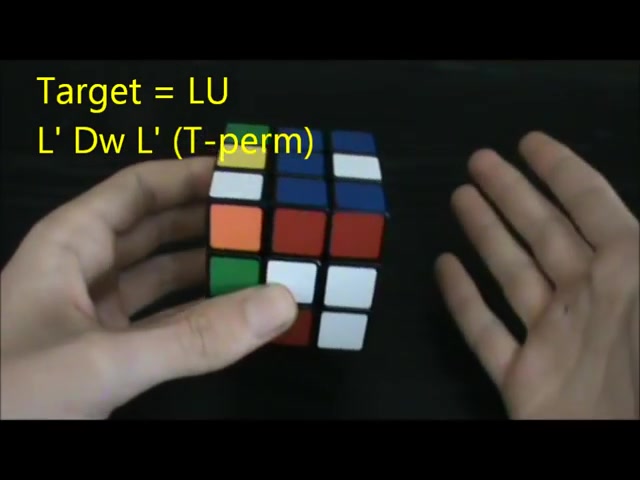
So it needs to go to Lu .
So we have to find a way to set up Lu to either Uful or UB .
And of course , you can't shift these three pieces .
Now the setup moves will come very fluent eventually and after practice , you won't even have to think about them .
But at the moment , they're probably confusing .
Now , I'm going to choose to set up LDU to UL then solve it with the , the way I'm going to do that is L prime D Oprah .
So that's the setup move , it's now there and I can do and under .
OK , look at the buffer , what are we supposed to do now ?
Because the blue yellow edge is now the buffer piece and that's where it should be like where are we gonna shoot it to ?
Because it's already in the right spot .
A lot of people stress over this and don't understand what to do .
It's not a problem at all .
You have to break into a new cycle .
All this means is you need to shoot to an unsolved piece and continue solving .
So let's pick an unsolved piece .
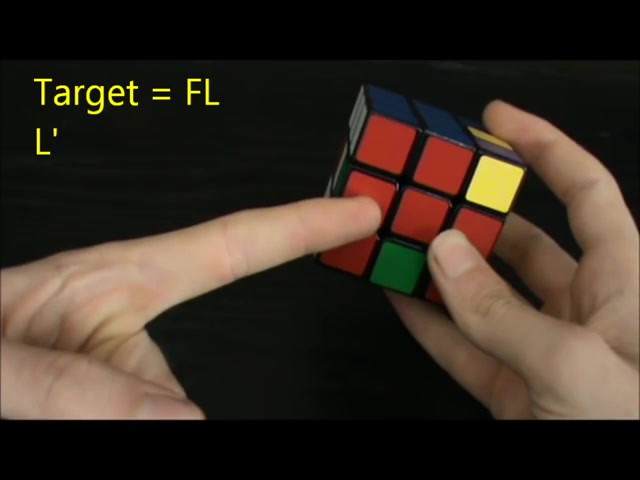
I'm gonna choose FL .
So we're gonna shoot the buffer to fl .
Now the setup and move for that is pretty simple L prime .
Now , it can be solved with A and under the set up move .
Now , we've got this target which is FD , see , red , green , red , green , it's the red sticker .
So it needs to go there FD .
Now , this can be set up to a GP in one move .
And if we do wide L prime , it's now there and that's AJ and I'll do the sit up move .
Now we've got to shoot to DL , the set up for that is L two .
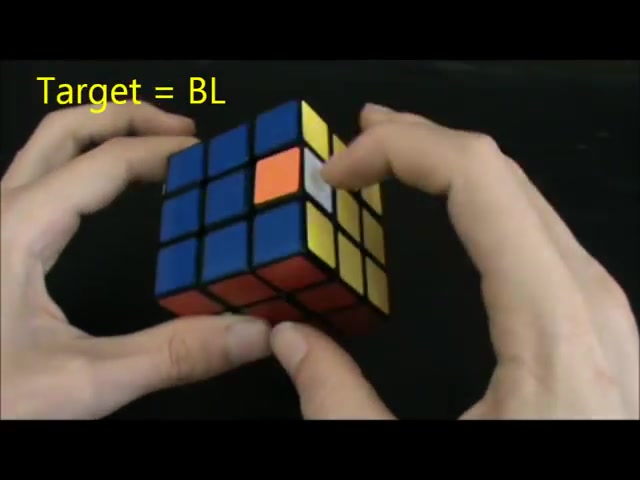
And I do .
Now we have to shoot to bl , orange , white , orange , white .
It's the orange sticker right there .
Now , this can be solved with the TP as well .
We just have to do L and now and under this can also be solved with TPA .
Um But hopefully not thinking of going like f because you might think .
Oh yeah .
Now it's cheaper .
But no , because you just wrecked , you just moved this corner .
So what you can do is set it up to here and then solve it with deeper .
So I'm gonna do that by doing YD prime .
Then L now it's there and I can do cheaper .

And Dundee the set up , set up moves for the possible 22 edge targets are in the video description , corners are solved in a very similar manner to the edges .
The corner buffer is UBL and the corners are solved with wiper .
What does is it swaps these two edges and it shoots the buffer UBL to RFD .
So all you have to do to solve the corners is set up the target , do RFD , then do wiper , then undo your set up move .
When you're solving the edges , you're not allowed to break up these three pieces here .
Well , with the corners , these three pieces don't matter at all , but you can't break up these three pieces here when you're solving the corners .
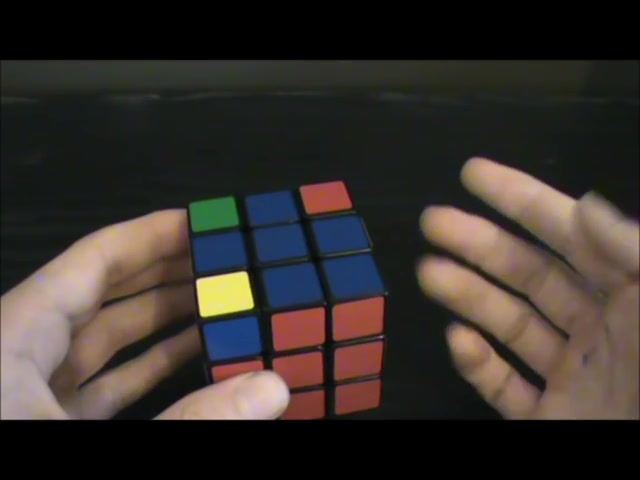
So Ubul and the buffer must all stay connected .
We are now going to solve these four corners using classic Pochman just like the edges .
We start off by looking at the buffer .
Now , where does that sticker need to be shot to ?
Well , it's the green , red white corner .
So it belongs there .
It's the green sticker , so it needs to be shot to DFL .
So in order to solve this , we must find a way to bring DFO to RFD without of course upsetting these three pieces .
That's a pretty easy set up .
It's just going to be F prime .
Now , we can do and I'll do the set up .
Now , the buffer solved .
So we have to break into a new cycle by shooting to an unsolved piece .
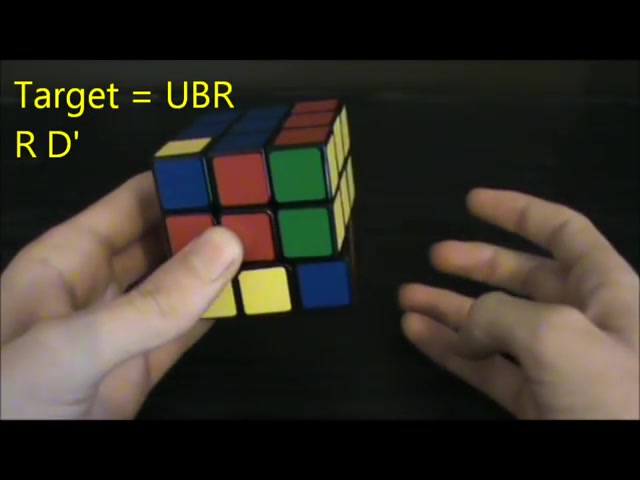
I'm going to choose UBR , I don't want to confuse you , but we could actually shoot to UBR with , you would just have to rotate , then do LP , then rotate back .
But if you're not comfortable with that , you can always do uh D prime as the setup than what .
And under the setup , the next target is flu .
In order to solve this , we're going to do the setup F prime D .
Now we brought the target to RFD and these three pieces are still in the same spot .
So we're good .
Now , we can do wiper and under the setup .
Now we're back to where we broke into a new cycle .
So the next target is UBR .
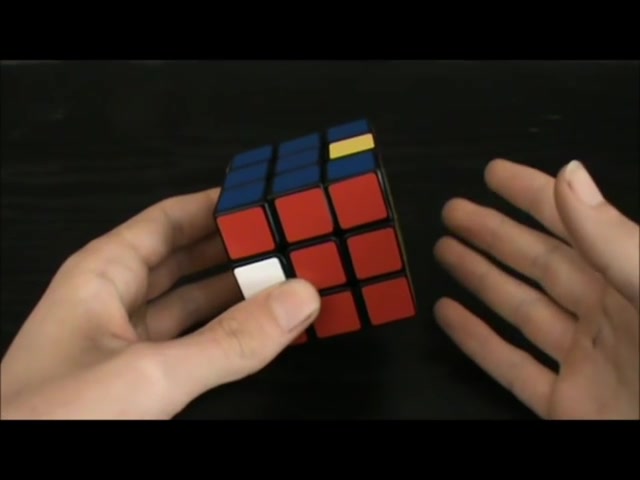
This time , I'm going to solve it with LP , rotate .
OK .
Rotate back the setup moves for the 21 possible corner targets are listed in the video description .
Often you'll have a scramble where there are pieces that are already in the right spot , but they're not oriented edges that are in the right spot , but aren't oriented are called flipped edges with corners .
They're called twisted corners .
Here's what you do when you have flipped edges , make sure you only deal with flipped edges after you've solved all the other edges and ignore the orientation of the buffer .
Because as long as all the other edges are oriented , the buffer has to be solving , flipped edges can be done in two easy steps .
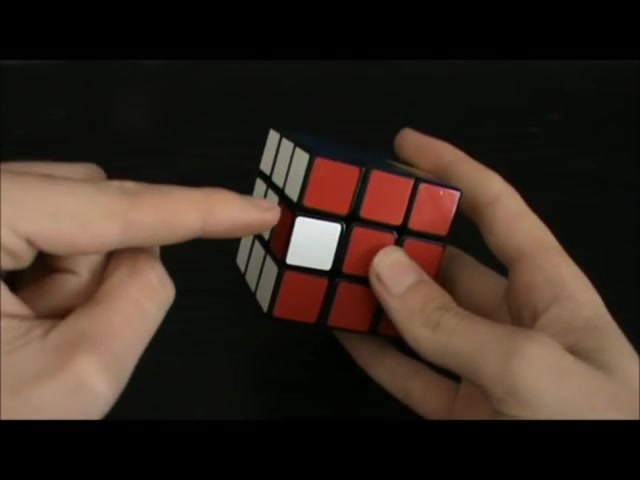
First , you have to identify the flipped edges .
In this case , it's just this one here .
Then you have to shoot to both stickers of the flipped edge .
So what I'm gonna do here is shoot to fl and then shoot to LF .
So let's do that , shoot to FL L prime setup .
Now T and set up now shoot to LF .
I'm gonna set that up to UL by going D prime YD prime L now T under setup .
Now that flipped that edge and it also flipped , the buffer , twisted corners can be dealt with much like the edges don't deal with twisted corners until after you've solved all the other corners first and ignore the buffer .

It doesn't matter if it's twisted or not as long as you've oriented all the other corners , the buffer will be oriented as well .
Corners can be twisted in two easy steps .
First , you need to shoot to the blue or green sticker , then you need to shoot that sticker to where it belongs .
So for this corner , I'm going to shoot to the blue sticker and then I'm going to shoot to UFR because that's where the blue sticker belongs .
So let's shoot to the blue sticker which is fru the set up for that is R two D prime .
Now what and , and do the setup .
Now , I'm gonna shoot to UFR which is where that sticker belongs .
So f set up now what time and then do the setup .
I still need to cover something very important .
It's called parody .
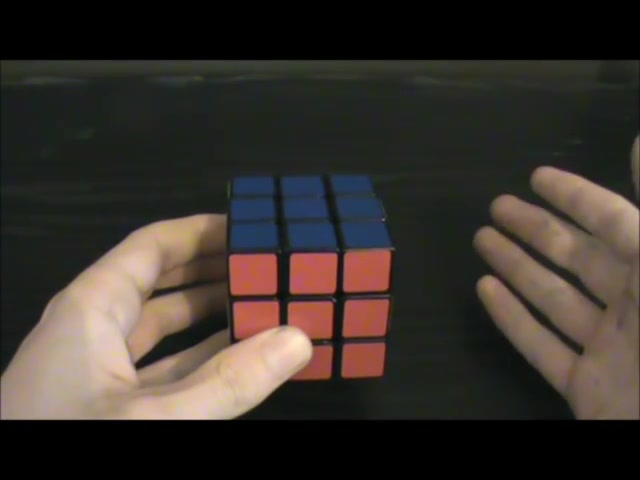
This is where RP comes in .
Parody occurs when the cube requires an odd number of edge swaps and an odd number of corner swaps in order to solve it .
So essentially what this means is if you have an odd number of edge targets and an odd number of corner targets , you have parity and you will never have something like odd edges and even corners , you'll either have no parody which is even edges and even corners or you will have parody which is odd edges and odd corners .
Can you avoid parody ?
No ?
50% of the times you will have it and 50% of the times you won't .
So if you have parity and you solve the edges first .
Once you've solved all the edges , you'll finish off with these two corners swapped .
If you have parity and you solve the corners first .
Once you've solved all the corners , these two edges will be swapped .
It doesn't matter whether you solve edges or corners first .
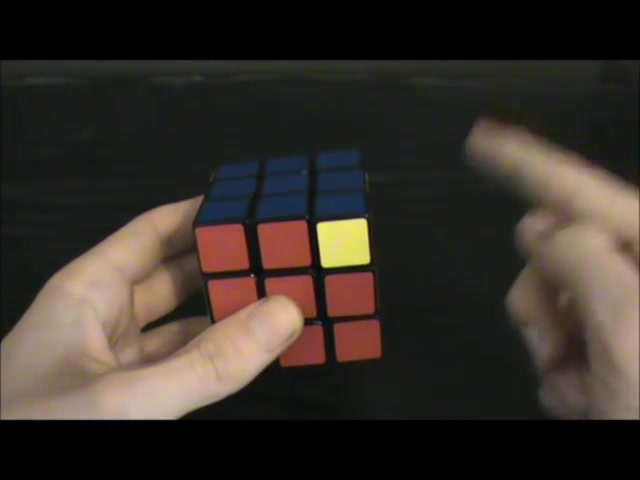
If you have parity , what you need to do is in between solving the edges and corners , you must rotate , then do a then rotate back .
I'm now going to give a walkthrough blind solve of a completely scrambled cube and it will have parody .
So you can understand it better .
Here's the scramble .
We now need to determine what has to be done to this .
In order to solve it , we're going to start by looking at the edges and the memo will be listed across here .
Memorization is a lot easier than how it's about to look .
I'll explain easier ways to memorize at the end .
So we start off by looking at you are .
Now it's the green white piece .
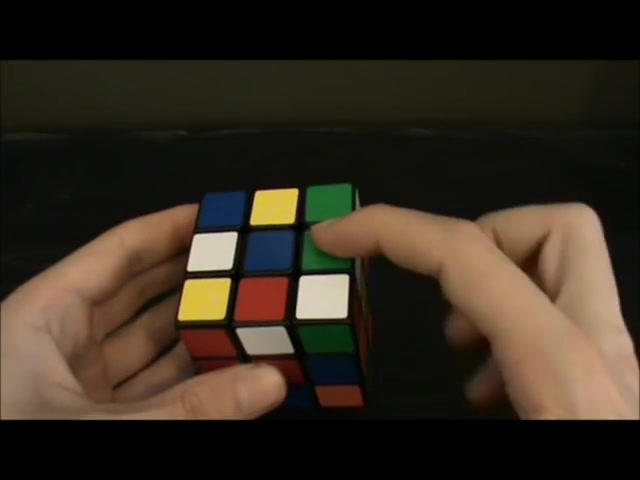
The green sticker has to go to DL Dale has to go to EF and this is the yellow blue piece .
And so we therefore have to break into a new cycle .
I'm going to choose to shoot to UB because that's unsolved and we haven't cycled it yet .
So UB then has to go to RD , which has to go to BR which has to go to DB , which has to go to lb , that then has to go to UF , which has to go to FL , which has to go to FR and we're back to where we broke into a new cycle .
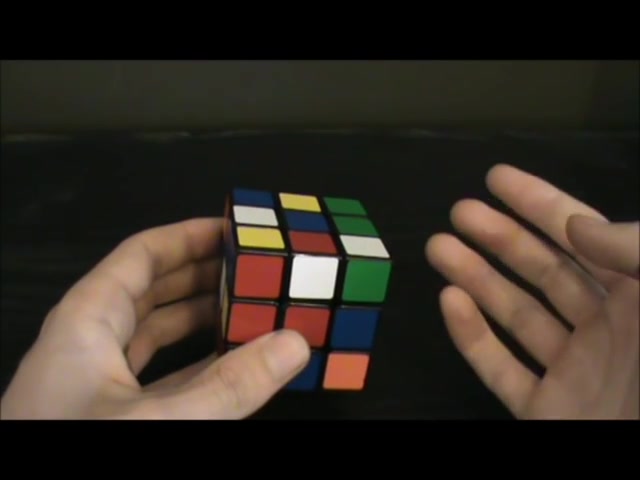
So we have to shoot to UB , after you've finished memorizing all the edges , you always have to make sure there's none that are flipped .
And that's what , and that's the only one to ensure that you have cycled all the pieces .
You can use the formula T equals U plus C where T equals the number of targets , U equals the number of unsolved pieces .
And that does not include the buffer and flipped edges and C equals the number of cycle bricks .
So let's count U right now .
And remember U doesn't include flipped edges or the buffer .
So we don't count that or that 123456789 10 .
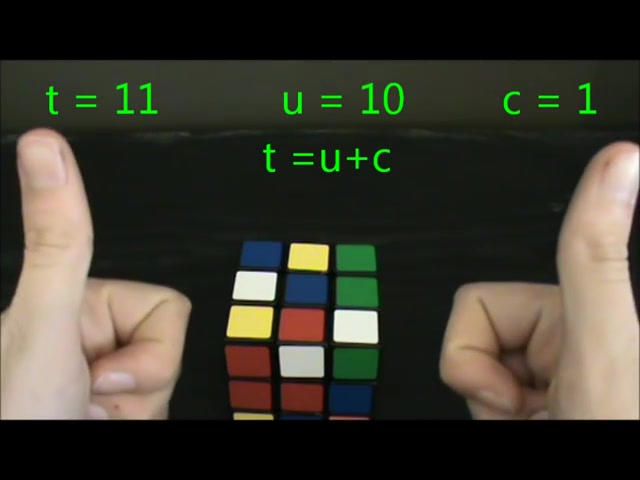
Now we had one cycle break and that was shooting to UB 10 plus one equals 11 , therefore , 11 equals 11 , which is what we want .
Now , we can memorize the corners .
Here's the buffer , it has to go to UBR that has to go to DB L which has to go to flu , which has to go to in a year , which has to go to DFL , which has to go to DFR , which has to go to RBD and make sure that once you've done memorizing the corners , there are no twisted corners and there are none and you can also use T equals U plus C for the corners .
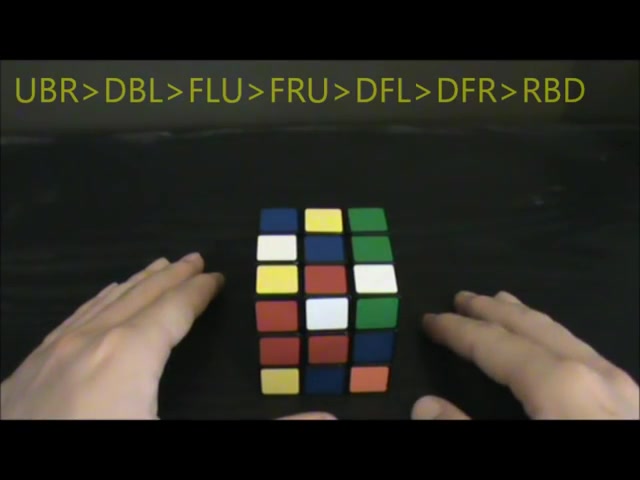
Well , there are seven targets and let's count the unsolved corners , +1234567 .
And we had no cycle breaks .
Therefore , seven equals seven .
Keep in mind that we do have 11 edge targets and seven corner targets .
They're both odd numbers .
Therefore , we have parity .
What we now need to remember to do is an up um in between solving the edges and corners .
Now that we've done all the memorizing , we can now start solving , I'm going to solve the corners first since we did just memorize them .
Therefore , they're very fresh in our head .
So the first target is UBR , we can set this up to RFD by doing RD prime as the setup .
Now what ?
And I'll do the setup .

The next target is DB L .
This can be set up with DF prime .
Now , what ?
And undo the setup , the next target is flu this can be set up with F prime D .
Now , we can do what and done doing the setup .
Now , the target is fru this could be set up to here by doing R two D prime .
Now wi and under the setup , the next target is DFL .
This can be set up to here by doing F prime .
Now we can do and under the setup .
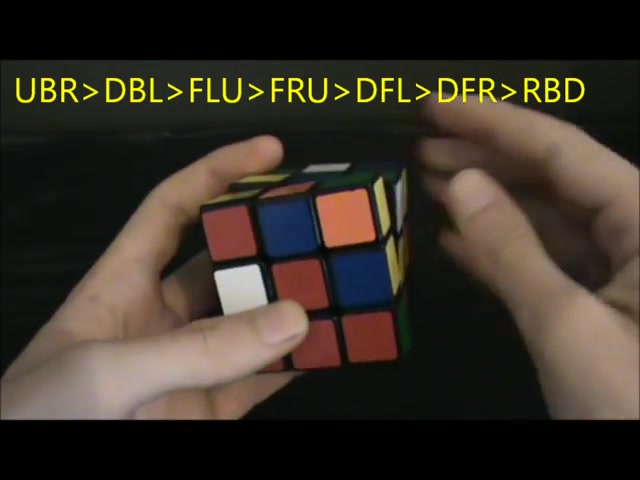
Now the next target is UFRDFR sorry , which is there , this can be set up to RFD by doing F prime R prime .
Now we can do and under the setup , the final target is RBD , which is there , this could be set up to there very easily by doing .
Ah , now we can do weapons and I do this up .
Now the corners are all solved .
But remember we have parody .
So what we now have to do is rotate and do a perm because these two edges are swapped and that's not how we memorize them .

So we're now going to swap them back up , rotate back .
Now , we can start solving the edges .
The first target is DL right there .
This can be set up with L two .
Now it's a TPA and I'll do the setup .
Now , we have DF right there .
This can also be set up to a T firm by doing D prime L two .
Now it's there and don't do the set up .
Now , we need to break into a new cycle here .
Remember ?
And that was UB ?
And this can be simply solved with ALPA .
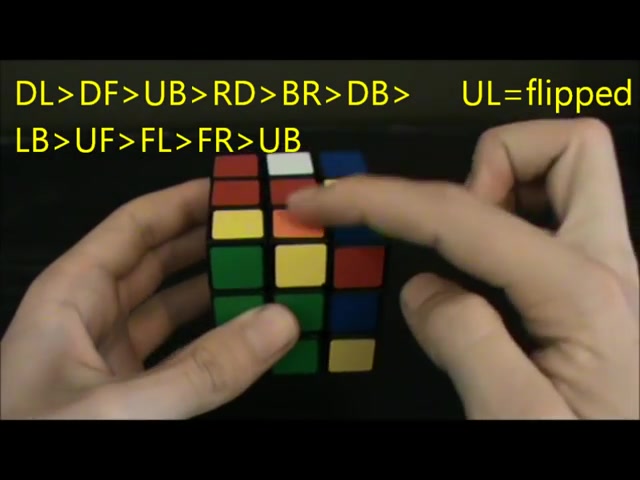
The next target is RD , which can be set up to AJ PM if we do D prime wide L prime .
Now it's there JP .
And I do the setup .
Now , the target is BR which is there , the setup for this is YD two .
Now it's there and I'll do the setup .
The next target is DB , which can be set up to AJ PM by doing wired alter .
Now JP and I'll do the setup .

The next target is LB , which can be solved with TP if we set it up to A T by doing YD prime .
Now take off and under the setup .
Now the target is UF right there , which can be solved with J PM without any set up .
The next target is FL that can be set up to A T prime by doing L prime .
Then under the sun up .
Now we have FR which can also be set up to a by doing YD two oh Now it's there and we can do taper and under the setup .
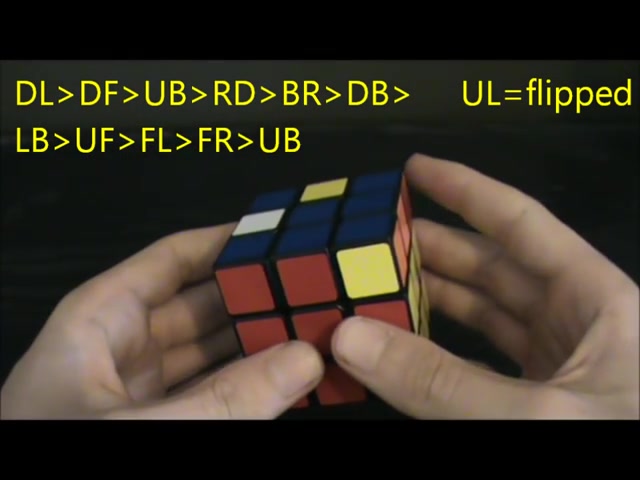
Now , the final target is your , this can be solved with time .
And remember we have one flipped edge right there .
So well , two .
But you don't , you just ignore the buffer .
So let's flip this by shooting to both stickers .
So I'm gonna shoot to UL and then I'm gonna shoot to lu let's shoot to UL first .
Now let's shoot to Lu , I'm gonna set this up by going Lydl pro Napa and undo if that was too fast , it may have been um the scramble and solutions in the video description .
There are many different techniques for memorizing .
I'll now show you a very easy way of remembering the edges .
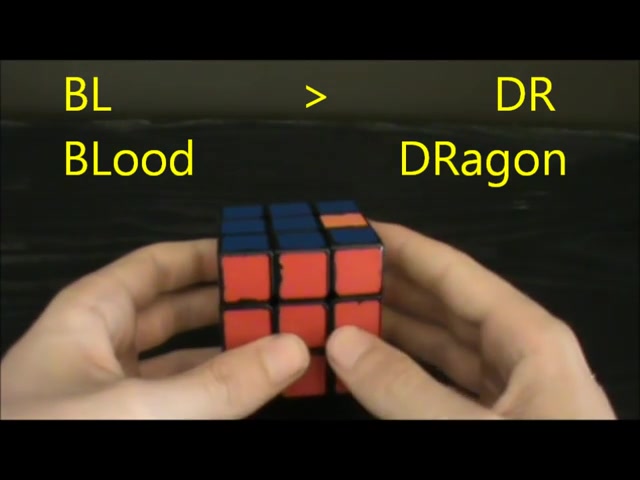
Here are the targets bill and they are , what you can do with these targets is translate them into images .
So BL could represent blood and DR could represent a dragon .
Images are very powerful because your brain works with images .
If asked to say , think of a dragon , you don't think of the word dragon .
You think of an actual dragon .
The way to remember these images is to imagine yourself walking somewhere .
So you could imagine yourself in your house and you might walk inside your bedroom and in one corner , there would be a puddle of blood and then on your bed , there might be a dragon .
So there will be one image for every target you have in the description .
There's a list of images that you could use for the 22 possible targets .
Even though you can use images to remember flipped edges , it might suit you better if you don't and you just make a mental note of what edges need to be flipped .
So you'll just visually remember that these two edges need to be flipped that's called visual memory .
Some people like to use visual memory for memorizing the corners .
Here .
The targets are lbdflurfd and RBU .
This could be remembered by simply going there , there , there , there they're there , they're there .
And after you repeat this enough times , you will be able to remember it .
The problem with memorizing the corners visually though is visual memory is very short term .

So if you're gonna remember the corners this way , then you should memorize the corners last and then solve them .
First twisted corners can be very easy to remember visually because all you have to do is .
Remember where the blue or green sticker is .
So you'll remember there and there .
Now when you go to solve these twisted corners , you'll know to shoot to there and then shoot to there and then for this corner you'll know to shoot to there and then there blind memorization is a very big topic .
So I'll leave it at that .
If you want to learn other memory methods for blind solving , I suggest you take a look at the speed solving wiki article .
Remember you need to make sure that you count your targets .
If you have an odd number of edge targets and an odd number of corner targets , you have parity before you attempt your first blind solve .
I recommend that you first try doing excited solves with classic Pochman .
That way you will know when you've perfected the execution and once you fully understand what to do , it may take you a few tries before you actually succeed .
Not many people get it on their first try , but it does happen if you didn't like this tutorial .
Joel has a written tutorial on solve the cube dot com .
I learned from there .
I hope this helps .
Thank you for watching .
Are you looking for a way to reach a wider audience and get more views on your videos?
Our innovative video to text transcribing service can help you do just that.
We provide accurate transcriptions of your videos along with visual content that will help you attract new viewers and keep them engaged. Plus, our data analytics and ad campaign tools can help you monetize your content and maximize your revenue.
Let's partner up and take your video content to the next level!
Contact us today to learn more.