https://www.youtube.com/watch?v=Hx9ZbPdX8zM
F2L For Beginners _ Easy CFOP Tutorial

Hey guys in this video , I'll be showing you how to solve F two L intuitively for beginners .
First of all , what even is F two L ?
How does it work ?
And why do we use it ?
F two L is the second stage of the most popular speed keeping method .
CFO if you don't know what the CFA method is , I recommend you first watch my intro to co for beginners video where I explain how it all works .
So F two L stands for first two layers , meaning you can solve both the first and the second layer at the same time rather than doing all the first layer corners first and then the second layer edges like kind of what happens in beginner's method .
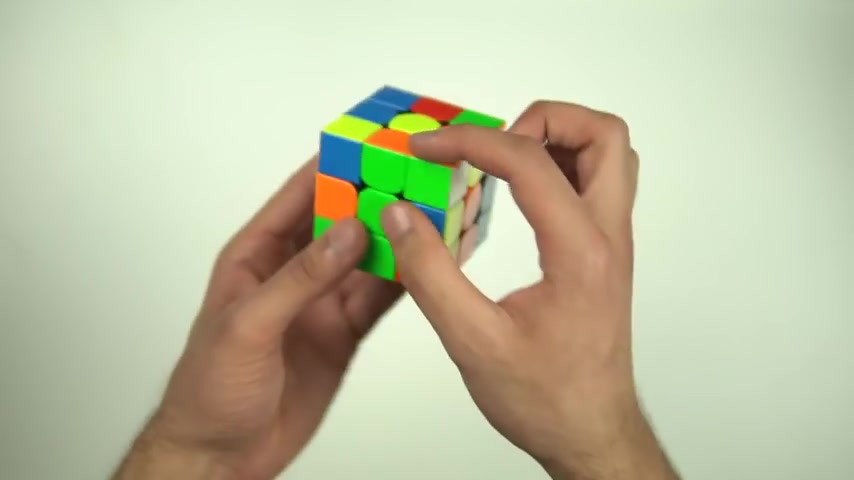
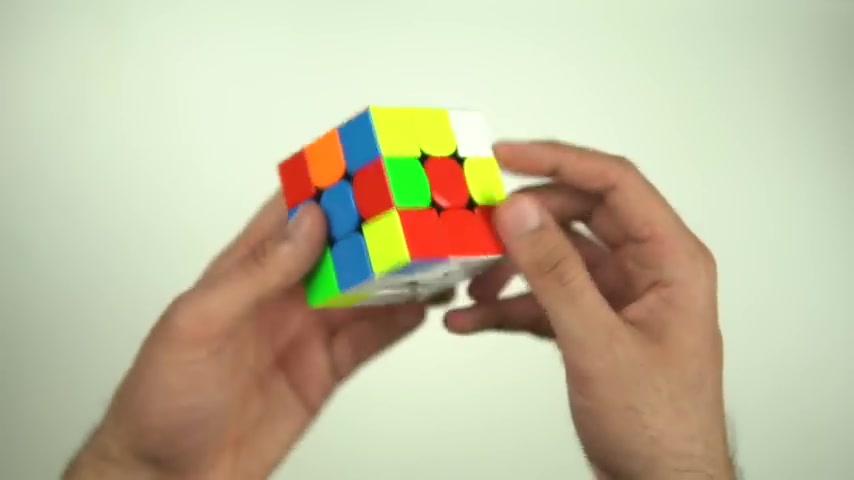
Now , the idea behind F two L is that we flip the cube over .
So the cross is now on the bottom and then we create these corner and edge pairs which we then insert into their corresponding slots and there are a total of four pairs and four slots on the cube .
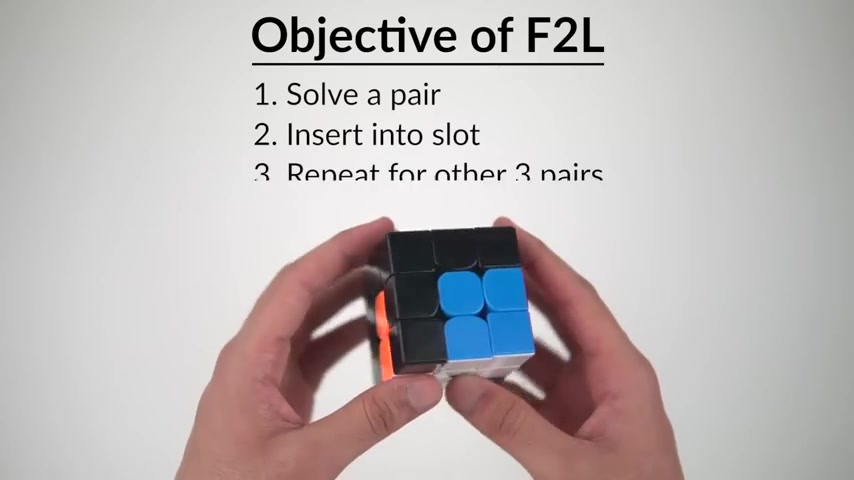
The goal is to solve a pair and insert it into its slot and repeat that for the other three pairs to solve all of the first two layers .
And that's it .
If that sounded confusing .
Don't worry , it'll make more sense as you watch this video .
So how do we actually solve F two L ?
Well , for beginners , F two L , we'll do this by simplifying the 70 something different F two L cases into just five simple scenarios .
Once you learn those five cases in this video , you can easily do F two L every single time .
And I'll show you how to convert any single F two L case into one of the basic five .
But before we get into it , I just want to give you a little bit of my own advice while you're learning F two to help your process .
Along the way .
I want you to treat this video as a reference .
A lot of people including myself find F two L very complicated at the start .
So don't get discouraged if you don't get it right away .

Use the time stamps in the description to rewatch parts of this video that you're stuck on and consult the comments .
If you need more , help , keep practicing as much as you can and whatever you do , don't go back to beginner's method just because you feel slow at F two L at the beginning .
That's the biggest thing .
You don't want to quit right away .
Just keep at it and eventually you'll get better and better just like learning any new skill .
All right .
Now , here's a breakdown of this video .
We just went over the intro .
Next , we'll be getting right into part one where I teach you how to convert any F two L case into the , one of the basic five .
And part two is when I actually show you what the five cases are , how to recognize them and how to solve them on your own .
So that's the bulk of F two L right there .
But then in part three , I show you a , a neat trick that you can use to solve the last pair of F two L because it's a little bit tricky sometimes .
And finally , we'll combine everything that I showed you in this video into a couple of examples .

And I'll also give you some tips and tricks and give you some next steps on what you should learn what you should do after watching this video .
So I hope you guys find this video helpful .
Good luck .
Let's get started with part one .
All right .
So let's get started with part one where I'll show you how to convert any possible F two LKS into one of the five basic cases using a foolproof three step process .
You don't know how to solve five cases yet .
That's what part two is about .
But for now this is what they look like .
And you'll notice that there are two main properties that all of these cases have .
First , both the corner and edge pieces are in the top layer and two , they're both separated from each other .
The edge is never touching or it's never beside the corner piece .
It's always further away from it .
And these properties are would determine the three step process .
Let's get into step one .

And by the way , feel free to follow along with me by applying the scramble you see on screen while holding your cube with the green side in front and the yellow side on top , these scrambles will already have the cross solved for you .
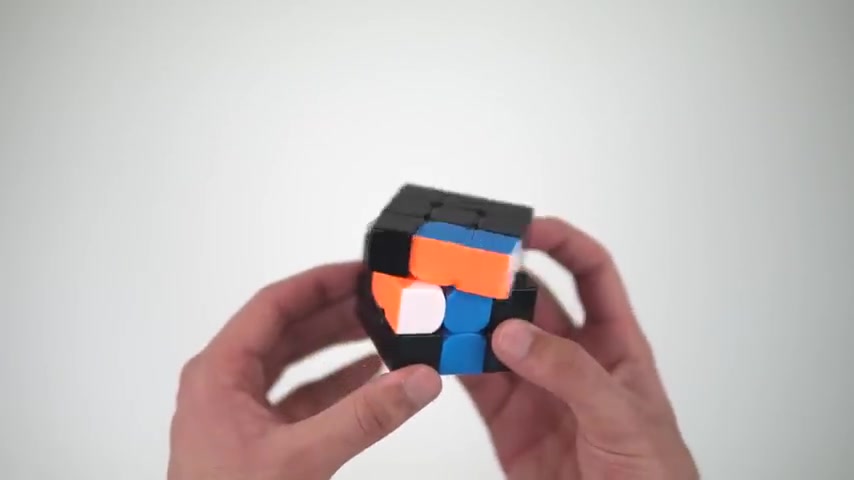
Now , holding the cross on the bottom , we want to convert this orange and green F two L pair .
So step one is to bring the corner into the top layer , we're gonna hold the cube so that the corner is in the front right position and it's gonna be at the bottom of the slot we want to take it out .
So it's gonna be in the top layer .
So to do that , we're gonna do an Rur prime to take it out into the top layer .
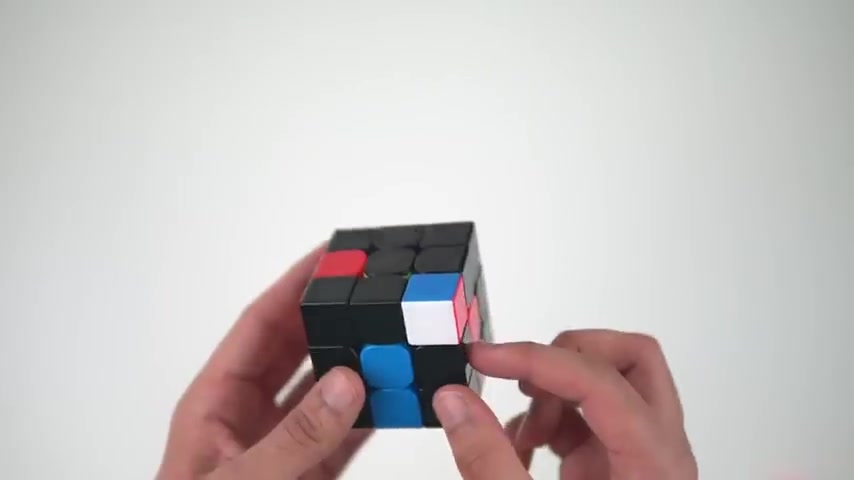
Now , step one is done for step two , we see that the orange and green edge piece is stuck here in the middle layer and we want to bring it into the top layer .
We can do the same three moves we did for the corner while holding the edge in the front right position now .
But be careful because you'll notice that .

Now the corner and edge are touching if you do an Rur prime and this violates step three , which is that the , the corner and edge piece must be separated , they can't be touching .
So instead of Rur prime to take out the edge piece , we can do an Ru prime R prime .
And this way , you're just moving the edge in the other direction and that allows them to stay separated and you have them both in the top layer .
And now we can just skip step three because it's already done .
We don't have to worry about it .
So just keep that in mind , you can use either way to take out the edge and corner , use whichever one results in them not being next to each other .
If that makes sense .
Don't worry , we'll go over a bunch of examples and this will start to make more and more sense slowly .
But for the sake of demonstrating step three , let's keep them adjacent .
Let's say you found them like this in the top layer already touching .
So how do we split them up ?

Well , you can use something that I like to call the hiding trick where if the edge is in the front and the corner is in the front , right position like this , then you can do an R prime to hide the corner piece in the bottom layer .
And this allows you to move the edge piece freely anywhere you want now .
And just so you know , there are four positions in the top layer , you can move it to .
There is the left , right back and front position .
Obviously , since the corner will be in the front , right position .
When we un hide it , we don't want the edge to be in the front or the right position .
Instead , let's push it in the left position back , would also work perfectly fine .
You can choose whichever one really .
Now , we can unhide the corner with an R and look at that .
Now , we have one of the five basic cases .
Now , let me show you what you would do if the corner was in the front , right , and the edge was in the right position .

Now , how do we split up the edge and corner when it looks like this ?
Well , you can first do a U prime so that they're both in the back now and now instead of an R prime , let's do an R so that we're hiding the corner in the back right at the bottom position .
And now we can move the edge freely .
So we're essentially splitting them up , but just doing it from a different angle and now we can move the edge wherever we want .
So let's move it to the left position .
In this case , the good positions are left and front , so you can move it to either one of those and then we can unhide the corner by doing an R prime .
And there we go , we have the corner and edge split up .
So just so you know , if you ever come across those two cases and you're like , oh how do I split them up ?
Remember you want to use the hiding trick to split up the corner and the edge and that should cover every single possible scenario .
All right .

So in part two of this video , I'll be showing you how to solve the five fundamental cases of F two L we've already seen in part one , how to convert any single F two L case into one of these basic five .
And now once you learn how to solve the basic five , you should be able to solve any F two L case on your own .
Now remember the whole objective of F two L is to create this corner and edge pair which looks like this and then insert it into its corresponding slot .
So to solve these pairs , we need to learn these five fundamental F two L cases .
Let's get started with the first one called the matching case .
And remember I'll have a scramble up at the top of the screen which you can perform on your own solved cube to follow along for each of the five cases .
So the matching case looks like this where we position the corner in the front , right position at the top with the white color or whichever is your cross color .
In this case , it's white .

So for the corner , we have the white side facing to the right and the edge is going to be in the back position , it's called matching because the top color of both the corner and the edge are the same color .
In this case , it's red .
And that's how you recognize this case .
Also , we always hold the cube .
So the slot that we're solving is in the front , right , and we position the corner right above it like this in the front , right top position .
Also remember how in part one , I talked about that the edge could be in either the back , left front or the right positions .
Right .
Now , it's in the back position .
But for the matching case , it's also perfectly OK .
For it to be in the left position , you , if you have it in the front position , you'll already have the pairs solved , which I'll show you how to insert in a few moments .
If it's in the right position , then you have to go back to part one and split them up using the hiding trick that I showed you .

So now that we have that sorted out , we know our goal is to make the red and blue pair for the matching case , how we do this is you first hide the corner piece just like what we do with the hiding method , do an R prime to move the corner into the bottom layer .
And now you can freely rotate the top layer and move the edge piece to any of the four positions .
We're gonna move it to the front because now that we un hide the blue and red corner with an R , it creates the pair just like that .
Now , so now we just have to insert it into its red , blue and red slot , which the corner should be right above to do that .
We're gonna rotate the cube .
So the slot is in the front left and now we're gonna move the pair over with the U prime and to insert it , bring up the white cross edge on the blue side by doing an L prime , then we're gonna attach the pair to it .
So the two whites are connected and then return the cross edge back with an L .

If you found the part where we insert the pair into the slot , confusing , don't worry , we'll be practicing that a lot more since it comes up in quite a few other cases and it's always the same few moves .
Now , let's move on to number two , the non matching case you're gonna see the green and red pair like this .
That's the one we're gonna be solving now .
And you'll notice this looks very similar to the matching case , but the top colors of the edge and corner are different .
Now , we've got red on top for the edge and green on top for the corner .
That's why it's called the non matching case .
And remember the white on the corner piece must always be facing the right side .
If it's facing the front , you have a different one of the five cases which will go over in , in a few minutes .
One really important thing about this case is that we've got to make sure that the edge is always in the back position .
It cannot be in the left position , even if you properly followed .
Part one , you could potentially end up with the edge being in the left to fix this .

We can apply the hiding trick again and just move the edge to the back if the edge is in the front or the right positions .
And you've got to go back to part one and apply the hiding trick to fix it .
And also we have , we've got to make sure that the corner piece is right above the slot that it's going to go into .
Now to solve the case , we're gonna push the corner towards the edge in the back by doing an R move .
And you'll see this creates the pair , but we've kind of messed up our cross now .
So what we can do is a U and this is actually going to attach the pair to the cross and then you can do an R prime which not only fixes your cross , but it also inserts the pair , which is really convenient and makes this the easiest F two L case since it creates and inserts the pair at the same time in only three moves here it is .
Again , you just do an Rur prime and that case is solved , moving on to case number three white on top .

Now , this one is a little bit more involved .
You recognize it when the corner pieces , white sticker is facing up .
In this case , we're going to be solving the blue and orange pair .
So we see that the blue , orange and white corner is in the back , we're actually going to rotate the cube because we want the pair that it's gonna go into in the front , right ?
It's always a good idea just to position your cube like that .
And then remember you want your corner piece to always be above the slot that it's gonna go into and the edge can be in either the left or the back position .
Remember it can't be touching otherwise you have to go back to part one to solve it .
We're first gonna look at the side color of the edge piece .
In this case , it's orange .
So we want to rotate the top layer .
So the edge is right above the same , the centerpiece that has the same color as its side color .
So we're gonna move the top layer .
So the edge is now right above the orange center and you'll see the two oranges lining up like that .

I know this abandons the idea of having the corner above the salt that it's gonna go into this is the only weird case where this happens .
And now what we wanna do is looking at the top color of the edge piece , which is blue .
In this case , we want to move the edge away from what from the blue centerpiece , the blue center is to the right .
So we're gonna move the edge to the left , just move it away from that centerpiece and you'll notice your cross edge comes up , that's fine .
We're gonna fix that in a moment and your corner is still in the top layer .
What what we want to do is move the corner above our edge piece and you'll notice this creates the pair .
Now we can return the cross to normal and our edge piece is back in the top layer and our corner is connecting it to create the pair .
Now we just have to insert it just like we did with the matching case so we can rotate the cube so that the slot is in the front left and you'll notice the weight of the corner is facing you now .
So we're gonna do a U prime to move the pair over , bring up the cross piece , connect the pair with the cross and bring it back down , return the cross and that will insert your pair .
You might have to rewatch that part of the video to get a hang of it .
And I'll do an example of it in part for the video .
So you can understand a little bit better .
All right .
Now let's get into the mirrored cases .
The first of which is the mirrored matching case , the main difference you'll notice between this and the regular matching case is that the white sticker on the corner piece is now facing the front instead of the right with the corner piece still being positioned on the front , right of the cube right above its slot that it's gonna go into .

So in this case , we're looking at the green and orange pair and just like with the regular matching case in this one , the edge can be in either the back or the left position , it doesn't really matter , it just can't be in the front or the right positions to solve it .
We're gonna move the corner piece to the back right position temporarily with a U prime .
And then we're going to apply the same hiding technique as before , except by doing an R this time to hide it in the back .
And now we want to move the edge from wherever it is .
In this case , it's in the front and we want to move it to the back because now when we un hide the corner piece with an R prime , it creates the pair in the back just like that our cross is preserved as normal and we have the pair .
Now we just have to insert it into its front right position .
And earlier , we learned how to insert when the pair was made such that the white on the corner was facing the right side .
Now we're going to learn how to insert a pair when the white on the corner is facing the front .

So you'll notice the edge is now on the right like this and it creates the pair .
So holding the slot still in the front , right , we're not gonna rotate the cube , you're gonna do A U to move the pair over .
You're gonna do an R to bring the cross piece up and then connect the pair with the cross piece and just insert it like that to return the cross back to normal and insert the pair .
And that's how you solve the mirrored matching case not too bad .
And finally , our last case that we need to learn is the mirrored non matching case .
This one's pretty easy as well .
In this case , we're looking at the blue and red pair which when you scramble , the cube up will be in the back .
So let's just rotate the cube over .
So we have the blue and red slot in the front , right with the corner piece right above it , the white on the corner piece facing the front instead of the right , the top color of the edge and the top color of the corner are not matching .
That's why it's called non matching to solve this case .
Let's hold the cube so that the slot and the corner are on the front left like this .
Now we're gonna push the corner towards the edge with an L prime to create the pair in the back and with a U prime , we can attach it to the cross piece and insert it just like that with an L and that's it for all five cases that we need to learn .
Not too bad .
It's gonna take a little bit of practice to get the hang of it .
If you ever forget , feel free to come back to this part of the video and rewatch how I solved these cases .
All right .
Now that we're done with part one and part two , that's really the bulk of F two L .
Part three is going to be pretty quick .
I wanna show you a trick you can use for when you're solving the last F two L pair to make sure that you're not accidentally unsold your other F two L pairs up until now , I've been showing you the hiding trick without mentioning any sort of side effects or consequences to using it .

But you may have noticed as you use the hiding trick , you might accidentally be unsold some of your F two L pairs .
So let's say we have this case where we've got an edge and corner next to each other and it's our final pair .
We want to split the corner and edge up .
So this would be part one of this video where we want the edge to be in the left or the back position .
Normally , you would just do an R prime to hide the corner .
Uh Let's say we move the edge to the back position and this would , and then we bring the corner back up and it would create the non matching case .
But we've accidentally unsolved the blue and orange pair .
Let's undo this .
We , we're back to where we were to make sure we don't accidentally unsolved any other pairs .
Let's rotate the cube so that the unsolved slot is now in the back , right ?
Because that's the slot that comes up when we hide the corner .
Now we can do A U to bring the corner back into the front right position , even though it's not above its slot anymore .

And now apply your regular hiding trick with your R prime to hide the corner , move the edge over , bring the corner back and now we've successfully split up the corner in the edge and preserved all of our other F two L pairs .
Then we can do a Q rotation back to where we were and bring the corner back to the front right position where it belongs .
So it's really not that much work and it preserves all of your F two L pairs .
And if you're wondering when you're supposed to do this trick , just I want you to remember this one golden rule .
If you ever want to apply the hiding trick make sure the slot that you're bringing up into the top layer is unsolved .
If you're hiding with an R prime , the back slot is what comes up .
If you're hiding with an R , the front slot is , is what comes up .
So that golden rule should generally cover every case if you're still stuck and confused .
Don't worry , we're about to do some examples right now in part four and you'll get a much better understanding of it .
All right .

Now I walk you through a complete in-depth example of how you would apply everything that I've taught you in this video so far to solve beginners F two L on your own .
And then I'll give you some next steps on what you should learn after watching this video .
If you want to follow along with me , hold green in front , yellow on top and perform this scramble .
All right .
So let's take a look at this scramble .
Uh We'll see that on the top layer , we have this orange and green F two L pair .
Everything else is in the bottom like all of the corners at least .
So let's go ahead and solve this one .
It'll save us a few steps .
So I'm gonna position the orange and green slot right in front of me in the front , right .
I'll bring the corner above it and looks like we need to convert this into one of the five .
The corner and edge are already in the top layer , we just have to split them up .
So to do that , I'm gonna apply the second variation of the hiding trick that I've shown .
You remember that's the one when the edge is in the right position here .
So what I'm gonna do is move the corner to the back and then hide it with an R and now I can move this edge wherever I want , I'll move it to the left .
And when I bring the cross edge down and bring the corner back up , they're split up .
And uh it looks like we have the white on top case now .
And so remember for the white on top case , we look at the edge piece first and we see that it , it has a green side color .
So we're gonna match it up with the green centerpiece .
So we got a green on green like this .
And uh we're not gonna worry about the corner for now , still have the green and orange slot right here in front in the front , right ?
And if we look at the top color , it's orange and we want to move that away from the orange side .
So the orange center is right here .
So let's rotate the green phased .
So , so that the edge is away from the orange side .
Now , the edge is here on the opposite side of the orange and uh we got the cross piece up , but we'll fix that in a , in a minute , we'll bring the corner above the edge to create the pair .
And now we can , when we return the cross , we bring the uh the uh the pair into the top layer and let's insert it into the slot .
So to do that , we're gonna rotate the cube slots down the front left .
We want to put the corner in here .
I mean , sorry , the pair in here .
But uh we're gonna , we don't want to mess up the cross , right .
So we want to move the corner out of the way , bring the cross piece up , connect the corner and the pair like that , bring the cross down and it inserts the pair perfectly .
All right .
Now , we look into the top layer .
We don't have any corners in the top layer , but we do have a couple of edges that we can use .
It doesn't really matter which one you'd pick .
In this case , I'll just pick blue and red .

So since that's already in the top layer , we don't have to do step two of the conversion process , we have to do step one however , to bring the corner into the top layer .
So here's the corner , got to bring this into the top layer .
So I'm gonna apply rur prime to take that out and um we have them both in the top layer .
And as you can see , this creates the matching case , so first let's rotate the cube .
So we have the blue and red slot in the front , right , like we always do move the corner above the slot .
So this is actually the mirrored matching case .
Since the white is facing the front instead of the right on the corner piece , we want the edge to come behind the corner right here .
That will , that will create the pair .
So what I'm gonna do is move the corner to the back right , in order to apply the hiding trick , um I'll do an R again .
This is the second variation of the hiding trick that I've shown you .
And then we're gonna move the edge to the back position .
So that when I do an R prime like this , it creates the pair in the back , the cross is preserved and everything , everything else looks good .
Let's move this here .
We want to insert this in uh to the slot now .
So let's move the corner out of the way , bring the edge up , connect it and bring it down and that solves that slots .
We have this other one that we already solved .
So we just have two more pairs to go and I'm gonna look around the cube .
I see we've got this orange and blue pair that we can solve .
Uh this one has the corner on the bottom layer .
So that's like an extra step .
So let's just do this one .
It's a little easier .
We can skip the first two steps of the conversion process .
So now we just have to split these up , right ?
Um So I'm gonna apply the hiding trick again because that's always what we do when we split them up .
And remember any time there's an edge here that you're dealing with , you want to apply the second variation of the hiding trick .

So what I'm gonna do is move that corner to the back , hide it , move the edge over , bring it back and now they're split up .
I'm gonna bring this corner back where it was and this is the regular matching case .
So um here , although this is , this is not the last pair , remember the golden rule .
Whenever you're uh using the hiding trick , you want to make sure that the slot you're bringing up is always empty .
In this case , I would normally apply the hiding trick like this , do an R prime to hide the corner here , bring this orange and blue edge to the front un hide the corner and create the pair , right ?
But notice it unsolved the blue and red pair , which is not what we want .
So let's undo that real quick back to where we were now .
So how do we uh make sure that we don't accidentally unsolved that case ?
So this is very important .
What you wanna do is rotate the cube so that the back slot is empty .

And then we want to bring the corner with us because remember when , whenever we hide it , we're using the first variation of the hiding trick .
Now , when we hide it , it's gonna bring the back slot up .
So that's the one you want to make sure it's empty .
And now we can safely apply the hiding trick , bring the corner back and we have the pair and we have not broken the blue and red pair in the back .
It's perfectly fine .
Now , let's go back to where we were , let's rotate the cube so that the slots in the front , right , let's bring this pair back where it was and we want to insert it here .
Now , so remember for this variation of the pair , when it looks like this , you want to rotate the cube here so that the slot is in the front left , move the pair out of the way , bring this cross piece up , connect it to the cross piece and insert the pair like that .
And there we go , it's solved that F two L pair .
So now we have three out of four solved , just have to get this last one in .
And this one , what I will do is so we're gonna take the corner out , the edge is already out .

So if it , if it was like this , if I did an rur prime to take the corner out , notice how they're connected , they're both in the top layer , but they're connected .
So what I can do instead is let's just put this back where it was , I'll do A U at the beginning and now when I take them out , when I take the corner out , they're split up .
So you , so you see how that kind of skips step three .
So I'm already kind of thinking ahead here .
You can start to apply tricks like that as you get more and more familiar with F two L .
That's just um a little example I wanted to show you and now uh we have the mirrored matching case , right ?
Because the white on the corner is facing us and the top two colors are the same here .
They're both red .
So we've got the mirrored matching case and we want to put it into this slot .
So I move the corner to the back .
We're , we're gonna apply the second variation of the hiding trick .

Now I'm gonna do an R to hide the corner , bring the edge to the back here so that when I do an R prime to un hide the corner , it creates a pair like that in the back and we're gonna insert it to the front .
So let's just bring the corner and the pair back where it was .
And uh this one is pretty easy to insert , move the corner out of the way , bring the cross piece up , connect the corner to the cross piece and in it goes .
So there you go .
That was a quick beginners F two L example showing you everything that we've learned in this video , this video is already getting pretty long .
So I don't want to drag it out more by adding more examples like this .
So instead , I've created a separate video that's full of beginners .
F two L examples .
Um You can check it out on my channel that's already uploaded .
It's essentially an extension of this tutorial video .
So I highly recommend you guys check it out .
There's a lot of good stuff in there that would help you learn F two L better .
All right guys .

So that concludes all the material I had for you in this beginner's F two L tutorial video .
Technically , this is all you need to be able to solve F two L on your own .
Now , every single time it just comes down to a matter of how well do you understand it and how quickly you're able to actually get started on solving it on your own .
It's gonna take a lot of practice .
You'll probably have to rewatch some parts of the video .
Once you feel like you've gotten the hang of it , you're starting to understand more and more how F two L works .
You're able to do it on your own every time pretty easily .
Then I would recommend you move on to intermediate F to learn a few more tricks , maybe start learning some algorithms for cases that you're pretty inefficient at solving and just continue on from that .
Moving on to advanced F two L techniques .
Uh learning more and more tricks .
And of course , like I mentioned earlier , you can watch this beginner's F two L example video .
I actually have an entire CF playlist on my channel where I go over various different levels , intermediate advanced beginners F 20 and I should have an intermediate F two L video coming out in a few weeks .
So keep an eye out for that .

If you found this video helpful , I would really appreciate it .
If you guys left a thumbs up , it helps me out a lot .
If you're new to the channel , make sure to subscribe for more cubing tutorials , reviews and boxing and hit the bell icon so that you're notified whenever I upload a new video .
Leave a comment .
If you have any questions , I'll try to answer as many as I can .
Thanks for watching and I'll see you in the next one .
Are you looking for a way to reach a wider audience and get more views on your videos?
Our innovative video to text transcribing service can help you do just that.
We provide accurate transcriptions of your videos along with visual content that will help you attract new viewers and keep them engaged. Plus, our data analytics and ad campaign tools can help you monetize your content and maximize your revenue.
Let's partner up and take your video content to the next level!
Contact us today to learn more.