https://www.youtube.com/watch?v=ObS9dHHsbWM
How To Solve The Rubik's Cube in 5 easy steps

In this video , I will show you how to solve the Rubik's cube .
I will be using the guide from our website .
The link is in the description step one solving the first layer cross , find the white centerpiece and keep that on top , find the green centerpiece and hold your cube .
So that that is facing , you find the white and green edge piece .
In our case , it's at the back here .
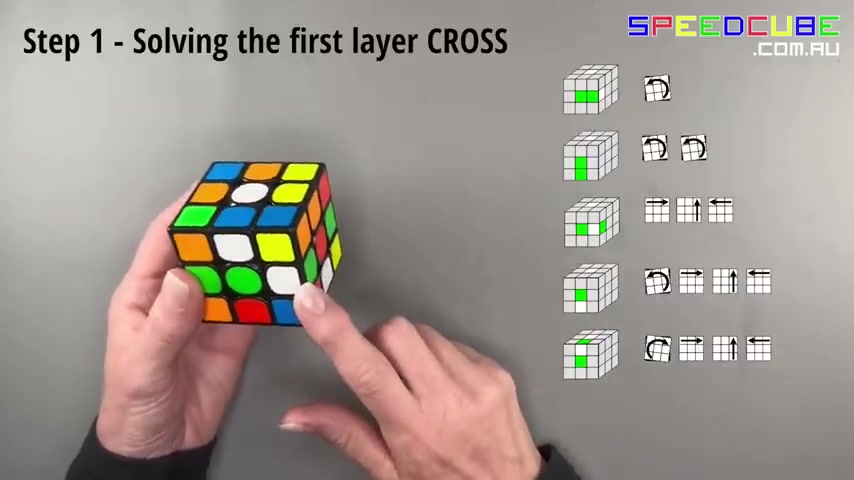
So we're just gonna turn this right hand layer so that that white and green edge piece comes into this front layer , choose the case that matches your situation from these options and follow the arrows to put your white and green piece in place , keeping white on top , turn your cube so that the next center faces you .
This is red for us , find the white and red edge piece or us .
It's in the front layer already .
I'm just gonna turn this front layer so that it matches one of the cases .
And again , choose the case that matches your situation from these options and follow the arrows to put this white and red piece in place .
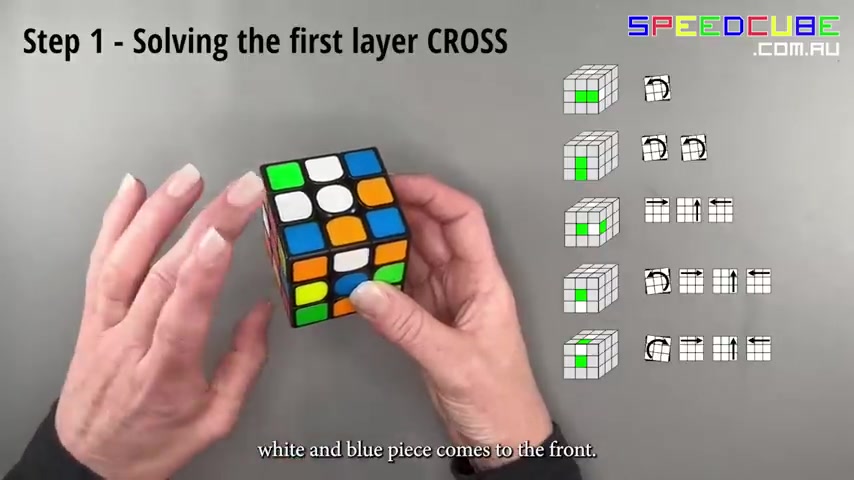
Again , keep white on top , turn your cube So the next center facing us is blue .
Find the blue and white edge piece for us .
It's in the back here .
So I'm gonna turn this left hand layer so that , that white and blue piece comes to the front .
It will break the little piece of cross we've done .
So what I'm gonna do , I'm gonna just move this blue and white edge to the bottom so that I can restore that cross .
So moving just the front layer to the bottom and restoring the white and red edge piece there .
So again , we're gonna choose the case that matches your situation and follow the arrows to put that white and blue edge piece in place .
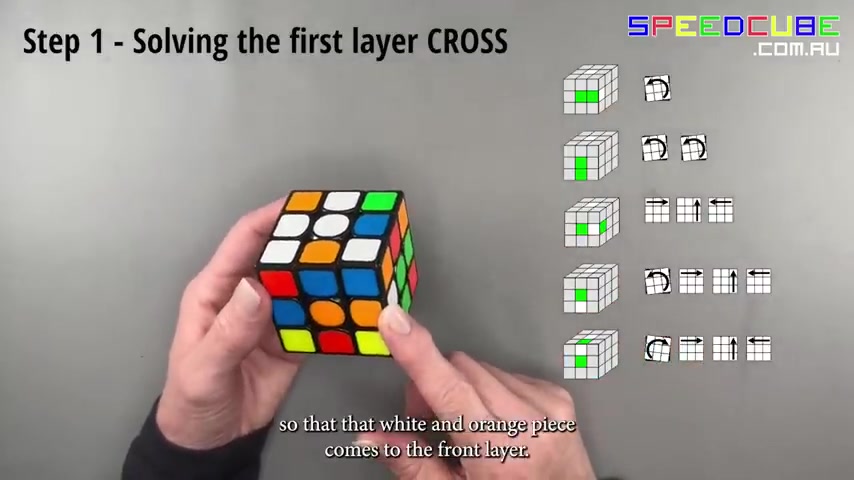
Turn your cube , we have got orange facing us .
Now the white and orange edge is in the back again , gonna turn that right hand layer so that that white and orange piece comes to the front layer .
This time , I am going to put the white and orange piece in place first and then I'll restore the cross .
So follow the arrow and restored the white and green edge piece .
Solving the white crust can be done intuitively .
You don't necessarily need to follow the arrow steps .
It just takes a little practice .
You move all the white edges in place , making sure they match the center colors .
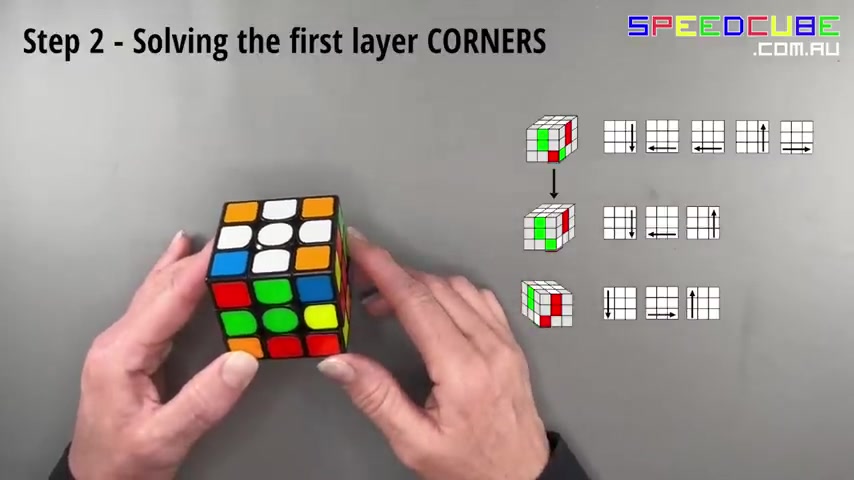
Step two solving the first layer corners , keep white on top green facing , you find the red , white and green corner piece in our case , it's in the back here .
Turn just this bottom layer so that that corner sits in between the red and green centers .
Choose the case that matches your situation .
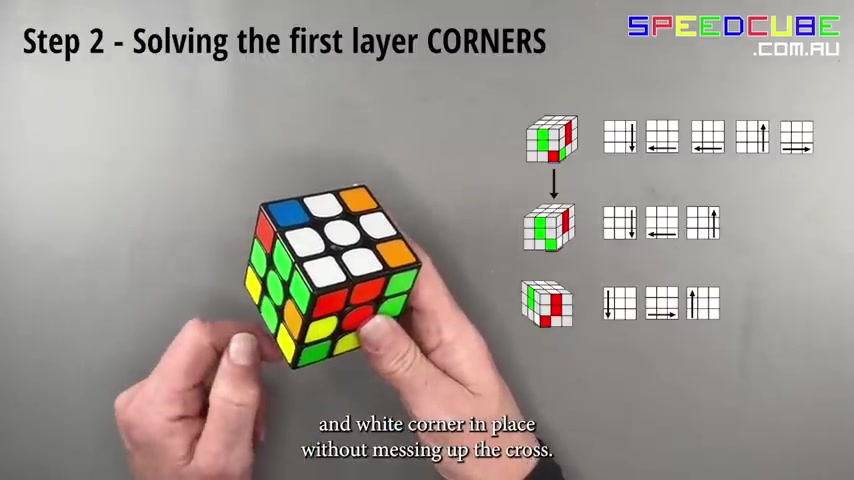
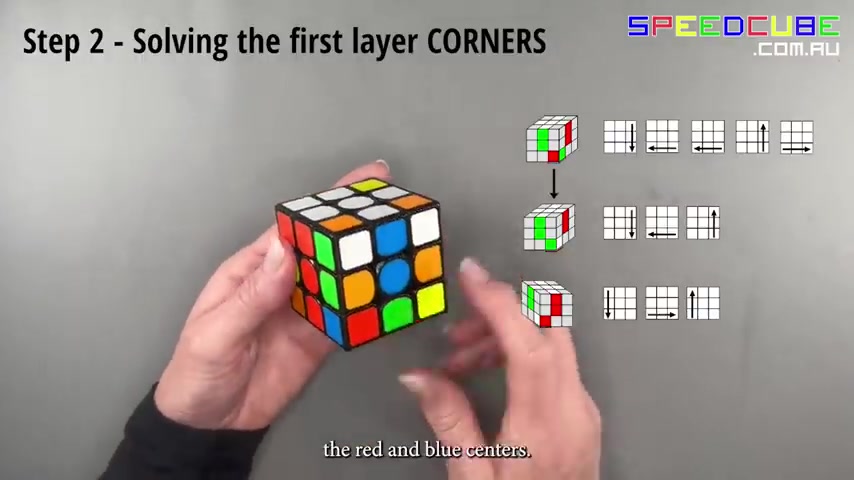
In our case , we've got red facing us , the white is on the left and follow the arrows steps to put the red green and white corner in place without messing up the cross , turn your cube so that the next center is facing you , which is blue .
We're looking for the blue , red and white corner piece for us , that corner piece is already in the top layer , but it's in the wrong place .
So we are going to follow these steps or arrows to just put that corner piece into the bottom layer so that we can put it into the correct place .
Now turn that bottom layer only so that it's in between the red and blue centers .
And again , choose the case that matches your situation from these options and follow the arrows to put that red , white and blue corner piece in place .
So turn your cube so that the blue uh center is facing you .
We need the blue , orange and white corner piece which is in the top layer at the wrong way around .
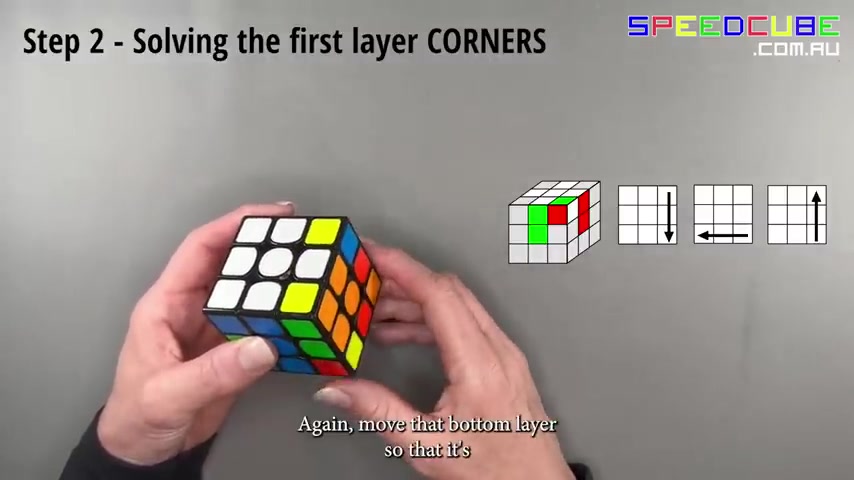
Again , we're gonna follow these three steps to pop that piece down into the bottom layer .
Again , move that bottom layer so that it's in between the blue and orange centers .
Choose the case that matches your situation .
In our case , why it's at the bottom and follow the arrows to put that orange , blue and white corner in place .
Keeping white on top , we turn the cube so that we've got the last corner to put in place .
So that's at the back here for us , which is the orange , green and white corner .
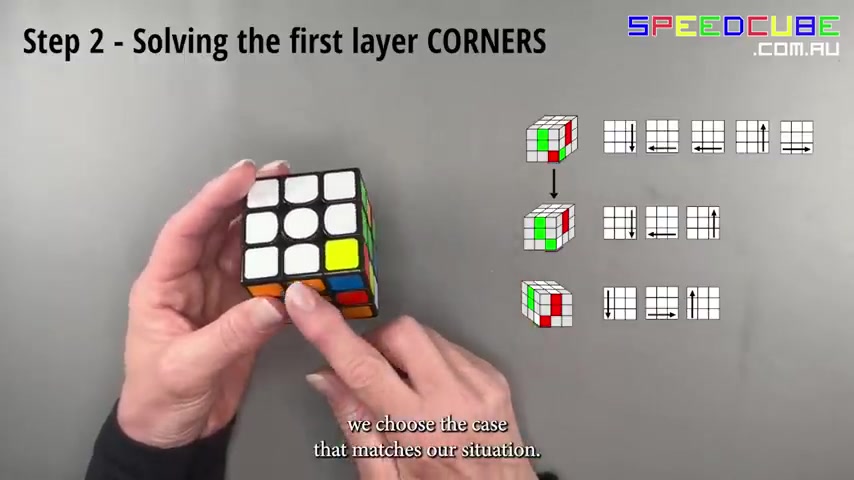
Again , we choose the case that matches our situation whites on the side here and we follow the steps to put that orange , green and white corner in place without messing up anything we've already done .
And there you go .
First layer is solved .
Step three is to complete the second layer keeping white on top .
You have a look in this bottom layer at the four edge pieces .
Find an edge piece that doesn't have the color yellow in it .
In our case , we've got the orange and green edge piece here , turn just that bottom layer so that that orange and green edge piece matches the center color .
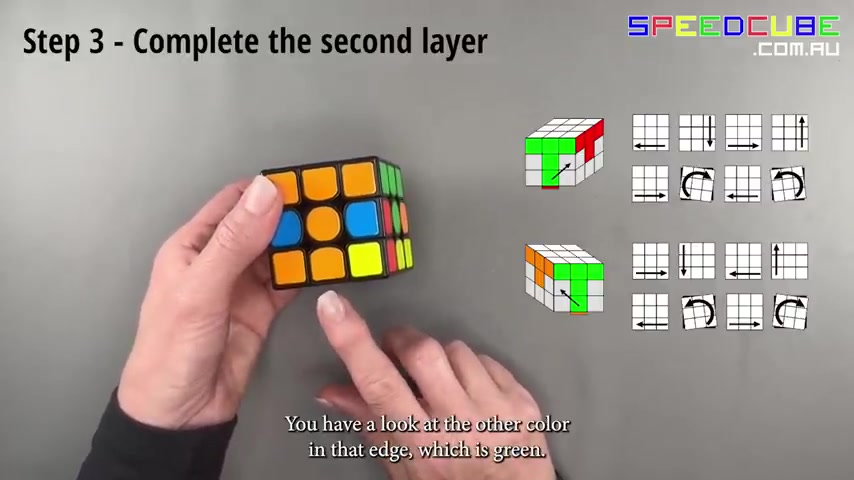
So you get this T shape , you have a look at the other color in that edge , which is green , check whether the green is on your left or on your right .
In our case , green is on the right hand side .
And we're gonna follow these steps to put that orange and green edge piece in place without messing up the first layer that we have already solved .
Again , we're looking in this bottom layer to find an edge piece that doesn't have the color yellow .
In in this case , it's our red and blue piece .
It already matches the center color .
So we've got this red kind of t shape .
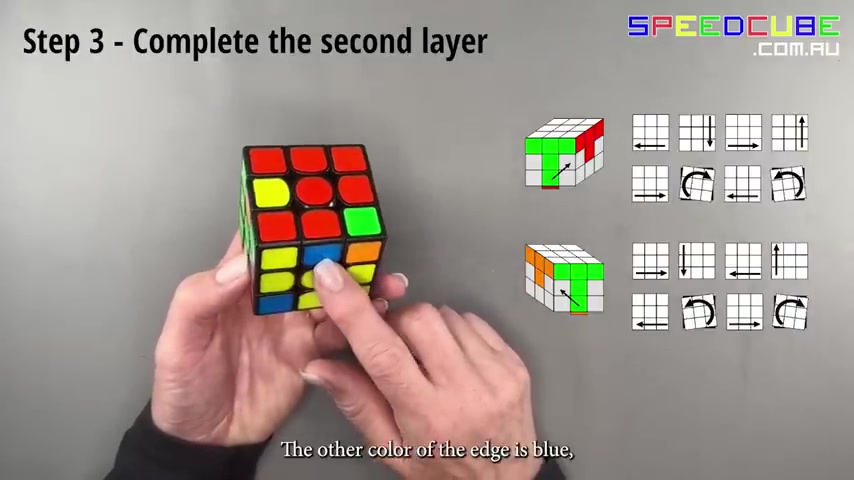
The other color of the edge is blue and blue is on the right hand side .
And again , so we'll follow these steps to put the red and blue edge piece in place without messing up anything .
We have already done .
Have a look again in this bottom layer to find another edge piece that doesn't have the color yellow in .
This is the green and red one turn just the bottom layer to match the center color , which is green , red is on our right hand side .
And so we were gonna follow these arrows to put that green and red piece in place without messing up what we've already done .
Lastly , we've got this blue and orange edge piece here .

It's in the correct spot , but it's the wrong way around .
So what we're gonna do is follow these steps to pop that piece out and then we'll put it in the correct way around .
So let's pop the piece out into the bottom layer .
It's down here , turn it so that it matches the center color , which is blue .
And then we're gonna follow the same steps we did before because orange is on our right to put the blue and orange piece in .
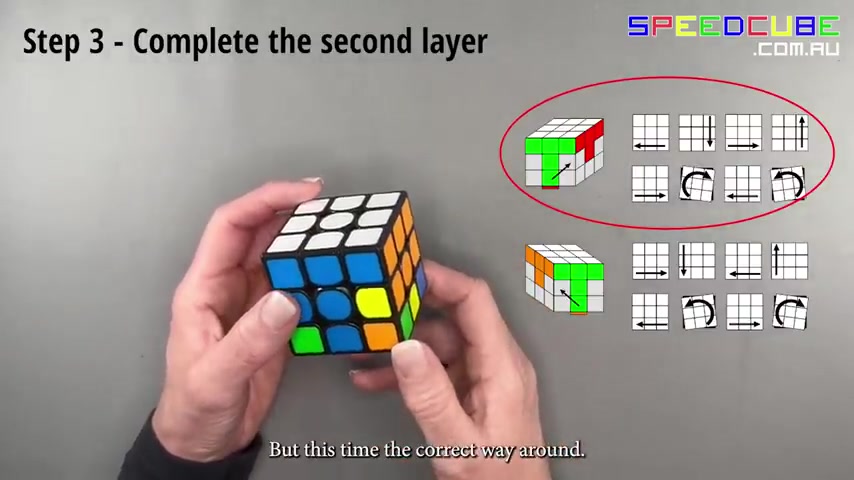
But this time the correct way around , there you go .
Your second layer is complete step four is to complete the third layer cross .
We have a look at just our four edge pieces in the center .
You'll either have a dot AJ A line or a cross .
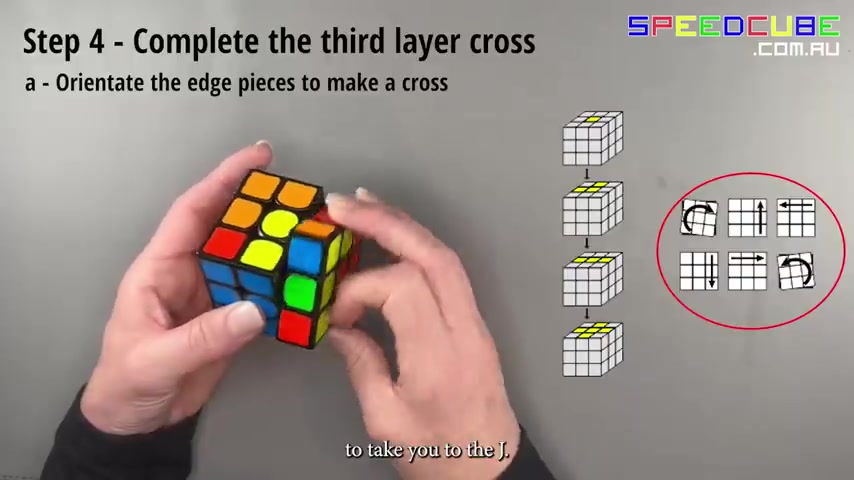
We have the dot So you follow the six arrows or six steps , which is the J , make sure you've got your j orientated like that and you follow the same six moves to take you to the next step , which is the line , make sure your line is horizontal .
And then you follow the same six steps again to make the yellow cross .
The next part of step four is to swap the edge pieces to make sure they match their center colors that's called permutating .
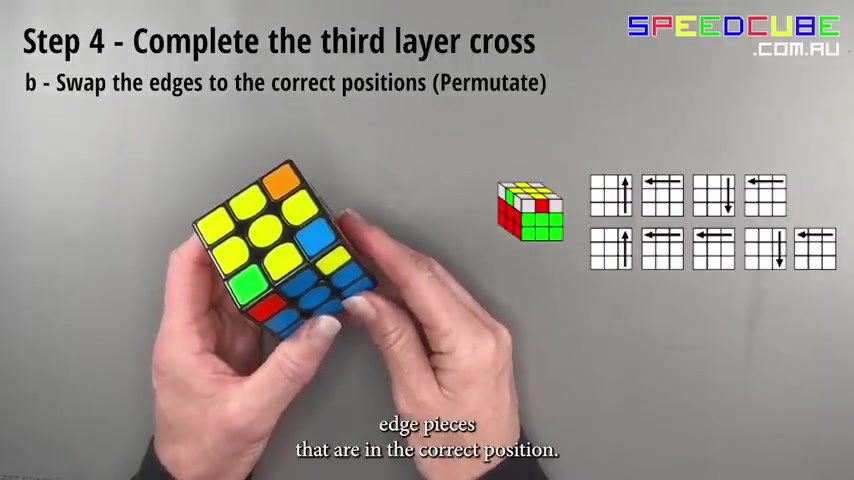
So if we have a look around , you'll have two edge , usually two edge pieces that are in the correct position .
In our case , they are opposite each other .
So you can hold your way as long as yellow is at the top and follow the steps to swap two pieces or two yellow edge pieces around .
In this case , we're gonna swap the red and green edge pieces .
Now , you should have two pieces that are correct , but they're adjacent to each other .
We have the red and the green .

So you hold your cubes so that those correct pieces are in the right and back position and we follow the steps to swap the other two edge pieces around .
Now we go all the edge pieces are aligned with their center colors .
Step five , complete the third layer corners , find one corner that is in the correct position .
It might not be the correct way around , but it's in the correct position , meaning it matches the center colors .
In this case , we've got orange , green and yellow .
That corner is in the correct spot , hold your cube .
So that that corner is on the right hand , top side and then follow the arrow steps to rotate the other three corners until they're in the correct position .
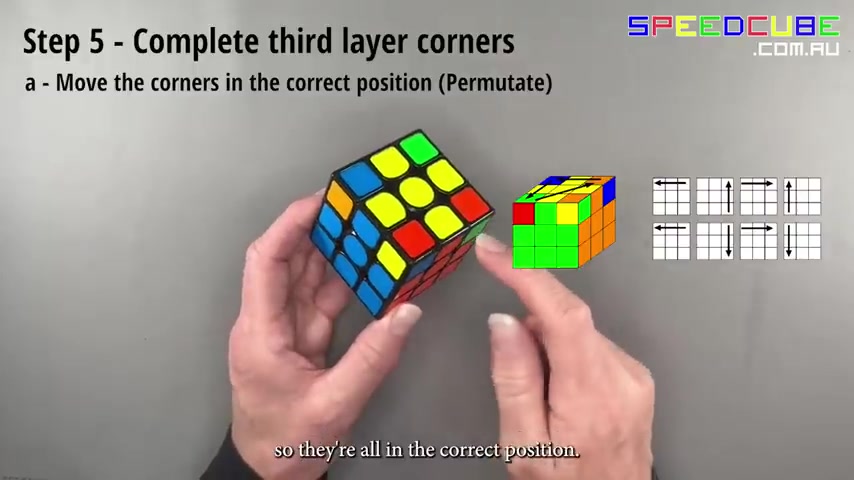
If we have a look around now , each corner matches the centers .
So they're all in the correct position .
Sometimes you'll have to perform this algorithm twice , but we just had to do it once .
If you have no corners in the correct position , you can perform this algorithm with any corner facing you and you will have one corner in the correct position afterwards .
Step five B , we're gonna rotate each corner so that the yellow stickers are all facing upwards .
Most important bit is keep the same center facing you .
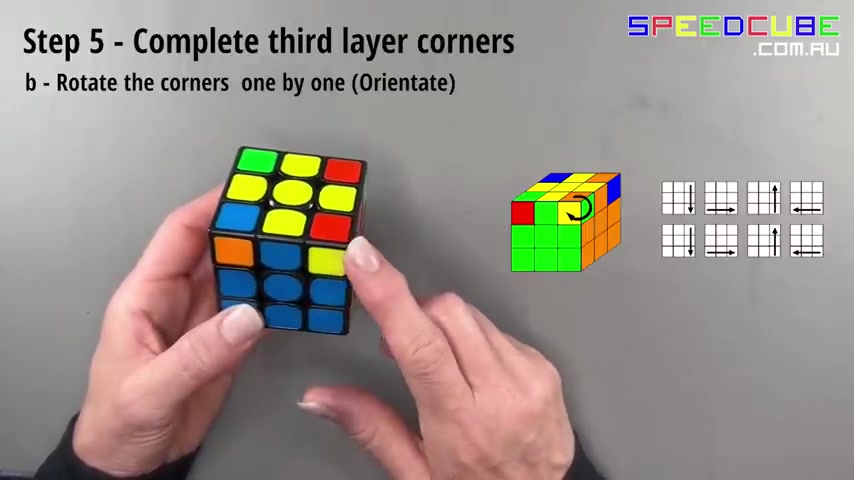
In our case , it's blue , hold the cube or the corner that you wanna rotate in the right hand top side and follow the arrow steps to rotate that corner so that the yellow sticker ends up on top , your cube looks like it's messed up .
But keep the same side facing you and rotate only the top layer .
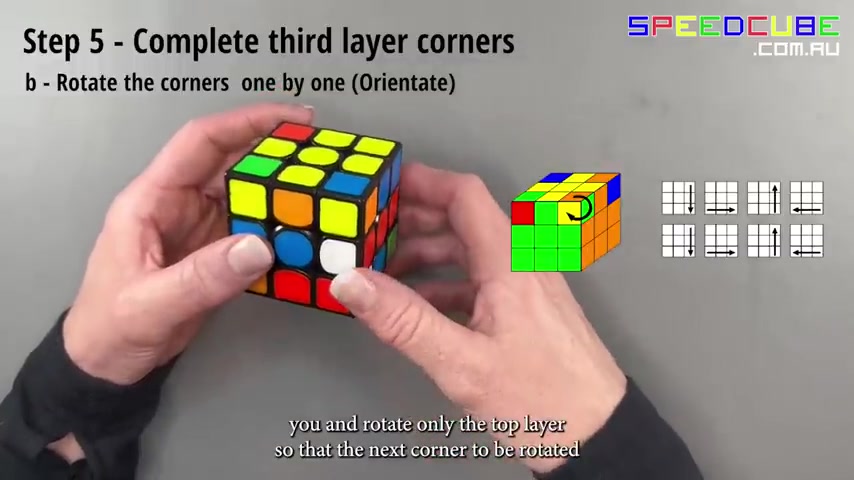
So that the next corner to be rotated is in the right hand side again , keep blue facing you and rotate just the top layer for the next corner to be rotated , keep blue facing you .
And ultimately , when you do the last corner , it will all come together .
It can be solved .
Are you looking for a way to reach a wider audience and get more views on your videos?
Our innovative video to text transcribing service can help you do just that.
We provide accurate transcriptions of your videos along with visual content that will help you attract new viewers and keep them engaged. Plus, our data analytics and ad campaign tools can help you monetize your content and maximize your revenue.
Let's partner up and take your video content to the next level!
Contact us today to learn more.