https://www.youtube.com/watch?v=oo7YllfSKM8
How To Draw A Box Of Chocolates + Spotlight
Hey , our friends , it's Monday and today we're gonna be drawing a box of chocolates .
But we're also during the lesson , going to be announcing all of the lucky spotlight winners and they're just gonna pop up during the lesson .
What's what's the noise gonna be ?
I like it .
So be sure to follow along with us and also keep an eye out for all of the spotlight winners .
All right , Haley , what do we need for this lesson ?
Markers , some paper and something to something to color with .
All right , let's get started .
We're first gonna draw a big giant heart in the middle of our paper .
So I'm gonna draw one side first , I'm gonna draw a big curve that comes up around and back down .
Yeah .
Then we're gonna draw another one on the other side to match it good .
Now we're gonna go back around the whole thing with another heart right next to it .
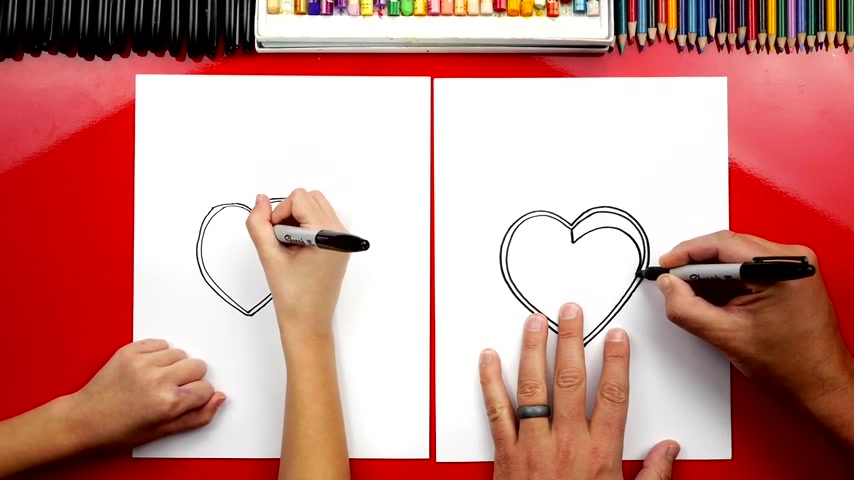
So we're gonna repeat that same shape and trace around it .
Now this is so that our box of chocolates .
Yeah .
Looks 3D has a thickness to the outside of the heart .
We go all the way around and if you guys need more time to do this step .
You can always pause the video .
OK , Haley ?
Now we need to make our heart even more 3d .
So we're gonna add the walls to the box .
Let's first draw a short line that comes down right here .
Then we're gonna draw the top .
We're gonna curve around and watch this right here .
We're gonna go into the side of the heart smooth , smoothly .
Yeah , there you go .
But you , then we're gonna do the same thing on the other side up around and in good .
Now we're gonna do the same thing down here on the bottom .
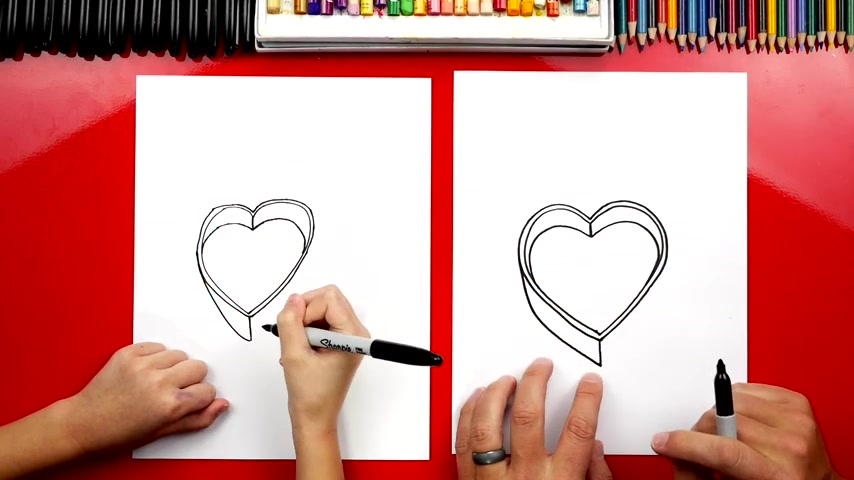
But this one can be a little bit longer straight laying down .
Then we're gonna start over here and we're gonna draw a curve that comes down first and then it curves and connects to that bottom line and we want to match the outside shape of the heart .
Oh , that looks really good .
Then we're gonna do the same thing on the other side come down and then we're gonna curve in and match that outside shape .
There's our 3d box that looks like a heart .
You did a great job .
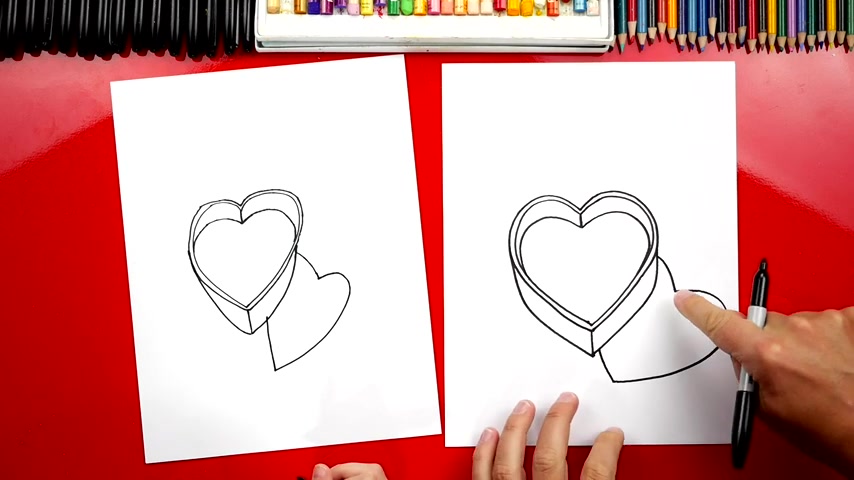
Now let's draw the lid and we're gonna draw it underneath the box off to the side .
So first we're gonna draw a curve that comes down like that .
Yeah .
And then we're gonna draw another bump .
So this we can imagine is the first bump to the heart .
Then we're gonna draw another bump that comes up around and it's gonna end down here .
Yeah .
How you did it ?
And then we're gonna draw another curve that's gonna come back up and connect to the box .
So it should look like a big heart underneath the box .
OK ?
Now let's make this look 3d .
We're gonna draw a line that comes straight down just like we did over here .
But it's shorter because this is the lid to our box of chocolates .
And we're gonna draw a curve that comes down and connects .
There you go .
Then we're gonna draw the thickness over here too .
So we're gonna start on this side , come down a little bit and then we're gonna match the outside shape to the heart .
Then on top of the lid , let's draw a little ribbon stripe .
I'm gonna draw two lines that go across the lid and then to make it look 3d like the ribbons wrapping around the edge .
We can draw two lines coming down .
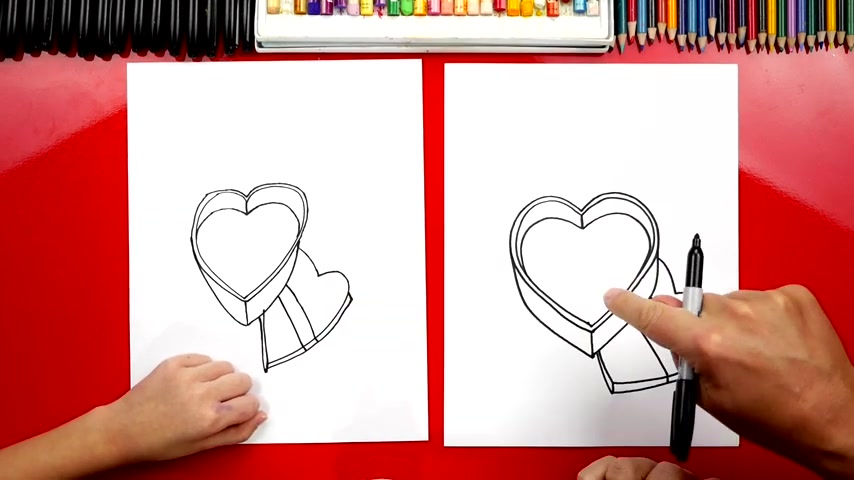
Yeah , we did it .
Now we got our box and we got the lid .
What are we missing inside of our box or the chocolate ?
Yeah , the chocolate .
Let's draw different shapes over here on the left .
I'm gonna draw a circle .
Then over here , I think we should draw a square shape but see how the corners are kind of around it .
So it's chocolate .
Now , let's draw two more shapes down here .
I'm gonna draw rectangle shapes .
So we'll draw one here .
Oh It does kind of looks like a face and I'm gonna add another one right next to it .
Here's our box of chocolates .
There's only a couple in this box because we're drawing them so big and there's a really skinny 10 , I like it .
Now , we can draw the little wrappers that go around each of the chocolates .
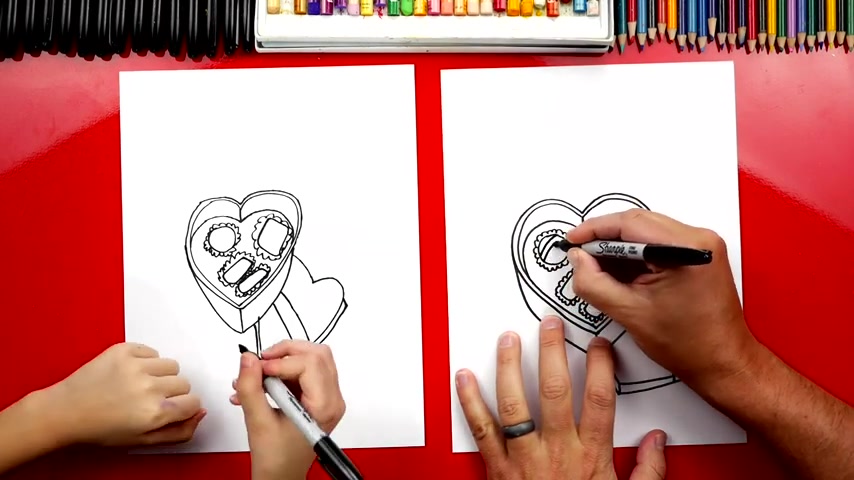
Now I'm just gonna draw a little bumpy line that goes around each shape .
Now , this part we're gonna fast forward .
But if you need more time , you can always pause the video .
Now let's add decorations to the top of our chocolates .
Maybe this one up here , we could draw a stripe .
I would draw two stripes .
Oh You guys at home could use your creativity and change the decorations .
Make it look any way you want over here .
I'm gonna add some circles , little circles on top .
Then we can add , let's add more stripes on this one and we go in a different direction and then on this bottom one , I'm gonna add three bigger circles .
All right , Haley , we did it .
We finished drawing a box of chocolates and we still need to do one last thing to make it look even better .
What is it ?
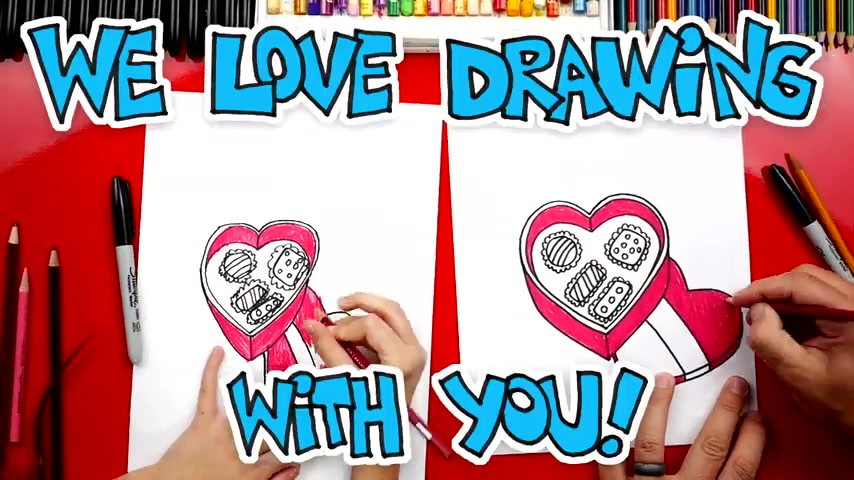
Yeah , we need to color our drawings and this part we're gonna fast forward one more time .
But at the end , you guys can pause it to match the same color .
You ready to fast forward a great job on your box of chocolates .
I love how you colored it .
Now , I also added some shading on the side of the heart and also underneath where the lid is to make it look a little more 3d .
But you could leave that off to keep the lesson a little easier .
We hope you had fun .
Enjoying your box of chocolate .
Yeah , we do .
We hope you had a lot of fun .
And we also want to congratulate all of the lucky our friends that we spotlighted during the lesson .
Now , parents be sure to private message us your email address so that we can send you something .
What are we gonna send them $20 to Amazon to buy more art supplies ?
Yeah .
We also want to tell all of you that participated in last week's challenge that you all did such an awesome job .
And we love looking through your art and we'll see you later .
Our friends .
Goodbye .
Are you looking for a way to reach a wider audience and get more views on your videos?
Our innovative video to text transcribing service can help you do just that.
We provide accurate transcriptions of your videos along with visual content that will help you attract new viewers and keep them engaged. Plus, our data analytics and ad campaign tools can help you monetize your content and maximize your revenue.
Let's partner up and take your video content to the next level!
Contact us today to learn more.