https://www.youtube.com/watch?v=ZAkRV4lz8sI
6 iPhone PHOTOGRAPHY TIPS & TRICKS!
I don't really like this layout because you don't really have a lot of options to customize it .
So I prefer just going with choosing your own template directly .
But if you feel like you want to do the Vix E , go ahead and try it , but I don't really recommend it at all , but we're going to go choose a template .
And what we can see right here is all the different templates we get to prep from to use for our blog .
And now it's really up to you what you're going to do .
I feel like I want to do food and try travel for this blog just as a test .
But as you see , you have personal blog , food and travel news , some business , art , fashion , sports and wellness .
So there's a lot of different themes you can choose from .
But I'm going to go ahead and do food and travel and I'm going to go travel blog this one right here .
If you hover over these themes , you can also press view in order to preview the theme before you actually pick whatever theme you want .
So this is how this theme looks .
I like the layout .
I like the blog feed right here .
I can also preview it on mobile by clicking on the mobile preview up in the corner .
And this is how the website itself is going to look on mobile even though it looks super good .
So I've decided I want to use this theme .
What do I do ?
It's not super hard you click on edit this site up in the corner , once you have clicked , edit this site up in the corner , you will be taken directly to the Vix editor .
And once you are in the Vix editor , it's gonna look just like this .
What you want to do here is just either watch this one if you want the introduction .
But since you're watching this video , you probably don't need introduction .
So you can just close this one down .
As you can see , there's a lot of different tools in this editor .
So you have both on the right and on the left , you also have the top right here .
You have your , publish your preview and your save and then you have your website in the middle .
So all these elements on your website , if you over them , you can see that you can edit every single element on the website .
So let's say we want to change the top banner at the top .
What we do is just click on this image and you'll see the small menu showing up right here and then you can do either change strip background or change the layout .
What we're going to do is just change the strip background and then you'll see this little menu right here .
So this menu you can either change the color .
So if you just want it to be a color at the top , you can go ahead and click color if you want it to be a video you can pick a video or if you want an image , you can do an image .
I feel like we're going to do an image .
So let's click image here .
You can either upload your own media or your own photos , your own videos or you can go ahead and go media from VX .
This is going to be free images that Vix is providing that you can use for your website .
But if you don't find any high quality image provided by Vix itself , you can also go to shot stock .
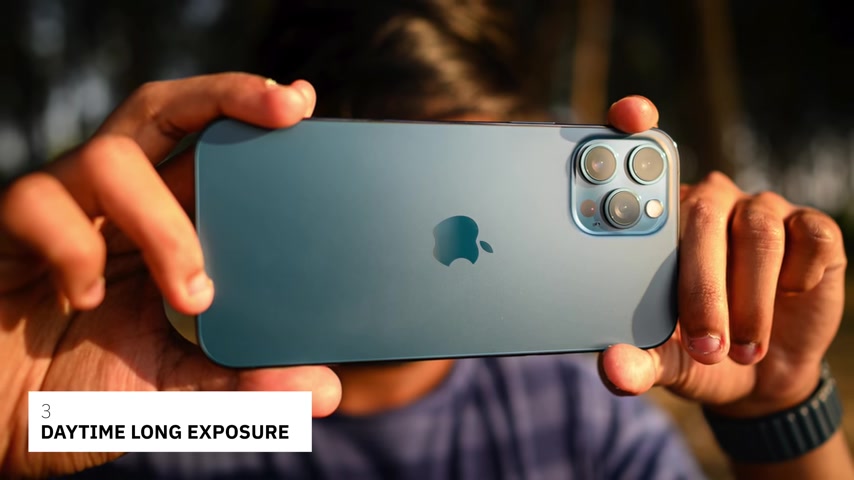
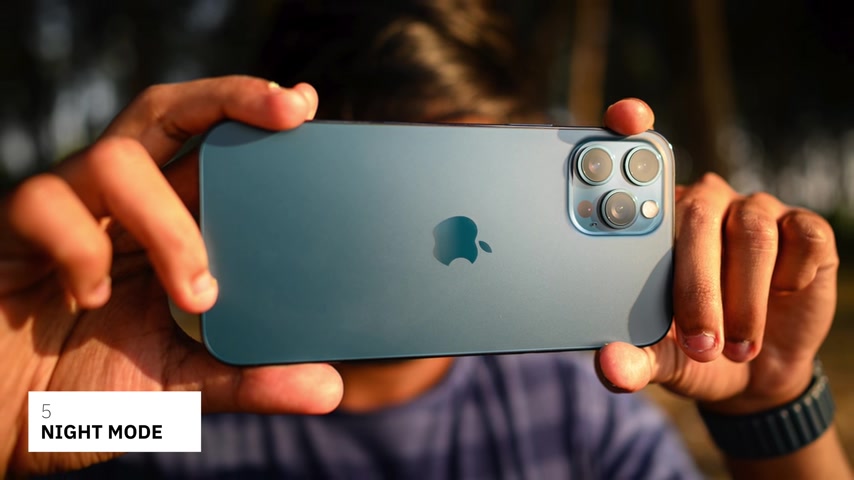
Again , the link is in the description below , moving to the next step and that is using night mode , night mode is something you can turn on by yourself .
The iphone will detect it's a low light situation and it will automatically turn it on .
Basically , it's long exposure photography .
But with stabilization and a bit of software processing to give you the final result .
Once the night mode is on , you can see it right here , click there .
It will be on auto , you can slide to the left and turn it off , which I won't recommend .
This feature is amazing .
You should keep it on auto when you're shooting handheld for better night mode images .
I prefer using a tripod and sliding it to the right to the max option available .
It exposes for more amount of time depending on how dark the scene is and gives you a better image in low light .
I have been using the max option even if I don't have a tripod and I still get pretty sharp images .
And what that is gonna do is when people go on the website , it's gonna scroll with the actual user .
So if we go and click preview , we can see how it looks .
So the image itself is gonna have a moving effect to it , which is just gonna add a little bit of a movement to the website which look makes it look a lot better .
So we're gonna go back into the editor .
But once we're back into the editor , let's say we want to change our title at the top .
What I can do is just click on the text , click edit and then just type whatever you want .
So I'm gonna do who is Bob and blog , travel blog , who is Bob on blog and , and even here , you can edit this text as well .
Check out my youtube channel for more .
So that is going to be my text looks super good .
What you can do as well when you edit the text is that you can change the font , you can change the color , you can make it bold , you can make it Italic underline it , center it , you have all these different options within each and every element .
Of the website .
And obviously we're not going to have enough time to walk through every element , but it's super simple and straightforward .
Once you get used to it , a learning curve can be quite steep depending on how technical you are .
But once you get used to using Wix , it's going to be super easy for you to edit your website super fast .
OK .
Scrolling down .
We have our different categories so we have travel , eat and relax .
Even these images are going to be the same thing .
You go ahead , you click on element , you can change the image or if you want to change the category itself , you can see that this is going to be a bottom element , just click on it and you can link it to somewhere else or you can change the text .
So if I want this to link to my youtube channel , I can do youtube and then I can change the image right here .
Again , the link is in the description below , moving to the next step and that is using night mode , night mode is something you can turn on by yourself .
The iphone will detect it's a low light situation and it will automatically turn it on .
Basically , it's long exposure photography .
But with stabilization and a bit of software processing to give you the final result .
Once the night mode is on , you can see it right here , click there .
It will be on auto , you can slide to the left and turn it off , which I won't recommend .
This feature is amazing .
You should keep it on auto when you're shooting handheld for better night mode images .
I prefer using a tripod and sliding it to the right to the max option available .
It exposes for more amount of time depending on how dark the scene is and gives you a better image in low light .
I have been using the max option even if I don't have a tripod and I still get pretty sharp images .
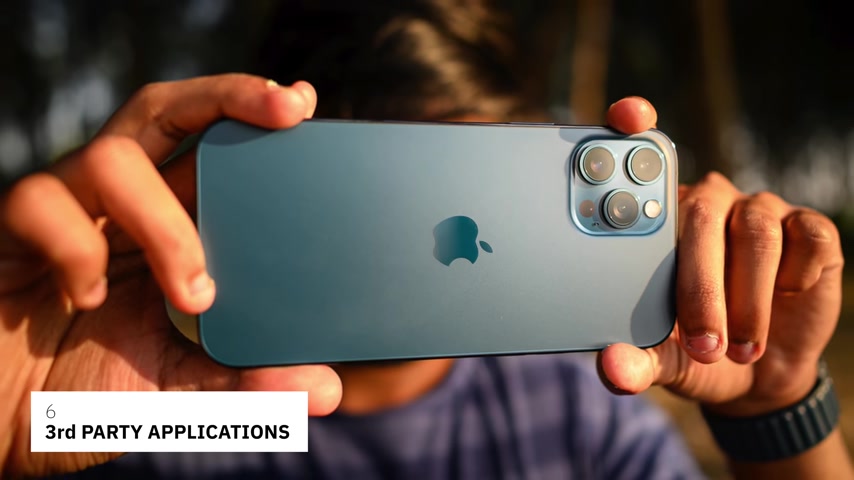
Whereas with the pro you get the same processing deep fusion smart HDR night mode and you still get the benefits of shooting in raw mode .
Basically , you're getting the best of both the walls .
If you're going to post process your images , I definitely recommend turning the pro raw option on .
Remember the file size is huge .
So don't turn it on every time .
If you don't need it by default , it will be off even you have turned it on in the settings .
So remember to check every time while you're taking the picture .
That's it from this video guys .
I hope you people enjoyed the video and found this video useful .
If you did press the like button new to the channel , you should definitely consider subscribing for more such content .
I'll talk to you guys in the next one .
Bye .
And if you want to move up this , so it's , it's not that huge gap with y all you can do is just drag this element and it's going to drag everything underneath it up this wall .
So everything is going to just go along with the flow .
OK ?
So now we walk through how you can edit your elements on your start page .
If you want to add more elements to your page , you're going to have all these options on this side .
So menus and pages are where you can see all the pages on your website .
This are the pages that you can see up in the menu as well .
And if you want to have a page that people are not able to see in the menu , what you can do , click on the three dots and hide this page and what that is going to do is just hide it from the main menu at the top and this can be good if you have a page that's not ready yet or you just don't want people to access it that way you can just hide it directly from their main me the above me page .
Let's just do it as a test , let's hide it .
And as you can see in the menu at the top , it's not gone , but we actually want to show this page .
So we're going to go back and click show and it's going to be back at the top again .
Uh within the pages settings , you have more options as well .
So you can add new pages or you can just go ahead and change your settings for the page .
You can set a password on it .
You can change your Sco for Google , you can rename the page , you can copy , you can duplicate it and can also do it to a sub page .
And if you want to do it to the sub page , what you can also do is just drag it and drag it underneath another page , what that is going to do is change it in the menu .
So if we do preview and hover over travel , you're gonna have it as well .
And this can be a good thing if you want to sub page your pages , but we're going to go ahead and drag it back onto the top .
Then you also have blog pages under blog pages , you're going to have your post and your blog .
Are you looking for a way to reach a wider audience and get more views on your videos?
Our innovative video to text transcribing service can help you do just that.
We provide accurate transcriptions of your videos along with visual content that will help you attract new viewers and keep them engaged. Plus, our data analytics and ad campaign tools can help you monetize your content and maximize your revenue.
Let's partner up and take your video content to the next level!
Contact us today to learn more.