https://www.youtube.com/watch?v=eDnb7N9_rWU
DIY Board and Batten Accent Wall _ Wainscoting How to

See how I turned a blank wall into this awesome accent wall .
So here's the wall that we're starting with and it does have a few things that we need to take care of before we start doing anything .
And that is removing the chair rail that is here .
We really don't like it .
It's too traditional and taking down this little extra piece of crown molding , which they add it up on the top to make it look taller .
I think it looks like junk .
So remove all that and then we can patch the walls and get it ready for paint .
And this technique is gonna work for removing any style trim or molding .
So if you don't have chair rail , but you have something else .
Don't worry , you can use this .
I started by scoring the top and the bottom of the rail with a box cutter .
And this helps break the paint bond and this lets you get a putty knife or a pry bar behind it and then you can start pulling it away from the wall gently , just be careful not to dent the wall .
I worked my way around the room and the chair rail came off pretty easily with minimal damage .
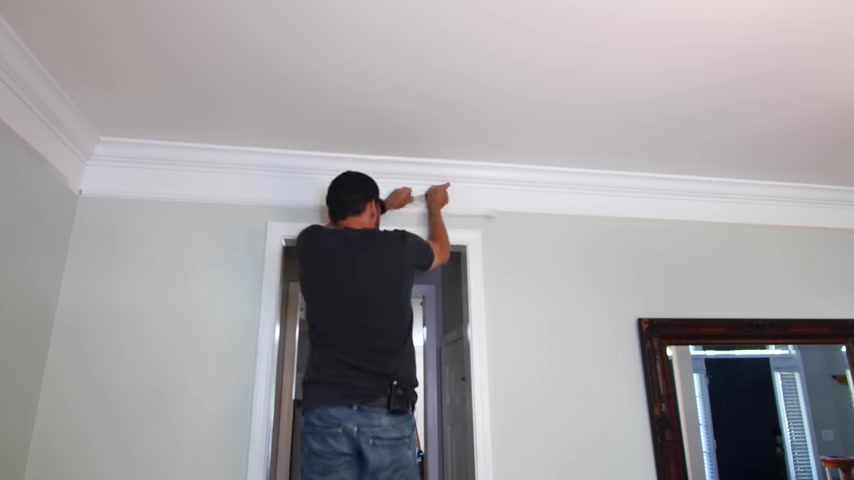
And then I grabbed the ladder and I could take care of that wonky top trim .
Right .
So here's the crown molding .

I've got this little trim up on top and this is just all painted wall and this is just like a horrible job to make this look more grand than it is kind of feels like those old Pontiac Fierros where they put the body kit on it to make it look like a Ferrari Tester Rosa just not doing it .
And if you're too young for that reference , just go Google it .
I used the same technique on this trim scoring and prying it away from the wall and they put it up as full wall length pieces .
So it was a little bit unwieldy but with a little work and a few broken pieces , I got it down right with the trim off .
One of the things you're probably gonna run into is a little mismatch in between the painted wall and underneath because there's multiple layers of paint on this wall , but the dry wall is just bare .
So there's a little gap there and you can even have some peel off here in between .
So to prep that , I'm gonna knock it down with a razor blade and then we'll sand that and use some spackling or mudding compound to smooth everything out .

I'm using a straight razor blade here , but you can also get them in those little scraper holdy thingies and that'll be a lot easier to handle .
And it doesn't have to be perfect .
Just scrape everything off flush with the wall so that you can fill it in with compound and glide a drywall knife over it .
So this is gonna be too wide of a gap for spackle .
So I am gonna use some joint compound and go over the top of that and then sand it all flush .
But if you just have a few holes and you saw how I was denting in the nail holes from the chair rail , I was doing that to get just a little indentation and then I can fill that in with sparkle .
So I've got the three M high strength small hole repair and this is perfect for nicks and nail holes .
And this is in the all in one applicator , which is great because you don't need any extra tools .
You can actually put this straight on the hole , squeeze it out and use the back end for a little putty knife and then the end actually even has sandpaper on it .
So it is truly all in one applicator .
This small hole repairer is great because it actually has primer in it and it'll dry quickly and it will not shrink or crack .
So you can do that if you just have a few holes to do .
This is a great option for it .

I went around and I died all the nail holes in the wall and then I mixed up some 45 minute joint compound to patch it .
It's pretty easy to apply the mud .
Since the chair rail left a valley between the two painted surfaces .
I'm using a six inch taping knife and I'm feathering in the compound into that recess .
I love using a drywall Hawk to hold the compound versus a pan .
It gives you so much more control and it's a lot easier to hold .
Plus , I think a Hawk makes you look like 3.8 times cooler too .
Sup Dude , as we get into the painting , it is all about preparation to get a great painting job .
I'm gonna start that by sanding the walls and I'm gonna sand the coat of the mud that I put on there .
I've got the three M prograde precision sanding sponge here and you can have in a variety of grits .
I like to use 100 and 20 grit .
I'm gonna sand that .
But these are also great for if you have any drips on your walls or any inconsistencies , go ahead and hit that with the sanding sponge first and then make sure you clean it all up because you want to have a clean , smooth and dry surface to get your paint started on .

Now , you guys know , I hate dust .
So I brought in the shop back and I tried to capture it before it got into the air .
After the initial sanding , I filled in any spots that I missed with a second coat and using a small flashlight to cast raking light at a 90 degree angle to the wall is a great way to find those voids and imperfections to fill and taking the time to get it right here before you paint is going to make your paint job a lot cleaner and it's going to look way better .
In the end , there's a ton of different styles that you can do with board and bad .
And whether it's just vertical strips or if you want to do a square grid across the whole thing or some combination of those .
So it really helps to go ahead and mock that up and make sure it's the look that you want before you commit .
So the way that I like to do that is start at the computer and then bring it back to the real world .
I started off by measuring the width and the height of the feature wall .
I will be removing this baseboard , but we're gonna be keeping the crown molding .
So I took that into account as well and then I could mock up the wall in 3d to see what it looks like .

कॅर आप देख रहे हैं माता मुझे बहुत सारे ॅ आपकी तरफ से आता है ।
मैं कोशिश करती हूँ ऍम ज्यादा से ज्यादा आप लोगों की जो रिक्वेस्ट है उसको मैं कॉल करूँ ।
तो ये जो विडियो है यहाँ पे मैं दिखाने वाली हूँ ।
कैसे आप के घर में बहुत ही कम बजट में एक्रो सिटिंग बना सकते हैं ।
अगर आपके पास सोफा नहीं है या फिर अपने घर में शिफ्ट हुए हो तो बजट में आपको सिटिंग कैसे बनाये ?
ये जो विडियो है फॅमिली मैं अपने घर में कोई प्रोसीडिंग जरूरत नहीं है लेकिन आप लोगों के लिए बना रही हूँ ताकि आप देख के आप के घर में आप ये अप्लाई कर सके ।
तो आखिर देखते रहिए ॅ यहाँ पे आपको कुछ अच्छे से आइडिया मिल जायेंगे ।

I can also see how it looks .
If I deleted some of those center boards and just left the top and bottom details .
You just need to change the numbers in the equation .
If you want to see how it looks with more or less boards and figure out what exact measurement is for your setup .
I actually liked the look of six openings , but when I mocked it up on the wall , that center board hit right on top of an outlet .
It actually wasn't even centered , it would have been right on the edge .
So that wasn't gonna work .
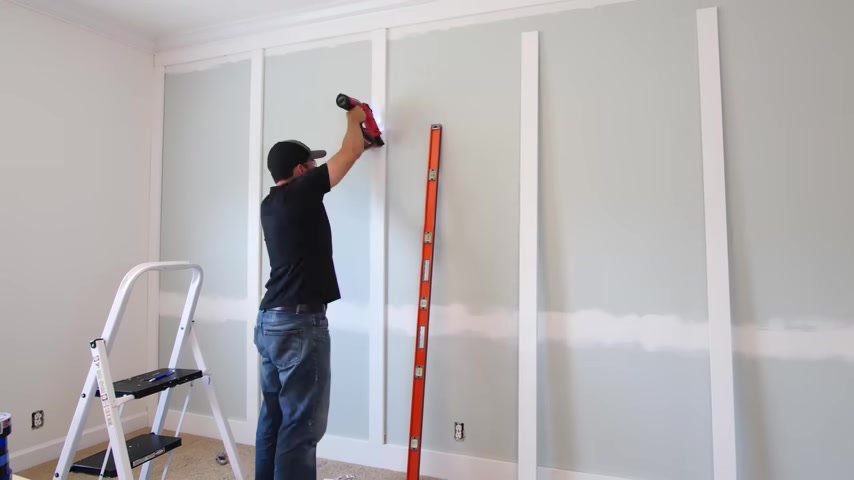
So in the end , we decided to go with five openings in a top and bottom detail , which I think looks great on this large wall .
So we got the design locked in and now we just need to prep the rest of the room before we start on the accent wall over here .
If you paint the rest of the room first , it's gonna make it a lot easier once you get installing and you'll just have to tape it one time I'm taking off the baseboard and replacing it with 5.5 inch one by six .

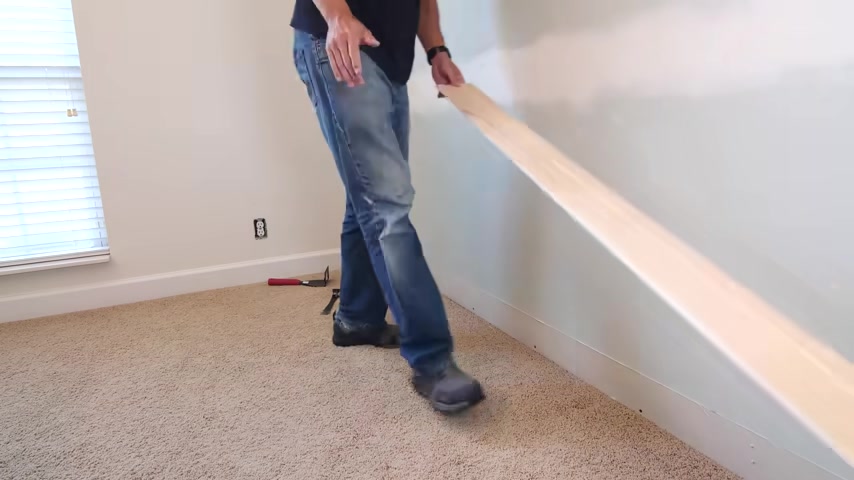
And this trim puller does an amazing job in its wide back , doesn't dent in your walls like a small pry bar can .
And before I started using this guy , my walls looked like I played a game of whack a mole along the bottom .
After I pried off the boards , I wanted my baseboards to run the full width of the wall versus coping it into the existing trim .
So I cut off a small piece of the new trim and I could use that as a reference to cut down the old ones .
Now , an oscillating tool is by far the best way to do this .
But you could also use a flush trim handsaw and a chisel to clean things up .
Now , the corners between the walls tend to get rounded and filled in with caw or paint , which makes your trim not fit well and stick out now to avoid any issues that can cause I like to bevel the back edges of the trim that go into the corner .
I do this with a chisel .
It ain't pretty , but it gets the job done .
I'm using 16 ft boards here so that I don't have to have any brakes in the trim to deal with .
And we just dropped it right into place and amazingly , it fit nice on the first try way easier than I thought after leveling it out .

103.87 --> 214.36

I butted the trim right up against the crown molding and that crown molding was a level .
So it looked great and I didn't need to make any adjustments and with the top and bottom boards in , I could start fitting the vertical pieces .
And instead of measuring , I just put the boards in place and mark the exact fit which I took to the shop and then cut on my m so I've got the board cut to size and I also put a little bevel on the back just like I did on the edges for the baseboards , except I did do this with my table .
Saw , you could also do this with a router or a chisel or even a belt sander just to give it a little more cushion in that corner .
So it's a pretty good fit .
But I do have some gaps in here as I push this against the wall .
There's some areas in here .
But since we're gonna be painting this and we're gonna be putting caw on that joint anyway .
And I'm not gonna worry about it because we all know that caw and paint making you the carpenter , you ain't small gaps on the side aren't a big deal .

214.86 --> 282.15

ऑॅल मुँह मुँह फॅमिली फॅमिली है ।
मैं हमेशा मुँह देखती थी और मुझे लगता था ये मुझे चाहिए ये वैसे मैंने लिया है लेकिन आज मैं आपको दिखा रही हूँ तो ये कैसे होता है ?

ऐसा फॅमिली फॅमिली आए हैं , ऍम करनी है तो आप को ऑॅल ऍम फॅस कर देती हूँ और ये ये रखूंगी ऍम तो स्टाइल प्लेस कुछ क्योंकि वो सबसे ज्यादा ऍफ लगने वाली है ।

381.3 --> 447.025

I came back with a putty knife embedded down the tape , putting some nice pressure on it and the tape should set for 30 to 60 minutes before painting to let that edge lock technology seal tight .
So I used that time to prime all the bare wood on the walls and to tape the top and bottom and do some cutting in .
I used the Scotch blue original on the carpet and I tucked the tape under the baseboard to fully protect it and definitely use the wide tape here for this application .
I use the Scotch blue sharp lines tape on the top to cover up the crown molding though , I realized that the entire line is gonna be hidden from sight because that top board actually sticks out further than the crown molding where they meet .
And before painting the outside lines , we decided to cut in the interior panels and that way Susan could be rolling while I was painting the trim boards .
I had this really cool time lapse of it all , but apparently my camera had other ideas because it cut off one minute into it .
So , and we're done at this point , it had been over an hour .
So I was good to paint the edges over the delicate surface tape .

You can just paint right up against that line , just try not to glob up the paint too much along the tape because it's gonna make it easier to remove later .
And then Susan and I just put on some country music and painted our little hearts out and I've gotta say Susan was at a handicap here because she was using one of those little hot dog rollers .
And at first I thought we'd have her roll the boards and then I back brush them and that little roller would be easier to use .
But it turned out that it was better for me to just go ahead and brush the boards and her to roll the wall .
But honestly , I still love those little hot dog rollers , even though the last time I used one , I got destroyed in the comments for it .
So I'll take the hit for this one too , right .
We put on a second coat of paint and then we could start taking off the tape and reveal things .
So I took the tape off of the top of the crown molding and then for the carpet to make sure that I didn't pull up any paint off of it , actually push down the tape to break that bond of the paint on the baseboard .
And then I could pull it off at a 45 degree angle and it came up great in the base .
Look awesome .

Now , for the corner over here on the delicate surface tape , all you have to do is pull it off at a 45 degree angle and you'll reveal that nice crisp line .
If you're starting to have any tears or anything like that , you can also score it with a razor blade and that should break the paint bond and allow you to remove it just like I did on the baseboards earlier this board and bad .
And a wall turned out really nice and is a huge upgrade over that rail that we had before .
And I wanna give another big thank you to Scotch Painter's tape for sponsoring today's video .
If you wanna check out some other home renovation projects , I gotta play this queued up for you right there and we've done some other room makeovers .
I think you're gonna like , I wanna give a big thank you to all those folks that have been joining the FT BT Builders Club and I'll get you guys over there on the next video .
Are you looking for a way to reach a wider audience and get more views on your videos?
Our innovative video to text transcribing service can help you do just that.
We provide accurate transcriptions of your videos along with visual content that will help you attract new viewers and keep them engaged. Plus, our data analytics and ad campaign tools can help you monetize your content and maximize your revenue.
Let's partner up and take your video content to the next level!
Contact us today to learn more.