https://www.youtube.com/watch?v=esvR6Es3Uag
How To Create A Blog On Wix - New WIX Blog Tutorial (2023)
Sometimes I want to lock the focus and then change the exposure to do that , tap on the subject and hold it until you see the A F slash A E lock , which stands for autofocus auto exposure lock .
Then you can adjust the exposure like we saw before the next step is viewing outside the frame .
This is applicable for iphones with multiple lenses .
Suppose I'm using the tele lens outside the main frame .
You will see an overlap of a slightly wider frame that you would get with a standard lens .
If you're using the standard lens , you will see an overlap of what it would look like with a wide angle lens .
Now , it is helpful sometimes and I understand why Apple has turned it on by default .
But personally , I find it distracting .
I only want to focus on the main frame and nothing else outside it .
So I prefer turning it off .
You go to settings camera turn off the view outside the frame option .
Is it necessary ?
No .
Is it going to improve your photography ?
Probably not .
But if you find it distracting like I do well , you have the option to turn it off .
The next step is daytime long exposure photography .
Now , generally , if you want to capture long exposures during daytime , you have to attach an end a filter , but you can also mimic the look of long exposure with the help of the life mode .
Turn on the live mode .
If it's off by clicking here , then when you take the photo , you can see the live text appearing for a second .
Basically , it is taking multiple photos .
You open the photo swipe up , you can create a loop video or bounce .
But what we're looking here is the last option , long exposure .
This will combine the images and give you that long exposure image look .
One thing I've noticed is the image gets cropped a bit once you convert it into a long exposure image .
So I would recommend to shoot a bit wider than the original composition .
You don't need a tripod , you don't need an N A filter .
Obviously , you don't get the option to choose the shutter speed for the long exposure image .
But still this small hack comes pretty handy moving to the next step is using and not using HDR .
What is HGR ?
It is high dynamic range meaning you have very bright highlights and very dark shadows .
And it's very difficult to capture all the details in one single image .
So the iphone is going to take multiple images and combine it and try to give the best result possible .
It works great most of the times .
But sometimes I feel the results are a bit over processed .
If you have smart SGR on iphone will automatically turn it on in most of the situations .
What I prefer is turning it off .
So that when I'm taking a picture , I get the option to turn the SDR on or off manually .
I won't recommend to turn off the SDR .
Every time the iphones do a great job in computational photography and I use SDR a lot for my landscape images .
The next step is about shooting in low light .
But before we move to the next step , it's time to thank the sponsors of the video .
And that is skillshare .
Skillshare is an online learning community .
And I've been using skillshare from a long , long time .
You want to learn photography , videography , editing animation , skillshare is the place to go .
Recently , I joined this class on street photography by trash and where he talks about shooting portraits , architecture , shooting in low light .
And also he shared his editing work flow .
Now I'm new to street photography .
So this course was super useful .
You want to learn something new , you want to upgrade your skills .
I will definitely recommend skillshare for the 1st 1000 people to click on the link .
In the description below , you get a free skillshare trial membership .
If you're taking a yearly subscription monthly , you're paying less than ₹800 or $10 .
And you're getting access to all the classes if you're interested .
Probably not .
But if you find it distracting like I do well , you have the option to turn it off .
The next step is daytime long exposure photography .
Now , generally , if you want to capture long exposures during daytime , you have to attach an end a filter , but you can also mimic the look of long exposure with the help of the life mode .
Turn on the live mode .
If it's off by clicking here , then when you take the photo , you can see the live text appearing for a second .
Basically , it is taking multiple photos .
You open the photo swipe up , you can create a loop video or bounce .
But what we're looking here is the last option , long exposure .
This will combine the images and give you that long exposure image look .
One thing I've noticed is the image gets cropped a bit once you convert it into a long exposure image .
So I would recommend to shoot a bit wider than the original composition .
You don't need a tripod , you don't need an N A filter .
If you don't have a tripod , I would recommend at least use some kind of support if you're getting shaky images .
The last tip is for people who are more serious about photography and that is using third party applications .
The stock application is great .
The UR is pretty neat and easy to use but it doesn't allow you to change all the settings .
I've been using Android phones till now and all the recent Android phones have promote built in as a photographer , I like to have manual control over my settings .
The app I'm using in this video is a lightroom application .
It has a camera option built in which is allowing me to change the shutter speed is so white balance and I can fine tune these settings .
As I like as I said , this is not for everyone only if you're serious about photography only if you want manual control over your settings .
This is for you 90% of the times I'm using the stock application and I'm very happy with the results .
But if you need that extra controls , you can use the third party applications .

The next step is about shooting in low light .
But before we move to the next step , it's time to thank the sponsors of the video .
And that is skillshare .
Skillshare is an online learning community .
And I've been using skillshare from a long , long time .
You want to learn photography , videography , editing animation , skillshare is the place to go .
Recently , I joined this class on street photography by trash and where he talks about shooting portraits , architecture , shooting in low light .
And also he shared his editing work flow .
Now I'm new to street photography .
So this course was super useful .
You want to learn something new , you want to upgrade your skills .
I will definitely recommend skillshare for the 1st 1000 people to click on the link .
In the description below , you get a free skillshare trial membership .
If you're taking a yearly subscription monthly , you're paying less than ₹800 or $10 .
And you're getting access to all the classes if you're interested .
There's some really good applications on the app store and I'm planning to make a video about them .
So stay tuned for that .
I know I said that was the last step .
But here's a bonus tip disclaimer .
This is only available to the 12 Pro and the 12 Pro max users as of now .
And that is using pro is a big deal for me .
Let me explain why raw files have more data compared to JP files , which is useful in post processing .
You can push the raw files more in post processing compared to the JPEG files and make it look better .
You could shoot in raw even before the help of third party applications .
Then the question is sort of why is Apple pro raw so exciting when your iphone takes an image , it does a lot of computational photography which we even saw in this video to give you the final result .
Raw photos from third party applications are simple raw images .
There's no computational photography involved .
Whereas with the pro you get the same processing deep fusion smart HDR night mode and you still get the benefits of shooting in raw mode .
Basically , you're getting the best of both the walls .
If you're going to post process your images , I definitely recommend turning the pro raw option on .
Remember the file size is huge .
So don't turn it on every time .
If you don't need it by default , it will be off even you have turned it on in the settings .
So remember to check every time while you're taking the picture .
That's it from this video guys .
I hope you people enjoyed the video and found this video useful .
If you did press the like button new to the channel , you should definitely consider subscribing for more such content .
I'll talk to you guys in the next one .
Bye .

And as you can see in the menu at the top , it's not gone , but we actually want to show this page .
So we're going to go back and click show and it's going to be back at the top again .
Uh within the pages settings , you have more options as well .
So you can add new pages or you can just go ahead and change your settings for the page .
You can set a password on it .
You can change your Sco for Google , you can rename the page , you can copy , you can duplicate it and can also do it to a sub page .
And if you want to do it to the sub page , what you can also do is just drag it and drag it underneath another page , what that is going to do is change it in the menu .
So if we do preview and hover over travel , you're gonna have it as well .
And this can be a good thing if you want to sub page your pages , but we're going to go ahead and drag it back onto the top .
Then you also have blog pages under blog pages , you're going to have your post and your blog .
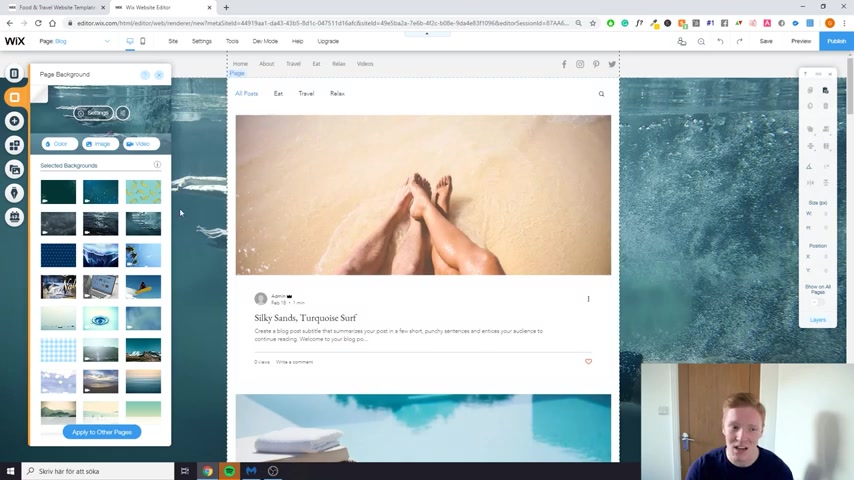
Same thing here is why you can have your settings and also changed for Google , you can rename the page or just delete it page transitions is not super needed .
So what you can do right here is just click none .
What this is going to do is increase the website speed because having these effects are going to just drag down the speed of your website .
OK .
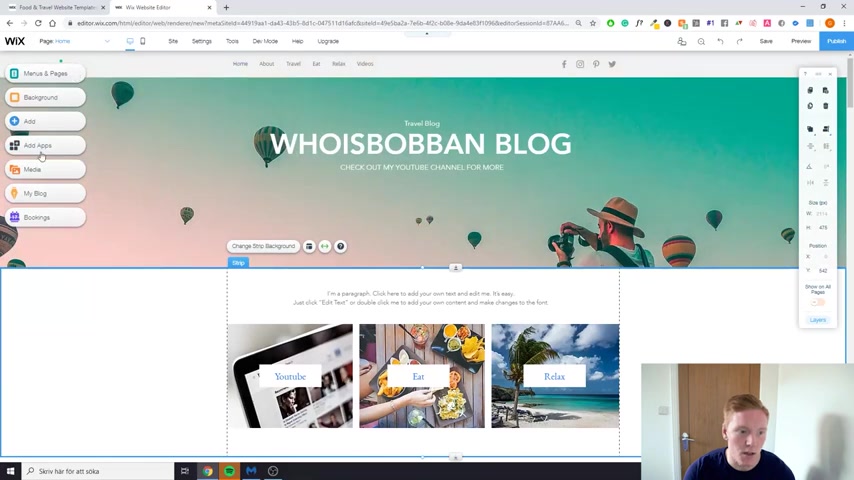
Next , we have the overall background of the whole website .
So if I click something right here , you can change the , see that the whole website is going to change , it doesn't look super good .
So we're going to go back to color and just add it to white , then you're going to have the plus right here .
And what that is going to be is all the elements you can add to your pages .
And if you want to go back to a page , you have the banner at the top .
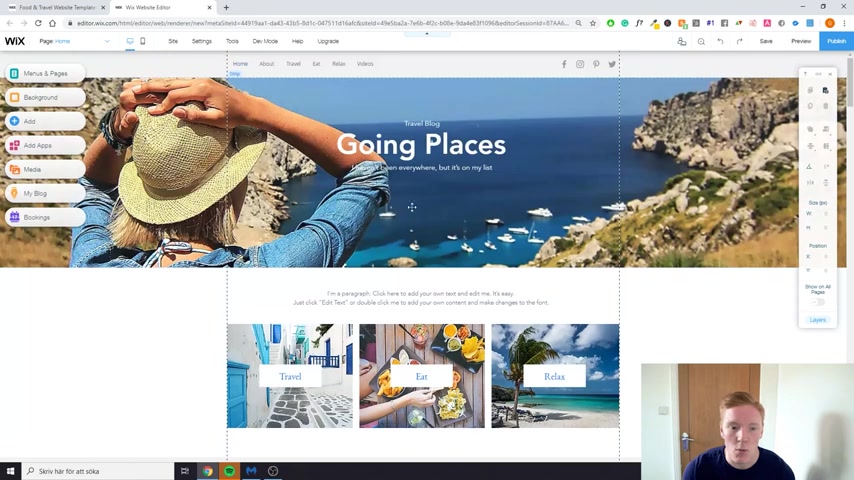
Let's say we want to go back to the home page , just click on home and right here we have our home page .
So if we want to add , let's say this woman right here , we would just click it and drag it wherever we want it on the website .
So if I want to read right here , I want it to be a bit smaller and I want to put it right here .
That's how you would do it .
Then I'm going to delete this because I don't want it .
So just delete , it's gonna be gone .
You can do the same thing with all these different elements .
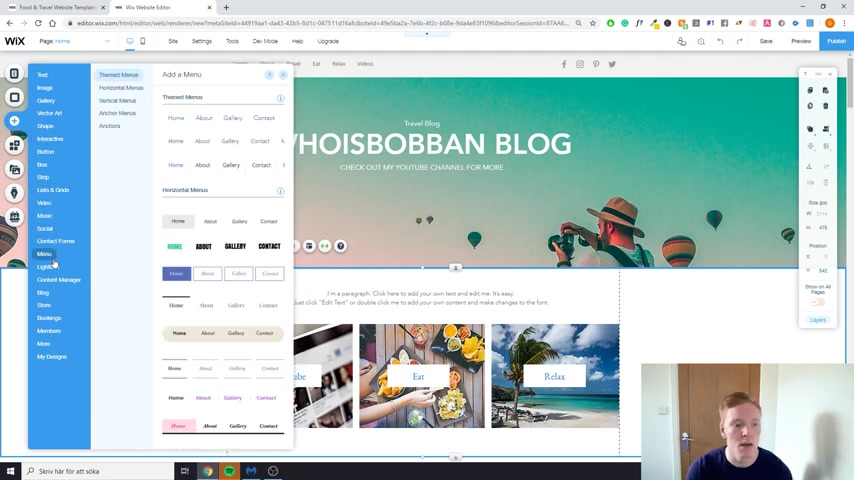
You have video , music , social contact forms and menu , lightbox , content manager .
So much more , if you keep going , you're going to have the Vix app market in the Vix app market , you can add features that are not originally within Wix and this is going to be third party or apps made directly by VX .
This is going to be super good .
If you want to add some special feature that Wix doesn't offer , you can just search within the app and then click on add .
So just to give you an example , let's say I want to add my Instagram feed .
I can just search Instagram and you can see this app is made by X and I want to add this just click add once I've clicked add , you can see this whole element on the website and you can see this is not your Instagram feed , right ?
So what you're going to have to do is go to settings , then you're going to have to connect your Instagram account .
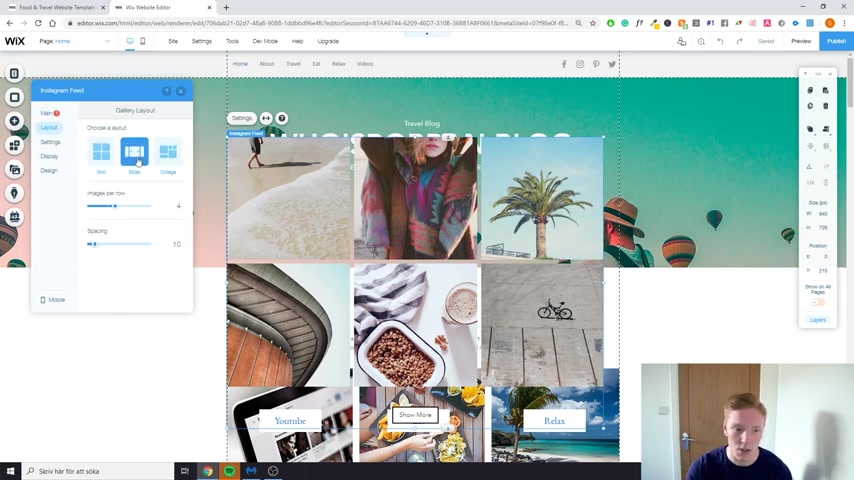
So you can show your images and then you can just change the overall layout of this element .
So you can change it to a slider collage how many images you want to show how many rows you want and how much spacing you want between the images .
You also have more settings .
So you can change it to your language , you can turn off to show more button or keep it on .
You can also display on hover full screen , you can change the side .
So there's a lot of features within every element within Wix .
But this Instagram feed , we don't want it .
So we're gonna delete it as well .
And as you can see , we have a huge gap once again .
So all we have to do is just drag all the content back off to the top , all the way up and there we go , there's no change to the website , going to go to media .
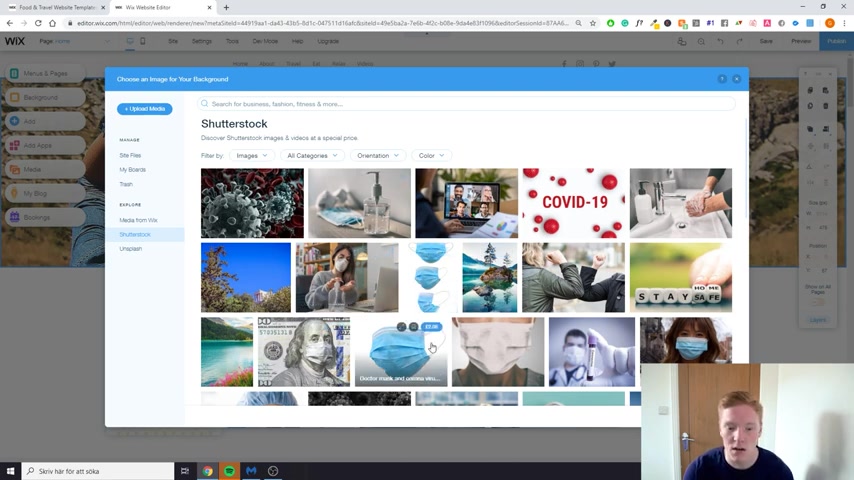
So under media , you can just add your own photos or as again , you can add your images from DEX , free images from DEX or shot or stock or just upload your very own images directly .
Then right here , we're going to have our blog manager .
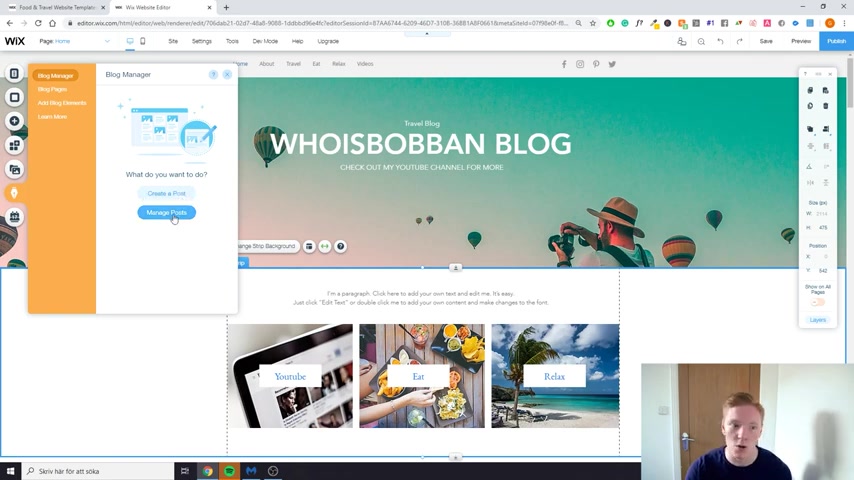
So in your blog manager , you can either create a create a new post or you can manage your old posts .
So what we are going to do is create a new post .
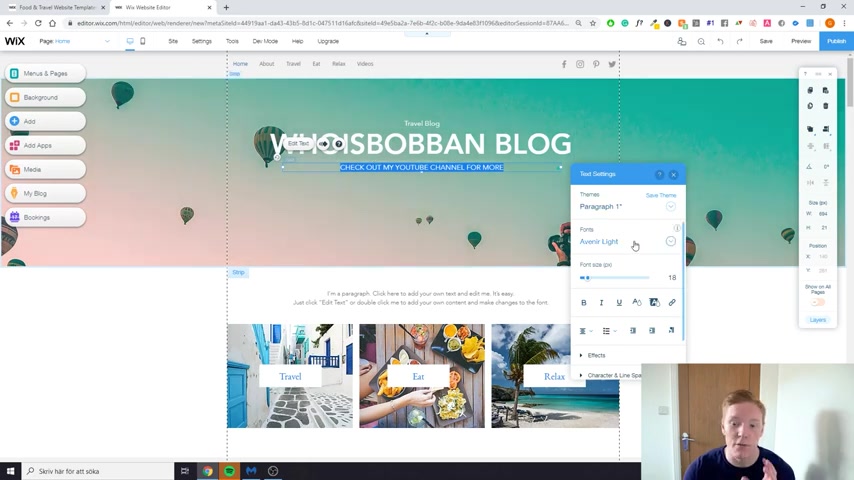
Once you're in the post creator , this is going to where you're writing your blog post .
So new youtube channel is gonna be my title and then just fill it out with your content as it would usually do .
So , hello , don't until it co is just to add some content on it just like this , then you can see the plus sign right here .
So let's say you want to add a video in the middle of the blog post .
This is how you would do it .
You can go to my video media from VX and let's say we want to add this one right here .
Now you're gonna have an image within your blog and then you can just keep writing your content down below , you can add your titles .
So if I wanted to create this one into a title , er I can just change it right here .
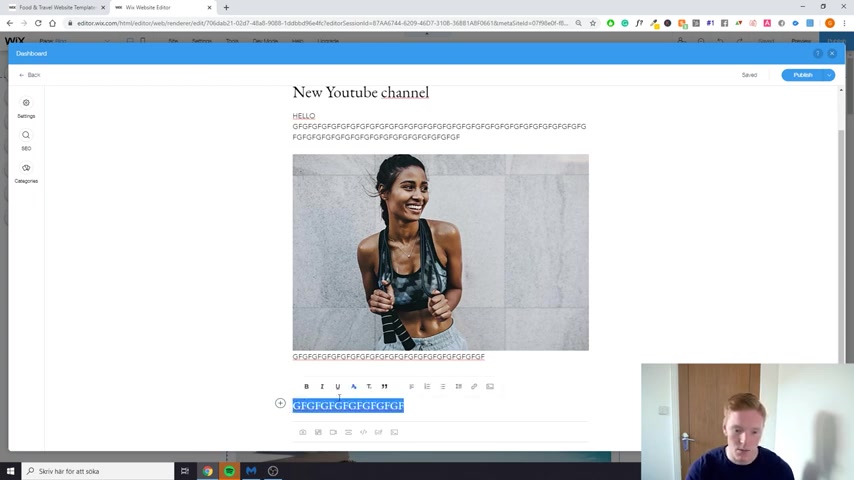
So now it is a title and then I can continue writing the text down below .
Let's change this back to a text .
So now it's just gonna be text , uh check out this and then you can write your content .
Once again , you can add gifts , you can add code , you can basically add anything you want within your blog post .
Once you're finished with your blog post , you want to make sure that in settings you have a cover photo and that you want to show up in your blog feed , you can publish it now or publish it later , you can also change or wrote it .
So if you don't want your own name , you can change it to someone else's name .
You can also add this which is going to be a preview in your blog feed .
You can also do your sco so the URL for the actual blog post , you can change the title which is going to show up in search in Google , you can also add your description .
So this is , this is basically a preview on how it's going to look in Google .
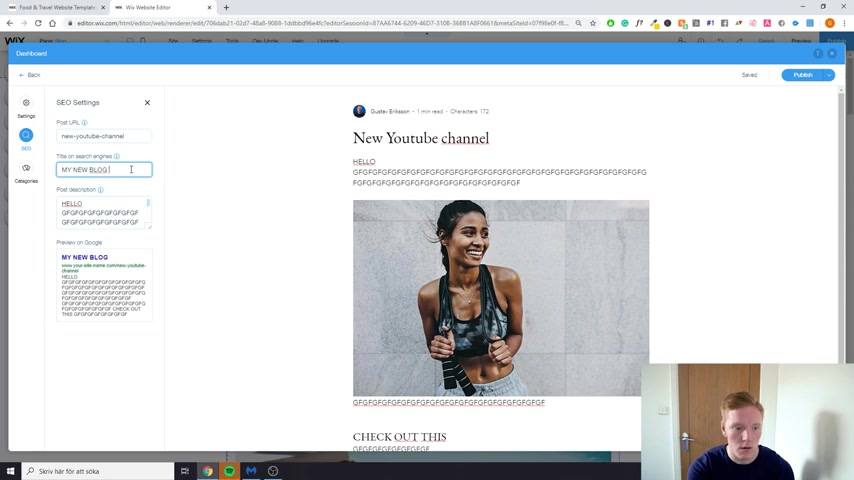
So if I change this right here , my new blog post , this is how the title is gonna look within the Google search .
And hello , please read my blog and that is description how it's gonna look within Google outside your categories .
So if you want to make sure you're putting it in the right category , you do it here .
So you can do e travel or relax or you can just add your new categories and you can also remove , add these categories when you want or add new categories .
So if you import a theme and the theme doesn't have the categories you want .
Don't worry , you can change the categories however you like , OK , let's say our blog post is done .
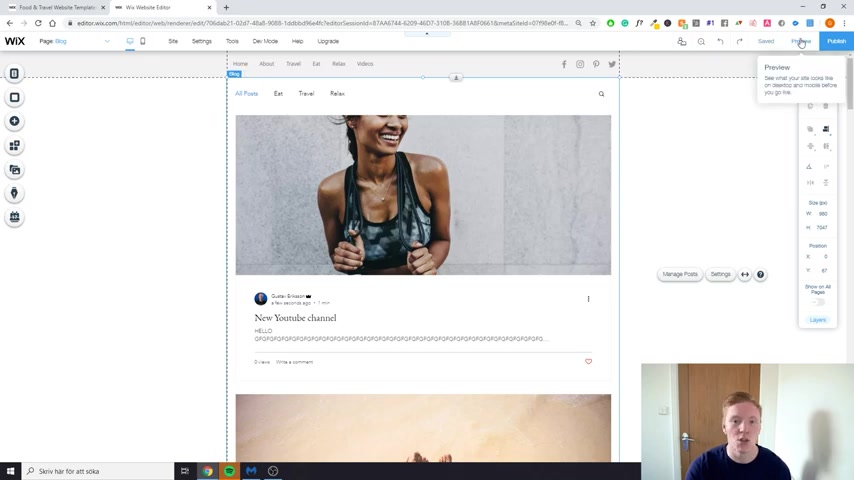
We're going to click publish and that is going to be our new blog post .
And when you import a theme , you're going to have old blog posts that are just standard .
What you can do is just go ahead and delete these .
So move them to trash , that's just going to remove them all from your website and you're never going to see them again .
Now , when we have edited our website , we have changed the layout .
We have created our first blog post .
We want to make sure that our website looks good .
We can just go into preview mode , look at our , how our website looks .
Let's go to the home page looks beautiful and we changed everything and obviously we want to spend a lot of time changing everything .
So it looks like you wanted to .
But once you're done with your website , what you want to do is just go back to your editor , you can publish it .
And as you can see right here , we're not going to have a , a domain right now .
So what's going to happen is that we want to make sure that we upgrade our package .
So if you go to upgrade right here and then we go to compare plans , we're going to be able to see the different packages for your website .
So what I would recommend you to do for your blog is definitely get the combo package , the combo package is going to give you a domain .
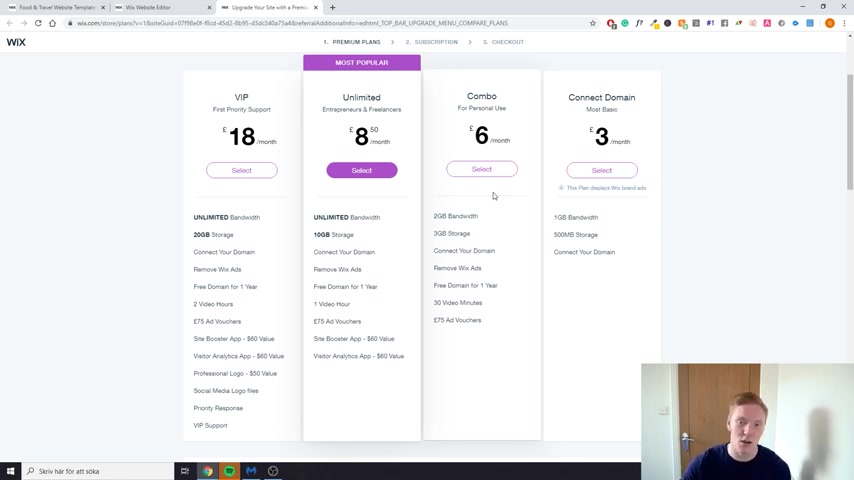
So you can have , let's say who is Bobin dot com as your blog name instead of having who is Bobin dot vix site dot com going to make it a lot more professional and also make it a lot easier to visit your website because a lot of people are not going to do who is Bobin dot vix site dot com .
It's just too complicated to write .
So it's super good .
Did you get a free domain with your purchase ?
And it's also going to be £6 a month ?
And what's included in this is why is that you're going to remove all the Vix ads on your website , which is going to make it look super professional compared to having Vix ads on your website .
Once you have bought this package , you will be able to pick your domain , connect it and then publish your website and it's going to be up on your new domain and there you go , your website is live .
That is gonna be it for today's video .
If you guys enjoyed , please make sure to subscribe .
Also , feel free to comment if you have any questions .
I usually answer as many questions as I can .
And if you want me to cover any special ideas , just comment it down below .
I'll make sure to make a video on that as well , but that is going to be it .
Hopefully you guys enjoy it and I'll see you next time .
Are you looking for a way to reach a wider audience and get more views on your videos?
Our innovative video to text transcribing service can help you do just that.
We provide accurate transcriptions of your videos along with visual content that will help you attract new viewers and keep them engaged. Plus, our data analytics and ad campaign tools can help you monetize your content and maximize your revenue.
Let's partner up and take your video content to the next level!
Contact us today to learn more.