https://www.youtube.com/watch?v=wA9yMDuqLI8
Drawing Female Heads
This video is all about drawing heads from a simplified luminous method all the way through to completion .
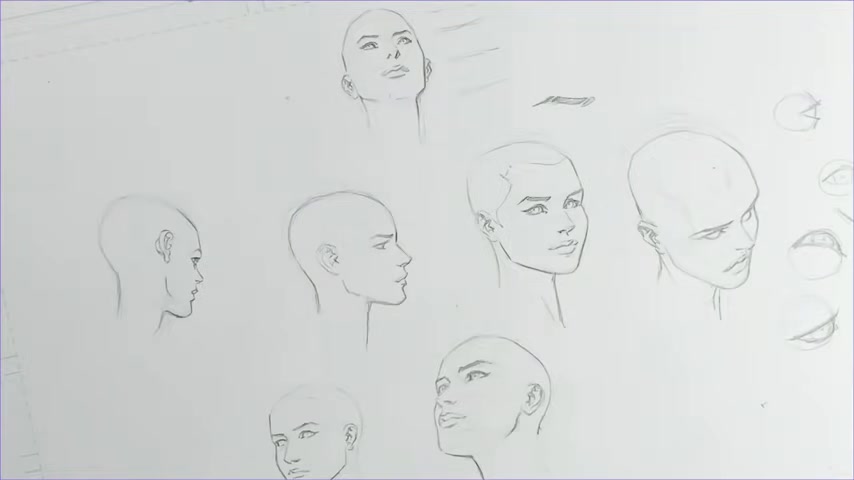
Female heads tend to be a little bit more unforgiving than male heads when it comes to symmetry and proportion .
So I decided it would be helpful to draw a series of female heads from multiple different angles and then carry them through to a bit of a finish .
I'm David Finch and I've been a comic book artist for over 25 years .
If you enjoy this video , please give it a like and subscribe and share with your friends .
And if you have any questions about the tools that I use , take a look in the description below and please leave your suggestions for future videos and comments below .
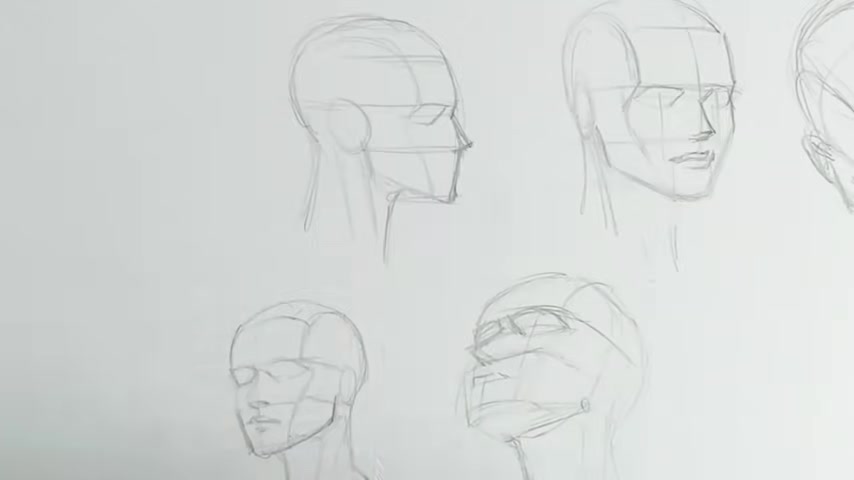
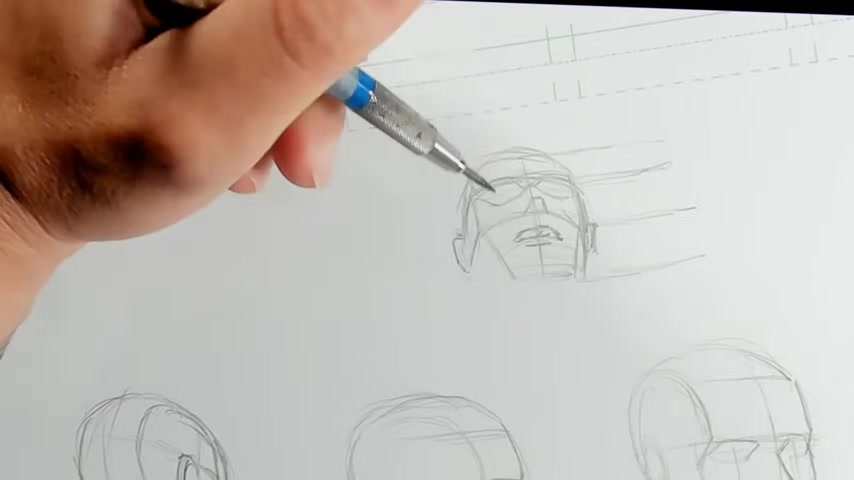
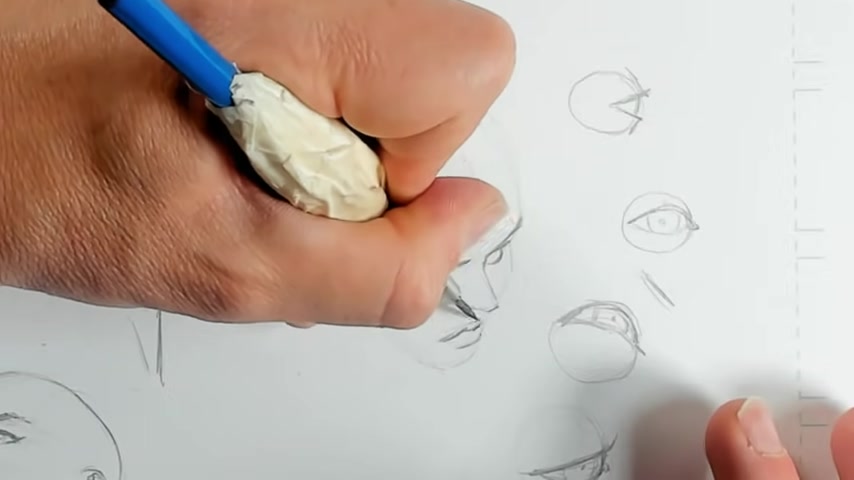
Over the years , I've adapted a bit of a simplified Lemus method to draw my heads .
I'd start with a , a chin , the line from my nose line for my brow and then the line for the top of my forehead and they're all evenly spaced .

I draw them across to where the ear is the side of the , the jaw and round backward for the back of my head .
The neck actually uh attaches just underneath the ear .
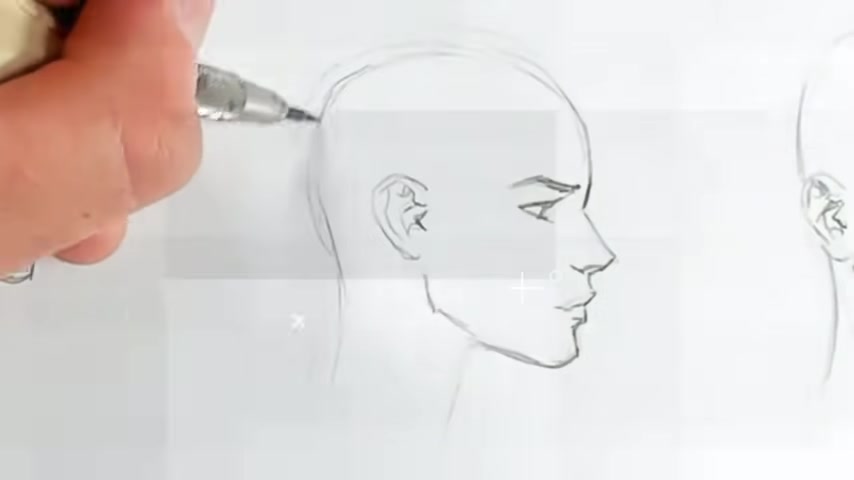
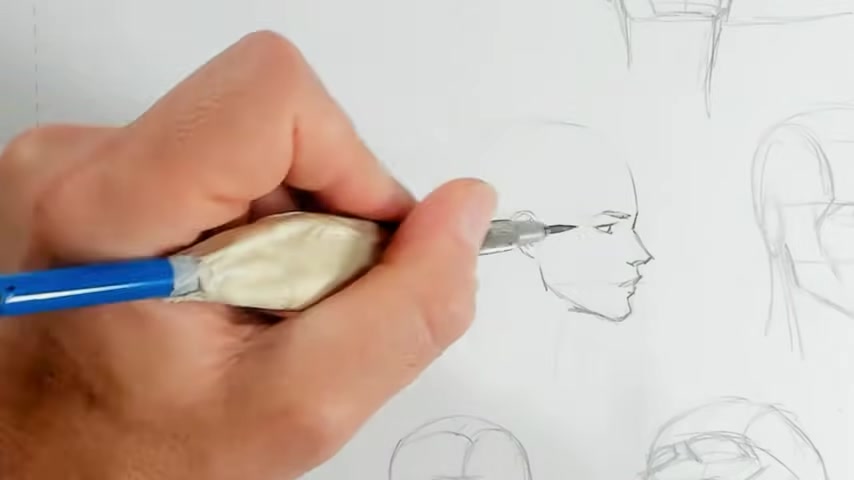
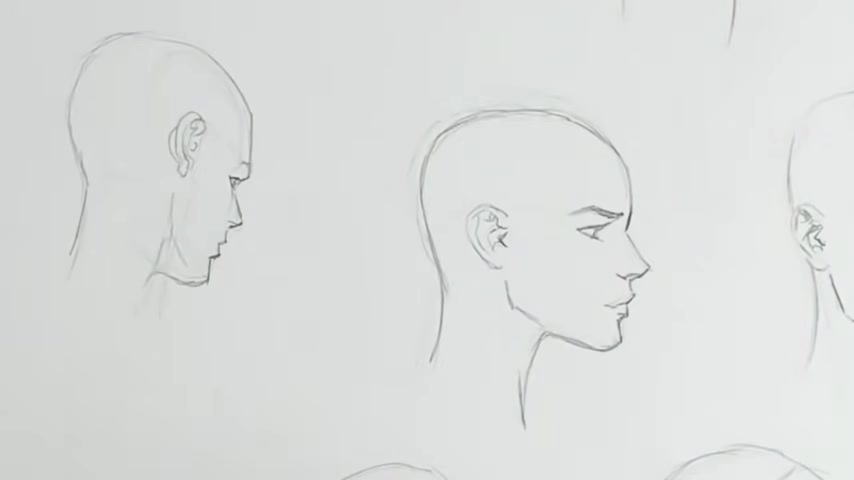
And now I'm drawing a profile and again , it's the same four divisions drawing in the ear just about halfway back on the side of the head , just a little bit further back .
So it starts about halfway back and projects backward from there .
And the neck again , coming from the bottom of my ear line , things get a little bit more complex once you start changing the angle .
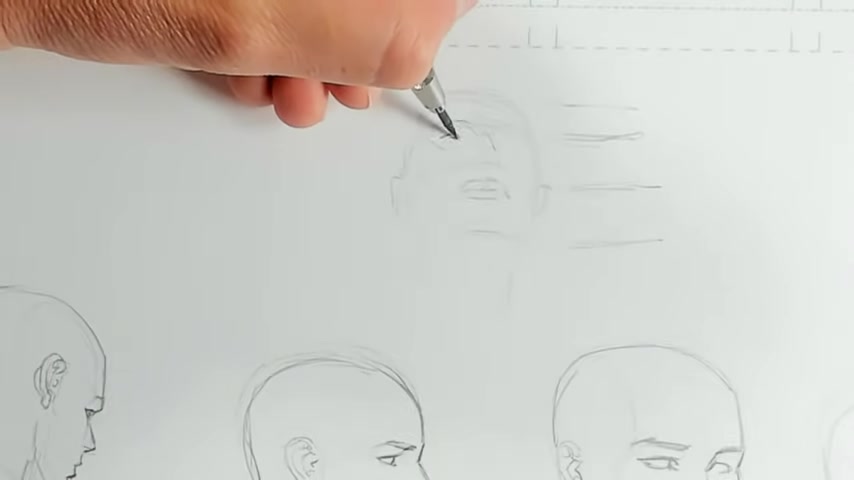
And so for this one , I'm doing a downward angle , I've got my four divisions again , drawing in lines around the side of the head .
In perspective , I've drawn a line across the top of the head that can really kind of help me place my ear and just refine my shape in space .
And now I'm gonna draw an upward angle again , center line , my four division lines back around the sides of the head .
It's a bit of a , a box almost actually , it looks now before I've really kind of defined in my cheek shapes .
So you can see it's like a box in perspective .
It's a very simple shape , the head shape , something that's , that's important , especially from this kind of an angle is I like to draw a line across from one side of my jaw below my ear to the other side , following the same lines that I drew from my brow , nose and chin and using that line to make sure that my jaw line works in perspective .
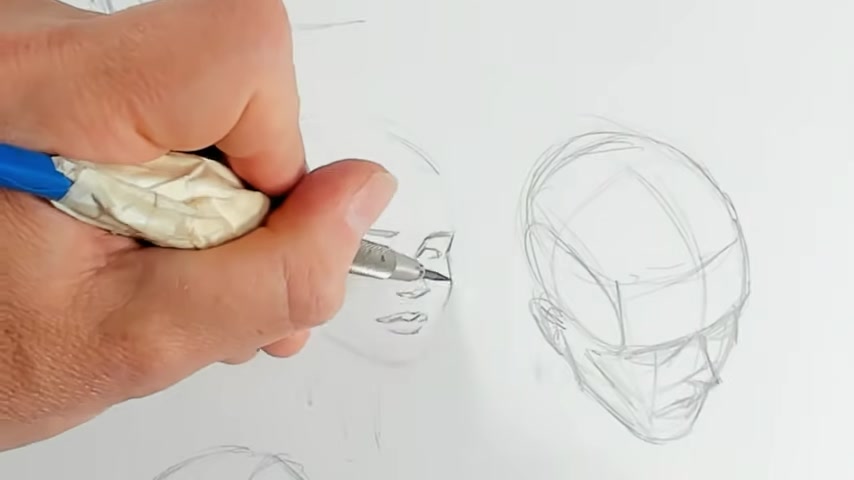
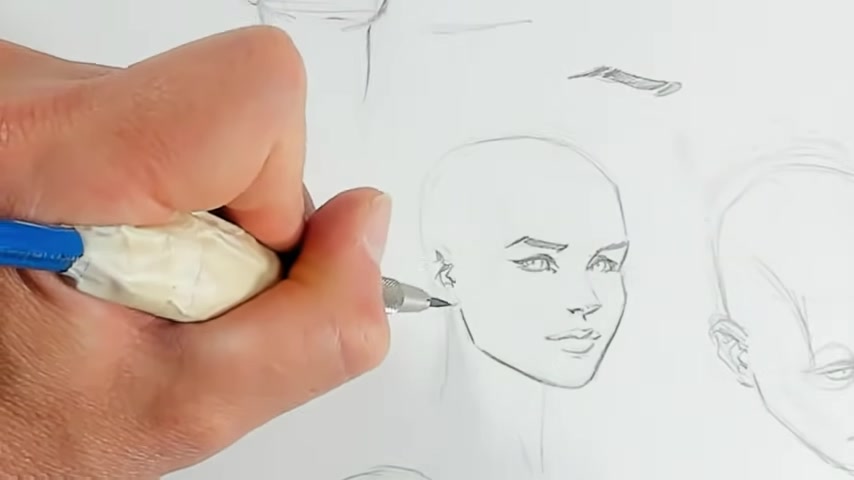
And so now I'm taking those basic shapes and refining them a little bit just by adding in some sockets for the eyes that I can rest my eyes in defining in the nose .
The no , the top of the nose , you'll notice lines up with the eyes and not the brow .
So it's a little bit lower and then the mouth lines up from the center of the eyes , the nose actually lines up from the inside of the eyes .
And as I draw those lines down , it kind of helps me refine where my chin is .
So I'm just fixing that a little bit to make sure that it's a little bit more even with the rest of the face .
And I find the more detail I add to the face , the more it it helps me to refine my my shapes as I go along .
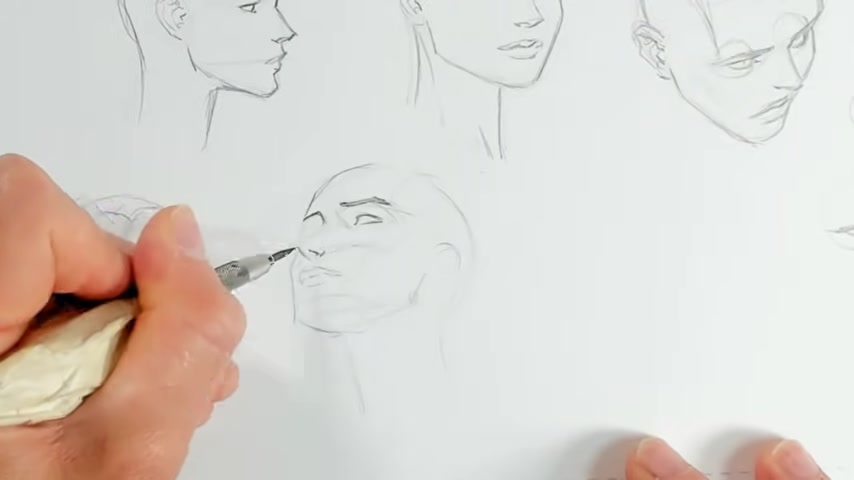
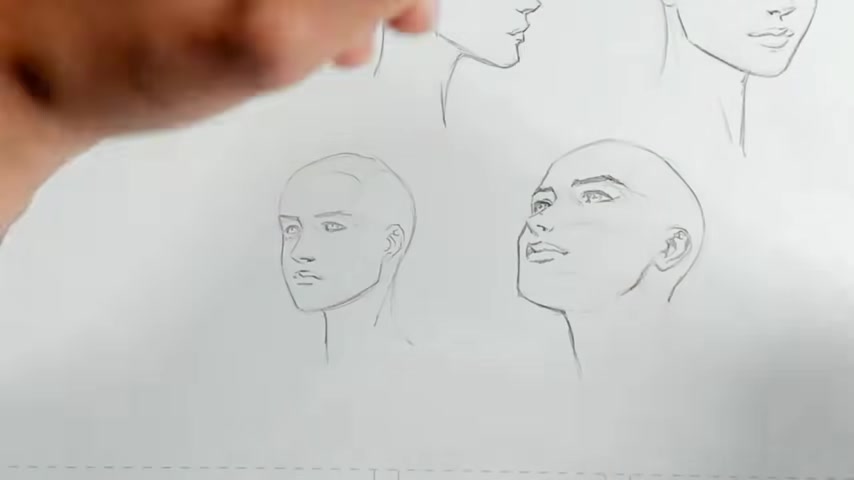
So now , back to my downward facing angle , you'll notice that the eye sockets are actually quite a bit shorter because you're seeing them kind of for shortened from this angle .
And the brow is actually resting lower over the eye roughing in my nose and my mouth and lining them up again with lines down from my eyes to make sure that the nose is lined up and the mouth is lined up between the eyes where it needs to be just refining my cheek shape a little bit and moving on to my upward facing face .
I drew a line in for where my , my actual eyes underneath the brow sit and drawing in the sockets .
I've got my nose projected out from the nose line because the nose line really represents the base of the nose that it projects outward from .
And so using my lines that I've drawn again from my eyes , every angle really works the same way and bearing that in mind can make it much more easy to think of faces that are at an angle like this , getting my ear refined in the sides of my cheek .
And now we're gonna do a three quarter shot from behind .
I've got my center line along the side of the head , the ear just behind that my four divisions , my cheek line , my nose projecting out from the nose line and my jaw projected across once again , using the same angles that I would define the lines on the front of the face .
So now drawing an upward angle , this is a tough angle I think for a lot of people and it certainly was for me for a long time .
And there are times still that I can find it to be a bit of a challenge .
A trick that really helps for me from this angle is drawing in my four even divisions as getting slightly larger as they get towards you .
So the line from my nose to my chin is quite a bit larger than the line from my nose to the brow and then from the brow to the top of the forehead because it's coming towards you in perspective and it's being foreshortened , drawing in the sides of my cheeks , the ears are significantly lower and you can see that I've drawn lines down toward the ears .
So I know exactly where they are in space in relation to the nose and the brow , mouth lines up in the center again .
And from this angle , I actually see the bottom of the jaw just a little bit .
And that's something you need to be very careful with though and you need to make sure that it lines up across .
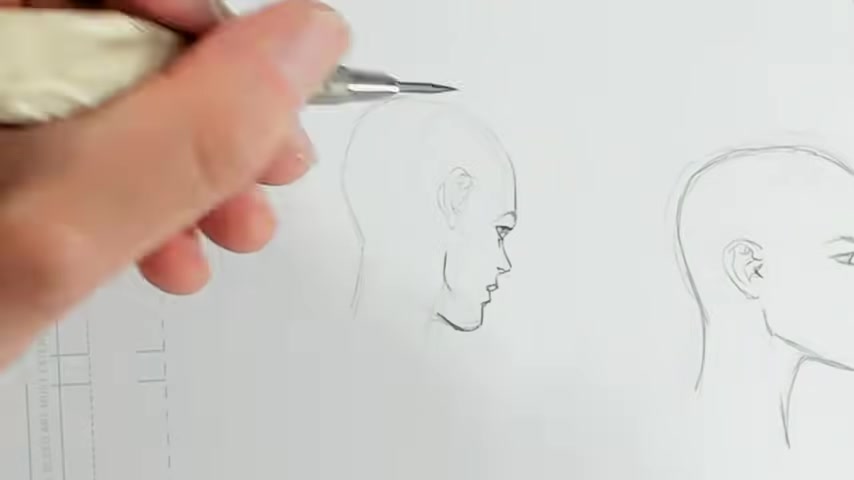
So now that I've got all of that in , I'm roughing in my actual features on top of my faces , starting with the profile , I've got my nose projecting out from eye level , projecting out from the nose line .
And then I just sketch in a line quickly from my mouth just to make sure that I've got it in the right placement , a little bit of a bump out for the chin and then my ear just slightly back from the center of my head and then just getting in the top of my head , the neck and then moving on to my three quarter angle .
This is always really the easiest angle to draw and it's probably the angle that you see most commonly because a direct because it eliminates a lot of the problems of drawing a direct frontal on shot .
That's something that can cause a lot of trouble because any deviation from symmetry whatsoever at that angle is very , very obvious .
Whereas a , a three quarter angle is quite a bit more forgiving , working in the lines of my jaw , just cleaning them up , cleaning up my ear , the top of the head , get the neck roughed in quickly again , moving on to our downward angle .
This is a bit of a tougher angle for me .
Certainly , the eyes tend to not give me too much trouble .
There was a time but once I learned to lift them up right into the eyebrow , be because you're seeing them from an angle where the space between the eyebrow and the eye is not really visible .
Being aware of that really allows your eyes to recess properly in the skull .
The nose though I find can give me a little bit more trouble because it's very easy to start making it look like it's pointed downward and maybe a little bit large from this angle .
And it's something that I've fought with over the years .
Also , I've moved the jawline , the chin down slightly .
I felt like it was looking a little bit too high .
I think my for shortening was just a little bit too strong .

And so I'm actually making the top of the head just a little bit smaller too , just to reduce some of that more extreme for shortening quickly .
I wanted to draw some eyeballs , the actual full ball and then just put the eye lid on top of it .
Here's a shot directly from the front and now you'll see it from the side and you only see one side of the eye as the lid goes over the actual eyeball .
And from every angle , you just need to make sure that your eyelid is rounding around your eye .
So if you're looking up at it like the shot here , you've got both of the upper and lower lid rounding along the eye and then the same thing applies .
If you're looking down at the eye , it just rounds along the bottom of the eye and just being aware of the fact that you have a sphere and that you're putting your eyelids on top of that sphere makes things much , much easier .
And so I'm just quickly drawing in spheres behind the eyes on my downward angle just to show you where they are in the head and where they are on the actual eyelids .
And so hopefully , it makes these eyes on this upward angle a little bit easier to understand because you can see that they're rounding around more of the top part of the actual eyeball because you're looking up at them finding in my nose , getting the mouth in and then making sure the eyes are lined up properly and looking like they're working in relation to each other , getting the jaw line in .
I try not to define too much of that line from the actual uh corner of the jaw to the , the chin .
I , I feel like it can be a bit of a distracting line on a female face .
And so I'm making sure to keep my features very , very shortened and very small on my three quarter angle because if you project in fact , too far into the actual side of the face , it ruins the effect completely .
So now I'm getting my eyes defined in , down into the sockets , making sure that they look like they're actually rounding over an eyeball , the brows , the nose , you see much more the , the bottom of the nose at this angle and making sure again to project it from the actual nose line upward .
So it's really pushed right up into the eyes from that angle .
And I'm not loving the way that I've defined the nose and the mouth here .
So I'm just gonna quickly erase them and use a bit more of a simplified shape for the nose .
I've used a triangle on one side and just a bit of a hook on the other side .
It gives the idea of the nostrils without it being too distracting .
I really , when it comes to female faces , the less lines you can use , the more effective generally , it will be , I can see just a little bit of the bottom of the jaw there .
So I've defined that in just a bit but not too much , getting my ears refined in here , the overall shape of my face .
And then I'm just quickly drawing some lines across to make sure that everything lines up the way that it's supposed to before we move on to refining our features and getting something that's more of a complete drawing .
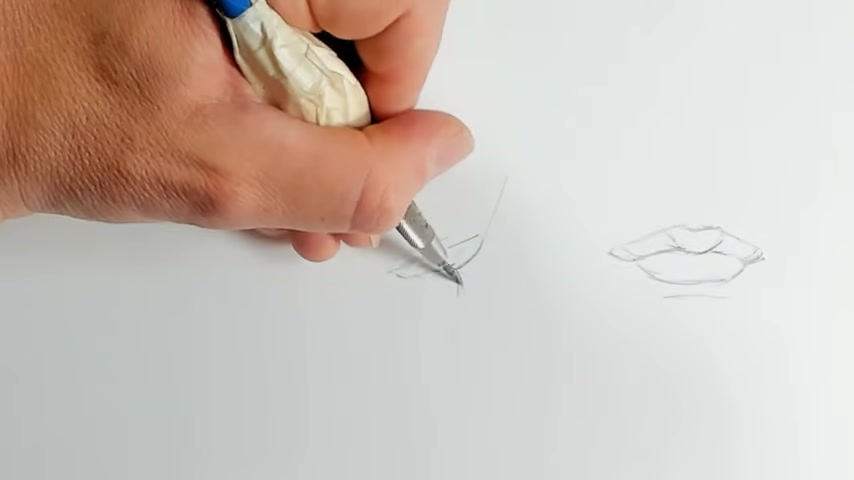
I wanted to quickly just cover the mouth and nose and the eyes from different angles .
So here's my basic shape for mouth from the front and then from the side , you see the same basic shapes .
I make sure to project the front of the upper lip forward from the lower lip .
It's just a little more pleasing that way .
And now looking up at the mouse , I'm making sure to make my upper lip much wider than my lower lip because you see more of it at that angle and connecting my lower lip into , into the mouth .
And the lower lip is much shorter in comparison .
And now looking down at the mouth , the upper lip is much shorter and the lower lip is much wider .
In comparison .
Looking at the bottom of the nose , it's really consisted of a central column with a ball and then two lobes that attach and getting those shapes right and learning how those shapes interconnect will actually create your nostrils for you .
And it's really the right way to do them if you try to just draw a triangle and then draw holes in it for nostrils , it'll always look a little bit odd .
So I've drawn the same shape from the front and now here I am ju just drawing it from the side .
You've got the ball at the front with the nostril flares connecting out to the side of it .
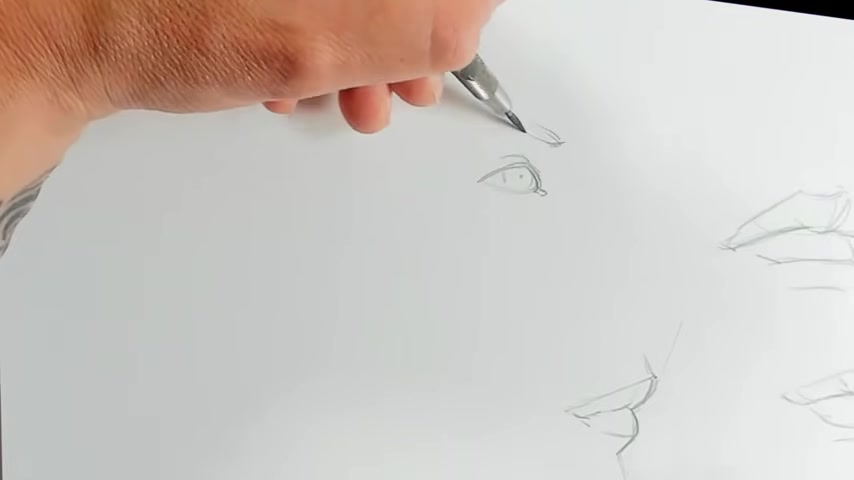
So now I'm gonna draw a couple of eyes .
This is looking up on an eye slightly .
There's a much greater distance between the eye and the eyebrow and the top lid of the eye is rounded quite a bit and looking down at the eye , the top lid is much flatter and the lower lid is rounded quite a bit and the eye is closer to the actual brow .
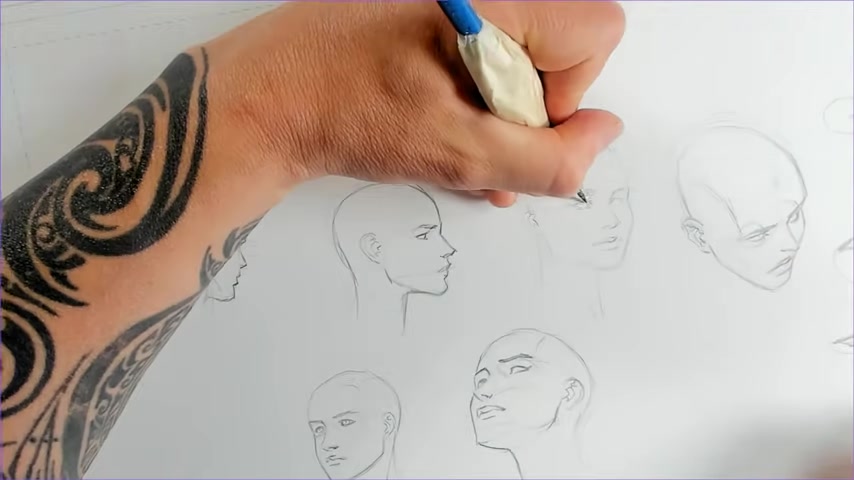
So we're gonna start erasing some of these down and just getting some final detail and making these a little cleaner .
I'm getting my upper lids thicker , giving it a bit of a mascara effect .
It's a female face and for the eyebrows , I want to separate them out into three pieces .
I've got my central piece , my outer piece and then the inner piece and I like doing it that way because that really corresponds with where the eyebrows move when you have expressions .
So getting the mouse defined in , I try to make sure to not just evenly draw all of the lines that make up the mouth .
I try to draw and I try to draw a thicker line underneath the top lip and then a thicker line for the bottom lip to give it a bit of a lit effect and to not look like lines that are just pasted onto the face , getting my jaw defined in the ear again , just using a little bit of line weight in the air to give it a little bit of a , a lighting effect connecting up my neck .
And that's gonna be really it , these faces are relatively simple when it comes to detail , but they can be quite a bit more complex to draw just because if you're off , even just a little bit in your proportions , it can really destroy your faces .
So now drawing the profile , I just again , I had everything really pretty well defined in there .
So I'm just kind of cleaning it up , getting a bit more of a line weight , nothing too serious .
I feel like the neck is actually projected back a little bit far on this head now that I'm looking at it and it's kind of throwing me .
So I'm looking at the eye , moving the eye a little bit and just trying to decide what it is exactly .
That's wrong about the face .
And in a minute I'll go in and fix the neck and I think it helps it quite a bit .
So again , thick with the upper lid , which gives it a bit of a mascara effect .
And also it lends to the eye underneath looking like it's shattered a little bit underneath the eyelid So it gives it just a little bit of depth defining in my nose , getting my actual eyes drawn in there and then my jawline , I really try to make sure not begin to um define in too much of the jaw .
So I just keep it kind of open and airy .
It , it just has a more pleasing look for a female face drawing in the full line from the jaw all the way to the chin .
To me , it starts to look like a line drawn onto uh paper in instead of instead of the effect that you're trying to get , I wasn't really totally happy with the nose and the mouth on that face .
So I just adjusted them a little bit , made the nose just a little bit larger .
And then I brought in the side of the cheek just a little bit just to , I felt like I was pushing out just a little bit too far .
And that's where as you're drawing your faces , you really need to be comfortable uh reassessing all the time and making sure that if something looks a little bit off to fix it and not just rely on the fact that you're under drawing said that that's where it should be .
And so it just needs to be there whether it looks right or not , you really need to make those decisions on the fly .
Uh As you go my three quarter drawing in the back of the ear , uh ears are something that's , it's obviously very important to really study drawing in our upward looking angle .
Uh The biggest challenge on this one for me really is just trying to make sure that the nose looks like it's at the right angle , but it's also not so defined that it starts to fight and , and just look uh overly detailed .
So you really wanted to find it with as few little shapes as you possibly can .
I felt like I was a little bit thicker with the neck on this one too .
So I just adjusted it in a little bit , then just refining my ears a little bit .
And again , you'll notice that I really didn't define very much of the , the jawline I could with shadow .
But if I'm not putting in shadow , putting lines across female faces is something I really try to avoid .
And so for the last one , we're gonna be drawing our downward angle .
This one , I think of all these drawings probably gave me the most difficulty .
Uh and part of it is getting the nose to look right and not look like it's , it's pointed downward because I like to have a slightly upturned nose .
But from this angle , it can be a little bit difficult to define that .
So uh it , it was a bit of a challenge , making sure to draw my ear .
So it looks like you're looking down at the ear and getting in the top of my head , I made the top of the head quite a bit smaller .
You can see the shadow of what I had before on the page um behind it .
And in the end I decided I wanted it quite a bit smaller just to reduce the , the fore shortening effect a bit .
And that I , I think it was pushed out just a little bit too far .
So I just moved it in a little bit and I think that helps , looks a little more proportional .
And so finally , I'm just drawing in the shape of my hairline .
I'm not drawing hair for these .
Uh There's just not time for this video , but I did want to just as a landmark draw in the shape of where my hair would go on all these heads .
And I think it's actually a very useful landmark because if you can get the proper shape of hair between the ear and the eyes on the side of the head , then , you know , you have the proper distance and your proportions are working .
So I think it's useful to get it in there .
Thank you so much for watching .
I will see you in the next video and hopefully we'll see you Sunday night at eight o'clock Eastern for our Sunday drawing live stream .
Are you looking for a way to reach a wider audience and get more views on your videos?
Our innovative video to text transcribing service can help you do just that.
We provide accurate transcriptions of your videos along with visual content that will help you attract new viewers and keep them engaged. Plus, our data analytics and ad campaign tools can help you monetize your content and maximize your revenue.
Let's partner up and take your video content to the next level!
Contact us today to learn more.