https://www.youtube.com/watch?v=p5DWgFQfR9k
How to Draw Faces in Profile
Hey there everybody .
It's Mark Carley .
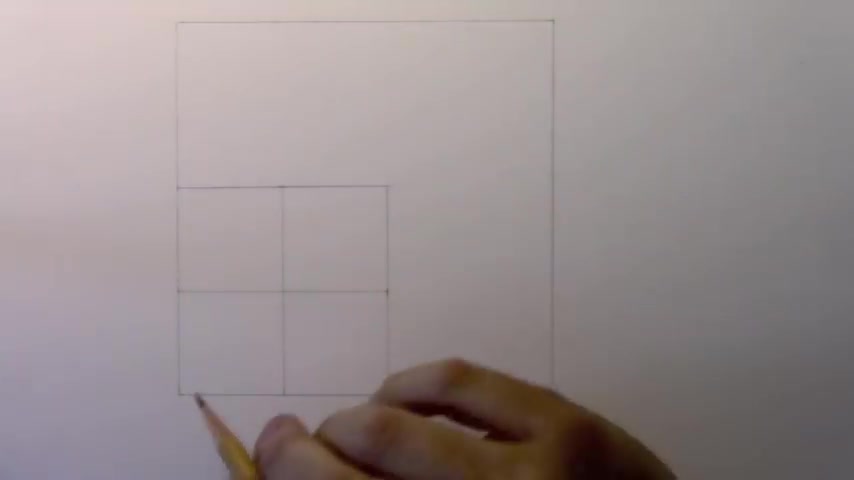
I'm back with another how to draw video today , we're gonna be drawing a face in profile and I've put down a few lines here just to help us with uh putting the facial features in the right spot .
If you want to follow along with this part of it , uh you'll want to know the dimension .
It's 4.5 inches on all sides .
This larger box in centimeters that works out to around 11.5 .
This smaller box is 2.5 inches on all sides and of course , it splits right down the middle um with an intersection of lines and that comes out to around 6.5 , maybe a little under 6.5 centimeters .
If indeed , you want to work at the same dimensions that I'm working at .
Let's begin by uh drawing just one more line and uh that's gonna get us started .

I'm going to uh bring back the trustee ruler and I'm trying to create a line that comes from around here down to here .
This is gonna help us for place in uh the nose and the chin later on .
So I'm just gonna add uh real quick , just that line right there .
Now , there's two other uh lines that I'm gonna do uh in time last , but I want most of this video to be real time .
Let's go ahead and get in the basic line of the sort of forehead heading uh to the back of the cranium .
If that is the right word for it , it probably isn't .
Let's go ahead and get that line in place .
Ok .
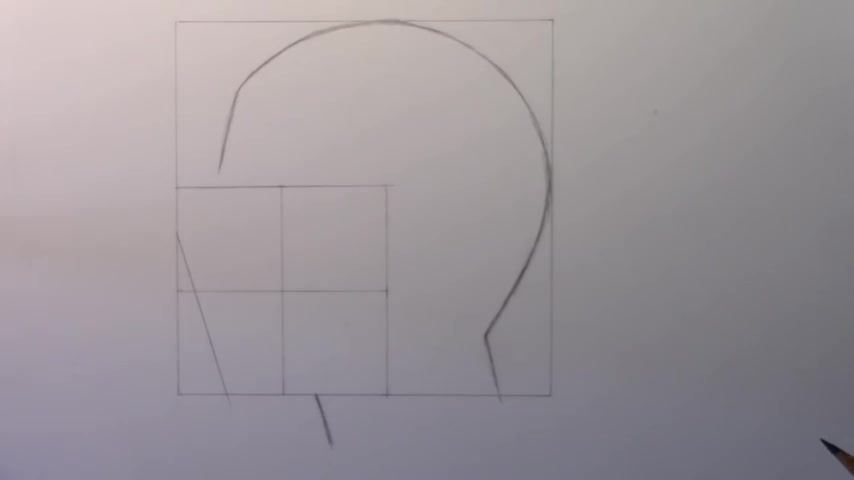
So here you see the line of the forehead , it comes up and uh is at a fairly straight angle at the forehead , then it begins to curve into a circle , kind of nearly a perfect circle uh for the contour of the head until you come down here to the back of the neck .
Now , the placement of these lines uh is related to this being a male uh character versus a female character .
Uh and maybe I'll do a separate video in which we do a female face in profile profile .
But the uh the , you know , width uh of the lines here is reflective of a fairly uh wide neck , which is one of the key ways of um you know , uh seeing the difference between a male and female character uh in terms of a drawing .
Um let's go ahead now and uh add the line of the ear and that might be it for the time lapse , uh at least for right now .
So there's the contour of the ear , you can see the placement , it sort of begins right at the edge of this box , but uh is uh shifted upwards .
Uh and maybe the distance from here to this uh cross hair line uh can help you with getting that right now .
I'm not gonna talk too much about drawing ears in this video .
I've got a separate video on that and I will link to it uh in the description , but let's go ahead and refocus .
We're going in here and I'm gonna try to do all real time uh the uh key facial features when drawing a face in profile .
All right .
So let's get started with this uh contour line .
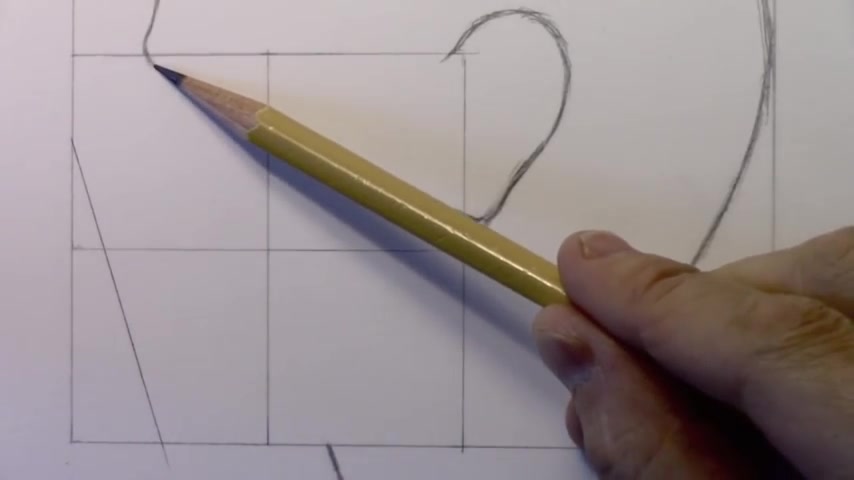
Uh And we'll begin by uh drawing a line for the forehead or right around the um the brow , I guess where the eyebrows would be the brower region .
And uh using this uh uh diagonal line that uh we put in at the beginning of the process , that's gonna help me draw a line from right here .
Uh the bridge of the nose heading down towards the tip of the nose and it may help you if you begin uh by drawing an indication of the tip of the nose .
So you sort of know where you're going and then you're kind of uh just connecting those two lines .
Now , of course , there's so many different uh nose shapes .
Uh It's impossible to teach them all in a single uh video .
Um But um again , I would urge you as I always do to consult reference , look at photographs uh compare all the different types of profiles you see .
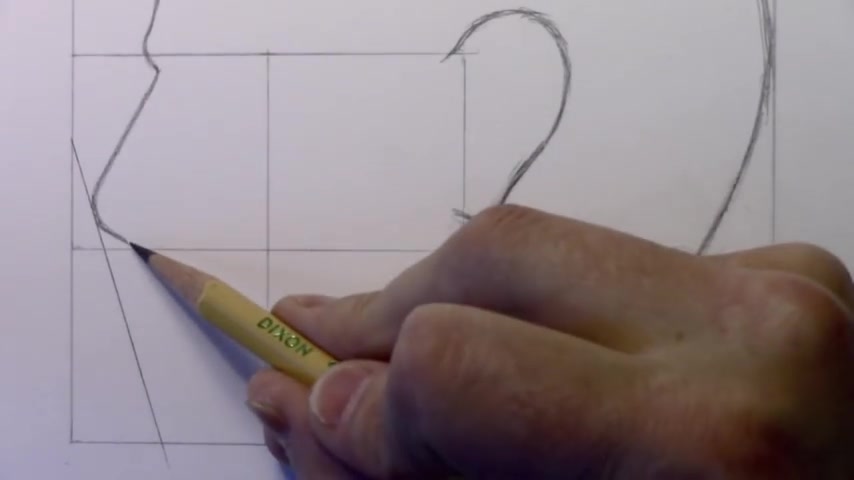
But having touched this line here , you can uh begin to uh bring this line down so that uh the sort of bottom of the nose that begins to curve into the upper lip crosses right at that line , that horizontal line of the cross hairs .
And uh another nice thing if you can get this sort of diagonal line in place is you can begin to pay attention to uh different um aspects of the line like the negative space .
As I curve this line down and I begin to uh come to the upper lip , you can pay attention to this negative space .
The shape that's created here can help you sort of see what it is you're doing .
And uh note that the way I'm drawing it , this upper lip is not gonna touch that diagonal line , it comes close , but it does not quite uh reach it .
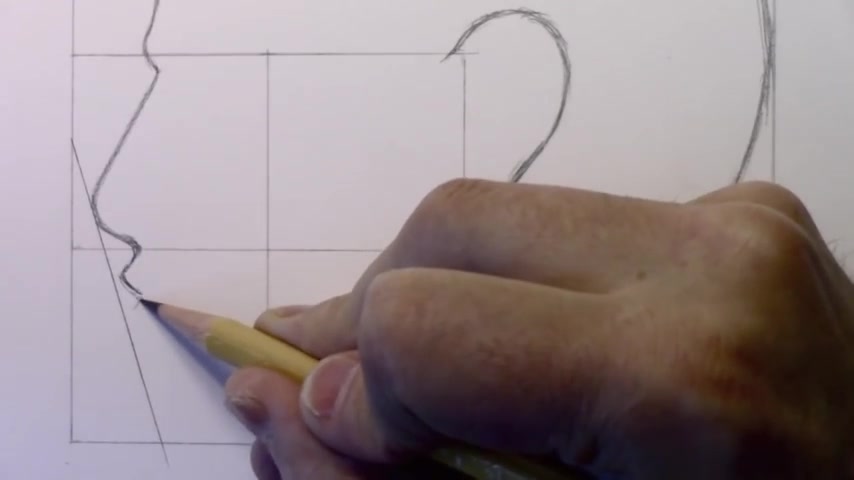
Now , this uh male character that I'm drawing is gonna have his lips slightly uh parted ever so slightly .
Um Now , sometimes coming down to the lips , the lips are one of the hardest things to do .
And I find sometimes that it's helpful to stop , take a break with that and instead move down here to the chin and uh get that line in place .
First because we've got these diagonal lines here or we've got the one diagonal line that will uh help us see where that goes .
Um This line of the underside of the jaw more or less following here , maybe tilting up just a little bit then having got this in place and giving it a certain um size uh relative to this square , I'd say it's a good third , maybe a little more .
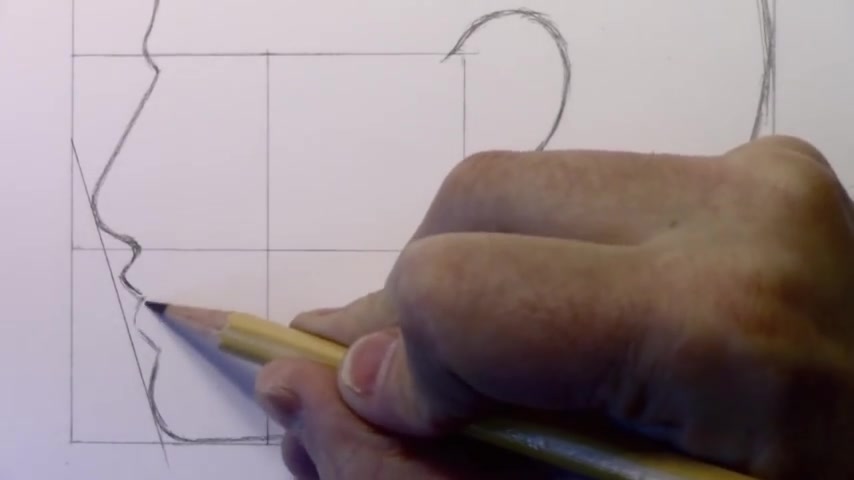
Then I can feel confident about coming in here and beginning to uh have that line head back and become the line of the lower lip or the sort of underside of the lower limp .
And as I said before , it can be very helpful to and when you have that diagonal line in place , you can sort of look at this shape and , and make sure that you're uh replicating that and that can help with all that various other stuff .
Now , I'll come back to drawing the mouth uh in a minute .
But um what I want to get to now is um to draw the eyebrows which uh begin right here quite close to the contour line .
I was surprised as I studied photos , um the eyebrows uh at least for a uh men .
Uh I'm less sure in the case of women , but it probably similar uh the eyebrows , one of faces and profile can come very close to almost touching that line , which I suppose makes sense .
They're not so far away .
From each other on the face .
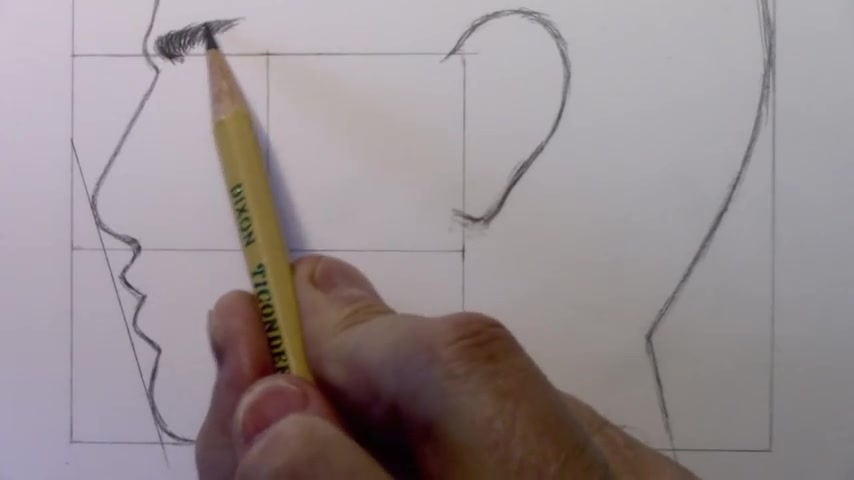
But anyway , I'm , I'm going up here and , uh , if you wanna start to get into the details of , you know , the hairs of the , um eyebrows , what direction do they go in ?
They're sort of following the underside of the uh , brow , uh , as you see here and then they begin to curve back this way .
I'm going awfully dark here , guys .
You might wanna go a little lighter if you're unsure of uh of the final result you're gonna get .
And then as you come along here , I noticed in various photographs again that the eyebrows by the time you're getting over here , they are beginning to um fade .
I mean , they're coming to an end .
They're not nearly as dark as what you see over here , especially in profile , the mass of darkness is way over there to the left .
But again , lots of different eyebrows out there makes , makes it sound like I'm describing them as a they're right outside my window .
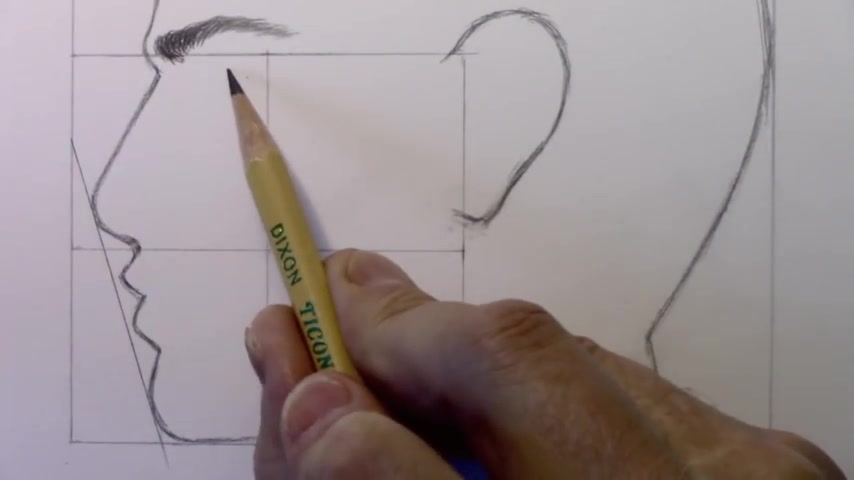
There's lots of different eyebrows out there .
What are we gonna do ?
Uh That was weird curly .
That was just weird .
Now , we got this line in place here and this is gonna be super helpful for placing the eye .
Now , you gotta get a gap here between the bridge of the nose uh and the eye and uh happily , it very nearly touches that upper line and it becomes a kind of a triangular shape , the eye when seen from the side almost looks like a , um , I would think of it as a candy corn kind of shape if you , if you're familiar with that , uh , candy crosses this vertical line and then over here is gonna be the sort of curvature of the eyeball itself .

And if your character is looking straight ahead , uh , then naturally the , um , iris is greatly compressed and you , you really are seeing it from the side to , to make it round , uh fully rounded from this point of view would be a mistake , I think unless he's , you know , doing a side eye glance or something , I'm gonna draw another line up here that's for the uh fold of the upper island .
And that kind of gets us to the end of drawing the eye .
You might want to do some indication of the lower part of the eyelid .
Depends on the , the person I think or the way that uh if you're studying a photograph , it depends on the lighting , maybe the degree to which you see this .
But normally with sunlight coming from above , I'm gonna erase this uh guideline stuff here .
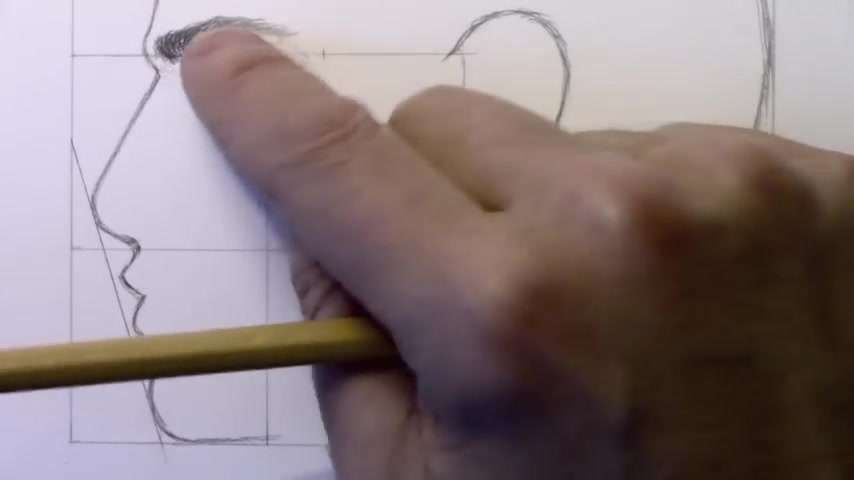
Uh and do just a tiny bit of shading here to get to show you how this would be finished off with uh an indication of lighting , the light coming from above and where the shadows would fall .
I think I should hold off though .
I'm doing the , the , the complete shading stuff until later .
And so why did you suddenly on the word go into the Brooklyn guy voice be consistent Rowley .
If you're gonna go , Brooklyn go all the way .
Anyway , so that's my drawing of the eye as seen from the side .
And uh now we can move on to uh drawing the nose down here as you get back to this contour line of the nose that we put in place earlier .
Um You want to get the nostril pretty close to the front there .
As again , as I looked at different uh photographs , I was struck by how close the nostril appears to the contour line itself .
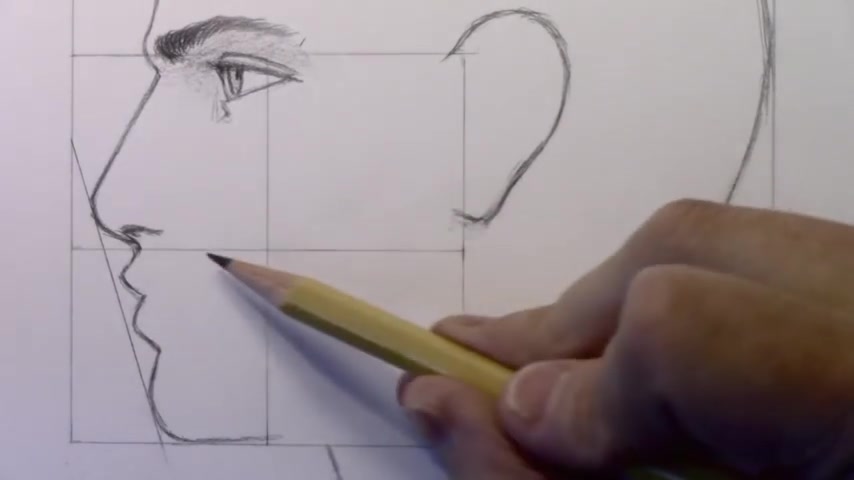
And then coming back here , there is this sort of line that uh defines the edge of the nose or of the nostril , the nostril nostri region really come on .
And uh I would say be very careful about outlining this too heavily .
If you start going up here and drawing , you know , really harsh lines right there , you're gonna kind of call too much attention uh to the nose .
I think there will be a lot of shading uh later on .
But let's move on down to the mouth .
I find personally that this is one of the hardest things uh to draw .
I'm gonna begin by drawing a very light uh indication of uh again , another sort of like triangle like uh area .
I sometimes find that before going all the way into drawing the uh opening of the mouth that it's helpful to get something in place , uh , to guide me toward it by way of these , uh , lines of the lips .
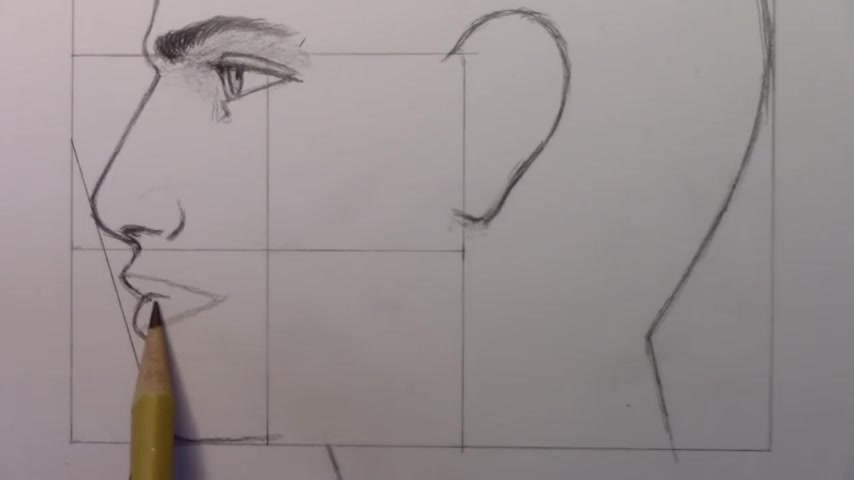
And then , like I said , I , this character is gonna have the lips slightly parted .
So I'm gonna , we'll see maybe just a hint uh of the teeth here as we go back and , uh , finish this off .
Be careful about making the line of the mouth go too far .
Think , uh , you know , pay attention to this line here in the distance there .
You might be tempted to make this very long line that keeps going back farther and farther .
But that is not what we see , uh , in real life .
And I can't resist putting a little shading here for the upper lip .
It just doesn't look finished .
I can't bear to see it looking unfinished and there you go with that , not as painful as I thought it would be .
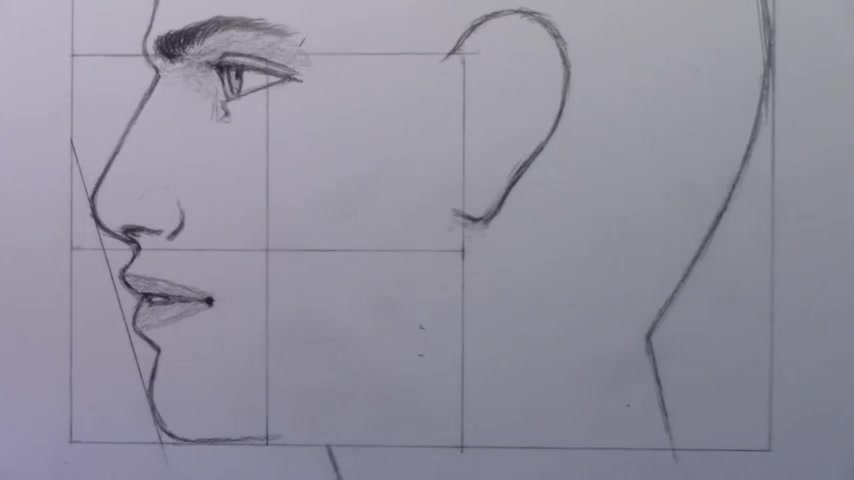
Um , you don't want to get too carried away with , uh , delineating this lower lip I saw in a lot of photographs , uh , of guys that you could barely even see , um where the lower lip ends compared to the like shading that comes beneath it .
So , uh I would say , you know , exercise extreme caution in terms of putting too dark of a line around , uh , the lower left , you can kind of get away without , um adding too much shading in there at all .
And that believe it or not is getting us near the end of the key uh facial features .
And uh what I'm gonna do right now and just using a little time lapse because it would be boring for you to watch is I'm gonna erase these uh guidelines uh so that we can get into adding some shading .
Ok .
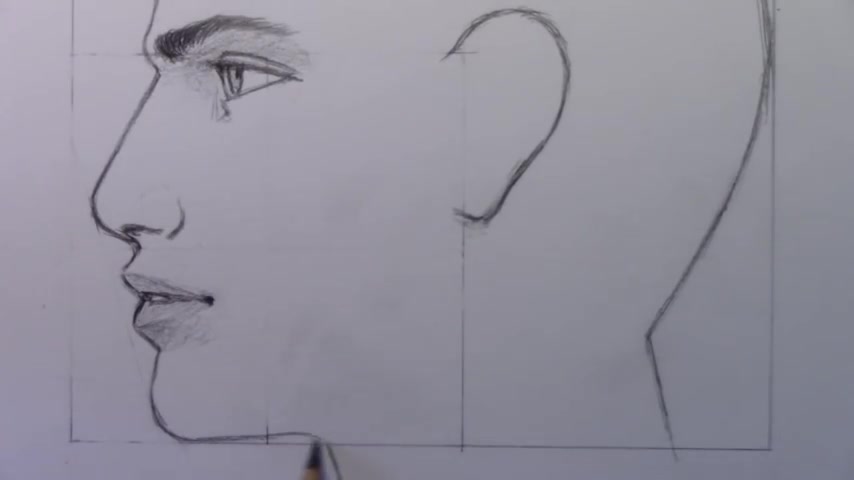
So having got rid of those uh guidelines , I'm gonna carry on with drawing the underside of the jaw here .
Now , this is just the contour line .
Um what happens uh especially with the male uh jaw is that there is a very um subtle line that occurs .
I wouldn't even call it a line really .
It's uh basically revealed mainly by way of light and shadow .
But you get this angle heading up and then uh beginning to change direction as it nears uh the , the area where the ear is gonna be and then it kind of comes along like this .
Now , you know , people , uh again , there's gonna be varying degrees of how sharply defined this is just on , on various people's faces .
Uh And I imagine with uh with a bit of weight gain , uh even you would find that this line is not so clearly defined .
Um But I'm gonna go ahead and uh get into the shading .
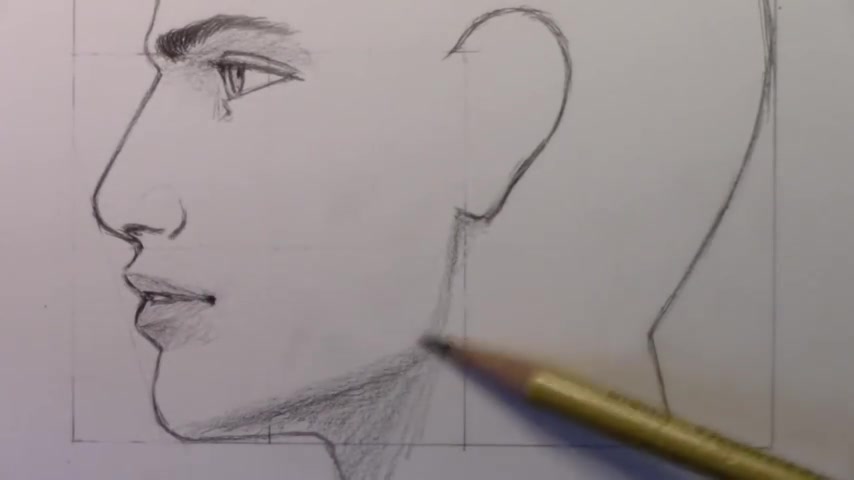
I find that um uh shading is crucial in terms of helping us understand the , the uh shapes the , the structure of what we've drawn here , especially here uh on the underside of the uh jaw so you can see how I'm kind of darkening in this area without turning it into a , uh , a real line .
Uh , the way you can do up here with like the fold of the upper island and so forth , there's gonna be some shading bank here behind the ear in most , uh , lighting situations I should say .
And then let's come over here to , uh , start adding shading to the uh , bottom of the nose .
You can see me holding my pencil low to the paper .
I'm trying to get an even kind of shading here .
I find that , you know , exposing more of the tip of the lead to the paper allows me to get uh that kind of smooth shading that I'm looking for .
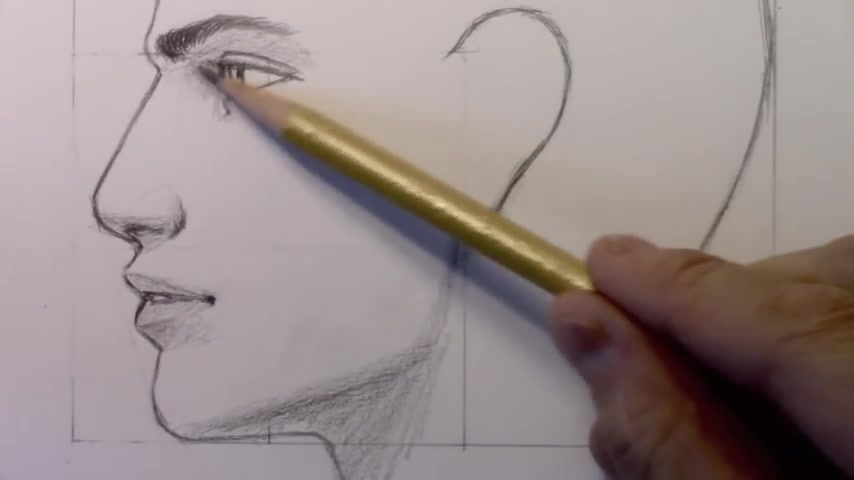
And uh darkening in right here , the underside of this uh area of the nostril can get darkened in quite a bit .
But as you go up , that's where I would uh uh bid you to exercise caution .
Uh as I said before , going too dark in there can uh just calls too much attention to the nose doesn't look realistic .
Most people , you know , there is and we understand there's a structure there , but we don't see lines , we don't see sharply drawn lines in that area , adding a little shading here uh at the bridge of the nose .
This tends to be this whole area where the eyes are , tends to be a place where light cannot reach in .
So uh shadow forms .
The brilliant physicist Mark rely when light cannot reach shadow forms , you see , you learn , it's so educational , educational this channel .
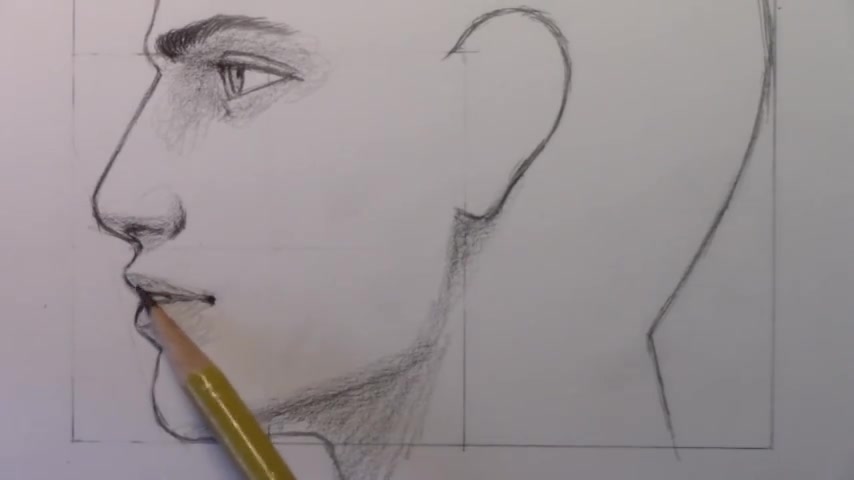
And as I said , I'm not gonna get too much into drawing the details of the ears .
I've uh in terms of teaching it in this video because we do have uh I have another uh video that uh teaches the the interior of the ear in a step by step way .
Uh And as I said , I'm linking to that in the uh description of this video , but I'm gonna go ahead and all in time lapse , I'll go ahead and finish up drawing the ear .
All right .
Well , I think there's one last thing that I want to cover in this video and that is sort of the hair , uh the line of the hair as it goes from the side burns up across the uh the temples and towards the uh top of the head .
Uh So let's refocus the camera and uh I'll go ahead and do it at least a little bit of the hair real time .
Ok .
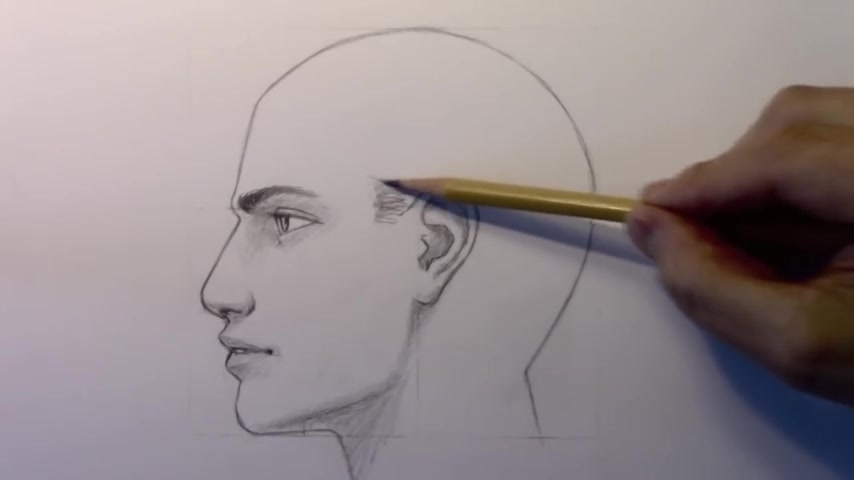
So oftentimes when I'm drawing the uh the hair , uh this whole area near uh the sideburns and the , and the shape of it as it goes up across the temples , um is it can be sort of a tricky thing in terms of understanding .
Um First of all , the shape , it seems to come forward uh at an angle for most people and then goes straight up again before reaching this , uh , the sort of hairline where the , the widow's peak would be if he has one .
but yeah , this seems fairly consistent certainly in men .
But I think to some degree also in women , uh , this way that the hair , uh , comes down towards an area where the sideburns would be and has this sort of secondary shape that heads up and , and the hair is sort of , uh , you know , growing off of the forehead in this kind of a direction here .
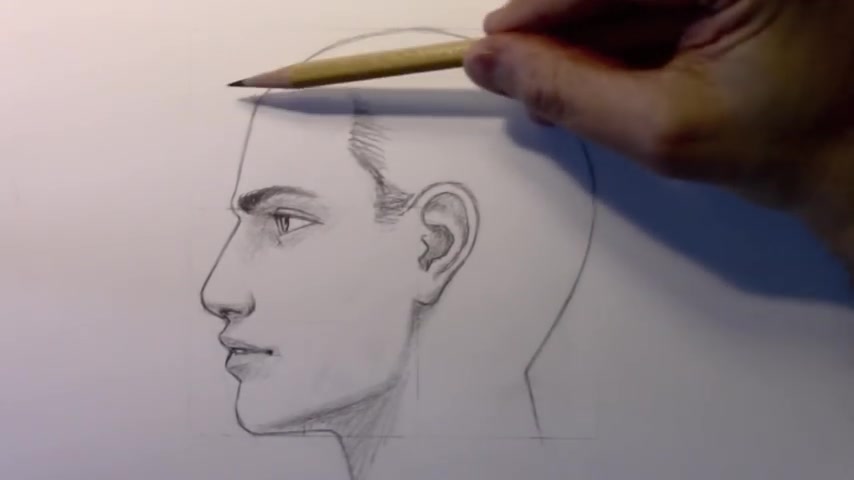
Uh And , uh , like I said , I'm not gonna devote too much uh uh uh of this video to uh drawing a particular hairstyle .
But I , I thought I could just maybe just show you how I would proceed to draw one type of hairstyle .
Let's go ahead , go ahead and erase , uh across here .
Um So that you can see my idea of , uh , of how to add a hairstyle and how it sort of , you know , if you think about this being the , uh the , the actual head itself , if you were to shave off all the hair , then of course , most of the hair has to be coming up above that uh , initial line and I'm gonna refine this a lot in , uh , in time lapse .
But one thing I think you will wanna uh learn about is where the hairline uh ends over here back behind the ear .
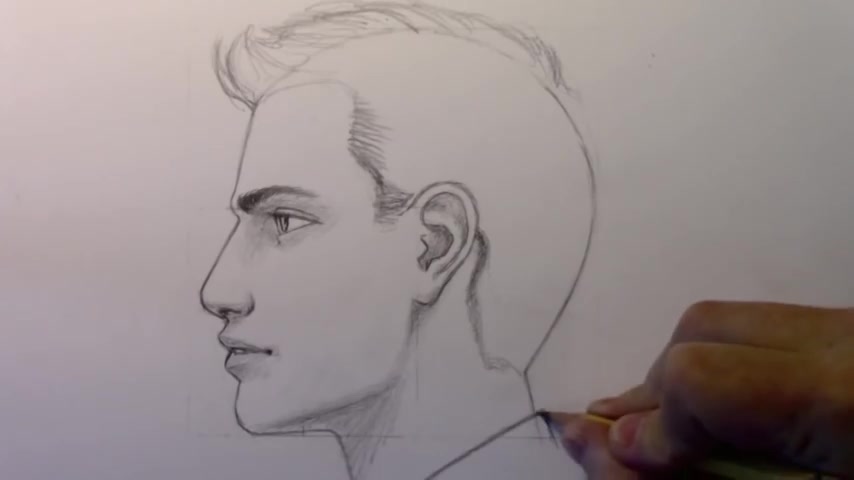
Uh It can be quite high up this uh sort of area of exposed flesh behind uh the ear .
It can , the , the hair does not begin growing until quite high up there .
And so you can see um again , if you study photos and , and people have their hair cut super short , uh you can see that exposed area of skin going quite high up there , maybe higher than you might imagine .
And then , yeah , we come down here and uh just to finish this drawing off , I'm gonna draw a diagonal uh sort of indication of the collar and that kind of brings me to the end of the main stuff that I wanted to cover uh in a uh real time way in this video .
I'm gonna go ahead and finish this off maybe uh just give you one last little uh indication of how I would uh finish off .
Let's say this person's got somewhat longer hair coming off from the top of the head and then they get their hair cut very short , right ?
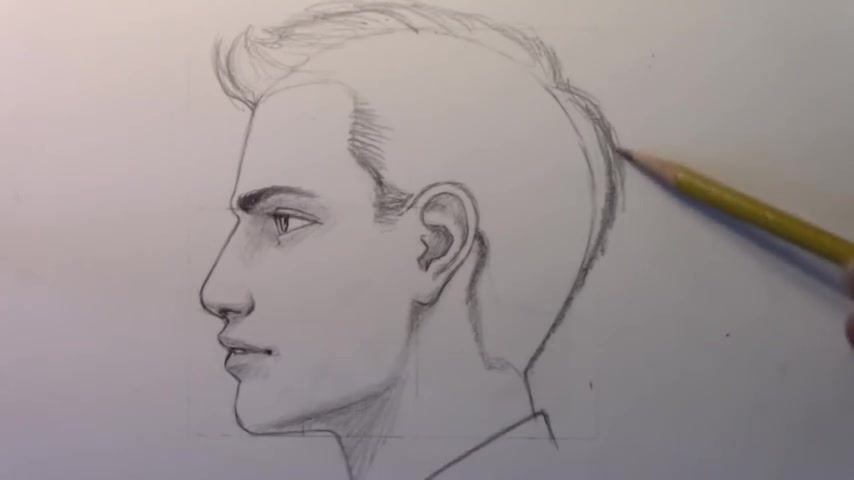
Then you understand that down here , you really are following that initial line before the hair begins to uh go its own way .
And if it's my hair , it really goes its own way because it's super , super messy .
Let's go ahead then and finish this off in time lapse and I'll be back with a few final words .
All right .
Well , there's my video on drawing the face in profile .
I hope you found it useful Uh Let me know if you'd like me to do one for the female face in a similar point of view .
I'd be happy to do a follow up video like that one .
But for now , let me say thank you to anyone who has supported me by getting any of my books like Ghost , my graphic novel series , The Realism Challenge .
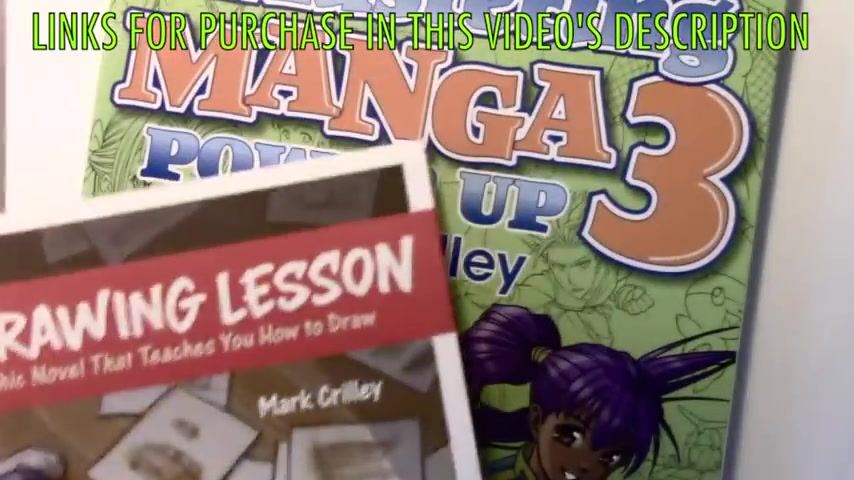
We've got the drawing lesson , a graphic novel that teaches you how to draw .
And of course the mastering manga series , I am always super , super appreciative of anyone who helps me out by getting one of those books .
But let's go ahead and lay down this pencil .
I wanna thank you all for watching this video .
I really hope you enjoyed it and I'll be back with another one real soon .
Are you looking for a way to reach a wider audience and get more views on your videos?
Our innovative video to text transcribing service can help you do just that.
We provide accurate transcriptions of your videos along with visual content that will help you attract new viewers and keep them engaged. Plus, our data analytics and ad campaign tools can help you monetize your content and maximize your revenue.
Let's partner up and take your video content to the next level!
Contact us today to learn more.