https://www.youtube.com/watch?v=_476poeMFqM
BEST DIY how to Easily Transfer a Photos onto glass, with Mod Podge

Welcome back to my channel friends .
This is Sonia here from growing Craft and today we are going to do image transfer video .
But before we start this video , please make sure that you have subscribed to my channel and hit the bell icon so that you all know whenever I do post any new video or any updates about my channel or my blog .
So let's get started with today's tutorial and it's about image transfer on glass plate .
So I have this really , really nice small cute little glass plates on which I wanted to do the image transfer technique and of course called my , if I'm going to use my mod podge , it's a matte finish mod podge .
And um you also get uh in photo transfer mediums also in the market , but I had tried this one and it worked really well for me for my previous video which is only live on my channel .
Then of course , I have a flat paint brush and a caesar .
And the most important thing the pictures .
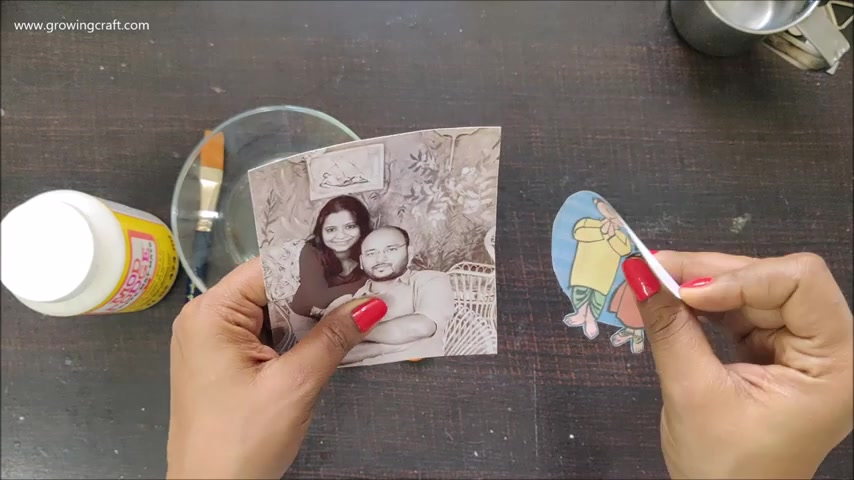
Now here what I have is two pictures and both are the print out for my printer .
This is on a very thin paper , the normal paper which we get at any local store .
And this one is also um uh matte finish paper .
But this one is thick , this is approximately 200 gsm .
So there is a huge difference in the quality of the paper .
This is thin , the regular paper , this is thick , the really good quality of matte finish paper .
And I had just done the work at my home only .
And uh yes , today I'm going to use this .
So I have already done a video tutorial on image transfer , which is already live on my channel .
But then that was on uh wood piece .
Now this is the wood uh plate which I had and I did this image transfer .
This was my first image transfer and I absolutely absolutely loved it .
I was super happy with the outcome and it's been months now , but it still looks the same .
There's no change in the quality or anything .
And this is one of my very favorite pieces from my living room , Decor .
OK .
Now , moving back to my uh today's tutorial .
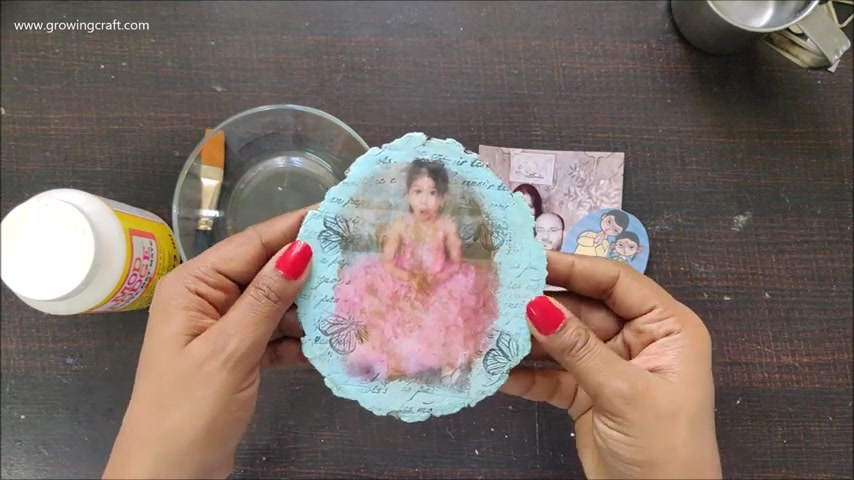
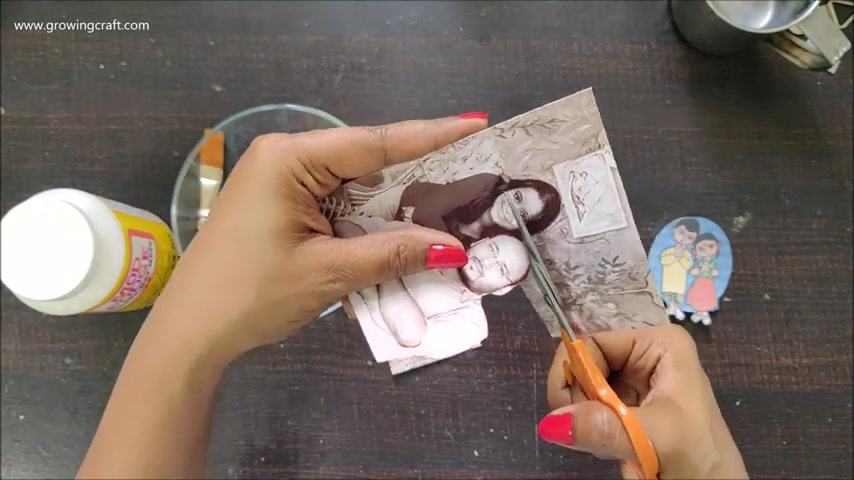
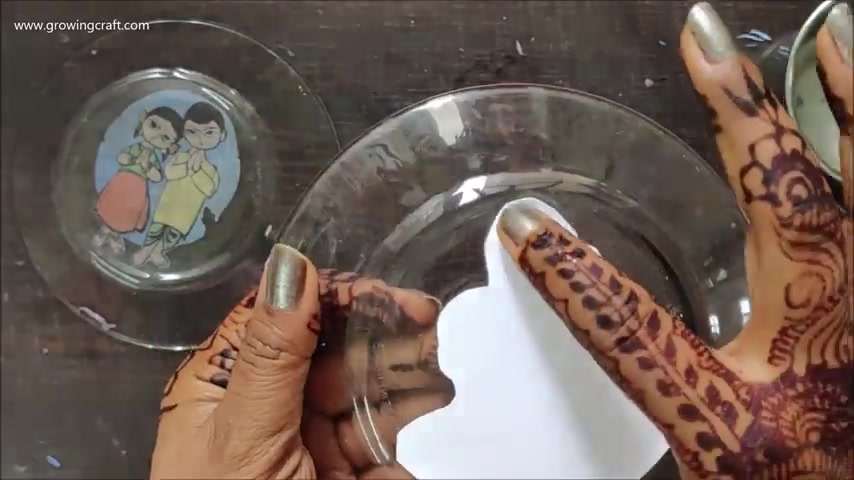
So I have already in the fussy cutting for this one .
Now I need to trim down this photograph also .
So maybe I will again do the cutting one , but I'm not really sure .
So I'm just doing the fuzzy cutting work .
It's completely up to you whether you want to do the fuzzy cutting work or you want to have the image as it is , you can even use any kind of photograph , you can use your magazine cutouts or you can use your newspaper cuttings .
Also , I'm not a magazine person .
That's the reason I don't even have a single magazine cut magazine at my place .
So getting a cutting was a task for me .
Although I'm trying , if I get it cut out , then definitely I am going to do an image transfer with the magazine cutting .
Also , if you want me to do that , please do comment below so that I get some more enthusiasm for uh doing a tutorial with magazine cut out .
But yes , of course , I do need your support and I do need your love for that .
Ok .
So I'm almost done with my , what's getting work ?
And this looks quite good .
Now , I'll just mark it with my palms only so that I know that where I have to cut the bottom line and then I can trim it off .

So here I'm almost done , I'm just going to cut along this line .
So if you want , you can always cover up the edges and everything with the colors .
But uh I'm not sure what I'm going to do later on with these .
Ok .
If I did not tell you , then I have these two really nice , cute little glass plates and I wanted to turn them into a Decor piece .
Now , we need to start with our stick work and for that , we need to have our pictures .
Very uh very important thing .
Very , very important thing .
Before starting your work , you always need to make sure that your bases are really clean .
They don't have any dirt or anything so that when your images stick , they stick properly , there are no dust , no bubbles and uh nothing is dirty out there .
Everything is clean and tidy .
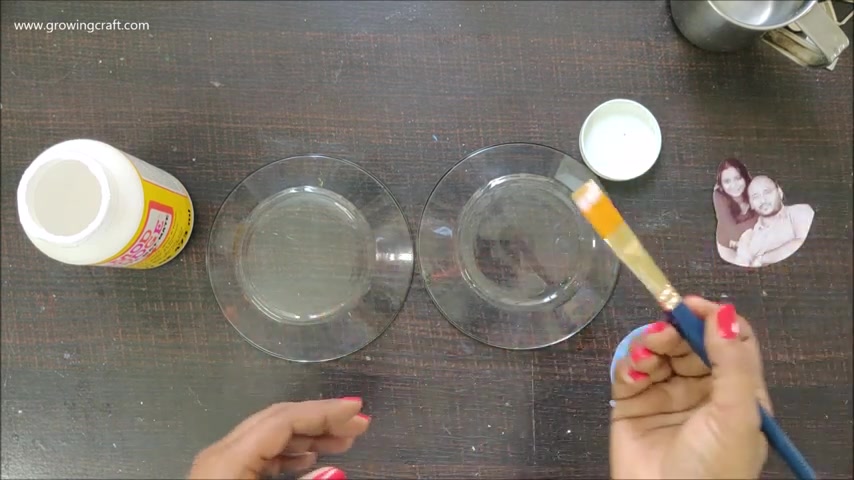
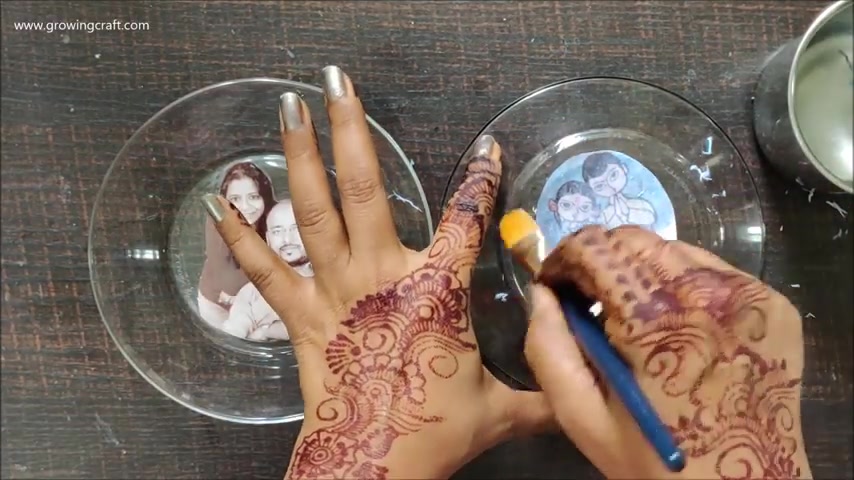
So here I'm taking a flat brush or the reason why I love flat brush because it always gives better coverage when it comes to spreading your colors or your mate pod or your additive .
And that's the reason I absolutely love it .
Now , instead of applying my additive on my base , I just thought of applying my editor , my mod podge on this print out directly .
Now , I think I will have to be a little quick because once I apply this , then I really need to stick it quickly on my glass .
And this is actually a better option than applying too much of glue on your base and then no cleaning that .
So I just felt I should do it this way .
I bring my plate to the center .
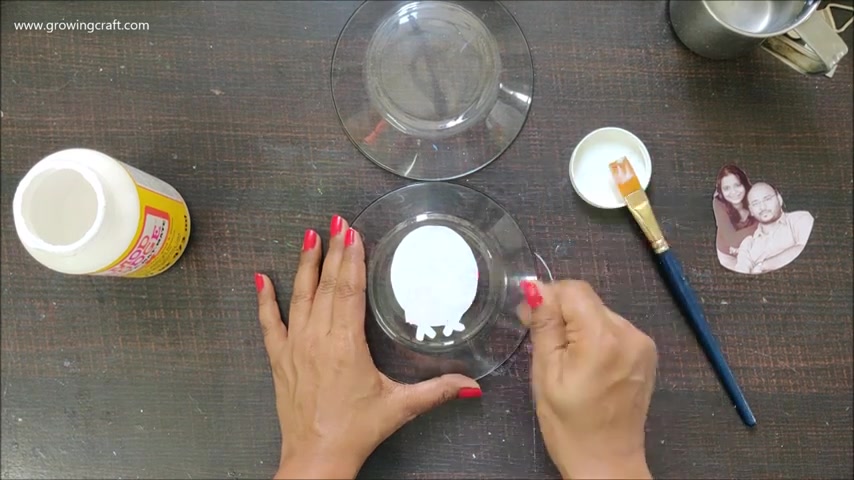
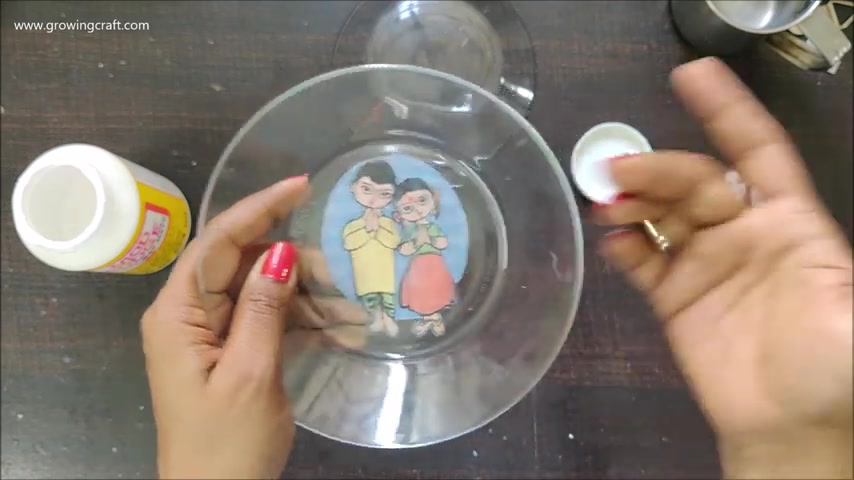
I will take it here and now I'm going to give it all really good Chris .
So this is quite good .
I can see some bubbles .
So I'm just trying to remove all the bubbles from here and can you really see it has stick so well and this is looking so so so nice .
But I just need to make sure that I press it really , really well , of course , you need to be also very careful because we don't want to ruin our paper .
So you can't just keep on rubbing that .
You have to be a little gentle , but you also need to make sure that it sticks well because that's the most important thing .
And from the front side , you can always see that if you're wrong paper has any bubbles or anything in here .
I can see that it's completely clean .
This is looking so neat and so nice .
Now , let's head on to our second plate .
I'll keep this aside .
00 , I just realized .
No .
Ok .
I thought it was coming out .
But no , it , it is not , was because of the cur area because the split has some cough .
So because of that , I felt that might be just coming out .
Ok .
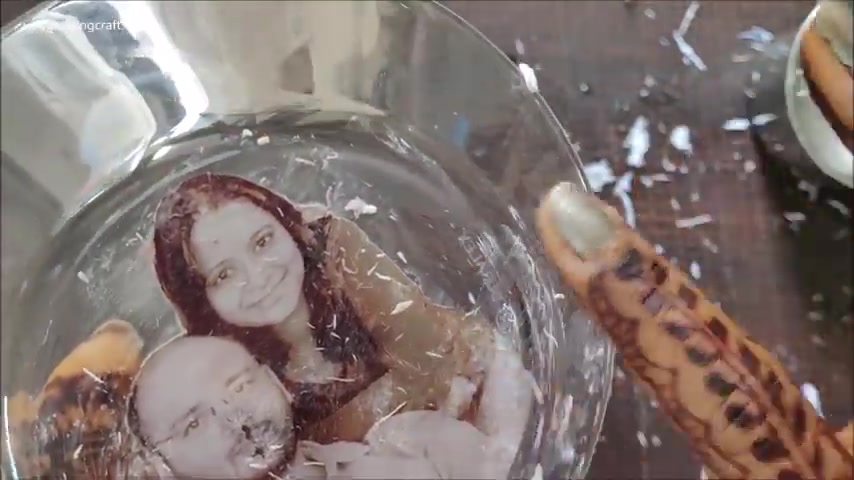
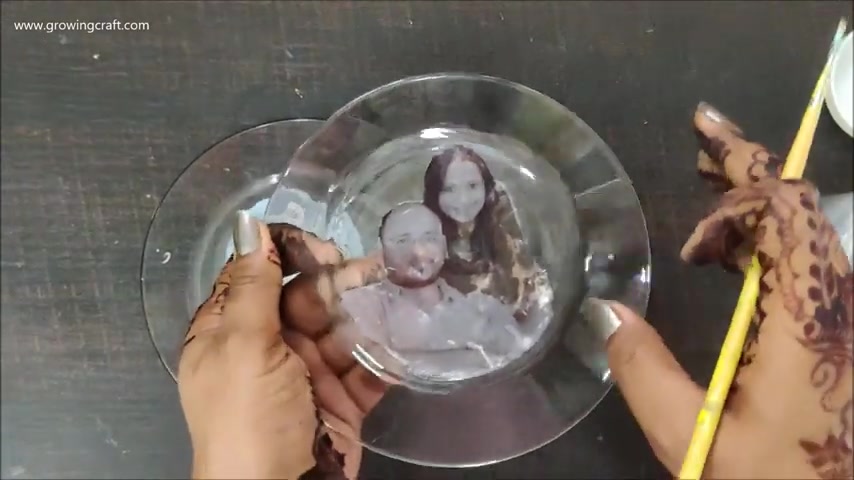
Now it's time for the second one and this is my picture , which I'm going to have .
I'm really excited because I've done of image transfer with the , um , thick photographs or thick , sorry , thin prints .
But I've never done image transfer with the , uh , thick pictures and I hope this turns out good because I hate wasting my supplies when things don't work out .
And yes , now it's done and now I'm going to stick it , but I just need to make sure that it comes almost to this round and here it is coming good .
I'm happy with the way it has sticked .
Now as this is a very thick paper , there are very , less chances of having bubbles here .
But like I said , as it's a thick paper , I also need to make sure that it sticks really well from the edges , the border so that , uh , there are very , very , uh , less chances of not sticking it too well .
So I'm just trying to put some extra food and sticking these by the time I'll put my paint brush in a mug of water so that it does not dries out .
And here you can see that it is looking almost visible .
Now , the picture is very clear , but still I need to let it dry .

Now , I'm going to let it dry for one complete day and then I'll be back on day two to show you that how it has turned out .
And then the main process of removing the backing of these papers will start .
So today is actually the sixth day .
Uh , yeah , I am shooting this video after sixth day when I had uh done the sticking work of these uh design paper , the print or on these glass plates .
I know it's uh really good and long time , but somehow I couldn't do it .
And I said , well , maybe it's a good thing that my , uh the seven everything is like my has dried out really , really , really well .
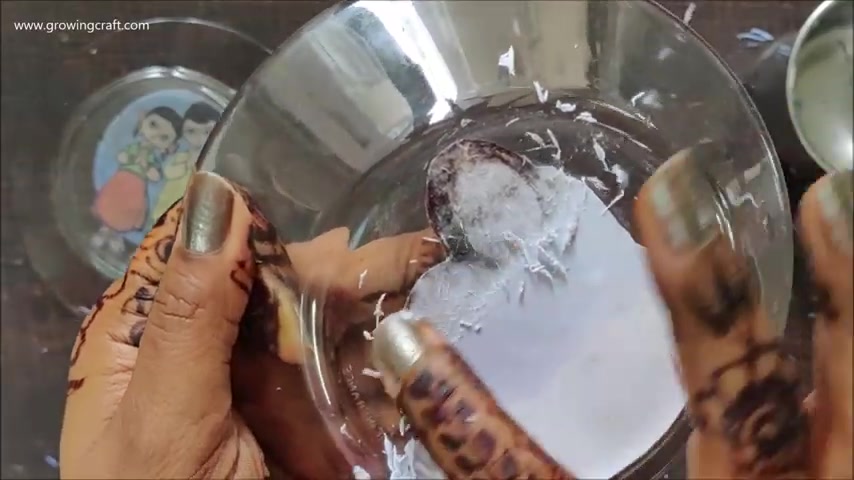
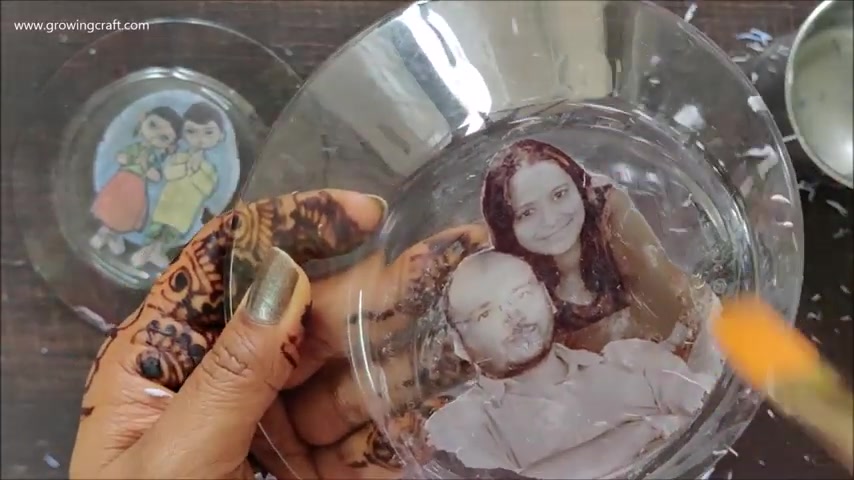
And now it's time to do our final thing that's removing the backing of these design papers .
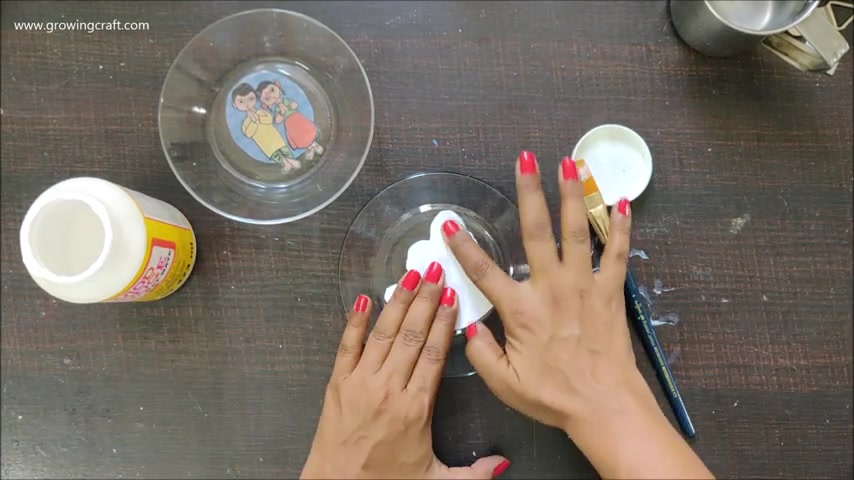
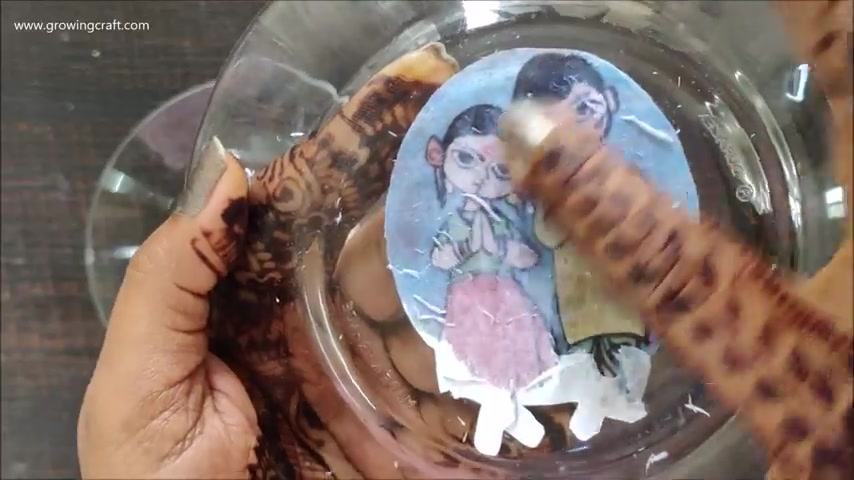
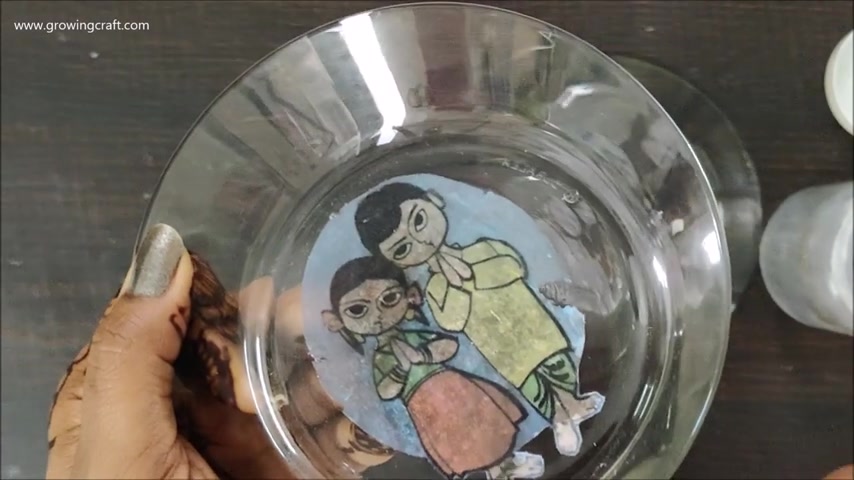
So first I'm going to start with this one and here I have my mug of plain clean tap water .
And now I'm going to start this with dipping my finger , applying it on one area and then just scrubbing it .
I just need to make sure that I very gently remove the paper from my glass plate .
And like I say , you with the papers , you need to be really , really , really careful .
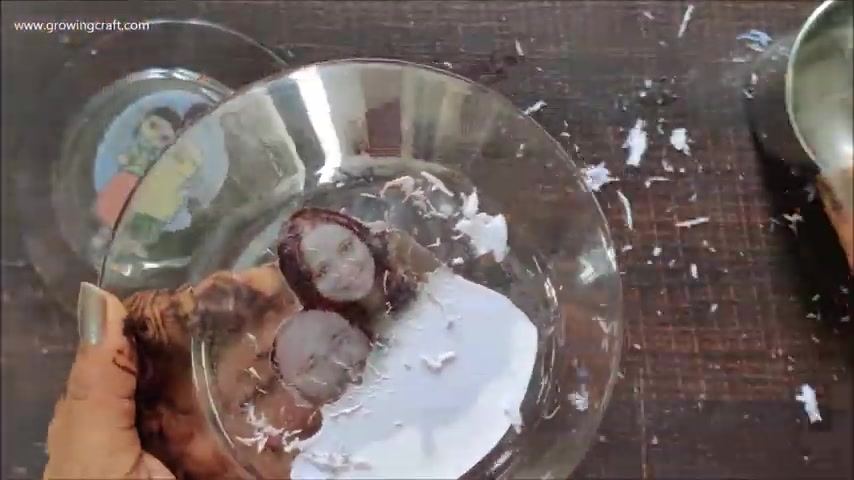
So if you can see it's actually paper is coming out layers wise and this is looking really , really good to me and I can see all the backing colors coming out really well , I just need to make sure that I don't uh pour too much of water .
I can't have excessive water here for sure .
And I'm just removing this .
Let me show you it how it's looking from the front .
This is how it is looking .
I will take up of that brush just to remove all the excessive papers from the side so that I can clean it really , really well , I'll get some more water and I'll try to remove the huge and bring it closer .
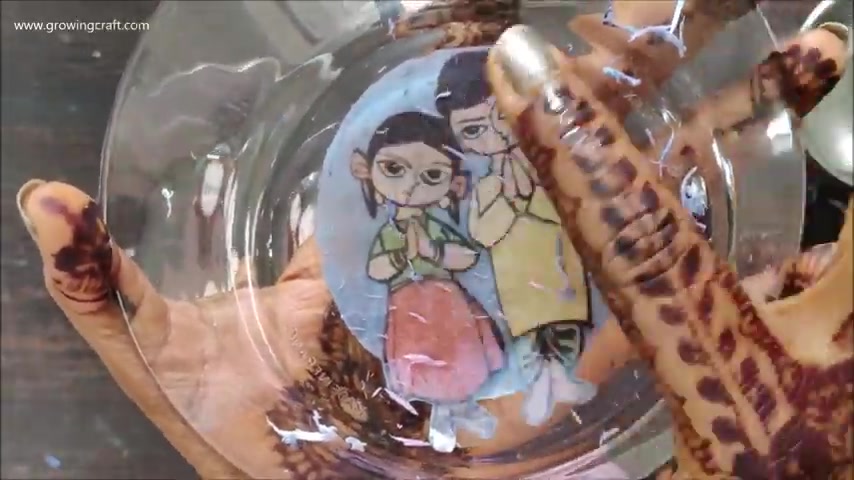
Can you really see the cure the layer has come out ?
Well , now here also it has come out .
Well , now in this area , my paper has actually come out really well .
So I don't need to rub it too much because my image transfer is done .
Can you see the layer of paper is coming out ?
It's only the print which is there on my glass plate .
So now here also here it's the color is visible here .
It's still you can see the white la .
So we have to remove that .
So image transfer like what I know is actually uh doing a design work on your base , your glass base and then removing the excess of paper from that .
So if you can see in this area , there is hardly any white space here , I can see some white uh paper lining .
So I'm just trying to remove that .
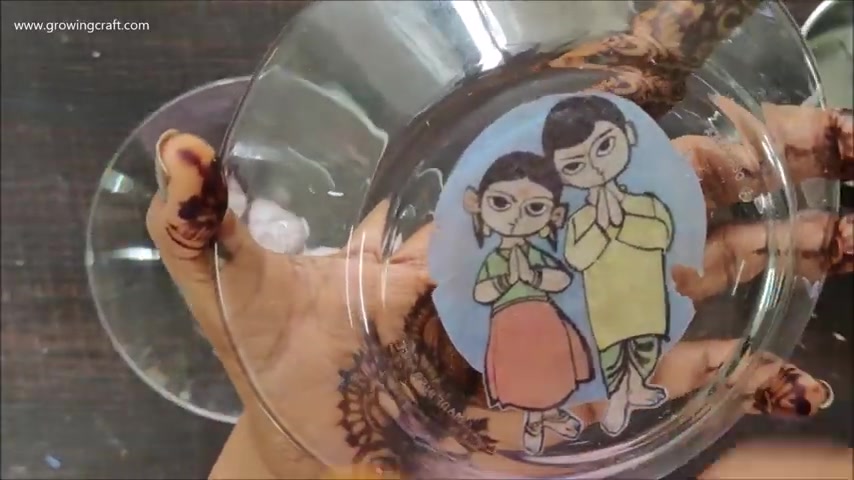
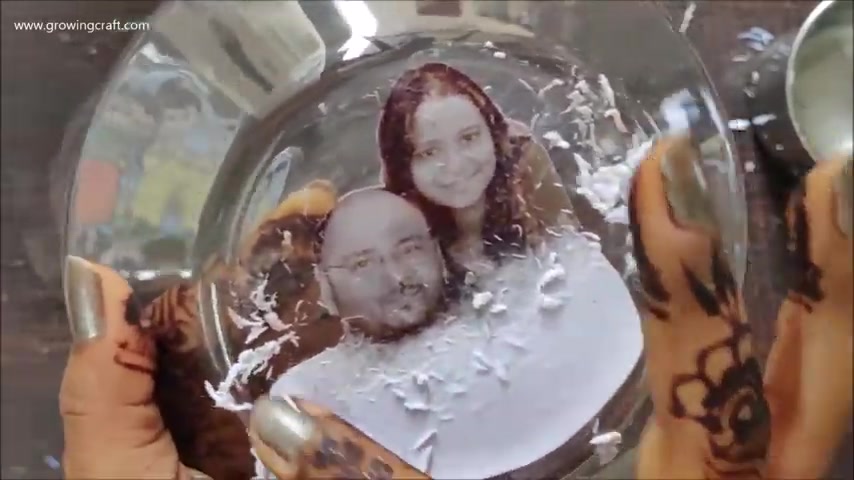
And um once you actually see this , you will realize that uh it's looking very , very , very clean and clear , the image is really clear .
So you won't even make out that if this is the front or the back side of the design because if you see it from here and from here , it's looking almost almost same , I won't say exact .
But yeah , it's almost almost same .
So as you can see that this was a thin paper , the regular or a TGSM print paper , which we have at our home or offices for regular printing .
So this was really , really , really easy for me to do .
And this has actually come out really well .
Can you really see when we started , we just had the plain paper and now we have this complete design here .
Now , once I feel that I'm done with this , I will stop rubbing on that area .
And if anywhere I see that extra paper is there , I'm just going to rub it a little more so that my design comes out .
Well , now with the flat and very clean brush , I'm just removing all the extra people which I had dropped off .
I'm just going to take it out now .
So here my paper actually it was a wrinkle when I had done that .
Otherwise it would have come out really , really well .
OK .
And this is done and I'm quite , quite , quite happy with this except this area cause where I my pa paper actually got wrinkled and that's why it has come out .
So maybe I should have taken care of that .
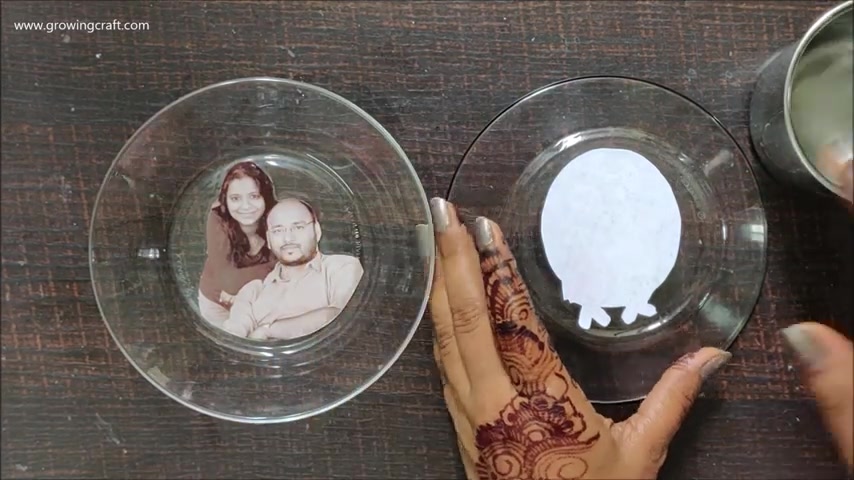
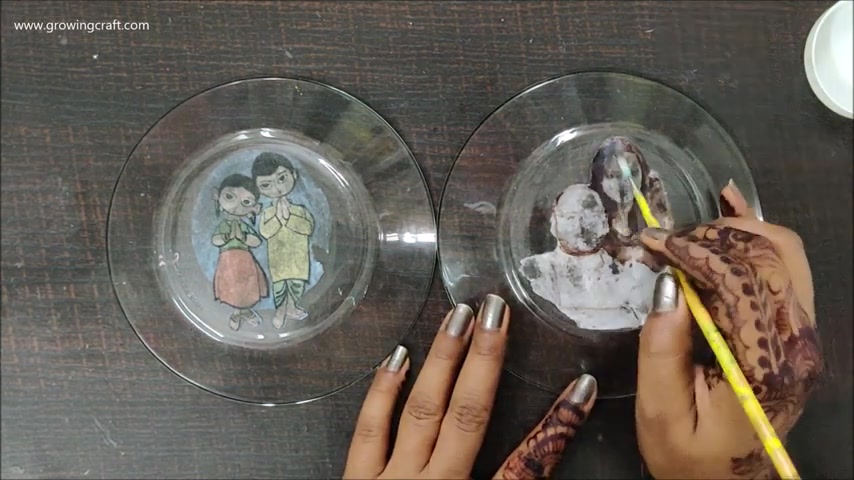
And this is done and wow , the weight is looking in the front , the weight looks at the back and this is the perfect , perfect , perfect image transfer .
And I'm so happy that I have done that and it's looking amazing .
Now , I'm just going to keep it upside down again so that it dries out .
Well , and now it's time to move on to my second plate .
Now , for this one , I'd use the thicker paper , the uh good or 200 of sorry 1 61 60 GSM paper .
And I really need to see that how it comes out .
Well , so I'll start with the upper portion , I'll start with one area at a time so that it's easy for me to remove the paper and I'll just keep on rubbing this area .
And yes , as you can see that my paper has started soaking some water .
It's coming out really well .
So with this , it is definitely going to take a little more time .
And with this , you need to be really careful because usually when we are rubbing it , we tend to forget that in one area , we really don't have to rub too much .
It has to be equally done on all the areas .

And just because it's a thick paper , we try to rub it , rub it , rub it and then we really forget that we have to rub it on all the areas , not on one particular area .
And I can see my picture .
Yes , I can see a bit of my picture and yes .
Yes .
Yes .
Can you see this ?
Can you , can you see this ?
This is looking great .
Now I'll start pouring my water on the bottom areas and I'll just make sure that I remove my paper plies from here .
So this is really cool .
Like I have used my prints or photograph prints here .
You guys can actually have uh some magazine cutouts also .
Definitely you can try with that .
Can you really see my hairs on maybe , maybe .
Can you guys see my black hairs in this ?
Yeah , it does come out really well , now I'll just rub it in this area also .
And again , this area So now if you can see this area actually has a very , very thin lay still , it has a very thin layer which I'm going to remove very , very gently .
And now you can see the more um paper layers , I'm removing more .
My picture is clear .
So here I am rubbing this in the bottom areas too .
Now , this is really , really fun and I absolutely love , love , love this technique .
So the first thing which I did was on an um wood , wood slice , wooden block and which actually turned out really well .

My daughter loves that piece and we have it in our living room and these are one of the very good and perfect decors for your home or even for your table decor or for your rooms or your office tables .
And these are just the perfect gift what you can have .
I'm just trying to remove the layers of paper as much as I can .
Yeah .
So like I was saying , you can use magazine cutouts , you can use some nice prints .
You can use some uh uh nice picture book photographs or you can use your own photographs in different ways and they actually turn out really , really well .
Now , here I can see that I can remove a very thin layer , one more very thin layer of my from my image .
And I'm just trying to do that and this is looking really , really great .
Can you see the front and back it's looking amazing .
Amazing .
Now the sticker paper is taking a little more time , but this is totally worth it .
Totally worth it .
Maybe I think there must be some kind of brush which makes this rubbing easier cause this is a small plate .
Uh like not very small but yes , so .
00000 I just , I just joined this part .
Maybe I'll try to fix it up because it is still in the la .
Ok .
So it was still in the lace so I could bring it back .
But it just , I realized that while talking , I did not realize that I was rubbing too much .
So I need to be really careful .
Now , this happens when I enjoy , I actually start to enjoy talking with you all like making these live videos and I do some mistakes .
I do some silly mistakes .
We'll see .
Can you hear the traffic sound ?
It's late afternoon and there is so much of traffic on the road and my home is just on the roadside and trust me , I have to hear so much of traffic every day , every time , each morning in the evening .
So here I can see my legs coming out and I'm just , just , just removing it really well , I'm trying to be a little gentle this time so that I don't ruin it .

Like the one which I did on my face .
I don't want to be that for sure .
Oh , wow .
This has also come out really , really well .
Now , the best thing uh to know that if your image has come out really well or not , you can very clearly , very , very , very clearly see your image .
And uh that's when you know that yes , your image transfer is done really well .
And once you start seeing the people coming out with the of the color , the color of your prints , that means it is just the top layer of the colors which is coming out and you need to be a little , a little careful .
That's it just be a little careful .
Don't keep talking like me , like me while doing your work .
And yeah , I'm almost done .
I'm just drumming it up .
So OK , one more thing that I realized is that I don't uh rub your papers and words .
So if you can just see that this whole thing is coming out , can you really see this ?
So just make sure that you rub everything from into , out , from in to out so that it comes out easily and really well .
So I'm just trying to push it off from end to out into out .
And yes , I'm going to use that now with my paint brush .
I'm going to do it in the same way .
So here again , I could actually oh pick out the blinds and maybe I'll just remove this one .
Maybe I'll just do some rubbing from her so that it looks much more natural and good .
Yeah .
So this is good .
This is quite good now and now I need to let it dry completely so that I can see my project later on .
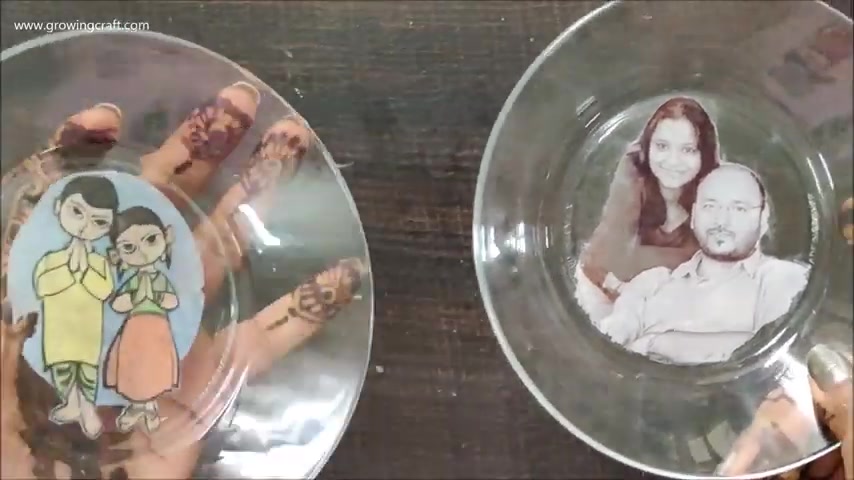
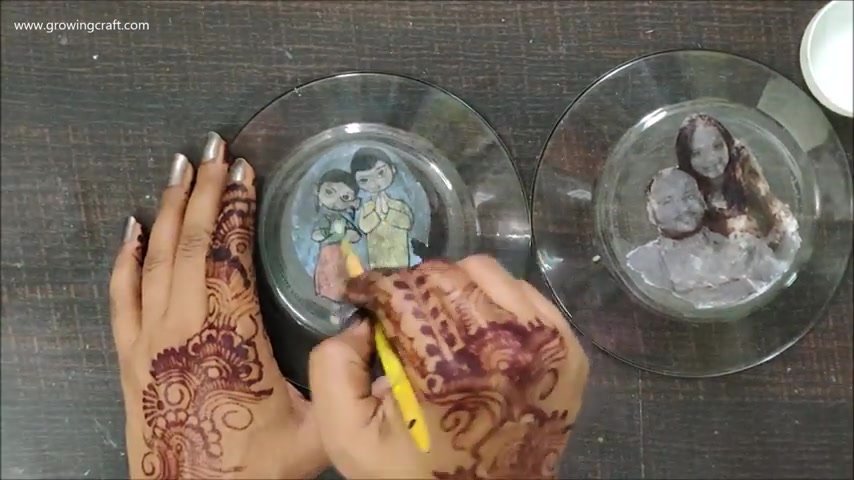
So here you can see that how my image transfer has come out .
I'll just show you both the transfers and wait once again , let me just clear out everything and then we'll start again .
OK .
So this is how my plate is looking and I can see some uh Mobo patches here and there , which I need to clean .
So with the uh tissue paper , I'm just cleaning that .
Uh you can also use your wet wipes , baby wipes .
They work wonderful in cleaning your glass plates and I'm just cleaning it so that it becomes easy for me .

Uh , later on , I don't , I will not have to rub too much on my plate and I just want to show it to you from the front , how this one stand out and it's looking absolutely absolutely gorgeous .
And now it's time for the second plate .
Interesting .
So this one actually didn't have much of stains on the side .
This one looks really , really clear .
Now , I need to dry this really well before starting my , so I'm going to use my heat gun and I'll just give it a quick try so that I can apply my varnish on it .
Ok ?
I just realized that once I have dried it out , my image transfer looks much , much , much more clear .
It's looking very , very , very clear .
Now , as compared to my uh previous look and this has dried out really well .
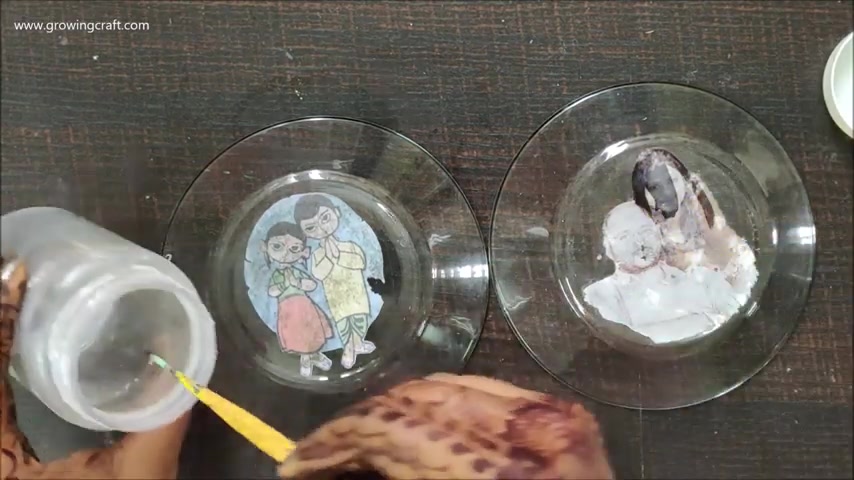
And now I have my varnish and I'm going to have it .
And my previous project first , I had done um , my mod podge and then I did my uh varnish work , but here I'm just a little more keen on um , having my varnish first .
So now this is dried out well , and now I'm going to have my varnish and uh like I always do , I am listing out all the supplies down in the description box .
So you just make sure that you do check the link in case if you have missed out anything in this tutorial .
And now this applying of varnish is something which I'm doing with my uh round brush .
I'll bring it closer so that I can show you and it's very neatly .
I'm just trying to do a good coat of varnish on this plate .
But please do make sure that your plate has dried out completely before starting this work so that you don't smudge it .
You don't ruin your project at all .
Can you really see the , how is it looking ?

It's looking fab and my hands are like , can you really see the designs are , can you see , can you see this is so trans and so nice and I'm loving it .
I'm so glad that I tried this and there's a huge difference when you do your image transfer on your glass objects or your wooden objects .
So , but this is really fun .
This is really , really fun .
Just imagine doing the same thing with your um glass vase or uh maybe with your pots , your clear pots , they are going to look really , really amazing .
And the best part of what I'm thinking is that wherever I have forgot to apply or I couldn't apply my varnish , that those areas are really visible .
So I can just have my stroke of brush there and it's good to go .
And now I'm going to let this dry .
Now .
It's time for the second one .
Let's see how the second one turns out .
I need to let it dry completely .
Now , for the 2nd 10 , it's the same once you apply the varnish , of course , it is a coating .
So it is going to get absorbed on that paper , what we have used .
And I love this varnish .
I absolutely , absolutely love this varnish because this is , first of all , it is water based .
Secondly , this has such a nice coverage .
So when we say it's nice coverage , that means it spreads really easily and really well , which is very , very important .
Usually with the pu varnish eye , I feel that's my , again , my personal opinion , I feel that they are really , really thick .
So working with that is a little difficult thing for me and of course the quality or the finishing what you get with this even after the years of dring is completely , completely different .
Ok .
So now this is also done .
Now let me do my heat gun technique again so that it dries out fast .
So this is how it looks after half dry .
But I think this is good to go for me to apply my second coat of varnish and my plate is really , really hot now , so I need to be a little , little careful here .
I'm just trying to make sure that I complete the cover plate , my cover , sorry , not the cover complete plate , but my complete design and so that it stays longer .
Me .
So here I just a coat of varnish .
Maybe you can try it with the mod podge also or your dick fudge .
Um Also that might also work was on my uh wooden palette , a wooden plateau .
I had done it with the and it has actually worked out really well .
But of course , later on I had uh surely added a coat of varnish to it , which is I feel is really , really important when you are working with some different areas and different material .
It makes sure that your everything stays really well well , well to your project .
OK .
I did love .
So here I'm done with my two coat of varnish and this looks really good to me now .
So yes , with this , my video tutorial is done and I hope , I hope , I hope you all enjoyed this tutorial .
Uh Yes , I'm listening all the supplies down in the description box .
Please do check that if you have any queries , please do comment below .

I'll be more than happy to help you all and thank you so , so so much for watching .
Yes , I'm sharing all the pictures at the end so that you can see how it looks after completely drying and I hope you all will try this out .
And if you are trying it out , please do let me know in the comment section below .
I will be so happy to know your experience and maybe it is a learning for me also .
Thank you so so so much for watching .
Take care .
Bye bye .
Mhm .
See I see and
Are you looking for a way to reach a wider audience and get more views on your videos?
Our innovative video to text transcribing service can help you do just that.
We provide accurate transcriptions of your videos along with visual content that will help you attract new viewers and keep them engaged. Plus, our data analytics and ad campaign tools can help you monetize your content and maximize your revenue.
Let's partner up and take your video content to the next level!
Contact us today to learn more.