https://www.youtube.com/watch?v=Cumm9ID99wk
🤯 22 HIGH END DIY ROOM DECOR IDEAS TO TRY (Amazing Dupes You HAVE To See!)
Hey there , Familia .
Welcome back to Mi Casa .
My name is Yami .
I am your Latina next door .
And if you love high End Home Decor and Diy s on a budget you're in for a treat today because I am gonna be sharing my best of the best Diy s of this year with you right now .
Now , I have compiled a list of 22 different projects .
Some of them were my favorites and some of them were your favorites .
Some are super simple to make and some require a little bit more expertise .
Either way I know you're gonna love each and every everyone .
Now , let's see if your favorite made the list .
So I'm going to start off with probably one of my most favorite Diy pieces of all time because I really think that this was really imaginative .
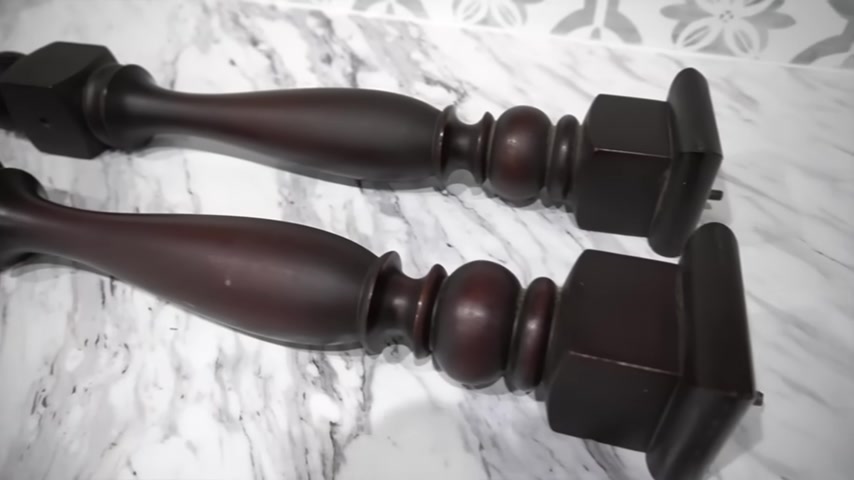
Now , I got these glass pieces at a local thrift store for only 50 cents a piece and I loved their shape , but I didn't know exactly what to do with them until , until I saw a post on Facebook marketplace where this woman was selling these to kind of end of stage away newel posts .
It's what it looks like .
She was selling these for only $10 a piece and I love their shape .
So I quickly had to grab them .
Now , I only ended up using the very end piece of this .
I actually made a three Diy s out of these by using different parts of it .
I wanted them at varying heights .
So I determined where I wanted them cut , indicated by the red line and I asked my sweet husband to cut them for me .
He also cut off these screws that were at the bottom ends of these .
Now , I had these hoops and my stash already and I had them in different sizes .
Now , since these were cut in different sections , I needed to use two different sizes , but it's ok because they worked perfectly .
I use some wood glue to attach them on .
I wanted to make sure there was a good bond .
So I placed some paint on top of each ring while it dried .
Next .
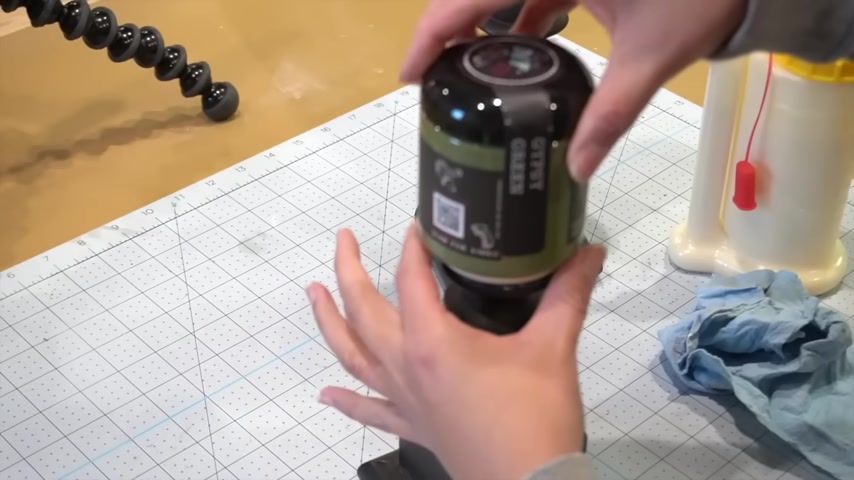
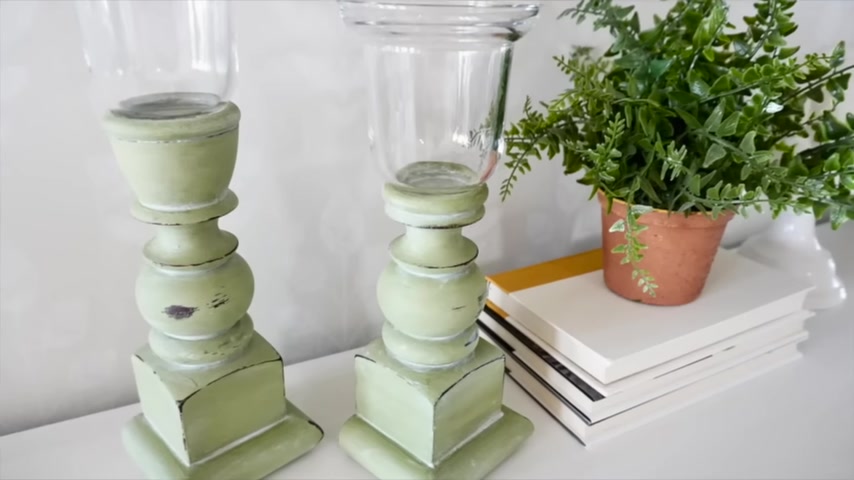
Once the paint was dry , I cleaned everything off and began to paint .
I use Diy paint's Gypsy green for these .
Now , these paints will be available on my website again to purchase as soon as we are settled into our new location .
Now , once I was done pinning them , I wanted to make sure that they dried completely .
Once they were dry , I took my clear diy wax and began to apply it over the entire surface .
Now , if any of these instructions are a little bit too fast .
I just know that I'll have the full and extended editorial in my description box for each of these Diy s that I am sharing today .
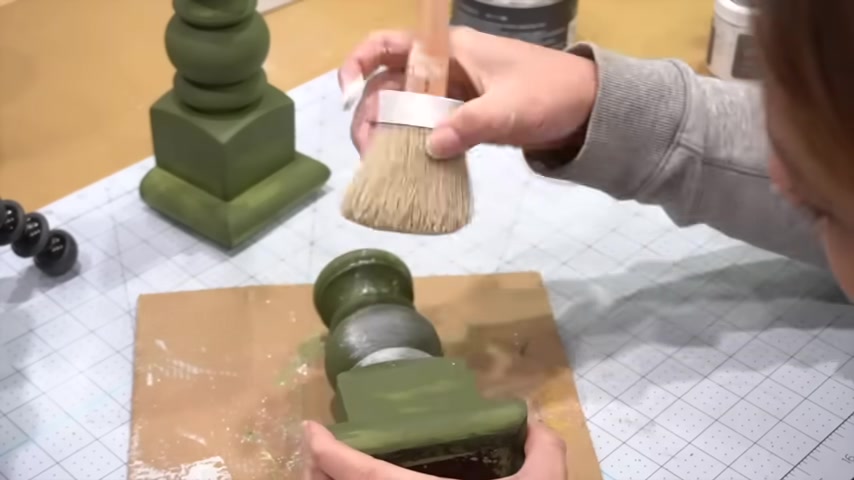
Now , while this was still tacky , I decided to add a sum of the decrepit dust , which is a nice aging dust that you can Sprinkle all over the surface and wipe off or on and depending how heavy you want it , but you want to get in all the nooks and crevices and then you want to remove some of it .
I was going for an aged look like I've had these for a while .
So that's why I chose to go ahead and do this .
In addition to the depa dust , I also added white wax in all of those crevices just to make them stand out even more .
Once I was happy with how it looked , I took a damp cloth and they began to remove the excess .
I applied variations of pressure because I didn't want every single surface to look the same .
I also sometimes even went down all the way into the original color of these so that I can distress it even further and have parts of the original wood through .
Once I was done , I made sure that everything dried completely .
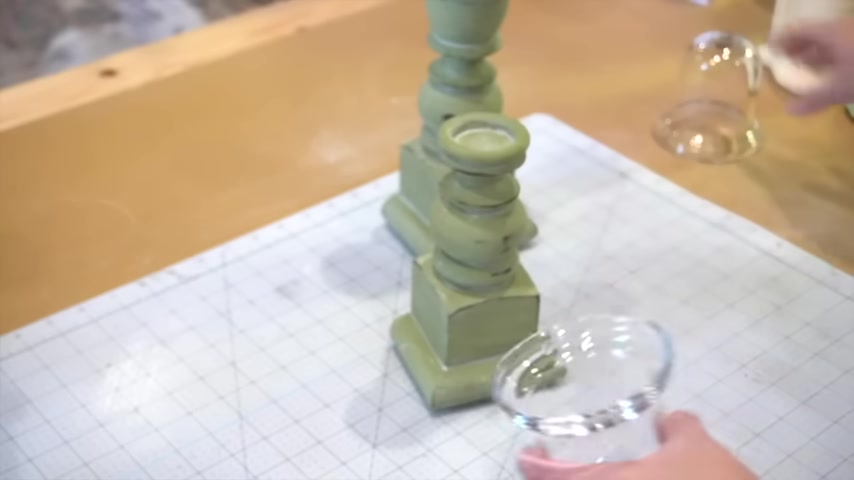
And remember these that I showed you in the beginning of the video .
Yeah , these are going to go right on top and I'm going to apply them with some E 6000 for a strong hold .
And in order to make sure that these were trying a level , I even took a small level and put it on the very top of it .
To ensure that I was putting these on properly .
Here is how these turned out .
Oh , this year was the year of Dupes and I especially enjoyed doing Serena and Lily Dupes .
This Marina table lamp at $598 was amazing .
But the price not so much .
So I had to find a way to recreate the same look myself for a whole lot less .
And this is what I did .
Now , I had this lamp that I had purchased earlier this year for only 8 99 .
Now , it was not the exact shape but it was close enough .
So I thought this was the perfect one to use for this project .
I came across this ribbon at Hobby Lobby in their floral section and it was the exact match as the rope that was on the original lamp for this project .
I picked up three of these at half off .
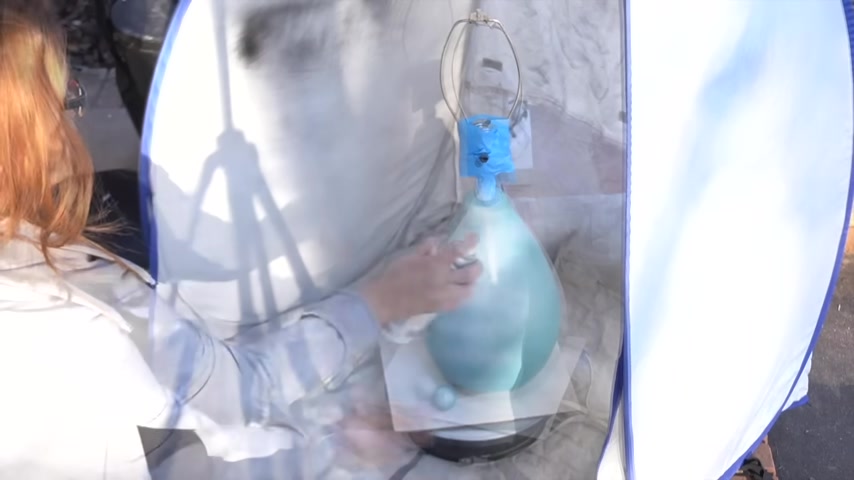
Now , the first thing I did was prime the base and this is not absolutely necessary , but this lamp was a blue color and I was going to be wrapping a rope all the way around it and I did not want any peaks or any kind of sneak of that blue color to poke through the rope .
So I made sure to apply a coat of primer so that if there was anything that kind of shown through , it would be less noticeable .
So once that primer was completely dry , I removed all of the tape .
And then I determined where I wanted to start the rope and I decided to start it on the back at the very bottom right next to the cord .
So that at least the gap between the rope areas that we're going to meet when they came back was to let out that piece of cord so that it didn't interfere with any of the rope .
Hope that was wrapping around .
I hope that made sense .
So once that was secured , I began to go all the way around with the hot glue and the rope .
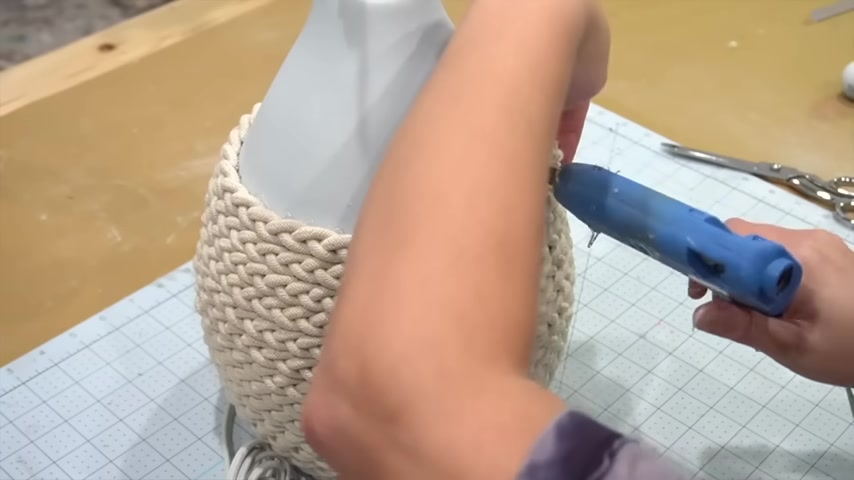
And then when I got back to the cord , I made it as tight as possible to start my next row and then I continued to glue on as I worked my way up .
Now , the process of doing this is very simple , but it is required to pay some attention to those details .
And I mean , by keeping the rope as tight as possible to the one below it .
So that at least the front facing side of your lamp is completely even .
And all the lines are nice and straight and parallel .
The only time you should see a rise in any of the rope is when you go to the back part of it and you have to go to the next row up .
Now , the most important part of the lamp is going to be the front .
So in order to keep no seams from being seen on the front , I made sure that when I needed to use a new spool of ribbon that I would cut down the seam on the exact same spot .
The other ones were started on the back of the lamp .
Even if I had a little bit of rope left over , I took the rope all the way to the top of the lamp .
And then once I got to the top , I hot glued the end piece and tucked it into the rest of the rope that was already coiled around the lamp .
That way you would not see that very last end piece call me O CD .
But it is this type of attention to detail that takes a piece of home Decor from Diy to high end looking .
I added a shade that I already had on hand and this is how that lamp turned out .

And whenever I create these dupes like this , I always love to share the side by side of the original piece with the price as well as mine with the cost that it took me to recreate it .
And I think we did a pretty good here .
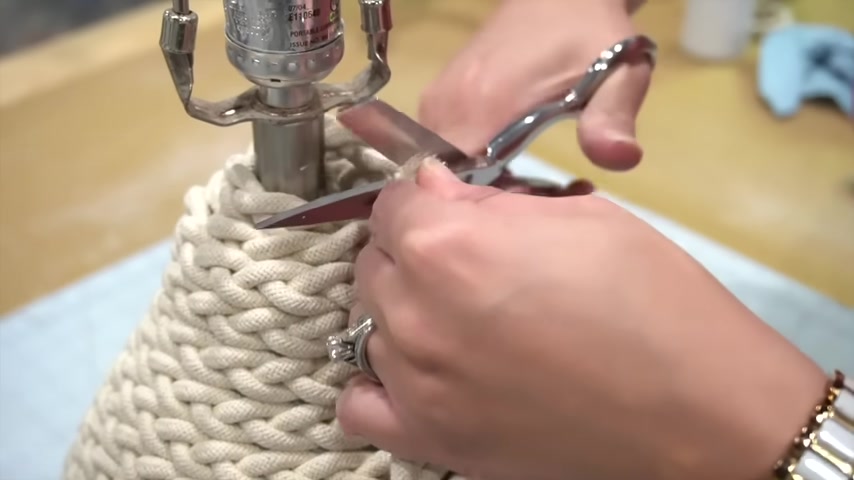
Oh , so we're back to these .
Remember that I told you I was making more than one Diy when I got these .
Yeah , this is the second one and this one's pretty cool too .
The first thing my sweet husband did was cut off this top and then holding it with some extra pieces of wood that we had on hand .
He sliced this right in the center for me .
He's got some mat skills with that saw , I had already had the measurements that I had in mind for the rest of the book and parts .
And so we took some scrap wood that we had on hand from previous projects and we ripped them down two sides .
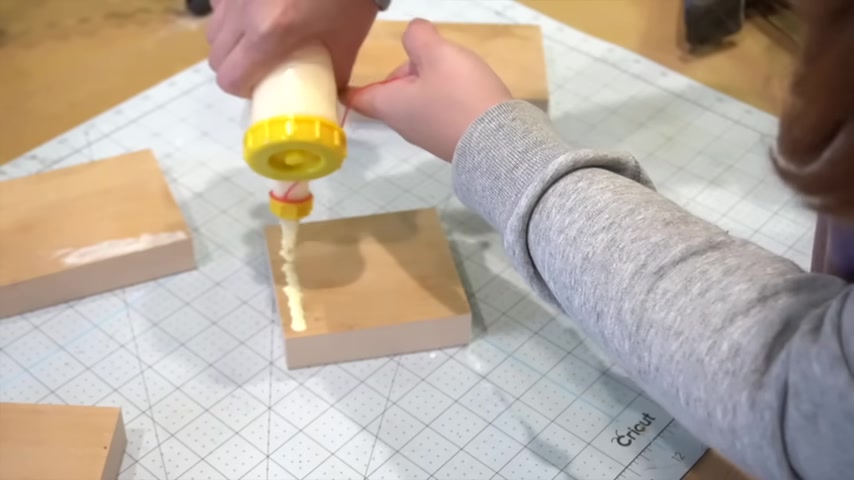
So once they were all cut down , I brought them back to my studio and I began to glue them together .
Now , in order to create a better bond and secure these further , you want to use a nail gun and attach the two pieces of wood together .
That way , there is less of a possibility for them coming apart in the future .
I used some clamps to hold these down while they dried .
When it was already , it was time to attach our beautiful pieces that my husband had split for me .
And I was so excited when I came up with this idea and he was able to help me execute it perfectly because this was just the right touch for these book ends .
And again , I used the clamps to hold these down while everything dried and while they were clamped down , I did go ahead and add some wood putty to fill in any gaps between the actual decorative piece and the book ends itself .
Once the clamps were removed , because everything was nice and glued together , I came in and began to remove the excess of all of that wood petty and any asada that might remain .
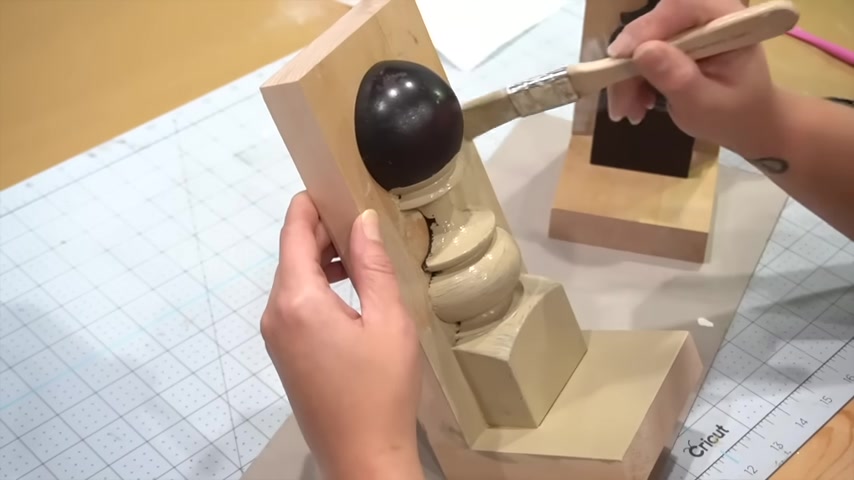
Now for this , I decided to go with a lighter color and I used sandy blonde in Diy paint and I covered absolutely everything with this one color .
Now , I did end up giving this two coats because the finial piece that I had used for the decorative portion of the book ends was darker and required two coats .
Once the paint was dry , I came in with my clear wax and began to apply it all over both bookends and then , and just like I did with my green candlesticks , I began to apply to crepe dust all over .
I added more white wax in all of the nooks and crevices .
And here is the difference between one that does not have any of the white decrepit dust or that white wax in all of the little highlighted areas as the one on the right does .
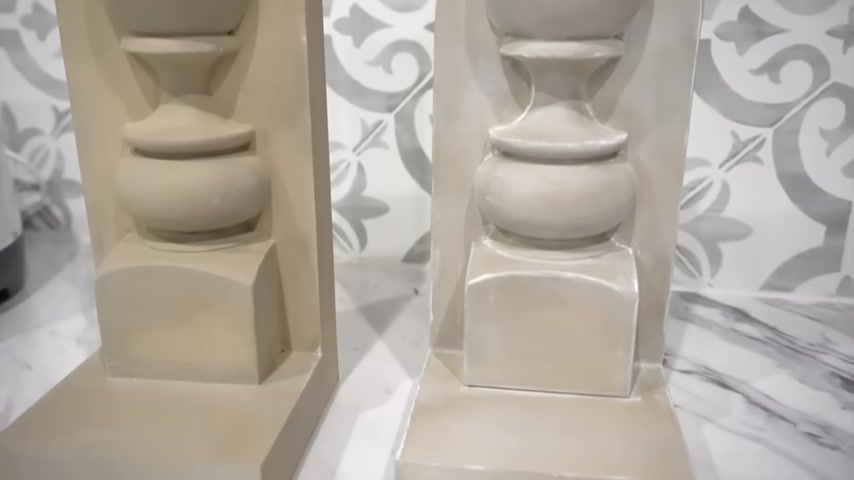
And you can see the effect that it gives the paint , it almost looks like some kind of ancient stone .
And so I continued to do this with the second one .
And once everything was dry here is how they turned out .
Now this one might look like a Christmas wreath .
But actually , I had originally shared this at the beginning of the year in January for a winter after Christmas piece of decor for your door for this .
I used two wire wreaths I had on hand .
One of them happened to fit right inside the other .
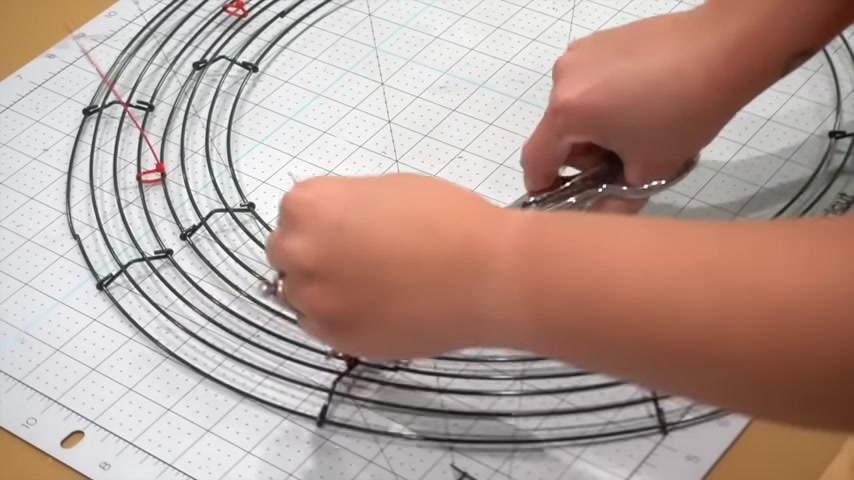
So I thought I'd join them together using very small zip ties .
One of them was just going to be too thin for this .
Look after the zip ties were secured , I cut off the excess pieces since this wreath was going to be white , I went ahead and spray painted it with some leftover spray paint that I had in my stash and I did both the front and the back of it for the next step .
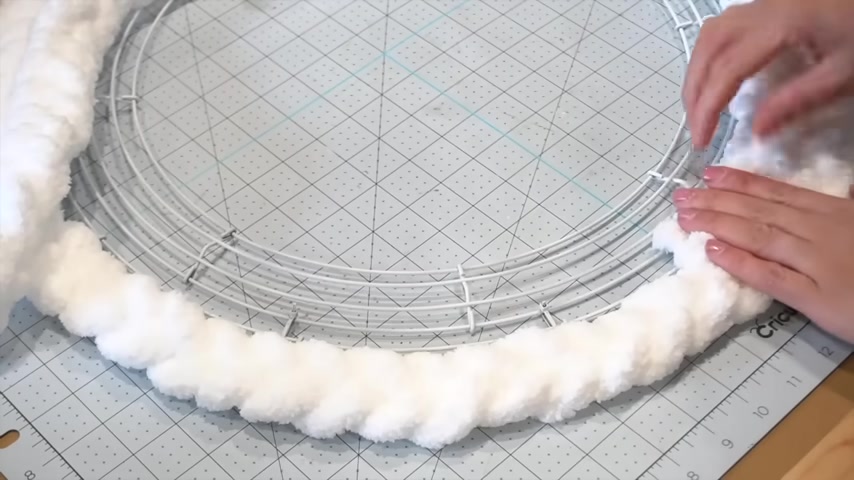
I got this thick yarn that I bought at Hobby Lobby and it was on sale for 30% off .
So it was just under $5 .
Next .
You're gonna take three pieces that you premeasured and you're going to tape them down and create a braid .
When you measure these out to cut them for length , you're gonna want to wrap them around your wreath and then wrap them over a little bit more onto itself about 1/4 of the way as indicated by the red arrows .

Now , the reason you have to add a little bit more is because when you braid them , you will actually shrink the length and it might not be as long as you need it .
If you don't add a little bit extra to those yarn pieces , once you're finished with your braid , you're going to want to lay on top of the wreath .
I started on the exterior of it and I worked my way inward .
Now I did one line at a time and I simply applied hot glue on small sections of the wire wreath and pressed the yarn down on top of it .
When I reach the other end , I make sure that the end pieces are nice and braided down .
Then I hot glue it as close as possible to the other end and cut off any excess and just tuck those end pieces downward and inward and hot glue the two pieces together because the yarn is so fluffy , you can barely even tell that that's the end piece .
Next , you're going to do the same thing with the next braid now because I wanted some different texture .
I decided to go in the opposite direction of the braid so that you have one going one way , one another way and then the final one on the inside will be going the same direction as the outer braid .
Once the second one is done , you can start from your third .
And as you can see , three braids around this form , wreath is the perfect size to cover the entire wire form .
And you'll only need one roll of this yarn if you wish to do something like this yourself with some yarn left over .
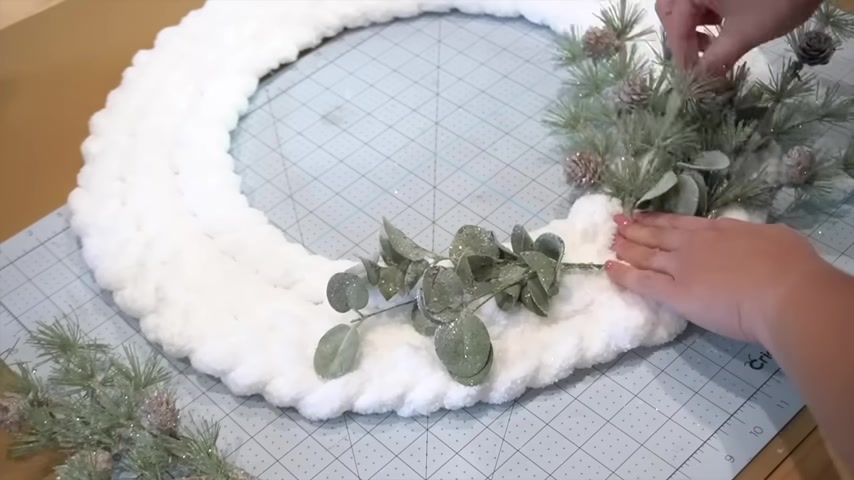
I knew I wanted some winter greenery .
And I picked up these pics at Hobby Lobby on a clearance from their after Christmas sale .
And I thought these would be perfect .

You can either buy something like this or you can actually use anything that you have remaining or from your Christmas stash .
And what I like to do before I glue anything down is kind of lay it out on my wreath to make sure that everything looks nice .
And then I start to hot glue it .
Now , here I have just a mixture of pine with pine cones as well as some really shiny eucalyptus leaves .
Now , I don't need that long pick stem .
So I just took some wire cutters and I cut them down and then using some hot glue .
I adhered them onto the wreath now because you are hot gluing it onto the yarn portion of the wreath .
It is good to add hot glue on several areas of the pick and it kind of helps keep them in place , not only on the wreath , but it also allows you to kind of form them the way you want them to show on your wreath .
So it'll give you a chance to open up the leaves , open up the branches and keep them in place .
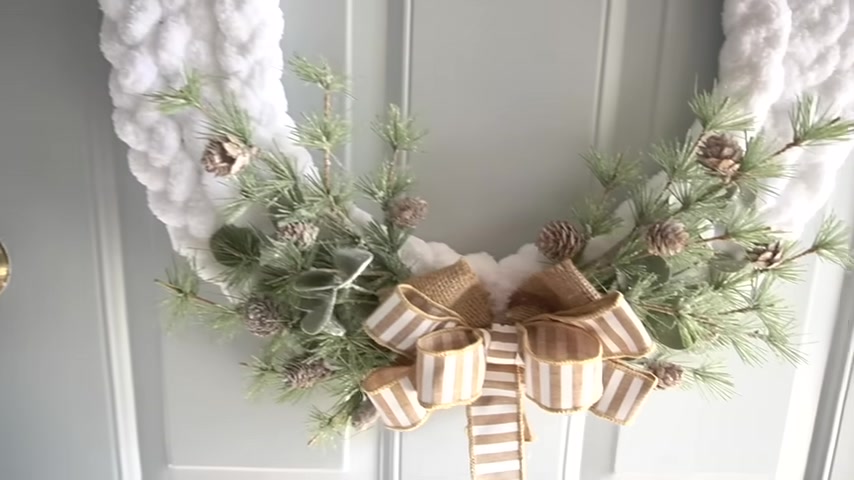
Next , I had some ribbon that I had left over from last spring and because of the neutral burlap and the white stripes I thought it would be perfect for this .
I didn't have enough to make a large bow .
So I do end up creating a burlap bow for the back of it to give it a little bit more presence on the wreath .
That way it doesn't look too small .
And then I simply attach the bows onto the wreath with some hot glue and because the wire is on the backside of the yarn , you don't need to add anything additional in order to hang it .
This is pretty much it for this one on my way on .
Yeah , let's go outside out on the beach with a Yeah , it is in Christmas time will be in this next one is another dupe and it is one from Grandon Road .
This time it's a leafy heart wreath that I did for the Valentine's Day season .
And of course , I know we can do better than $99 .
I love this idea because it was nice and green .
It wasn't like in your face .
Valentine's and you can have this displayed on your door or wherever else you want to for a lot longer than Valentine's Day .
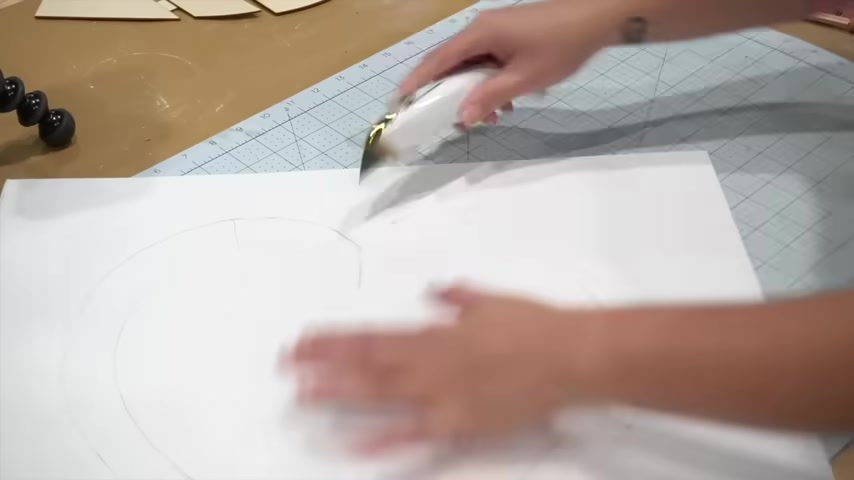
So , what I did was I got some foam board because for some reason I couldn't find any of those wires in the heart shape over a dollar tree .
So I just used what I had on hand .
I had this wooden cut out of a heart and all I did was take some dollar tree foam again that I already had and I traced it around to create my very own wreath form .
I needed the wreath form to be about an inch and a half to two inches wide .
So what you see me doing here is just measuring it out evenly all the way around so that I can create an outer layer of the heart so I can cut it out .
Next , I use a box cutter to cut out the form .
I get a lot of questions about this box cutter whenever I share it and I do have it linked below under the tools I frequently use .
Now , of course , this is completely unnecessary if you do have one of those wire wreaths in the shape of a heart .
The next thing I wanted to do was reinforce this wreath because after all , it was just foam .
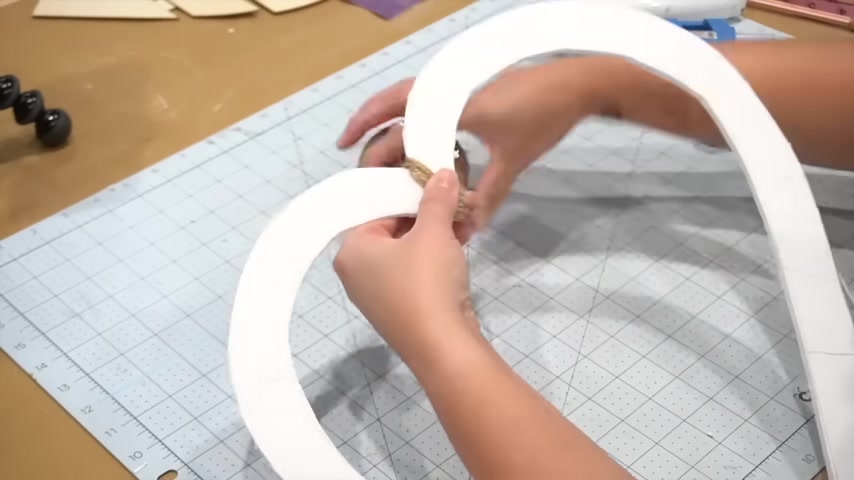
So I took them jude string and began to wrap it around the entire form .
Not only did it give it more strength , but also it covered up the foam so that it didn't look like it was just a piece of foam after the reform was covered , I got some of these eucalyptus bushes that you can get at Walmart for under a dollar .
Now , you can also get these little bunches that are larger and a little bit lighter in color .
Also from Walmart because I like the contrasting look of both .
I'm going to use both of these leaves for this wreath .
The first thing you want to do is take these greenery bushes apart one by one .
And I just took my wire cutters and cut them individually .
Then it was a matter of just adhering each one of these one by one .
I began facing them downward like this towards the bottom peak of the heart .
And then when I came down to the other right side , I did the same thing and pointed it down to that side .
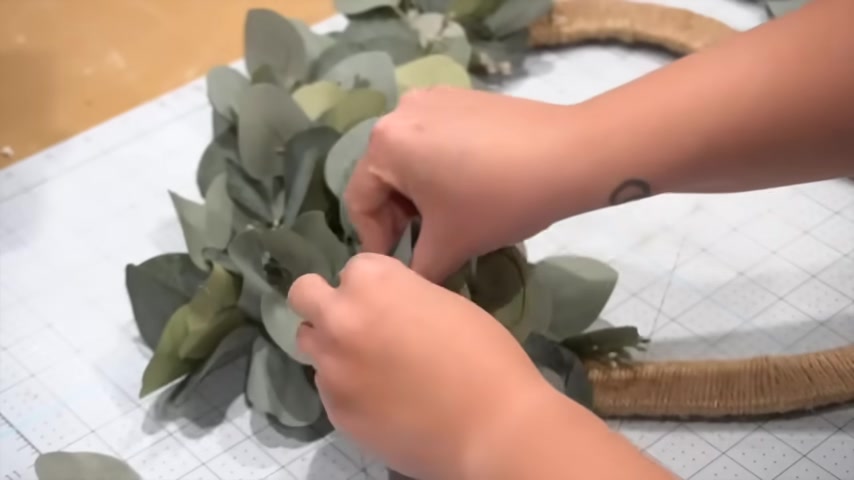
I made sure to try and cover as much of the wreath as possible in order to make the greenery nice and full .
And I alternated the colors as I adhered them on .
Now , the fullness of the wreath will depend on you how , however , I made this entire wreath for under $20 and I think it turned out more full than the original .
Once the wreath was completed , I just took some ribbon and it here it with some hot glue to the back .
You can use any kind of ribbon you want for this .
Once the ribbon was secure , it was ready to hang .
So this year , we had done a ton of bathroom makeovers at our last house and we had this one that we did for my son and his bathroom and we had done so much detail work for this bathroom and the above wall just was kind of empty and it didn't have anything on it .
And it really needed something .
So I saw this picture at Kirkland's and I thought it was really beautiful and it was on sale for 100 and $5 which is not bad .
It's a beautiful painting .
But I thought maybe I can recreate something like this so that I can put it on the wall and it not look so empty .
And I went to Mustache , got my existing paints and got to work .
Now I don't really consider myself an artist , but I do like to challenge myself .
So I figured I can just copy what I see in the original painting .
And I began to apply the paint in similar hues over the canvas in the same shapes that were in the original piece .
Does that make sense ?
Ok .
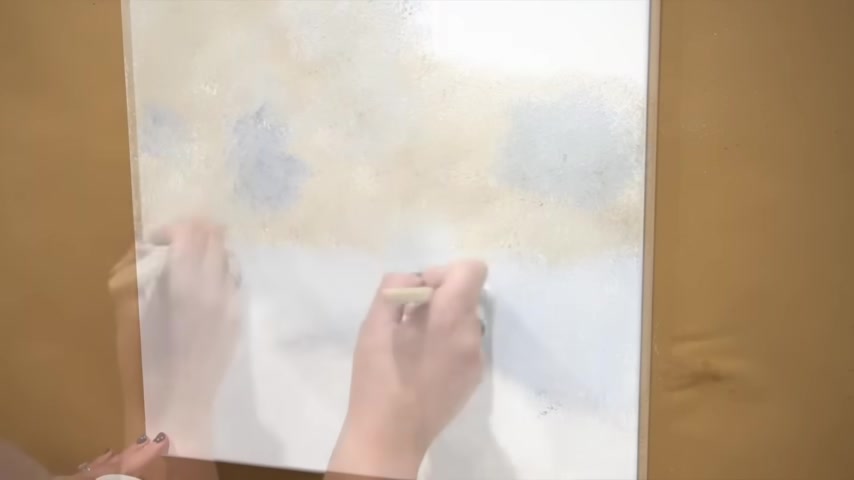
Anyways , so I started doing that .
And as you can see here , this is a vertical piece and I'm actually going to be painting two pieces to create a larger landscape piece .
Now , I wasn't going for perfection here , but I was trying my very best to channel my inner Bob Ross .
So I just kept at it and hey , if there's anything that you want to try or , you know , just test out to see if you can do , I highly suggest this .
Now , I'm not using any particular mediums .
I'm literally grabbing from all the acrylics and chalk paints and anything that I had on hand in order to create this as well as tools , this plastic spatula I have no idea where it came from , but I had it .
So I used it once I was happy with my background colors and shading .
I began to create my Happy trees .
Once I finished my first canvas , I began my second one .
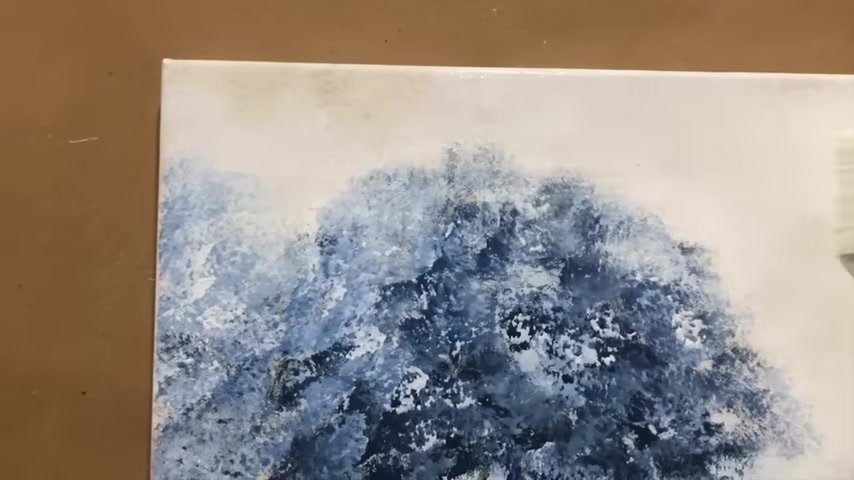
And in hindsight , I probably should have put them together side by side and just kind of continuously painted across both of them so that it was a little bit easier for me to match everything instead of having to bring it up , look at it and then put it back down again .
Once I was done with the painting and everything was dry , I did apply a clear code to protect the painting .
And here you can see what the painting looks like up close .
Once the sealer was dry , it was time to hang it up .
And of course , we have to do a side by side .
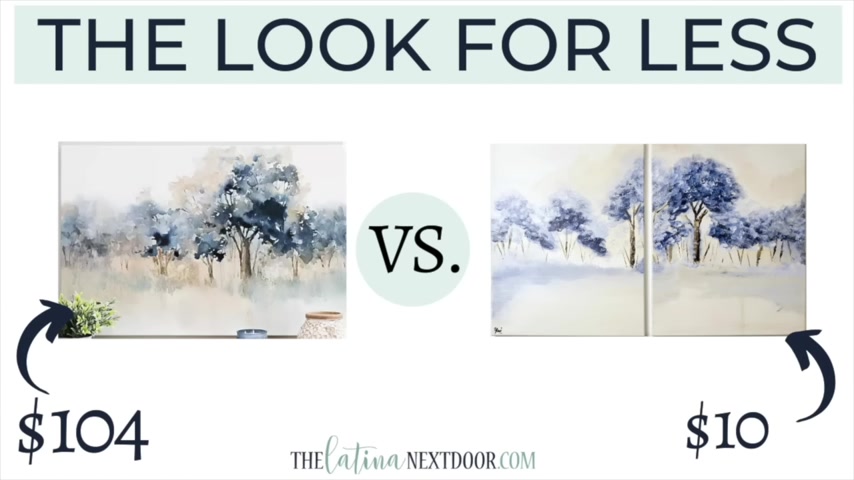
The original piece is on the left for 100 and $4 and minus to the right and it only costs me $10 in supplies .
Also , if you have an Instagram account , I'd love for you to follow me on my Instagram as I share behind the scenes and current things we're working on with you all .
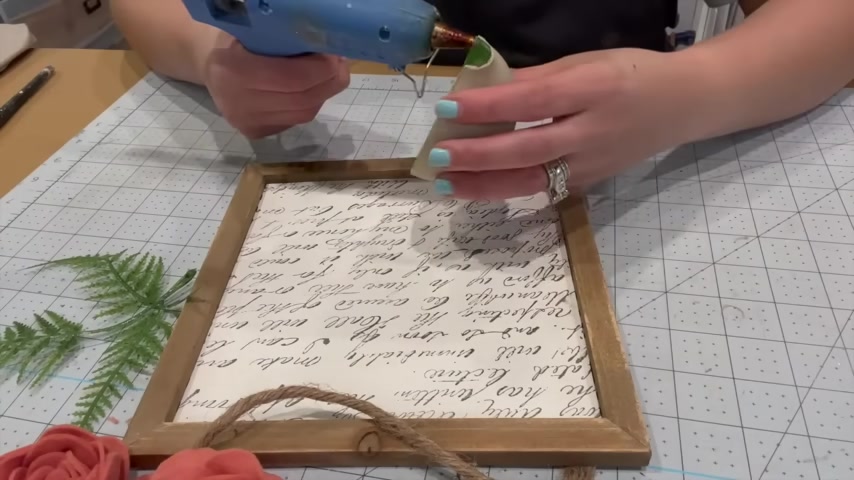
Now , this next one is a piece that I had made from one of the items that I had gotten in a past mystery books challenge that I had done earlier this year and I had received this self watering plant globe thingy .
And I had to figure out what to do and make a home decor piece out of this thing .
And what I ended up making was actually pretty awesome .
I started off by removing this plaque from this frame that was also included in that mystery box that I had received .
The .
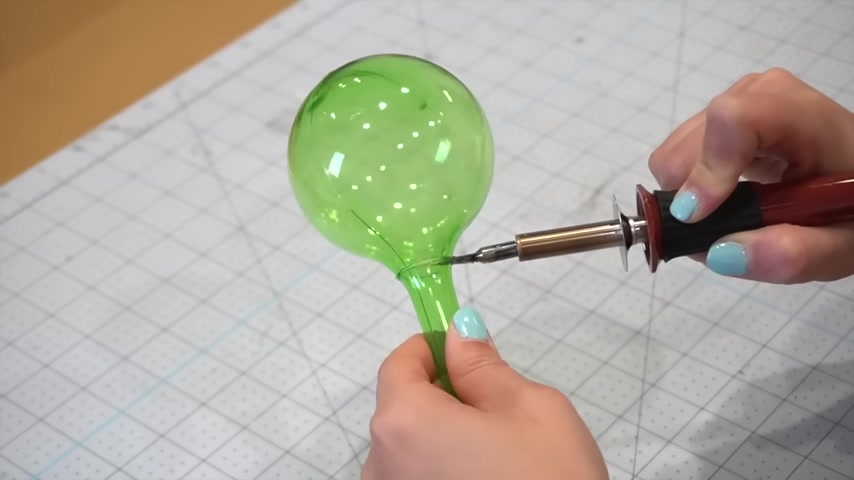
Next , I took the self watering plant thing on Majer and I got my wood burning kit and I cut the stem off of the little globe portion .
Once I cut the long portion off , I began to slice the little bubble part in half , going down the natural seam that it already had .
I set that aside for a minute and then I decided to cut down some poster board to fit inside of the frame .
I wanted to give the paper a custom look .
So I had this iron organ design stamp that I wanted to try out .
And so I filled up my ink pad with some black ink and decided to use it for this .
Once my stamp pad was full , I just applied it by dabbing it all over the stamp .
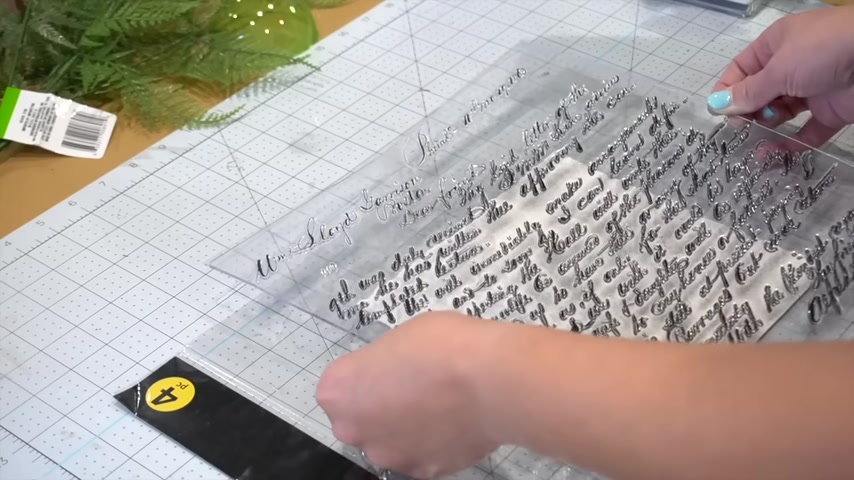
And then all I needed to do was find the perfect placement on my poster board and press down .
Now , once the ink was dry , I just used a glue stick and applied glue all over the back of the poster board and then inserted it into the frame as the poster board was drawing onto the frame .
I went back to my little plastic piece and I began to clean off all of the edges , making it nice and smooth .
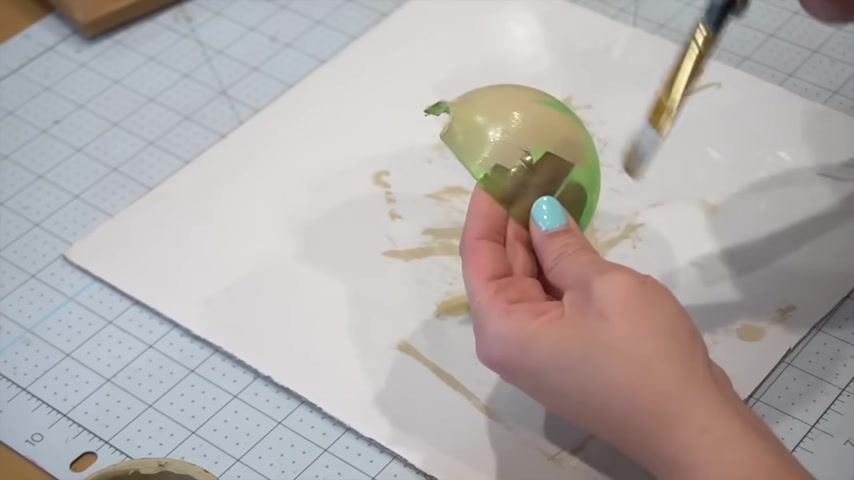
Once I was happy with the edges , I gave it one coat of my diy paint in the color sandy blonde .
This is the same color that I used for my book ends .
If you guys remember while that dried , we were moving on to the next step , which was I had to incorporate felt into this project or one of these projects from my mystery box .
So I decided to start cutting out one inch square pieces .
As a matter of fact , I cut out one inch square pieces , one and a quarter inch square pieces and 1.5 inch square pieces .
And I use my little fcs rotary blade for this .
Once my little squares were cut , I began to round off the edges of each of the squares with some fabric scissors .
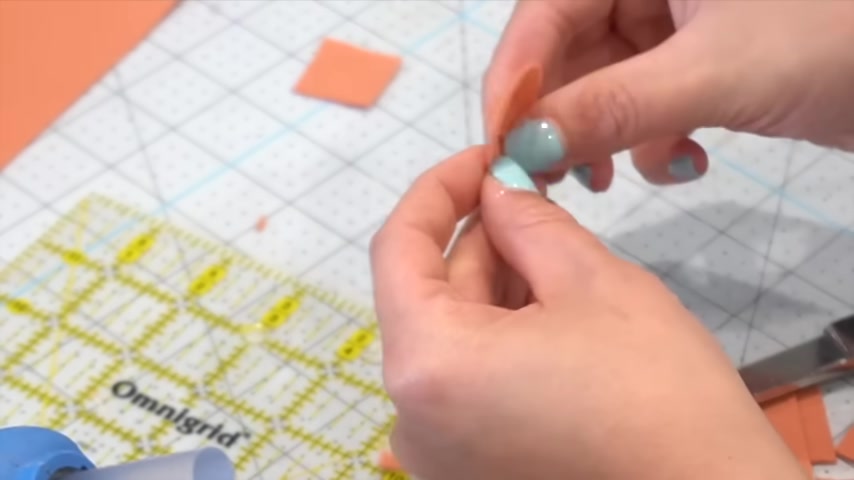
I would then cut a slit into the little round circle and with a hot glue gun , I would bring in and glue one of the sides over the other .
This actually created like a little cup out of that circle then taking a little pearl .
One of those that you can find in a dollar tree's floral section .
I began to hot glue each of these little petals onto the pearl and I would glue them down , overlapping one another .
I started with the smallest size pedals first and began to work my way out with the medium and then the large ones .
Mhm .
Mhm .
The next thing I would do is I would cut a larger square and then round out those edges as well .
And then I would make little slits towards the center of it .
These would be pedals .
And so then I would come in and round out those edges as well .
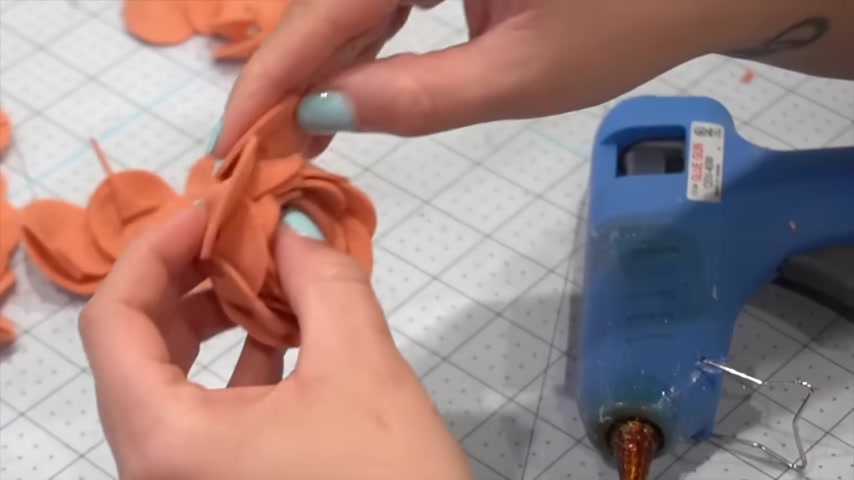
At the end , you should have a little form like this and you can sit the flower right on top of it .
I take some hot glue and apply it to the bottom pedal .
And then I add the flour and put it right on top .
I repeated this process two more times to create a total of three flowers .
Once the flowers are done , it's time for the next step .
I am taking hot glue and putting it all over the edge .
And I'm gonna hot glue it down onto the bottom center of the frame and then using some pieces of the fern that I had gone in the box .
I inserted it and hot , glued it onto the frame as if it was coming out of a little vase .
Once the greenery was added , then I did the same thing with the felt flowers and I love how this cute little 3d piece of artwork turned out .
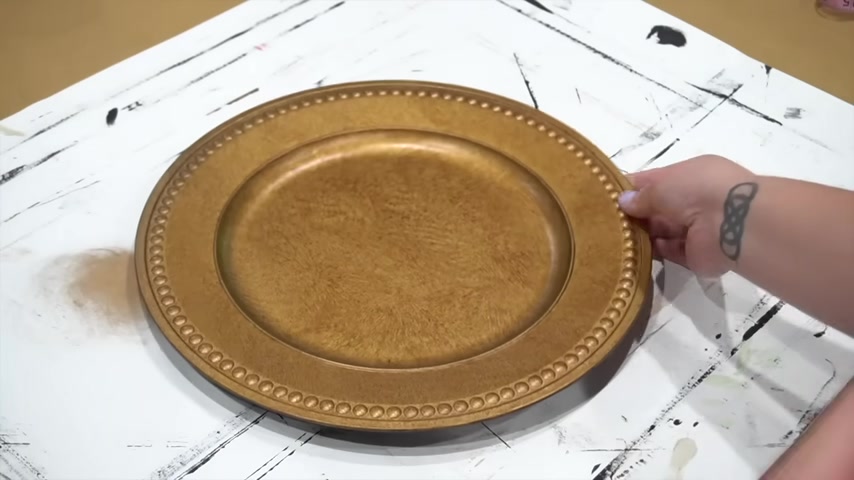
Now , at one point in time , we all have these gold chargers in our home .
And if you still have some , this is a great way to update them and give them a more classic look that can be used time and time again .
Now , if you don't have them , it's ok because your local dollar tree probably has them still .
And basically I'm just going over them with some of Diy paint in white Swan .
Now because I'm going from such a dark color to a crisp white .
I will need a couple of layers of paint to get it completely covered .
And then I'm going to be using some iron orchid designs , transfer sheets in their English toil pattern .
And what you do is you peel the backing off and you place them right over your surface .
Now , once you get it where you want it , you want to hold it down and with the spatula that it comes with , you're going to start rubbing that transfer onto your painted surface .
And as you can see the transfer just starts coming off , you just got to make sure you rub it accordingly .
And once you're done rubbing , you remove that top plastic protective cover and you'll see what you end up with .
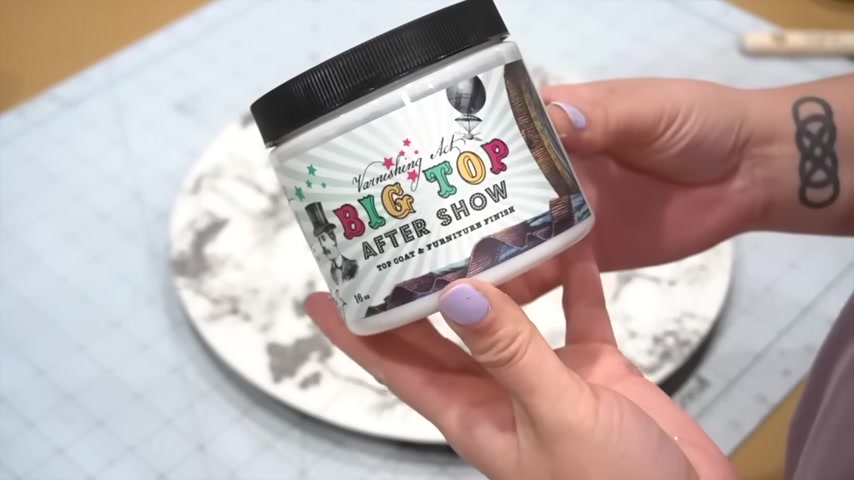
Once you're done at transferring your images , you want to seal this and I'm using big top after show for this because it has a nice satin sheen to it .
And of course , if you will be using it for any of Fall or Thanksgiving festivities , you do want to be able to protect your charger that way they don't get with any food .
So you definitely want to seal this .
And once , once the top coat has been cured , that is all there is to it .
And as you can see , I do have a little bit more of a spring setting , but with the right colors and place mats and pumpkins , this can be totally used for a fall table scape .
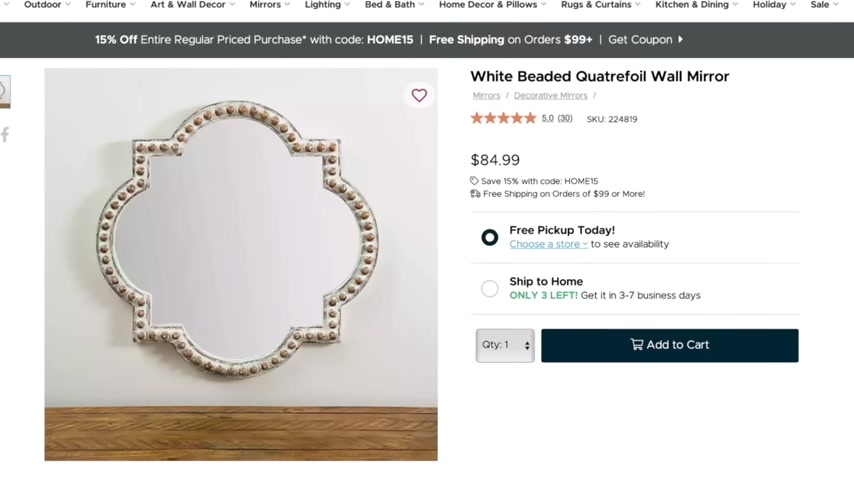
Now , for this next diy , we're gonna be recreating this Kirkland's white beaded Quattro Royal wall mirror .
Say that five times fast .
Now , I love the look of this and it was $85 .
However , I just so happen to have one in the same shape in my stash that I had bought quite a few years ago for about 25 bucks or so .
But if you like the idea and how this ends up turning out , you can apply this to any size or shaped mirror that you might already have on hand .
Now , I want to protect my mirror .
So I'm gonna go ahead and apply painter's tape all around so that I don't paint on it and I'm trying to place it underneath the lip of the mirror so I can make sure and get all of the edges straight down as close to the mirror as possible .
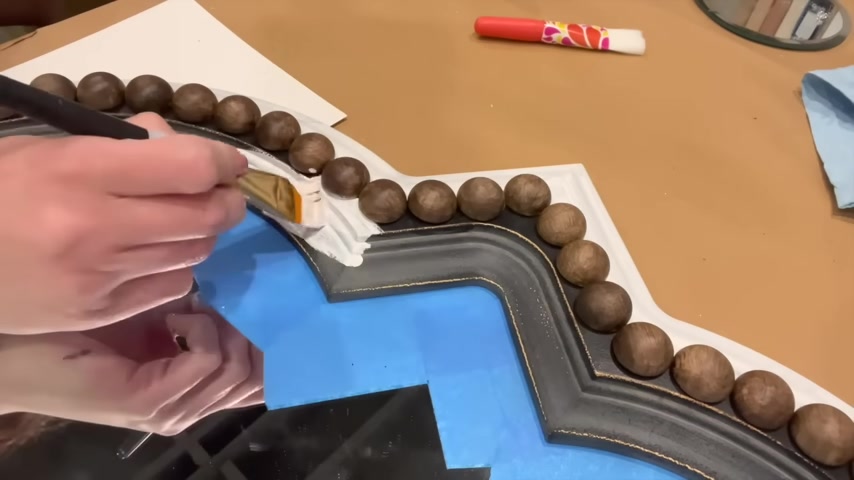
Then after I'm done , I'm gonna take these half round wooden beads and place them all along the border .
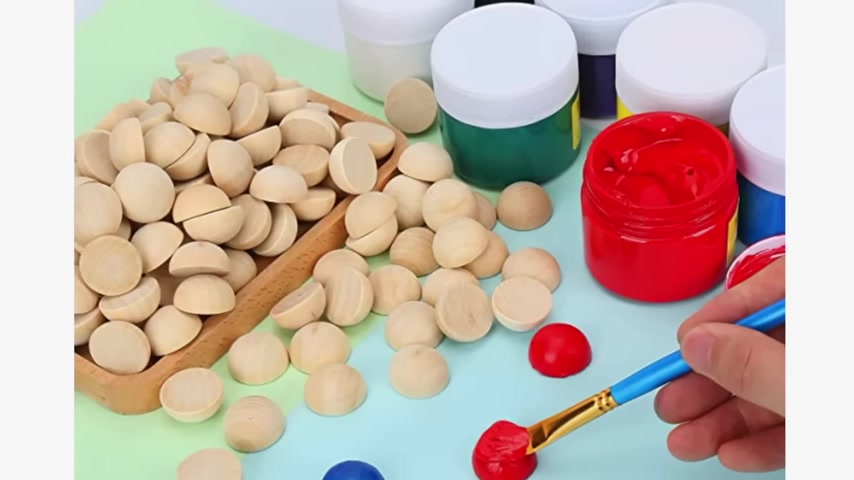
These are the 25 millimeter size and I got these from Amazon and I'll link to them in the description box below .
And all I'm doing here is just placing them for right now .
I want to make sure that I get the spacing correct and get everything right .
The first time I will have to shift some of these wood beads around and I don't want to end up at the other side where I have a gap and it just doesn't look right .
Many times I've seen people try to use these and instead of measuring the spaces first and doing kind of a dry run , they just kind of start to glowing them right away and sometimes it doesn't end up being perfectly even on the other side .
And you want a professional look on this , at least I do .
So putting them down first and making adjustments is priority .

So after all of the beads have been laid down and your spacing is nice and evenly distributed , you want to hot glue these down and all I'm doing here is picking one up and applying hot glue and placing it back down right where it was next .
I'm taking some darker and decrepit and it's kind of like a stain and a sealer all in one .
And I am going to be covering all of these beads in this color .
At first I applied it with a rag , but then it was hard to get in between them .
So I did it with a brush instead and it was much easier to apply .
Next , I took another brush and I began to apply the white paint to the rest of the frame and I used a brush to get all in between the beads .
Now , when I first created this , everyone asked me why I didn't just paint the mirror first and then it would save me trying to paint in between them , which I totally understand that reasoning .
However , I wanted to make sure that the beads stuck onto the frame and not the paint .
So that's why I stuck the beads on first if that makes sense .
But of course , if you want to do it the other way , you can certainly do so .
So after the two coats are dry , I'm gonna go back in with a damp cloth .
And what I'm gonna do is I'm going to wet distress it , which is basically rough it on the edges and high parts and remove some of that white paint that I applied .
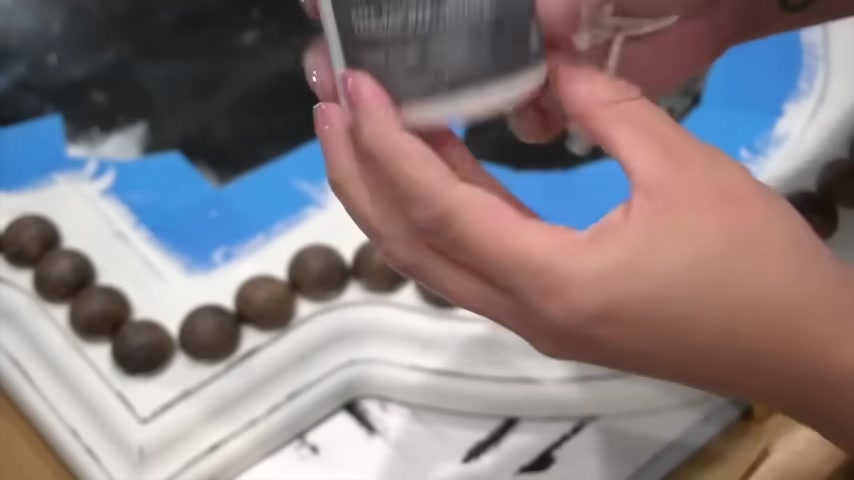
And so once I'm done with that , I'm gonna take some of Diy paint's clear wax and I'm gonna apply it all over the mirror , making sure I get into all of the nooks and crannies .
Now , if you're happy with how this looks , you can certainly stop here .
However , I did want mine to look that worn and more rustic way that the original one looked .
I really like that style .
So I'm gonna add a few more things after I'm done with the clear wax .
I am going to add my white wax and I am basically gonna be applying it around the base of all of the beads to kind of get it look a little bit more in distress .
That way , there's not such a harsh contrast between the white and the dark beads .
Then I took a larger brush and I began to spread the white wax even further out and all over the large beads .
Then I'd come back in with a cloth and remove any excess that I thought needed to be removed so that I can continue that rustic contrast .
After that , I took off the tape and here is how it turned out .
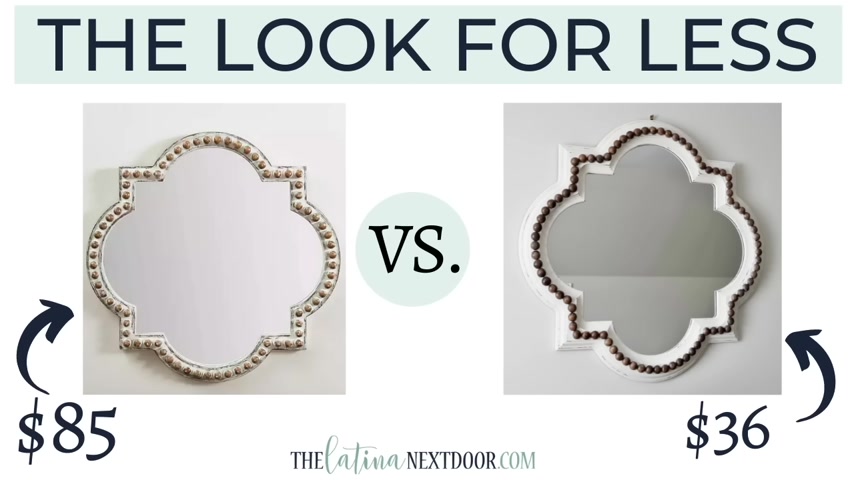
And for the comparison , the original was $85 .
Mine only ended up costing me $36 and that was because I included the original price of the mirror when I bought it as well as a few supplies like the beads .
Ok .
So the next one is a dupe and this one is coming at you from Ballard designs , this green fern leaf art .
Now these range from 220 up to $449 a piece depending on the size that you wish to get .
Now for my version , I am going to be using some smart vinyl with my cricket as well as a sum of the silhouette , transparent pngs available on the silhouette studio .
However , you can use this with any kind of stencil that you can find at your local craft store or you can paint this on yourself .
You can also simply use green card stock paper and cut the pattern out yourself .
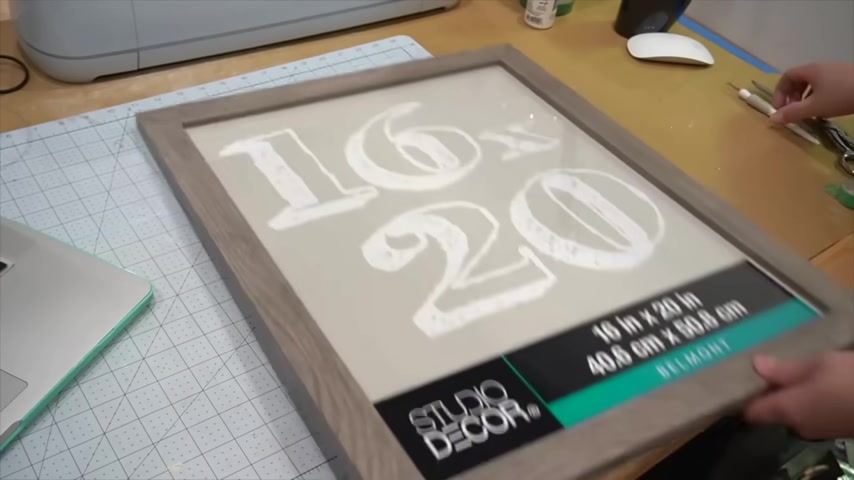
Now , I had two of these 16 by 20 inch frames in my stash .
I had bought them originally , I think from Michael's and I had them , never used them .
So I decided that this would be the perfect time .
And what I needed to do was mark them all the way around so I can create that beautiful gold border that the originals had .
Once I had taped them off , I took some rub and buff and began applying it to the inner portion of the frame .
Once it was dry , I removed the green tape and then I applied blue tape over the already painted areas that I had used the rub and buff on .
I then applied black paint to that portion of the frame .
And I think this mimics those original frames perfectly .
Next , I got myself some poster board from a dollar tree .
And for this , I'm going to be using the matte side , not the shiny side .

And what I did here was fold it in half because I was going to make two of the art pieces out of the one poster board .
And I wanted to make sure that I had even size poster board for each piece of art .
Now I use my leaves as a template to make sure I got the right size that I needed for the frame .
And then what I did was I did the old school folding forward and backwards so I can tear off those edges because that's what the original piece had .
It had kind of ripped edges all the way around the art piece .
And then once that was done , I applied the vinyl onto it and making sure that I didn't pull up any of the leaves .
And then once that was done , I put it inside of the frame and then I hung it up and this is how it turned out .
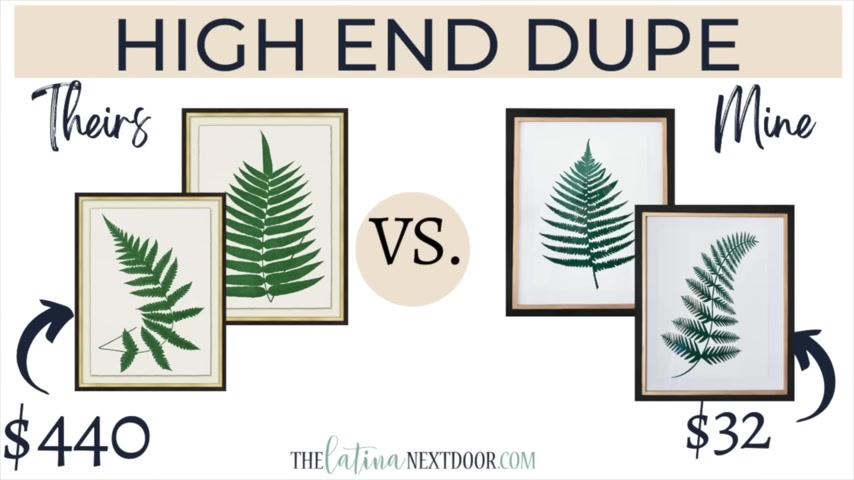
And of course , there's that side by side and the originals was $440 for a pair and I made mine for only 32 .
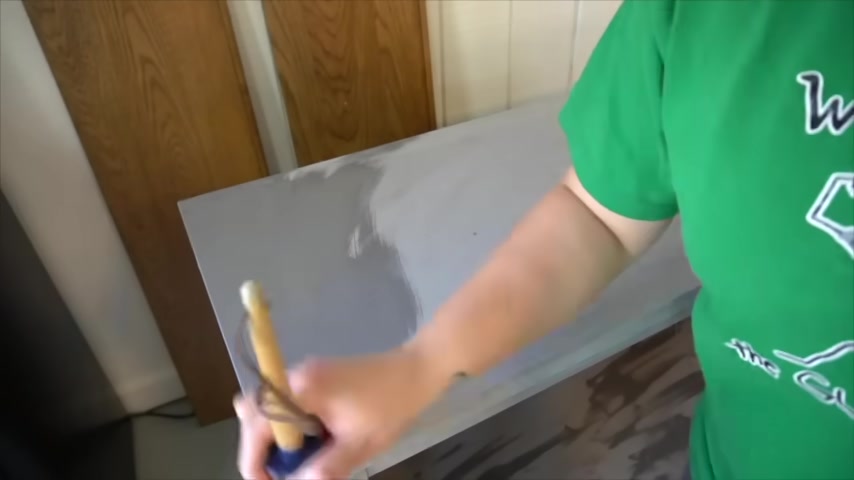
This next doy is a furniture makeover that I did earlier on this year .
And it's probably my most favorite of all time .
I had found this piece of furniture on Facebook marketplace for only a $50 .
And I loved everything about it except perhaps the design on the front .
And while some people like this , it's just not my style .
What I really like are these beautiful raised paneling furniture pieces that have like the dual tone with the white and the natural wood color .
So I wanted to try my own shot at this .
After getting my inspiration from pieces online , I began to work , I removed all of the hardware and I gave everything a thorough cleaning .
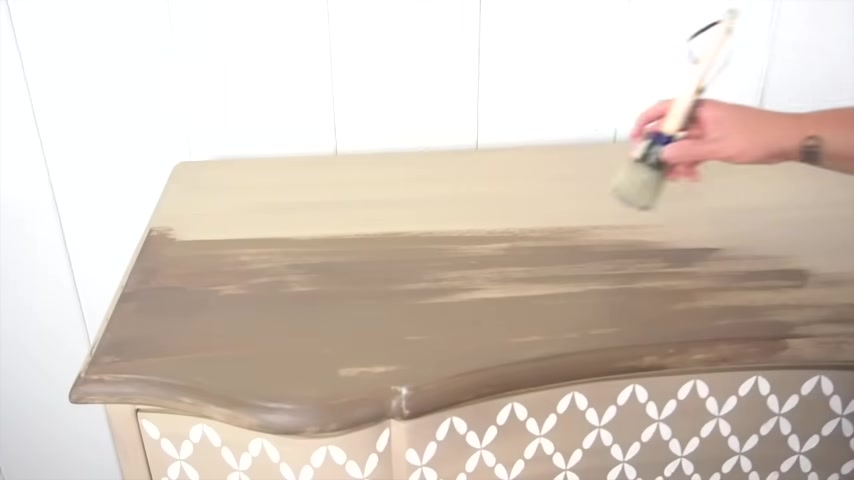
Then I got some diy paint in the colors , cake batter and layered chocolate .
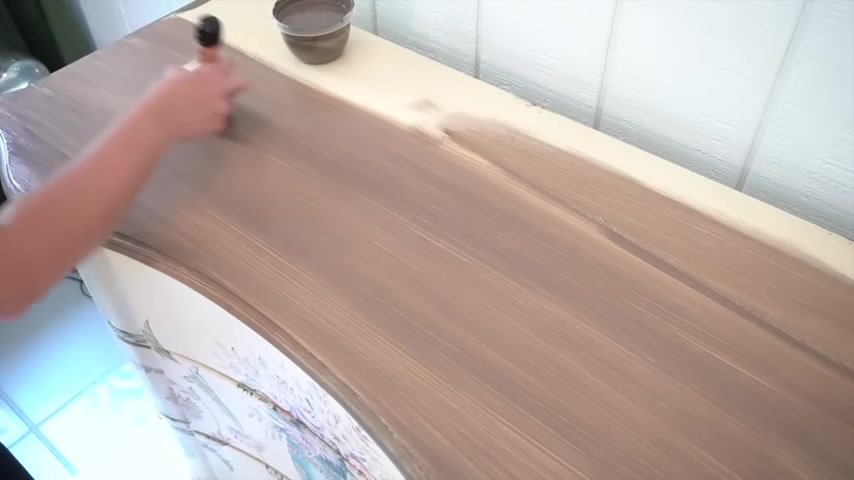
I was looking for a very coastal wood look .
So I began to mix these up to get the right consistency .
Once I found the right color combination , I began to apply and I did long strokes because I wanted it to look like aged wood , added the top of the piece of furniture first and then I moved on to the front .
I kept all of my brush strokes in the same direction .
And I did require two coats of this paint in order to make sure that none of the floral painting underneath would show through .
However , for my second coat , I did change the hue of it a little bit so that it would give me a little bit of a different contrast to apply on top .
And as you can see here , there's a little bit of streaking and I did that on purpose .
I would get some of the new paint as well as some of the previously mixed .
So I can get that variation to make it look like it's actually wood instead of just a painted surface .
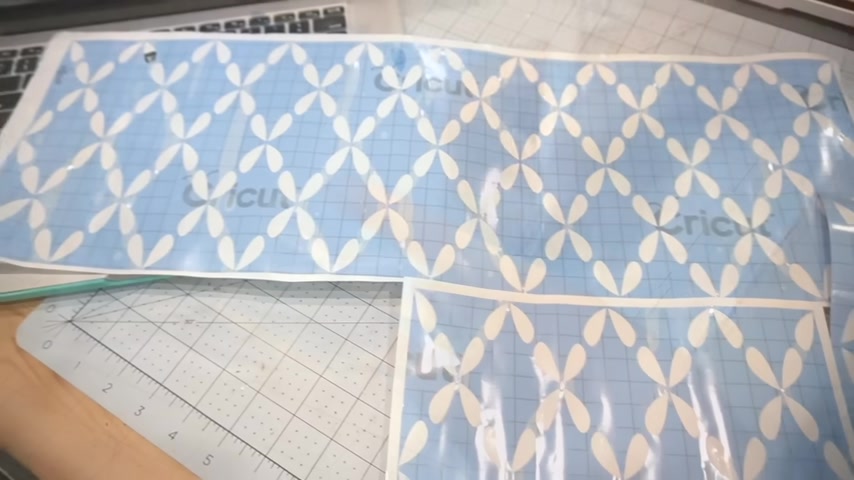
Now , while that was drying , I ended up creating my very own stencil from my cricket .
However , you can use any store bought premade stencil for this as well .
I just wanted a particular pattern and I wanted to make sure that it fit perfectly on the front panels of each of the drawers .
And in order to get that raised effect , what I decided to use was some wall spackle for this .
And instead of applying paint over the stencil , I applied the speckle .
Instead , I use the kind that's pink and once completely dry , it turns white just to better see when it was ready for me to take on the next step and removing each stencil was absolutely satisfying .
And I did start applying it with a special , but I found out later that it was actually better to do it with my fingers .
I made sure that everything was dried overnight .
And the following day , I came back in and sealed everything with the clear wax .
I also applied the wax in the same direction as all of my brush strokes .
And as you can see the wax brings out and kind of makes that color underneath really vibrant while sealing the paint .
Now , after I had applied that clear wax , I went back over with some of my white wax and I started adding it throughout the entire piece and I would go in a little bit at a time and I would apply it , then I would remove some of it .
I wanted it to look like an old beach piece , right ?
It's something that you would find in like a coastal home .
And I think this really brought that out and it highlighted all of those crevices any of the creases that it had on the corners and just any angles that it naturally had .
And I just absolutely love the effect that this had on the entire piece itself .
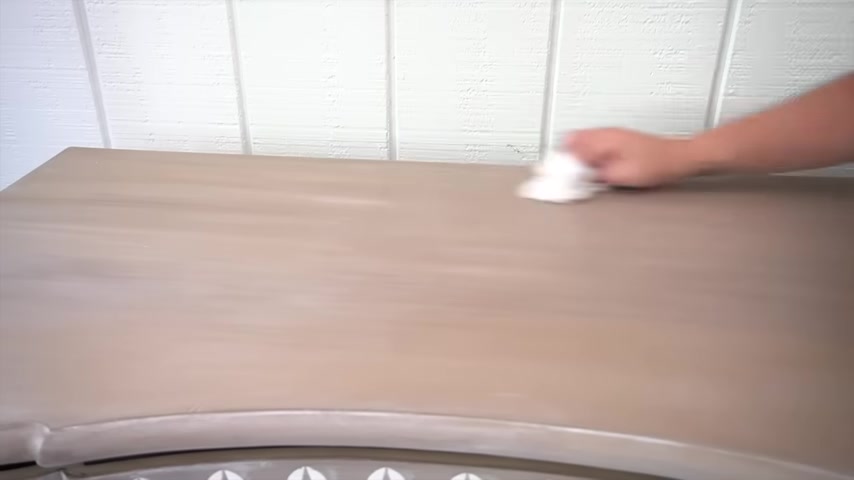
Once the piece was completely done , I let it dry for 24 hours and then I came back in and buffed the entire surface .
After that was done , I added its original hardware and this is how it turned out .
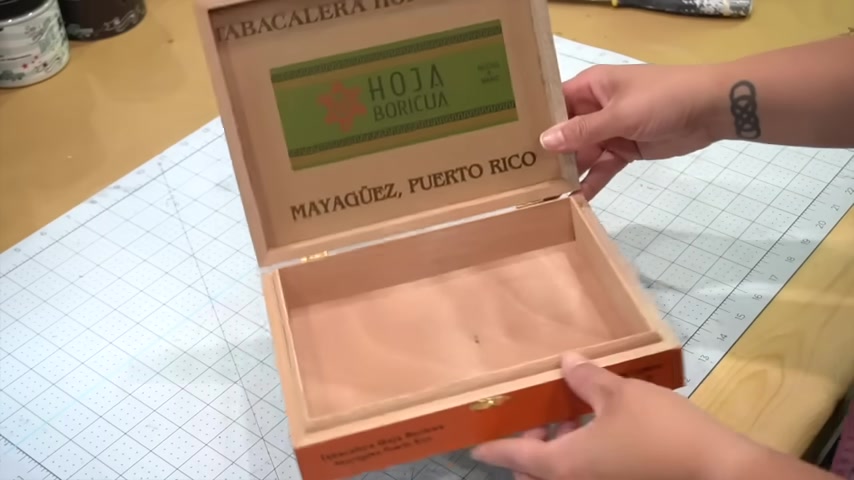
So whenever I create a coastal home decor , I really try to make it look as classy as possible since a lot of coastal decor tends to run on the more cheesy side .
And I had this really cute tobacco box from Puerto Rico and I wanted to transform it .
It really wasn't my style , but it could be used as a very useful piece of Decor .
I added some painters tape to the hardware as well as some drawing gum that's actually used in artwork for protecting certain areas that you don't want to paint .
Since these areas are really small .
I thought I'd try it out on this and it actually ended up working out pretty well when all of the areas that I didn't want to get paint on or protected , I took it outside and I spray painted it with some white paint .
You can definitely always hand paint this but I want it a nice , smooth even finish and spray paint does just that .
And it also has a protective coat .
So it's kind of a two in one .
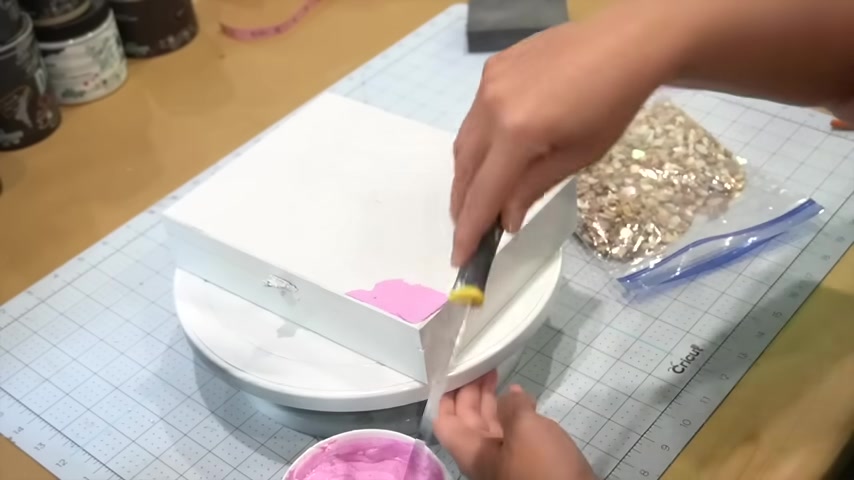
Now , I had some of this mother of pearl crushed vase filler that I had previously used on other coastal projects like this really cute tea light candle holder that I created a little while back .
And I wanted to create the same effect that was on this little candle votive on the lid of this box .
So I put the little box on the spray paint stand .
It kind of looks like a cake stand .
And I began to use some speckle again and just frost this little box like a cake now because I didn't want any areas too dry too much .
Before I applied the little pieces .
I began to work in small sections .
So I would spread some of the speckle on a corner and then I'd start adding the little pieces one by one to create my pattern .
I worked my way along the entire top part of the lid and then I covered the edges of the top lid as well .
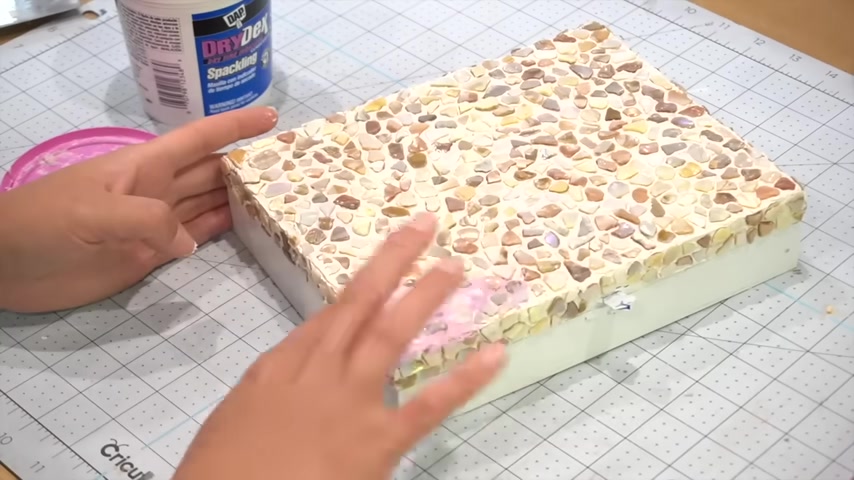
Once the first layer of speckle was completely dry , I came back in and began to add a more speckle in between all of the little mosaic pieces that I had added just like you would .
If it was grout .
Once that was a little dryer , I came back in with a damp cloth and began to remove any excess speckle that was actually laying on top of each of the little mother of pearl pieces .
Once that was complete .
I remove all of the gum and all of the painter's tape that I had applied to the little pieces of hardware .
Finally , I came back at the very end with a top coat to apply all over the shell area to give it an extra layer of protection .
And this is how it turned out .
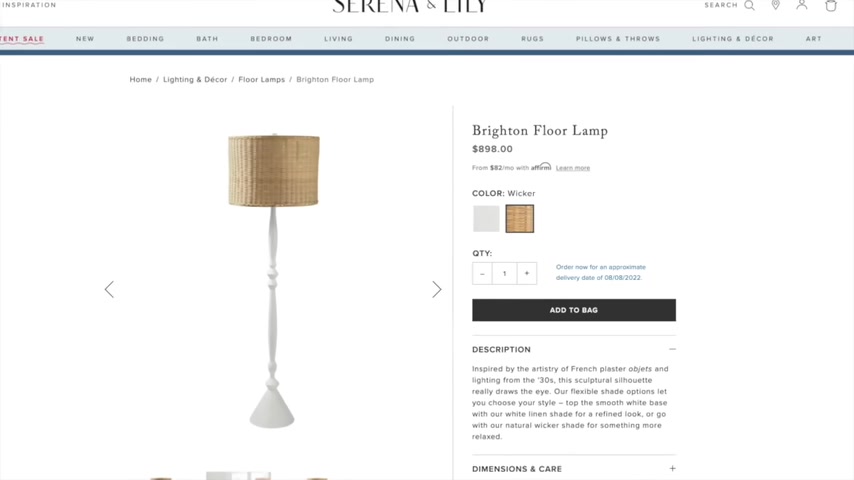
And here is another Serena and Lily dope .
I was really eyeing their lamps this year , but the Brighton floor lamp at $898 that was pretty wild , but I loved it .
I thought it was really pretty .
So I thought I can do this myself .
Well , I came across this floor lamp over at my local goodwill and it only cost $13 .
It wasn't the prettiest thing , obviously , but it had great bones and a perfect base .
So I decided that I was going to use this one and to make my dope .
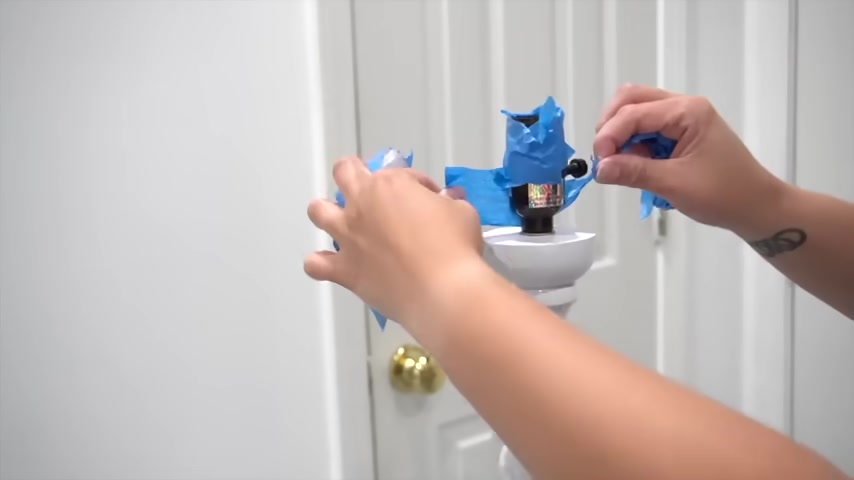
Now , the first thing that I did obviously was remove the shade because that was not my style .
And then with a hair dryer , I removed the price .
Next , I took some painter's tape and began to protect the areas .
I did not want to get any paint on .
And with some white gloss spray paint , I began to cover the entire piece .
Now , you certainly can use any kind of sheen of spray paint that you have .
But I had the gloss .
So that's what I went with in order to get full coverage .
It did require a couple of coats of paint , especially since I was painting on a darker surface .
And I let it outside to dry for a while .
Then once it was completely dried , I removed all of the painter's tape .
Now , the lamp shade that was previously attached to this lamp had its own attachment on it .
It did not have a harp .
So I went online to find one and I actually found this one on Amazon .
And the reason why I'm sharing this with you is because it all of these little notches so that you can adjust it depending on the length of your lamp .
And I had never seen anything like that .
And since this lamp , it didn't have a harp , it also didn't have the little attachment for a harp .
This kit actually came with several different options , especially ones that would fit right over and around the bulb section .
I found this beautiful seagrass lamp shade at , at home for 40 bucks .
This is more than what I'd like to spend on products like these .
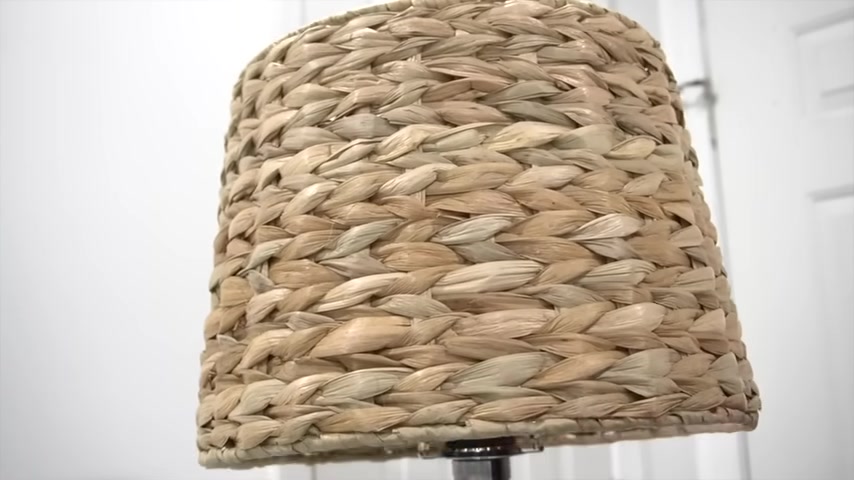
However , it's a beautiful shade and it gave me the right look that I was going for and shades are expensive regardless sometimes .
So as you can see here , this is what I'm talking about .
When it comes to the harp adjustment , it was a little bit too high .
So all I did was adjust them to the right level .
And then I put the lamp back and it was perfect .
So I'll be buying more Harps like this for sure .
All that was left was attaching the lamp shade to the lamp and I found this really cute finial that matched the color of the seagrass lamp shade perfectly and that was it .
And of course , we have to look at that side by side .
The original from Serena Lily was $898 versus mine with all the supplies cost me only a 75 and I still was able to pull off the same look .
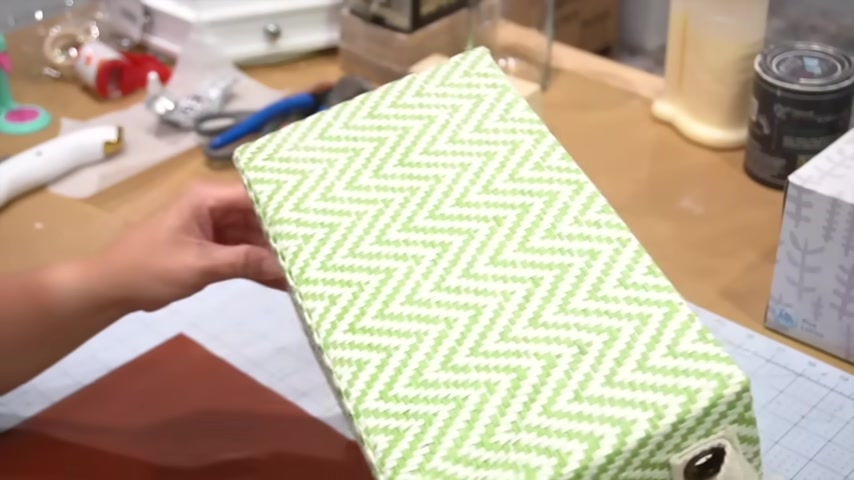
Now , this next Diy can be a little bit complicated for some but high end decor also sometimes means that things have to take their time .
So I had this little box in my son's bathroom and this is where I put the extra rolls of toilet paper .
And honestly , I just wasn't feeling that green and white pattern anymore .
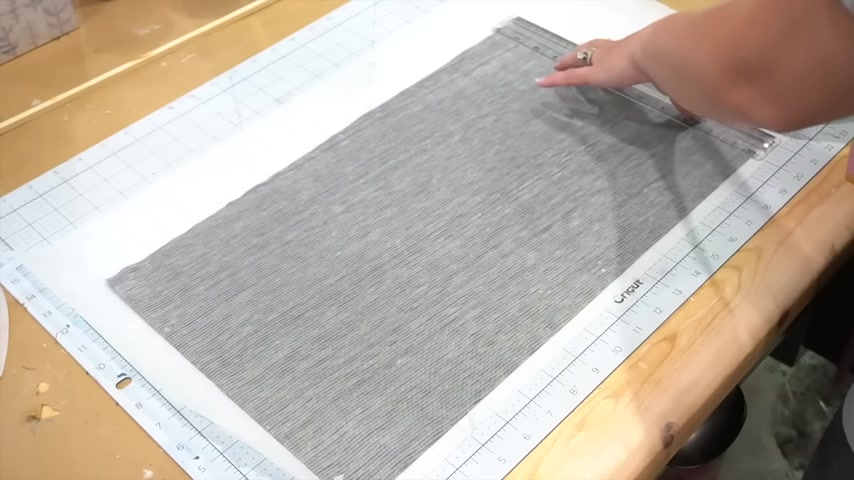
So I challenged myself to create something unique and high end or a cover for it so that it looked like a completely a different basket using dollar tree's faux leather sheets .
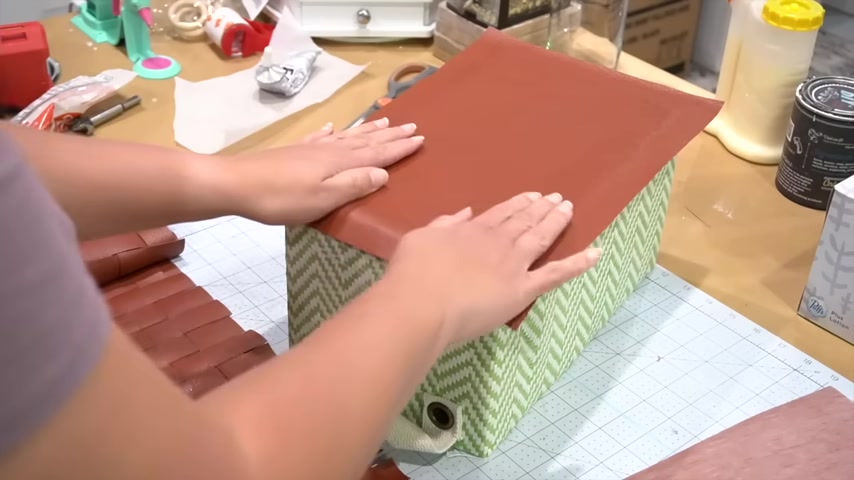
So using my cutting mat , a straight edge and a box cutter , I began to create long one inch strips out of this faux leather .

And as you can see here , I am cutting those strips along the longer side of the faux leather pieces now because just one of these pieces was not going to be enough to wrap around the entire box length .
I did have to glue the end pieces together in order to create longer strips .
Next , I began doing the same thing with shorter strips .
Now , this time I had measured the height of the box and this is what I am cutting here .
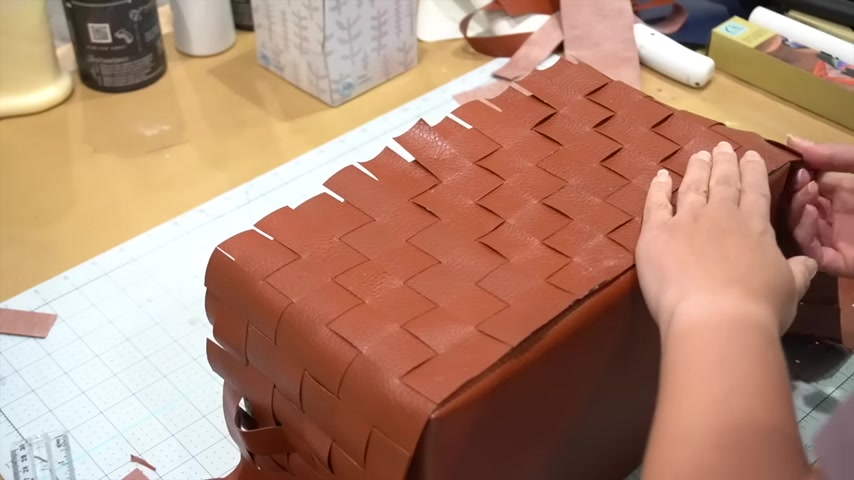
Once all of my pieces were cut , it was time to create a basket weave pattern .
Now , as you can see , I have the longer strips horizontally and then the shorter strips vertically .
And remember that I had created some seams by joining two end pieces together .
Well , I would strategically place those seams behind some of the basket weave so that you would not even notice it was there .
And using some hot glue , I began to attach the pieces to each other .
Getting that first vertical strip is actually the trickiest part .
Then once you get that first one done , it's really easy to continue the basket weave all along the length of the longer pieces .
Once I was done with that part , I took another piece of faux leather and I hot glued it to the very bottom of the box .
I didn't want any of the old pattern sticking out and shown .
So I wanted to make sure that every single piece of this box was covered .
I cut all the four corners and I hot glued those bottom pieces to the sides of the box .
I also didn't want any handles .
They were honestly going to be a little bit too complicated to go around .
So I simply just cut those off .
Then I placed my basket weave pattern on the front portion of the box .
Then once I was happy with how everything was laying flat on the box , I began to attach it using some hot glue .
I worked in small sections making sure that the hog glue was hot and adhered to the surface before moving on to the next .
once the entire box was covered , I began to fold over the leftover pieces of each of the vertical strips over and into the box .
Then in order to give it a nice clean look over the top edge of the box , I added a strip of faux leather over it and glued it over the edge .
And then I added a smaller one all the way around the bottom of perimeter as well .
And that was pretty much it for this .
And you can use this concept for any type of box that you may already have that's outdated or even a cardboard box and you use it for something precious in your home , not just for toilet paper rolls .
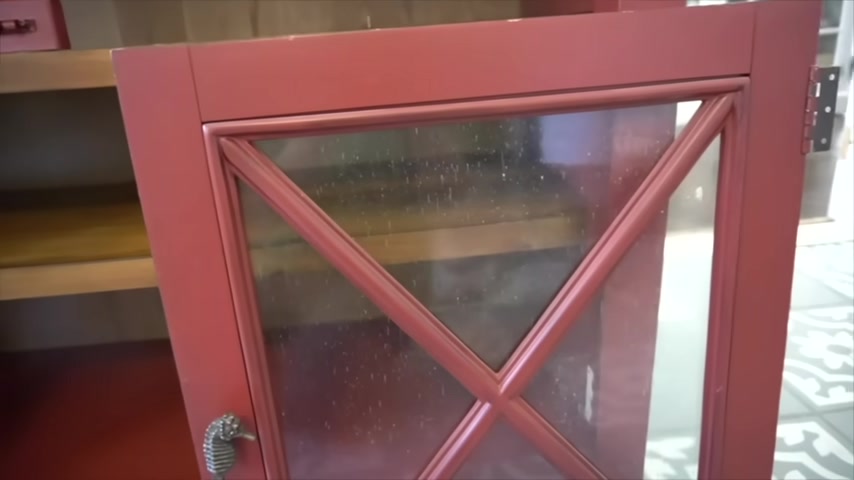
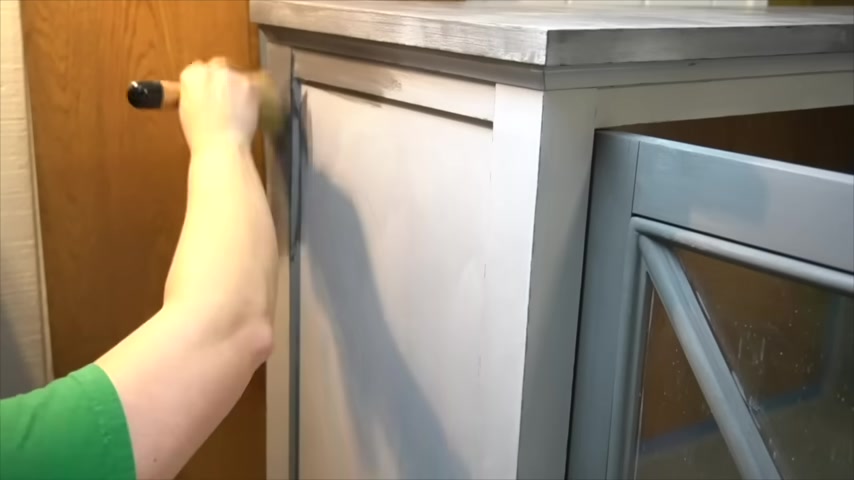
Another really fun furniture transformation that I did this year was transforming this beautiful red X door cabinet .
The color and knobs weren't my style , but at only $20 I could not resist .
The doors were already removed .
So the first thing we did was remove the inner shelf and I use the color , a letter press gray from Diy paint .
In order to give it the makeover , it's a very nice rich industrial type gray .
I wanted this to be a more textured look .
So I began applying the paint in different directions .
I painted the tops , the sides , the legs and even the inside .
I wanted to make sure that I got rid of all of the red .
After the first coat was dry , I applied the second coat again using strokes all over the place in all different types of directions for the doors .
I decided to go with a darker color and I also applied two coats on all of the red .
I gave the surface a light sanding to smooth out any imperfections .
And then I began to add little bits of the darker paint color throughout all of the edges to give it a more distressed look .
Now , you could generally sand this down .
However , since there was red underneath , if I tried to sand it , the red would get exposed and I didn't want that .
So I thought that in this case , it would be better to just take a small artists brush and add these little sections like this so that it looked to stress with a darker color underneath .
Then of course , I sealed my work with my favorite clear wax from Diy paint , added the doors back on buffed all of the wax with a limp free cloth .
The following day used some extra doorknobs that I had on hand , had some spray paint that I use as well to give them a little bit of a makeover and make them look a little bit more copper and hammered .
I added those to the doors and here is how it turned out .
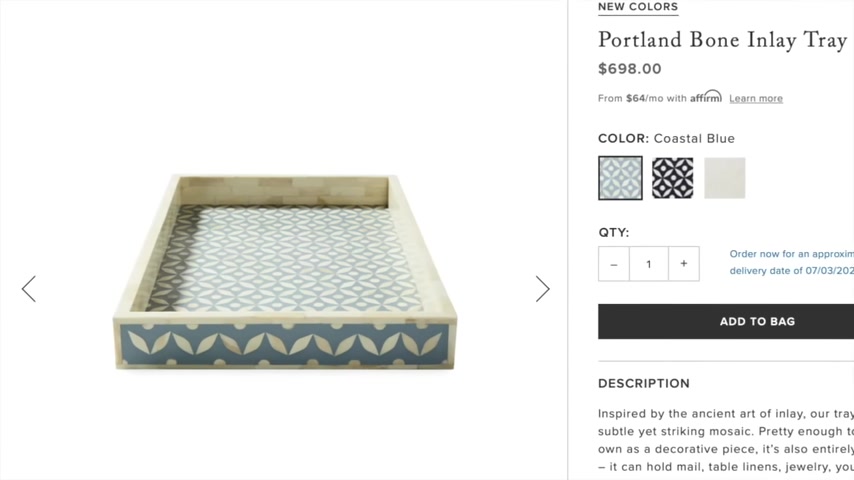
Now , I don't think I can have a countdown without including the most complicated Serena and Lily Doop of all time .
Now , this Portland Bone in lay tray was going for $698 .
I don't know about you , but at that price , the tray bread be bringing me food anyways , I love the color .
I love the pattern .
I love the style .
I did not like the price .
So here we go .
I had found this red tray at my local thrift store as well and it was a nice size .
It was nice and big and it was this the same style as that one from a Serena and Lily at only 3 99 and from a crate and barrel , I knew it was a great deal .
So I gave everything a good cleaning before I started my work .
Now I did sand it in several areas because the paint was kind of thick and it was kind of uneven in some areas .
So I decided to just kind of smooth things out first .
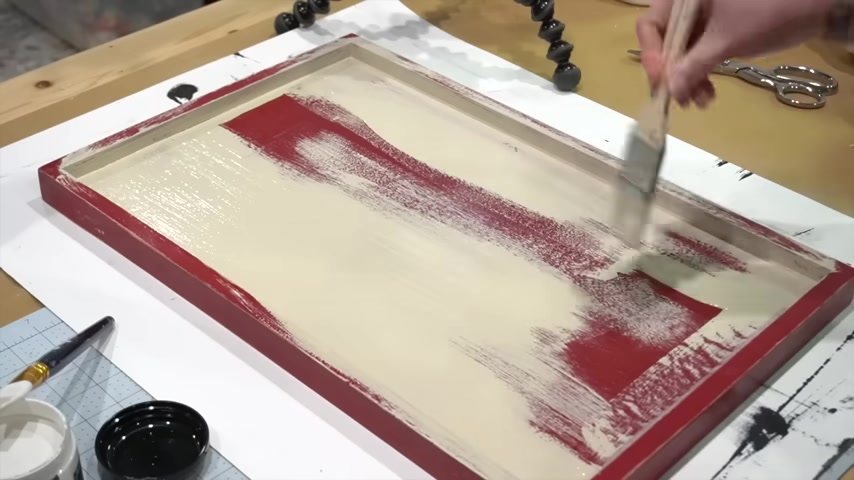
Now using some sandy blonde and some white swan , I decided to mix them together to create more of a bone color like the original piece now , because this is such a red , vibrant color .
This did require a couple of coats of paint .
Now , I actually created my very own pattern and I even have an SVG file available for anyone on my website who wishes to download this .
It is absolutely free .
I did the hard work for you , but yes , I did this entire pattern from scratch because I wanted it to look exactly like the original .
And using some old contact paper that I had on hand is what I use in order to create the stencil for it .
I applied the pattern and let me tell you this was probably the hardest pattern to transfer because the tape did not want to come off .
But alas I was able to get that pattern on there .
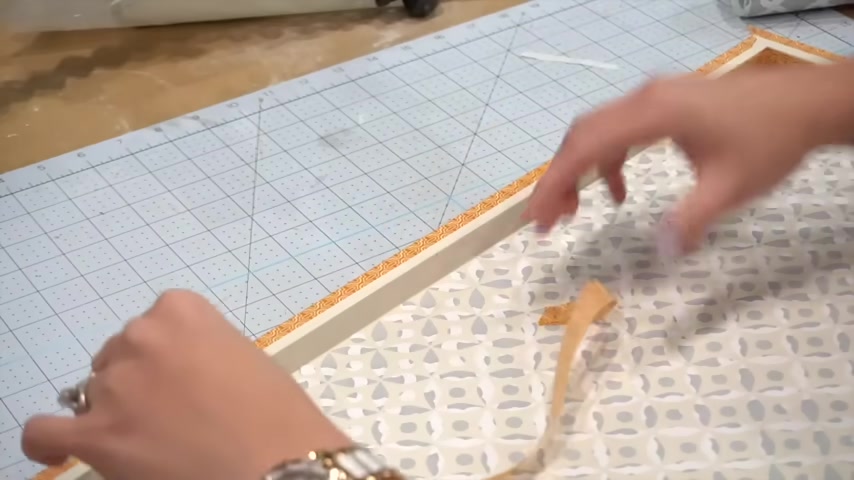
Then using some washy tape , I prepped the sides of the tray to get the exact pattern that was on the exterior of the tray as well as to protect these sides of the tray that were not supposed to get painted as far as the paint .
I just took out all of the blue paint that I had on hand and I just began mixing it to try to get that very exact same color that I had seen on the original piece .
I started applying paint with a sensor brush , but that wasn't working so well .
So then I just took a regular artist brush and began to sweep it across the entire surface of the tray .
Next , once the paint was dry , it was off to removing absolutely every single piece of that stencil pattern .
Yep .
It took me a while and it even pulled up some of the previous paint that I had already painted .
So it would require me to touch up a couple of areas .
But that didn't stop me .
I came in with a very fine brush and as I was removing it , I was applying the touch of paint so that it would dry .
By the time I'd have to go back and remove more stickers .
Yes , this was a little crazy .
It was a little ambitious , but the pattern that you see emerge is pretty amazing .
Finally , it was time to seal everything with my clear wax and this is how it turned out .

Oh , I had found this real wood , large toy bench on Facebook marketplace for 50 bucks and I wanted to make it over for my son's room to prevent any bleed through .
I use a salvation solution by Diy paint , which is great because it has no odor and it's an easy clean up with soap and water .
I primed it making sure I got into all of those nooks and crevices .
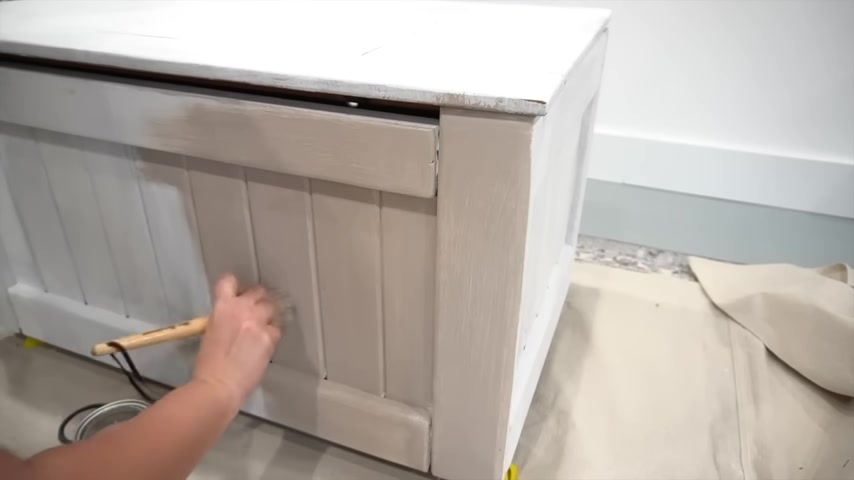
Next , I use the color faded burlap , which I thought would be a really nice contrast to my son's really dark furniture and I gave the entire piece two coats .
Now I had primed the top of the bench because when I primed it , I wasn't sure whether or not I was going to do a cushion at the top .
But as you will see , I won't be painting the top because it will be covered .
After applying two coats of paint , I sealed with clear wax as well .
And next , I bought some upholstery foam from Hobby Lobby and I decided to double this up to get a thicker cushion .
It was actually cheaper for me to use one roll of the thinner and double it up than to buy one roll of the thicker foam .
So just a quick tip there .
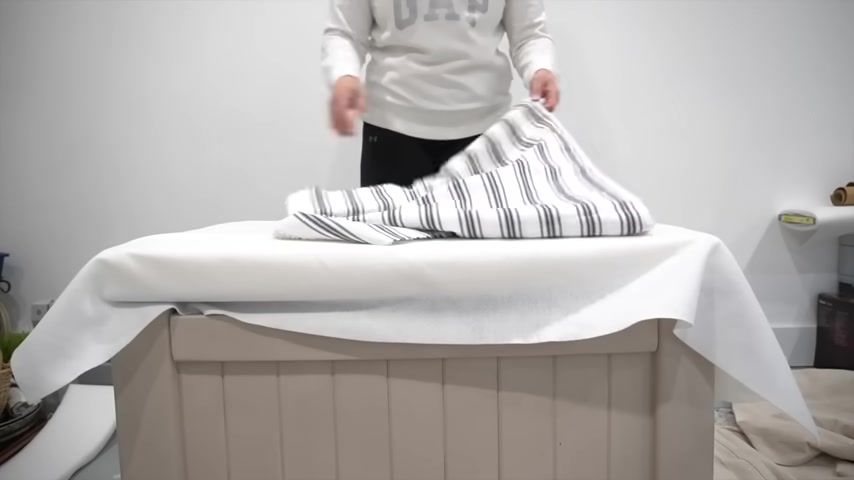
If you are thinking about upholstering something , then I added some batting that I had on hand and I decided to use this beautiful navy and white striped fabric .
I began to upholster the piece to hold the striped fabric in place while the top of the bench was still attached , but we did remove it and I finished stapling it in while it was upside down .
And on the floor , I cut off the extra fabric then reattached the piece and here is how it turned out .
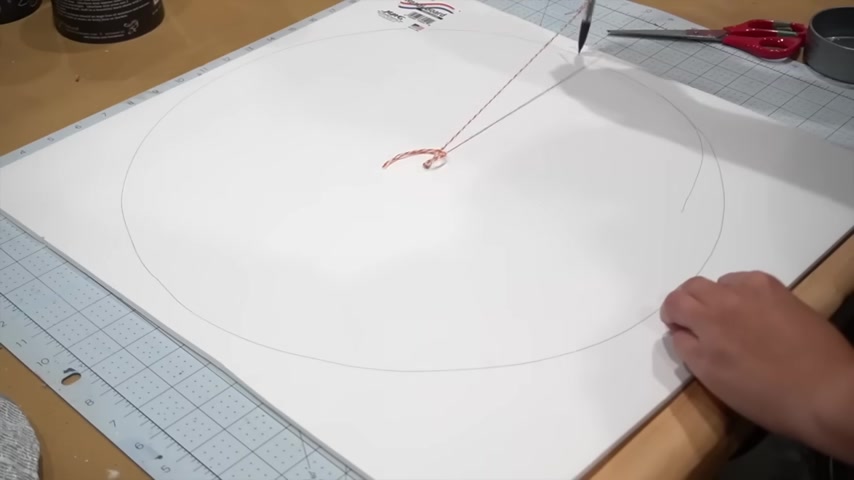
I'm gonna be using this mirror round .
I got from IKEA , but you can find these at your local dollar tree .
I will also be using some foam board also from a dollar tree .
Now , you can always use any thick cardboard that you may have on hand .
And all I did was tie a pencil with a string of Baker's twine and I use a little pinch to secure it to the center to create a circle .
Now , I made this circle a little bit too large .
I was a little ambitious because I thought I would have enough of my rope for it , but I didn't .
So I had to cut it down later .
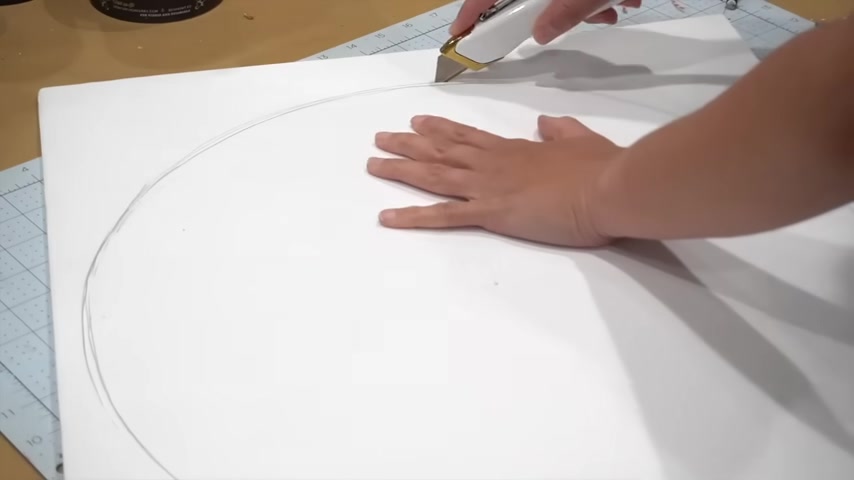
Once I had my circle drawn out , I just took a box cutter and I cut the entire perimeter and I know it's hard to see because I did it in pencil , but I did trace a smaller circle where the mirror would lay , making sure that it was completely centered in order to secure the mirror onto the foam board .
I used a combination of E 6000 as well as hot glue to hold it down .
Once my mirror was secure , it was time to apply the rope .
And I found this rope in the floral section of Hobby lobby .
It's originally 7 99 .
But of course , I bought it when it was half off .
So it was only $4 .
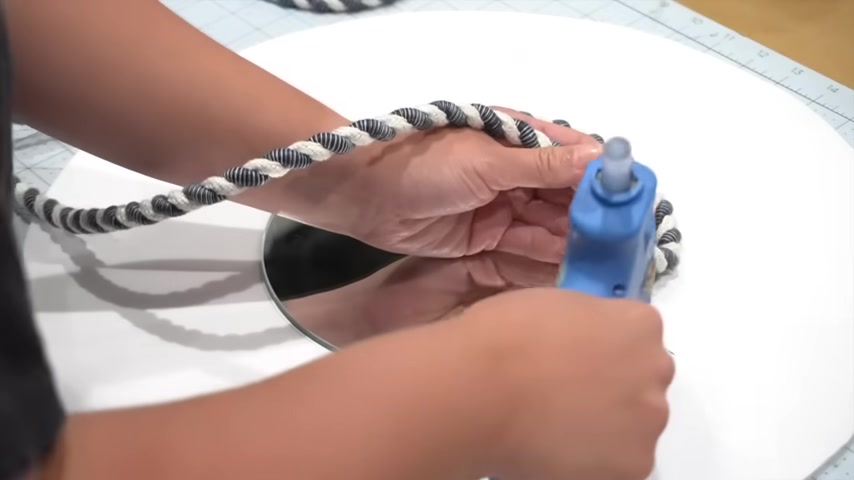
I began to glue it down to the foam board really close to the edge of the mirror because I did not want the edge of the mirror to show through .
I went around with a hot glue gun and when I reached the other end , I cut it off instead of continuing to go around , I wanted to make sure that each row was nice and secure as well as even I didn't want any changes in the direction of my rope .
Once that first rope layer was down , I started my second one , making sure to keep that seam where they meet at exactly the same place for the next row and so on and so forth .
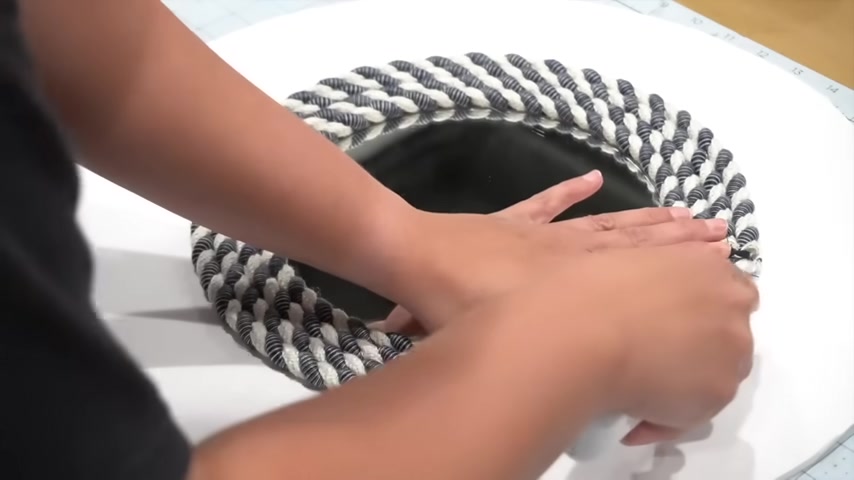
Now , I was able to get five rows with just the one spool that I had purchased .
So , before I added my final one , I cut down that foam board and I wanted to cut it kind of close to that last rope that was already there because I didn't want it to come out from underneath the final rope .
Ok .
And here you see what I mean as I'm gluing that final layer of rope .
When it goes over that foam piece , it will actually overlap the outside edge of it so that you cannot see it .
Now , you can still see the foam piece underneath it and I wanted a finish edge .
So what I did was I took some rope that I had on hand and I applied it to the underneath portion covering that edge of that foam board .
And since it was nautical , adding the rope , honestly , it didn't do anything to the aesthetic .
I think it only adds , however , you only see the rope from the side and not from the front .
And finally , the last little detail is covering up that front seam on the face of the mirror .
And I had this little piece of leather on hand .
I've used a few pieces of leather in some of my work and I had some left over .
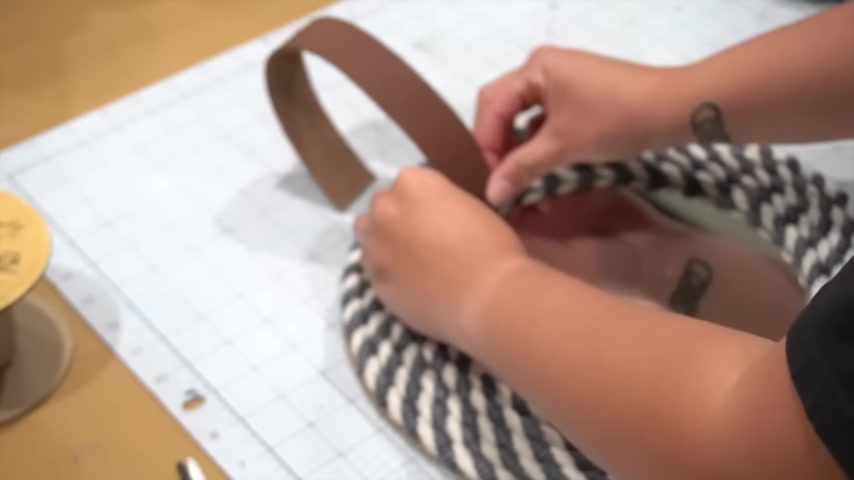
And so what I did was I applied it to the top right at the edge of the mirror , making sure that that end was nice and fastened and secured and then I wrapped it over the top edge and here you can see where I cut off the excess and I'm just pressing it down and making sure that it doesn't come undone .
And then I took a little flame and began to burn off all of the little excess pieces of the rope .
That way it would just clean it up nicely .
I added a little bit of juice string with some hot glue to the back of it in order to hang it up and here is how it turned out .
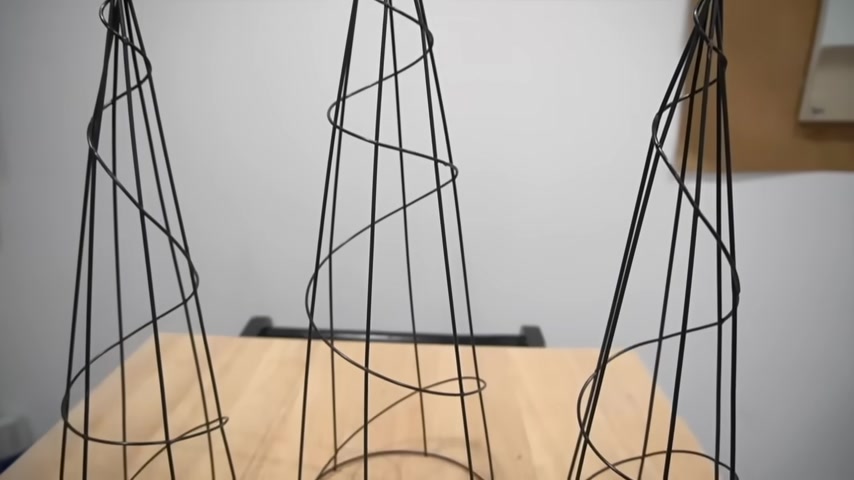
Now , this Diy is one of my favorites from my Christmas in July video this year .
It was using these tomato cages that I found at a local dollar tree and I really wanted to create some fancy high end RAA Decor trees for Christmas .
These are a little complicated but they are totally worth it .
I decided to make three completely different designs in different skill levels .
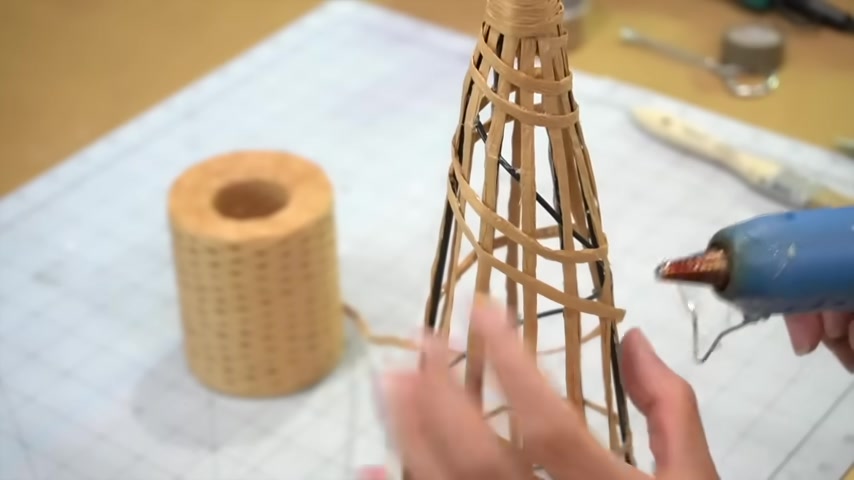
This first one though is the toughest .
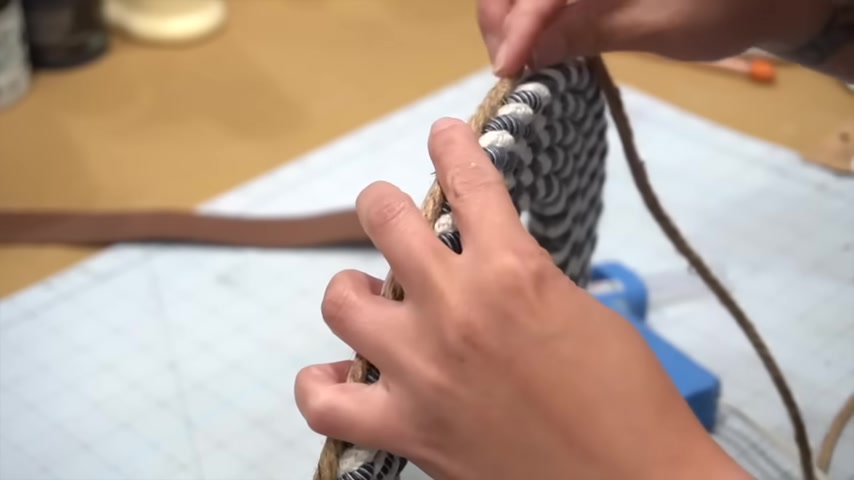
Now , the reason that this one is a little bit more complex is because I wrapped each and every one of these wires with the er ribbon .
After that was complete , I began to take the raffia and wrap it around three of the vertical pieces at a time .
So the first time I created this triangle pattern right here .
And then after I had made it all the way to the top , I started back on the bottom and began to do the same pattern in between the ones that I had already woven on the other three vertical wire pieces .
So in the end , if you looked at it from the underneath portion , you can actually see like a star of David , that's what it created .
And I didn't even realize that I had done that when I was doing this pattern , but it ended up being pretty cool .
I wrapped the top end of the piece to hide the wire there .
And then I began to bring that all the way down on that little wire piece that kind of wrapped itself around the entire cone shape .
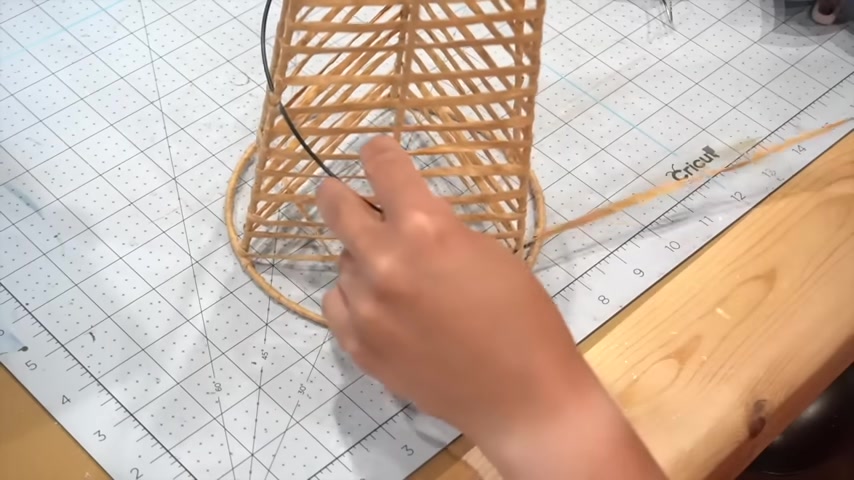
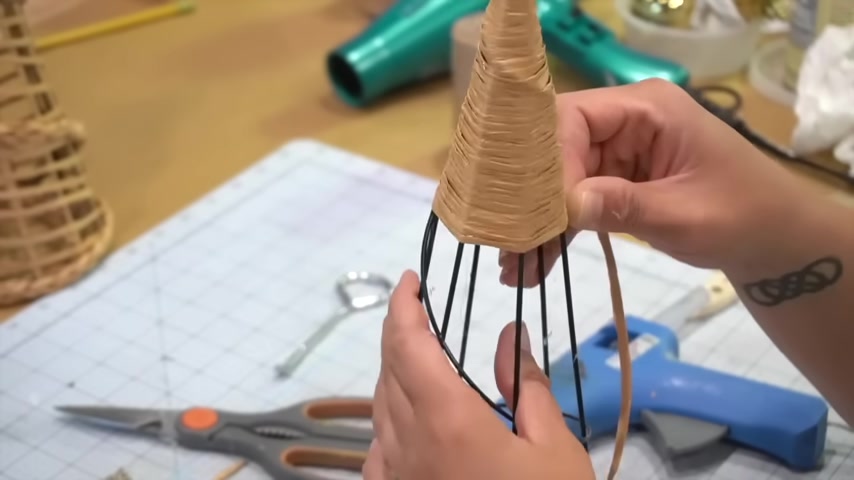
The next one is a little bit less complicated .
I decided that instead of wrapping each and every one all the way around , like I did before , I just placed the Raffa on the front of each of the wires and just kind of slid it all the way down like that to cover it up .
Then I began to wrap around the RAA all the way down kind of following that original wire pattern .
And I would just hot glue it in sections along the way .
And then once I made it to the bottom , I'd come back to the top and add more as you can see here .
Finally , in order to cover that one wire piece that was wrapped around the entire cone .
Again , all I did was create a braid out of the raffia and hot glued it right over the rest of the remaining wire including the bottom base .
The third one was the most simplest of them all and all I did was start at the very top and began to wrap the RAA ribbon all the way down , making sure it was very tight and very close to each piece so that you wouldn't see practically anything in between any of the ribbon spaces .
I took it all the way to the bottom and making sure that the bottom wire was covered as well .
And here is how all of the three different Christmas trees turned out .
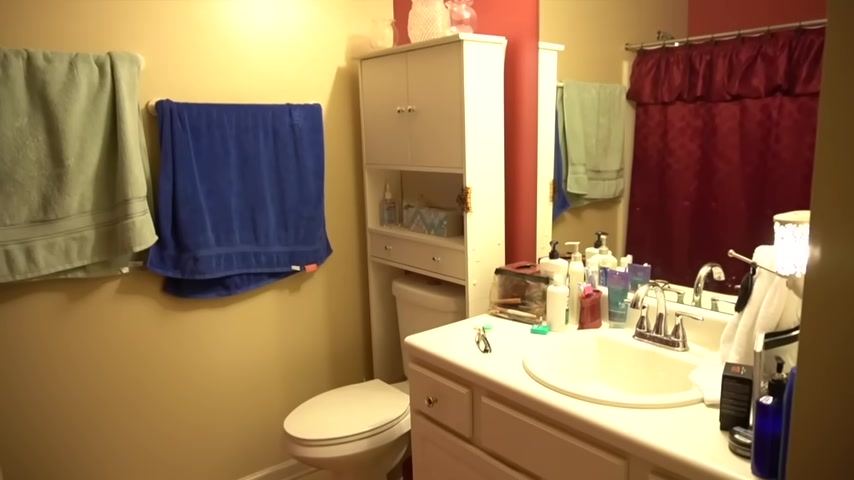
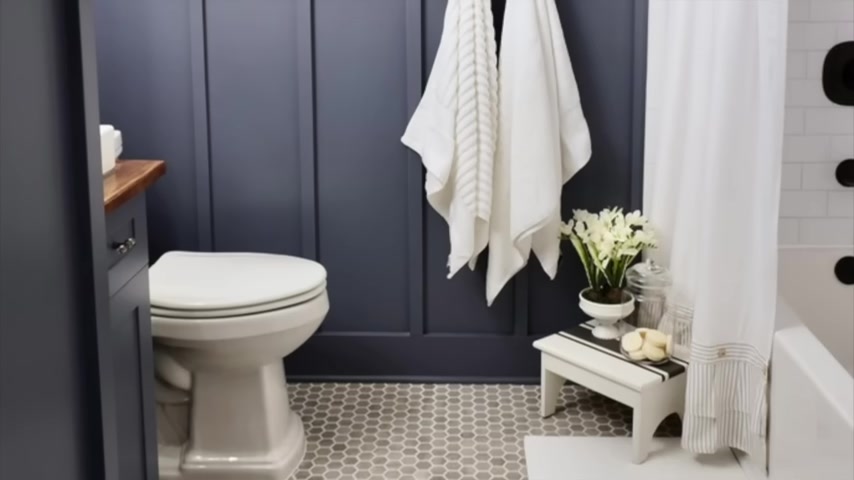
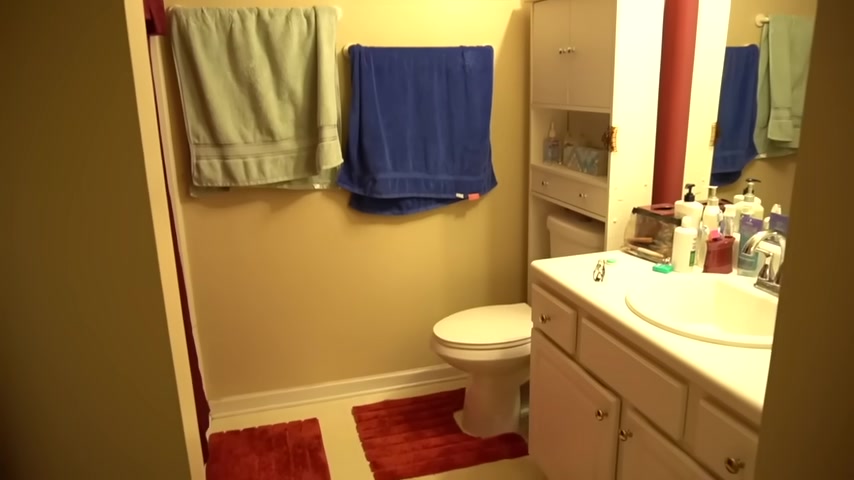
Now , if you've been following along , we have done a number of bathrooms for to be included in the last year alone .
And one of them had to make it on this list .
And the reason this one made it on this list is because this bathroom is a bathroom that I used to use during my teenage years .
Right now , we're staying at my parents' house while we transition to our new location in Tennessee .
And while my parents were on vacation is when we moved into my parents' house .
So I decided that while my parents were still on vacation , I would make this space over without their knowledge .
And boy , was it a transformation ?
Because everything that I pretty much did in this involved paint , I created my vision board for this bathroom and I got to work .
I started with the cabinetry and I cleaned out everything that was underneath .
It took out anything that was expired or old and then covered the bottom of the cabinet with some brand new contact paper in order to protect the surface and update it a little bit .
My husband removed the large builder grade a mirror that was in the bathroom and I began to prep so I can paint the walls .
This bathroom has no windows so there is no natural light and this fuchsia color that I had picked out many summers ago , which I thought was a good idea at the time is no longer working for this space .
It made it feel like a cave dark and just inviting .
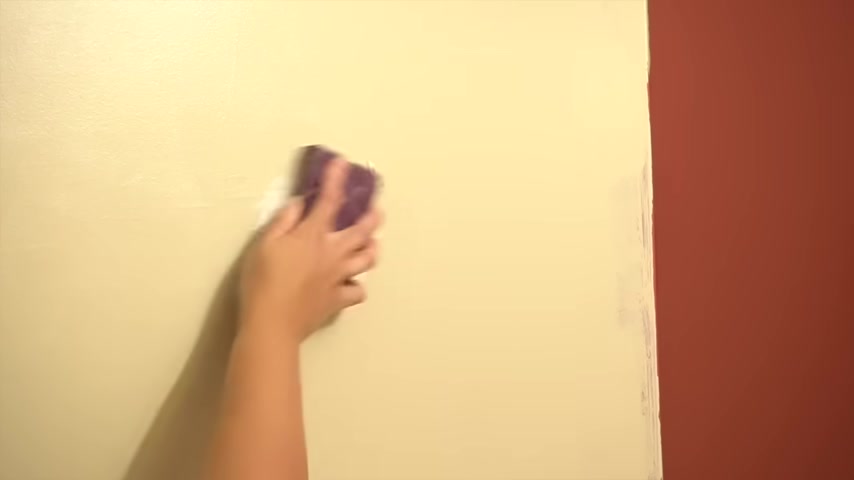
So I wanted to use a color that was light and airy , not completely white and also not too warm and not too cool .
I just wanted to keep it nice and neutral .
So I picked the perfect paint color for this and I began to paint all of the walls .
Trust me .
When I say that I was very happy when those two tone color walls went away .
My husband helped me with the actual rolling of it while I worked on the trim .
And then once the walls were done , I began to paint all of the baseboards and all of the molding around the doors as well .
It had been a while since these were painted .
So I decided to give it a fresh coat of paint .
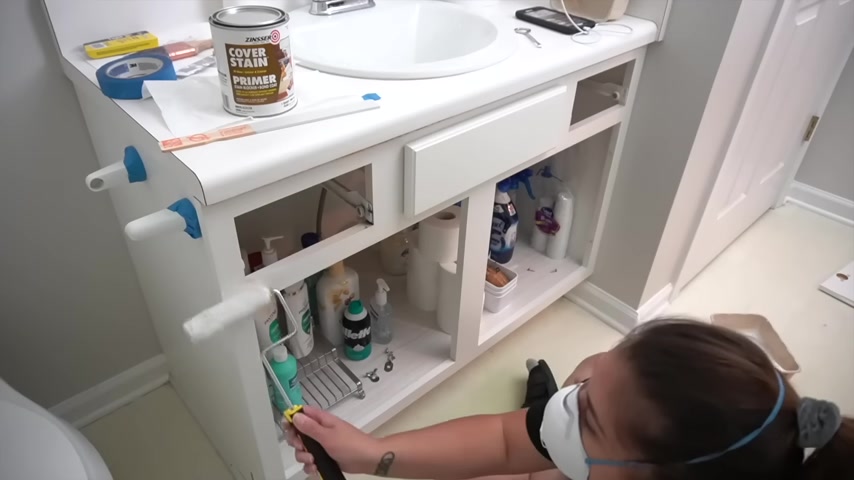
Also , next , it was time to tackle the cabinet and I use the same process I have been using for years to paint cabinetry .
And first off , I'm starting with priming it .
And after I primed the cabinet , then I decided to prime the floors while I was at it because I was going to paint the floors as well .
It was an old linoleum that had been here for a while and throughout the years , this gets stained , this gets yellowed and I just had to cover that all up .
After the floors were painted , I started to paint the cabinet .
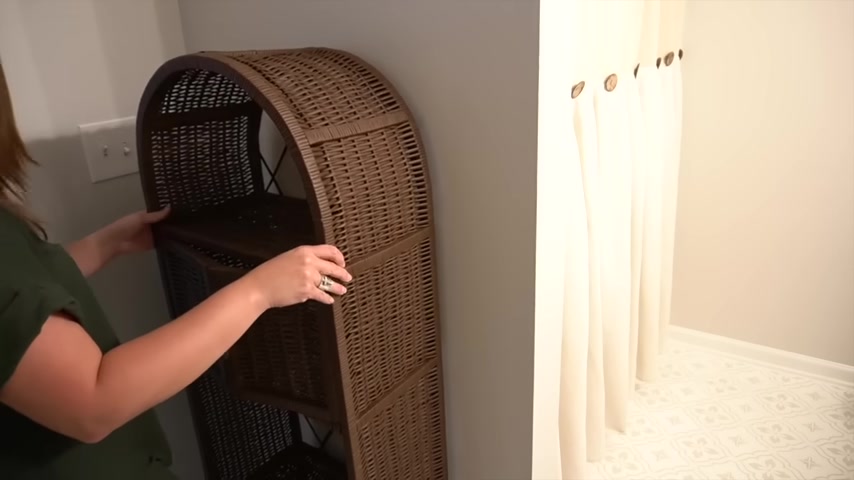
There was also these wicker pieces that were in , in that space that I had actually spray painted white a long time ago .
And I thought it's time to bring them back to a more natural color .
So I took some brown spray paint and began to spray them all over again and to give them a nice fresh look .
And I really do think that this honestly helped .
I didn't want to get rid of any of this stuff because obviously this belonged to my parents and it's been in the family for a while .
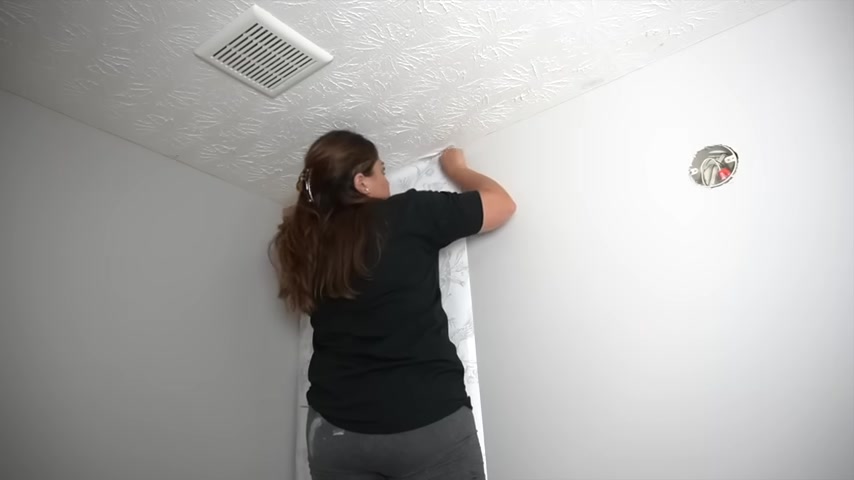
Also , it's very functional , but it just needed a face lift and to provide a nice focal point for the bathroom .
I decided to do peel and stick wallpaper on the back wall where the mirror would go .
I decided to go with the peel and stick because honestly , it's a lot easier to apply .
And if in the future they no longer wish to have it , they can always pull it right off .
Once the wallpaper was done , it was time to install the new light fixture and then it was time to paint the floors .
This was a beast of a project .
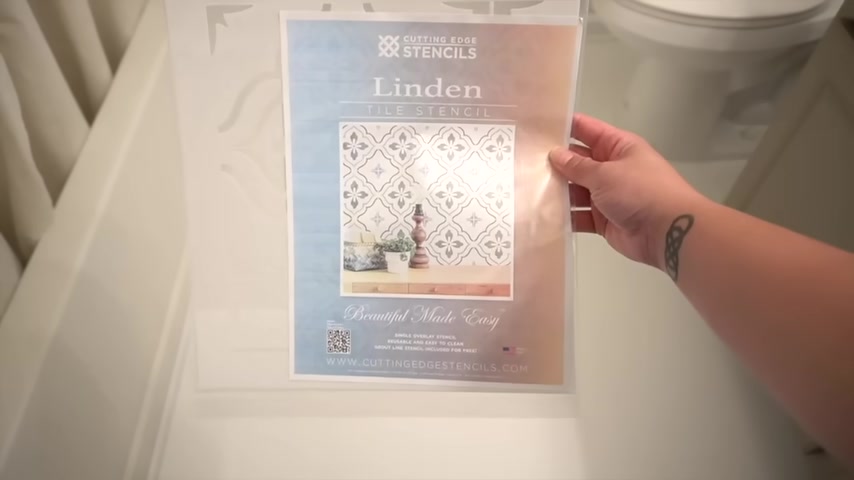
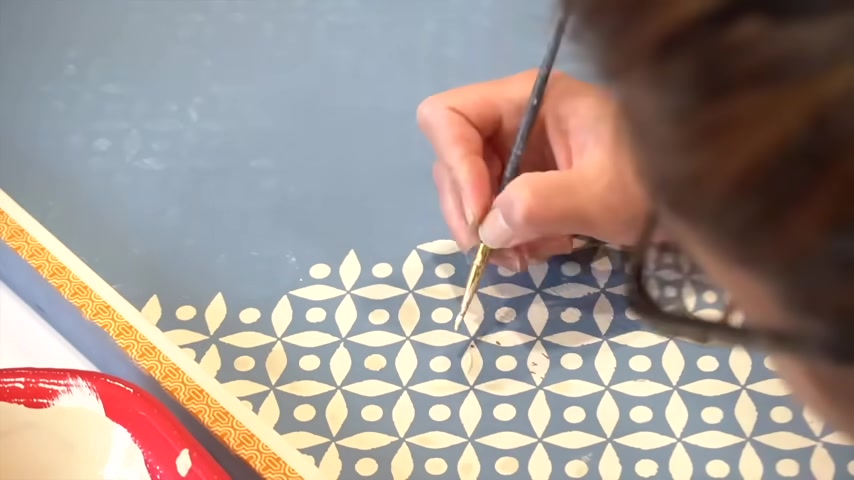
Now , I will say it only took about a week to do everything else for the entire bathroom , but it did take me several days to complete this .
Now , I picked this beautiful stencil online and I began to apply it and create like a faux tile finish on the floor .
This is something that I have done several times and it's a very inexpensive way to update your floors as long as you seal them properly .
This was a huge undertaking .
But I'll be honest with you , the end result of just the floor alone was totally worth it .
It really did give the room a brand new feel and just an amazing look overall .
Now , in order to , in order to seal this , I did use three coats of polyacrylic and I use a brush to apply it in order to prevent any bubbles from forming on the surface .
Next , it was time to add all of the accessories , bring everything back in and make everything nice and cohesive and functional once more .
But let's see the before really quick to remind us how bad it was .
4750.89 --> 4816.729
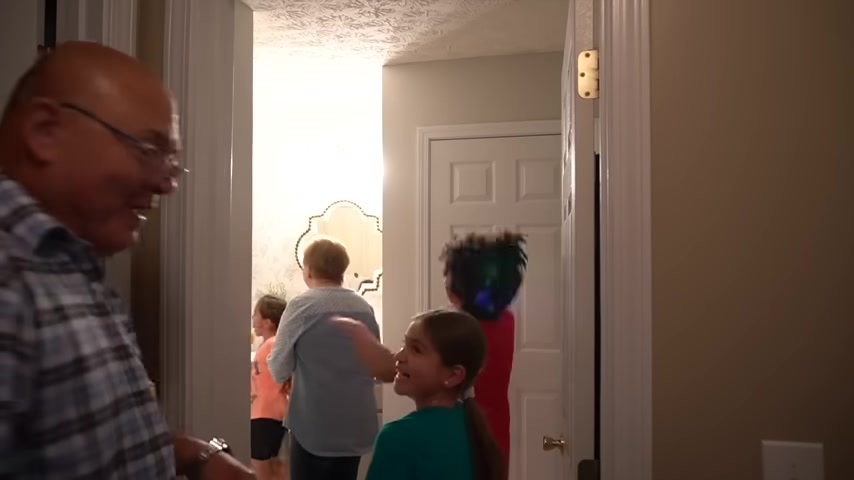
Of course , the true test was gonna be when my parents got home and got to see it for the very first time .
But with my mom's little happy dance , you can tell that she was extremely happy that it was completed and she absolutely loved everything .
And if you noticed in the bathroom , I used the Kirkland's mirror dupe that I had created at my last house and I placed it in here and I think it worked perfectly .
Now , this next Diy is going to be a little bit more complicated but very useful .
And what we're going to be creating is a beautiful wall unit to handle your mail .
And it's a piece that was inspired by one that was at Target only and this is going to be a little bit cheaper and I am going to make it easy for you by providing the exact pattern and that you need to recreate this exact same one .
Now , I'm going to have it in my free principals library on my website and all you got to do is download it , cut the pattern to size and you'll have this easy in no time .
Now , I went ahead and skipped over the part where I'm actually creating the pattern because again , I will be providing that for you if you wish to recreate this .
So this is kind of what it's going to look like .
And for this part right here , all you need is one sheet of that faux leather .
Now I'm gonna add a little bit of detail to make it look a little bit higher end .
So you will need a second one if you decide to do it .
Now for this , you'll also need some dolls and the size of the dow is going to depend on the size of the little that you're going to use for your wall .
These are fairly small because I'm using command hooks that are meant for wires in this case because that's what I had on hand .
These are the command hooks I am talking about and those towels were cut down to 13 inches in length .
Now , next , what you're gonna do is you're gonna put your pattern down on your faux leather sheets and you're gonna tape it down so that you can cut the exact shape .
Now , I found the best way to do this to get nice crisp lines is to use a straight edge and a box cutter .
Now you're gonna end up with a shape like this .
Now , you can definitely leave it like this .
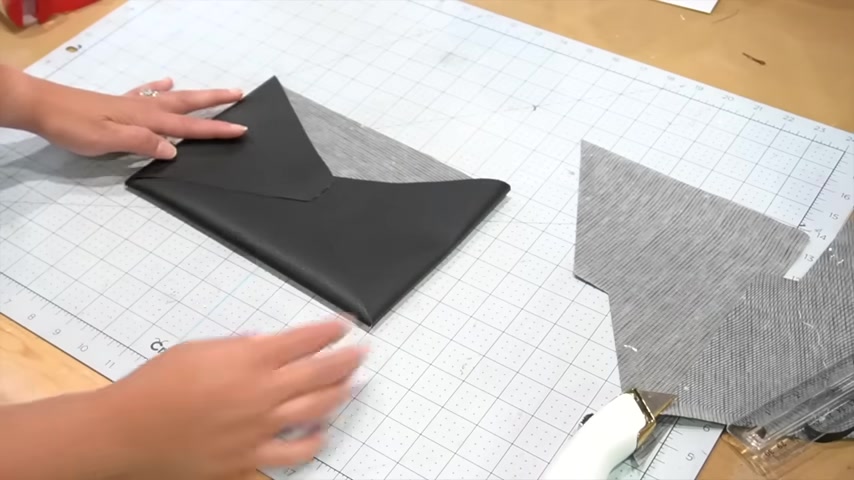
But in order to hide the fact that it's not real leather .
We're gonna have to cover that interior portion and that is going to remain exposed .
We're going to cut another rectangle piece that's gonna fit nicely inside of this envelope when you fold the flaps in and as you can see it covered that interior portion to make it look a little bit nicer .
This is definitely optional and it will require a second sheet of faux leather , but I do think it looks better this way .
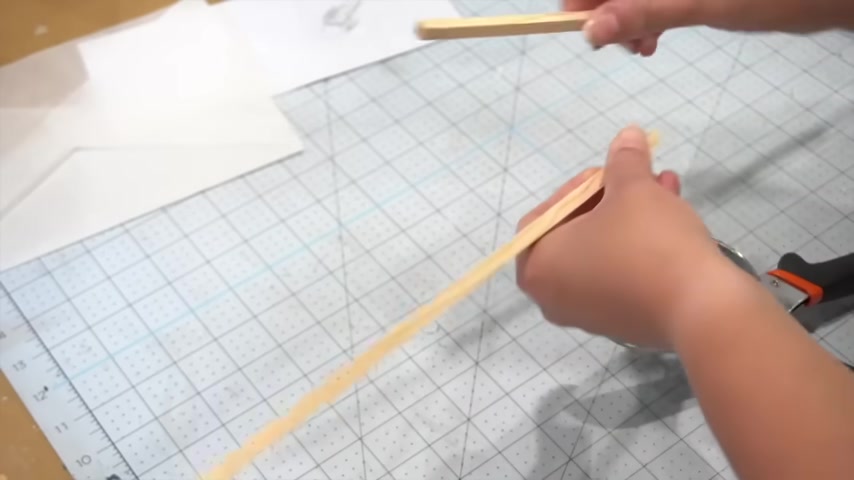
Next , you're gonna want to cut four pieces that are one inch by four inches , ok ?
So next , we're gonna put it together .
You're gonna take that interior rectangle , add some E 6000 to it and you're gonna align it perfectly inside of that envelope .
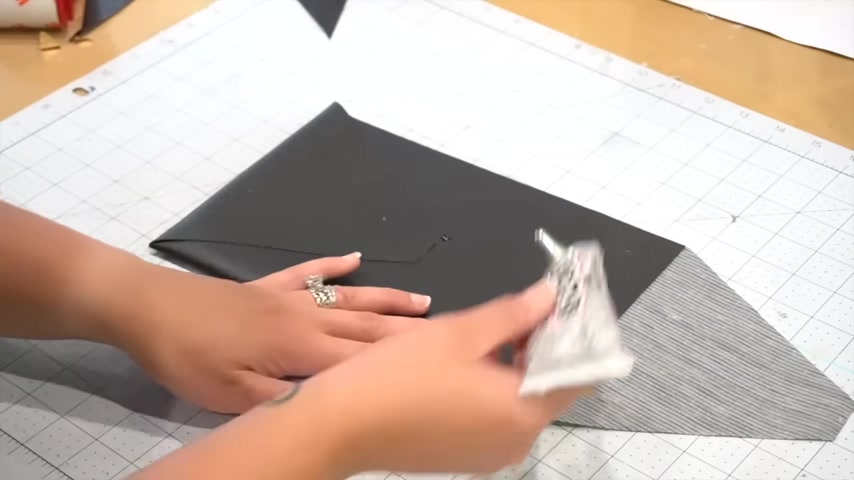
You're gonna fold the bottom flap in and with E 6000 , you're going to add it to the very edge and pull in the side flap , do the same thing to the one on the right and next , you're gonna grab those little thumb tacks again and we're gonna add a little bit of detail to the envelope .
You're going to remove the pin from the thumbtack again with wire cutters , leaving it nice and flat and you're gonna adhere that to the center of the envelope .
Next , you're gonna take those four little smaller pieces that we cut earlier and you're gonna fold them over and also glue them at the ends to create little hoops .
You're gonna wanna do that to only two of them .
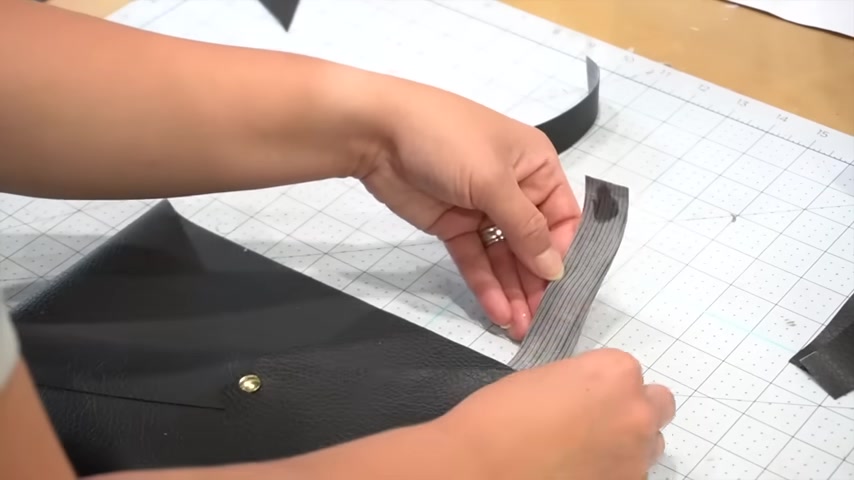
With the other two , you're gonna adhere the back portion to the back of the envelope and then the front portion to the inside of the envelope .
That way the envelope lies inside of the hoop .
For the bottom ones , you're just gonna glue them underneath and behind and just make sure that everything is nice and evenly spaced so that when you put the dowels through , everything will be nice and level next , I'm taking some gold spray paint .
And the reason I'm using this is because I have clear command hooks and I didn't want them to look plasticky .
Obviously , if you have nicer ones , you can skip this step .
Now while those dried , I decided to add additional thumbtacks to the envelope to give it an additional decorative touch .
And as you can see here , this is what the hooks look like .
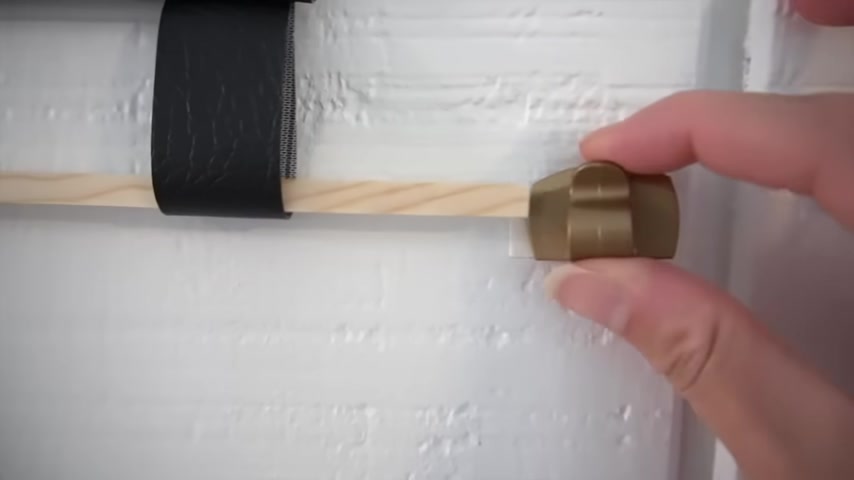
And I added the little command strips to the back .
These were actually longer ones that I had cut in half .
Now you can leave it as is or you can add hooks just like these .
I'll have these linked below .
And even though you can't put anything too heavy on this , you can still find ways to make these useful .
And here is how it turned out .
First , Diy , we're going to be attempting to recreate these faux potted berry cluster cone trees , say that five times fast .
They're pretty large and the smaller one is $79 when the larger one comes in at 100 and $59 .
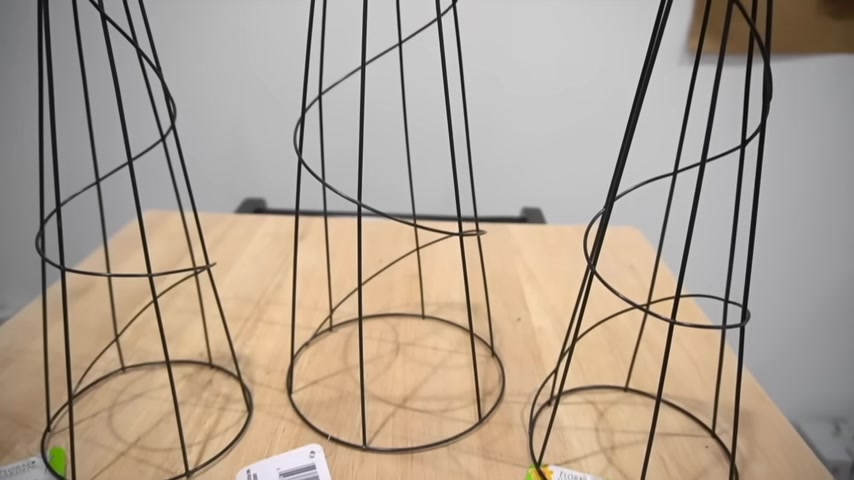
Now , the perfect thing to use to recreate these would be these metal cages that have been found at the Dollar Tree garden section .
I had three over the summer , but I was not able to find any this time around for these diy s So if you're unsuccessful in finding these , like I was the next best thing are these right here that you can get right .
Now .
Now , if you were making the larger ones , I would suggest using the larger metal buckets that they have a dollar tree .
But since these are smaller , I am using these that you can find at the party section and finally , you will need a ton of these .
Now , I did notice this year , these only come with four sprigs on them when they used to come with five and now they're a dollar 25 .
So you're actually paying more for less berries .
So just keep that in mind when you do this and consider your costs .
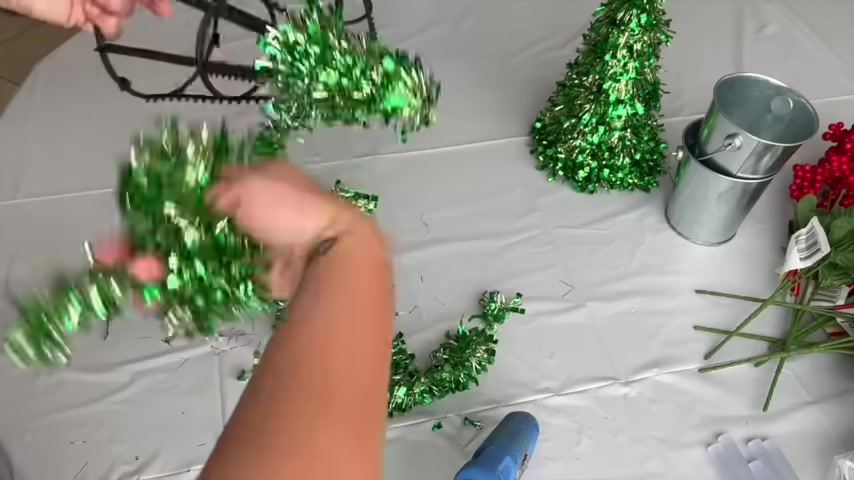
Now , the first thing you want to do is remove all of the tinsel that goes around each of these trees .
And it's actually quite simple .
I wanted to make one of them taller than the other , just like in the original inspiration .
And since I have limited supplies , I had to get really creative .
So what I did was I melted two ends of half a stick of hot glue and I put that in between two of them to give the illusion and that one of them was taller than the other .
Then with some wire cutters , I began to cut off the little heads of the berry bundles so that I can start placing them on the cones .
Now , before I adhered any of the berries in , I wanted to give it a little bit more surface area so that the berries would adhere .
So what I did was I took some yarn that I actually had purchased for another diy that you'll see soon .
And I began wrapping it around all of the little teeth that were already on the cone .
It held it in place very well .
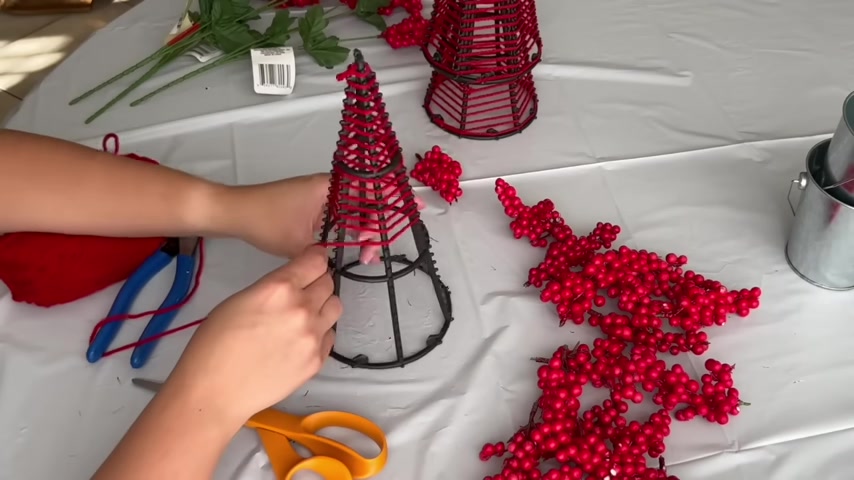
And this will just give me more surface area so that the berries have something to adhere to when I glue them on .
As I began adding berries to the tree forms , I started at the top and worked my way down .
I cut the berry little bundles down into smaller ones and adhered them that way .
I continued all the way to the bottom .
And then after I was done adding the main berries , I would come back in and check if I had any areas that needed to be filled in .
Then I took some paint in Santa Red .
This is some old paint that I've had on hand and I decided to paint all of the berries because not all the berries are the same color and sometimes you can see the styrofoam from when you cut them from the previous bushes .
So I decided I wanted to cover all of those white spots off and give it a more consistent look .
So I painted the entire thing .
I also wanted the berries to look a little bit more shiny .
And so I had some mod podge on hand as well in glossy and I gave everything a nice coat and I wasn't perfect with this , but it did give a nice sheen throughout once it was dry .
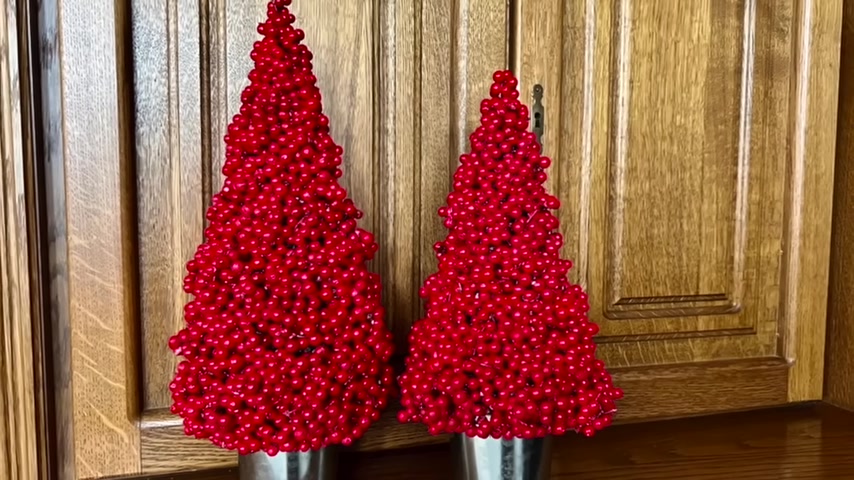
All you needed to do , was it hear them on to the buckets or you could leave them without honestly , I like them without the buckets myself .
So let's see how he did because these were much smaller than the ones they had online .
I went ahead and priced out two of the smaller ones for the original pottery barn ones .
So if I would have bought two of the smaller ones , it would have come out to 100 and $58 compared to mine for the berries , the tree forms and the buckets .
I paid $34 for two of them .
Well , that's it for today's video .
I hope you enjoyed it .
If you did , please make sure to give this video a thumbs up , it really helps my channel and let me know in the comments below if you saw your favorite project from this year or if you discovered a new favorite today .
Thank you all .
As always for being part of my familia here on youtube and I hope to see you guys back here very soon until then .
Are you looking for a way to reach a wider audience and get more views on your videos?
Our innovative video to text transcribing service can help you do just that.
We provide accurate transcriptions of your videos along with visual content that will help you attract new viewers and keep them engaged. Plus, our data analytics and ad campaign tools can help you monetize your content and maximize your revenue.
Let's partner up and take your video content to the next level!
Contact us today to learn more.