https://www.youtube.com/watch?v=JlXmJBe6MJA
How to Start a WordPress Blog _ Blog Tutorial for Beginners
In this video , we'll show you step by step how to start a Wordpress blog for 2018 .
And rather than give you a one size fits all approach , I'll show you the fundamentals and give you the resources .
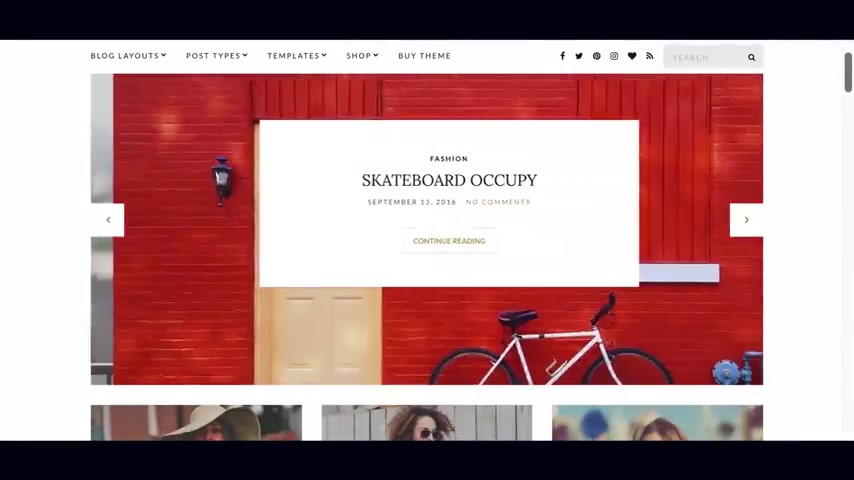
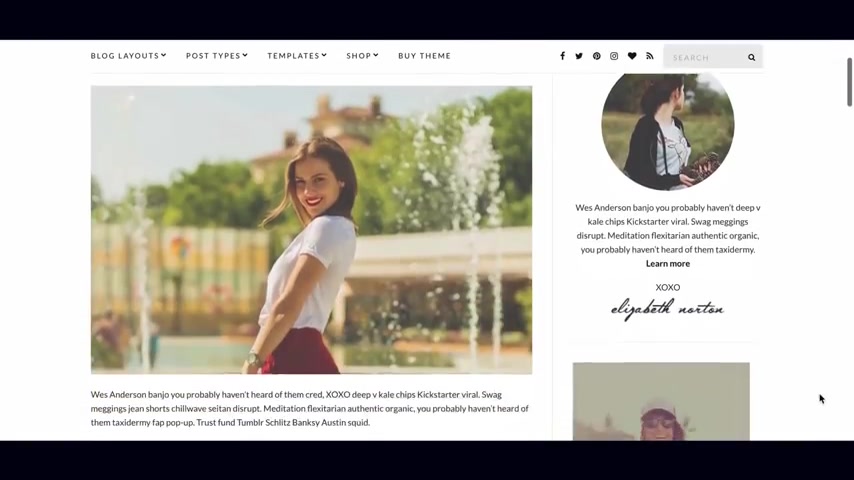
You'll need to create the exact type of blog you're looking for , whether you want to start a fashion blog , something like this or a travel blog , maybe even a lifestyle blog or a food and cooking blog or really any type of blog for that matter .
In this video , I'll show you how to do it for this video .
We'll go and create this exact blog here .
But more importantly , I'll teach you the process for building any of the blogs we featured before the Wordpress themes for which can be found on the Oakland blog at Oakland ohklin dot com forward slash blog .
Under the Wordpress theme reviews category .
This video will focus on the fundamentals of setting up a Wordpress blog and give you the resources you need to put together the exact blog you want .
Having built hundreds of wordpress websites and blogs for clients ranging from $1500 to tens of thousands of dollars , I can walk you through best practices and help you avoid the common mistakes that beginners often make .
So if that sounds good , then let's get into our how to start a wordpress blog .
2018 tutorial .
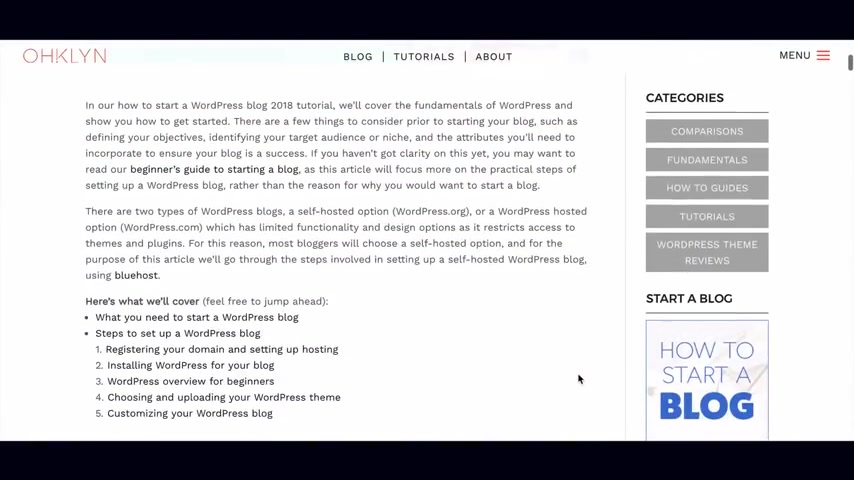
There are two types of Wordpress blogs .
A self hosted option , often referred to as wordpress dot org and a wordpress hosted option referred to as wordpress dot com , which is limited in functionality and design as it restricts access to certain themes and plugins .
For this reason , most bloggers will choose a self hosted option .
And in this video , I'll go through the steps involved in setting up a self hosted wordpress blog .
This video is intended for beginners and those who may have some experience with wordpress .
What I'll focus on is the process of setting up a Wordpress blog step by step to take you from zero to hero in about an hour .
It can be found on our blog at Oakland dot com forward slash blog .
I'll also add a direct link to the How to start a Wordpress blog .
2018 article in the description box below .
I will refer to the article from time to time .
So I would recommend opening a new tab and following along as we go through .
And if you like what you see , I would recommend signing up to our newsletter or subscribing to our youtube channel .
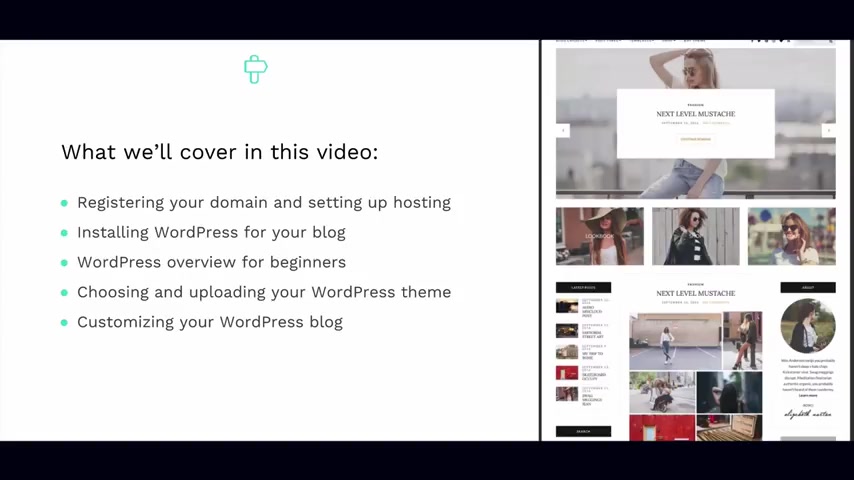
What I'll cover off in this video is registering your domain and setting up hosting for your blog , installing wordpress .
We'll go through an overview of wordpress to make sure you're comfortable with the platform .
We'll look at choosing and uploading a Wordpress theme and lastly customizing your wordpress blog to reflect your design style .
In regards to registering your domain and setting up hosting for your blog .
Your domain often referred to as your URL is the web address for your website or blog .
It's what users will type into their browsers to access your blog for Google .
Their domain is Google dot com for Oakland .
It's Oakland dot com .
It's a good idea to pick something that's relevant and memorable hosting is what allows your blog content to be accessible to users around the world .
Web hosting refers to the process of storing the content and data for your blog on a web server .
When someone visits your blog , that content is then made available or served to your blog visitors on demand 24 7 .
If you want to learn more about hosting , then check out our posts on what is web hosting ?
I'll add a link in the description box below our preferred hosting provider and the one we'll use for this tutorial is blue hosts as they're really easy to use , reliable and incredibly affordable at around 5 to $10 per month .
Depending on the term .
There's a link in the description below that gives you access to discount hosting through blue host as well as a free domain name .
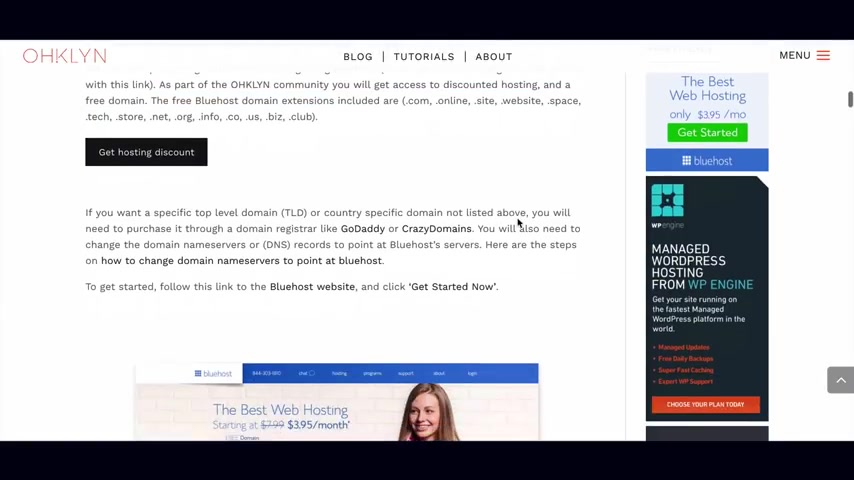
If you're following along with the post on the Oakland website , you can click on this button here to get access as it says here .
The types of domains that are included for free are at dot com dot online dot site dot website , dot space dot tech dot store dot net , dot org , dot info , dot code dot us dot biz or dot club .
Now , if you've already purchased your domain or you want to purchase an alternative top level domain such as dot blog or dot io or dot design .
For example , maybe because the dot com isn't available or you want a country specific domain such as dot co dot UK or dot com dot A U .
That's ok .
You can purchase those domains through a domain register like go daddy or crazy domains or any other domain Reger .
I'll add some links below .
If you go with that option or as I mentioned , if you've already secured your domain name , all you'll need to do is then change what's called your domain name servers to point at blue hosts , which will be your hosting provider .
Fortunately , we've written an article and a step by step guide on how to do this .
I'll add the links to these guys in the description box below and if that applies to you , you can access it there .
We'll take care of the first two steps together which is registering your domain and setting up hosting for your blog as well as installing wordpress .
So to do this , follow the blue host link in the description below or if you're on the Oakland website , follow this button here .
Blues is an affiliate partner of Oakland .
So by using those links , not only do you get access to discount hosting and a free domain , but they'll set aside a few dollars from their marketing budget to help fund future free videos like this one .
So we appreciate you using the link provided that will take you to this page and we'll click on the get started .
Now button to select our hosting plan and register our free domain .
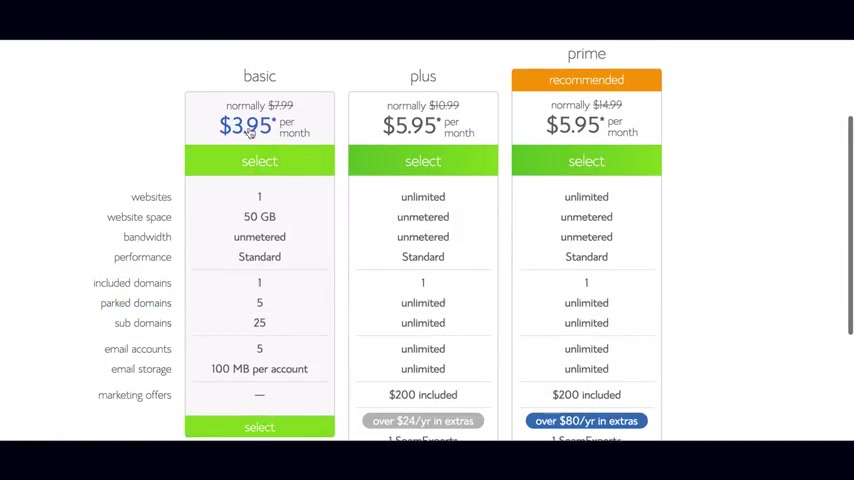
Select the plan .
That's right for you .
If you intend to just have one domain for your blog , then the first option will be fine .
Alternatively , if you want to have multiple domains on the same hosting account , then you'll need to select one of the other plans .
You can always amend this down the track .
And the cool thing is you get a 30 day money back guarantee on either plan .
So you can get going risk free for this example .
I'll go with the middle option to get your free domain name .
You'll enter the desired domain name for your blog in the new domain field .
Select the domain extension for example dot com and hit next .
If the domain name isn't available , you'll get an error message and we will need to either select an alternative domain name .
Try contacting the owner of that domain to purchase it from them or select another top level domain extension .
If you've already purchased your domain name , enter the domain in the transfer domain field and select next , remember to review the article on how to change the DNS records to point at blue host to set up your hosting account .
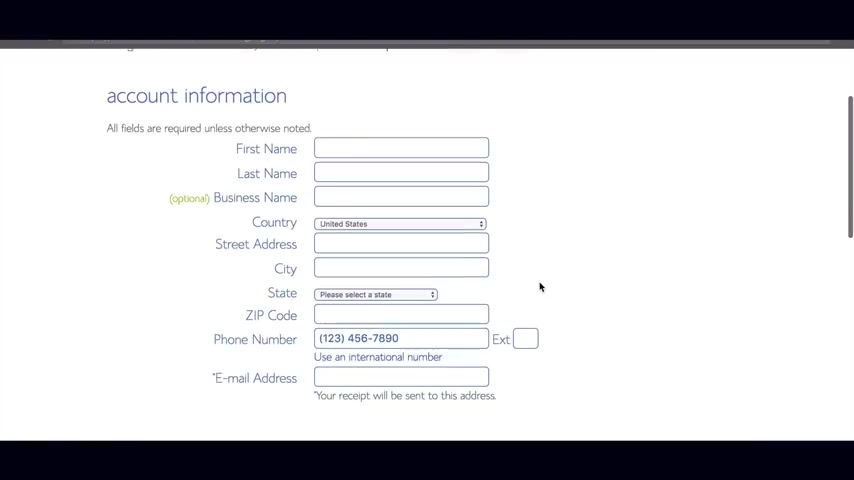
Enter the required account information here in the package information section , Choose your desired hosting term and domain add-on preferences .
I recommend selecting the domain privacy protection so that your personal information isn't associated to your domain and publicly available .
This is optional .
Of course , once you've entered the required information , add your payment details , review the terms and select , submit .
Once you've done that you'll be taken to this page here .
You'll have been sent a confirmation email to the designated email address on the account .
You'll need to create a password for your hosting account to do that .
Click on , create your password .
Make sure to pick a secure password .
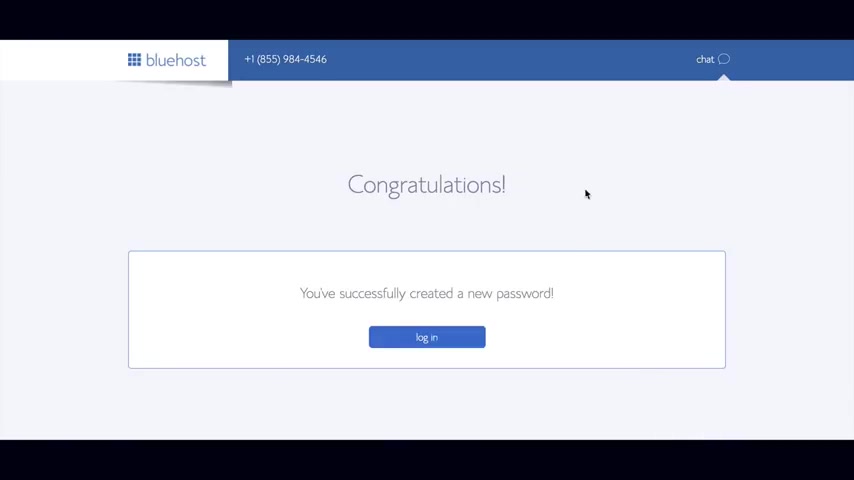
You could use the suggest password tool to help you with this .
Once you've entered in your password , review the terms of use and select next , you'll then be able to log into your blue host dashboard as part of the new blue host offering , wordpress will automatically be installed on your new domain .
If you've registered your domain elsewhere , you'll need to amend the DNS records to point at blue hosts and install wordpress using the blue host .
One click wordpress install for the steps on how to do this .
Review our article on the Oakland blog .
The direct link will be in the description below .
You can choose to install one of the free preselected wordpress themes on your domain .
For this tutorial , we'll use a premium wordpress theme .
So in this case , we'll just select skip this step .
Wordpress will now be installed on your domain to access the back end of your Wordpress website .
Click start building .
This will prompt a guided tour which you can choose to run through or not .
We'll go through this in our tutorial .
So I'll click , I don't need help .
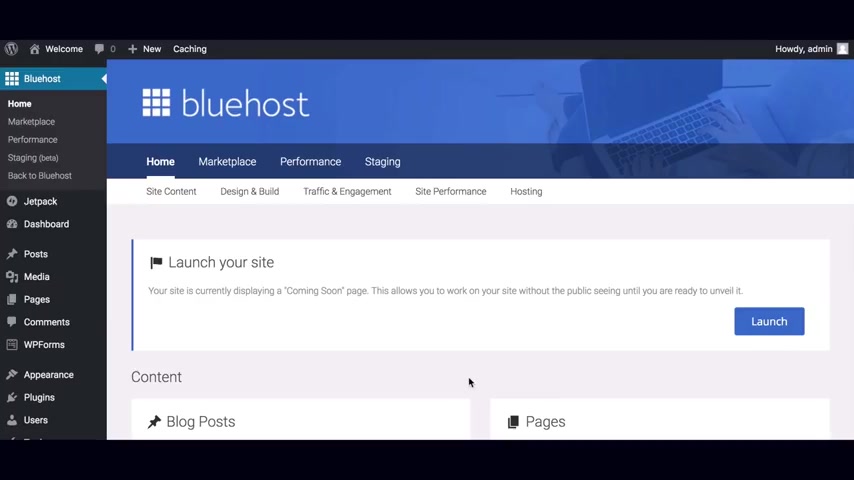
This will take you to the blue host tab within the back end of your Wordpress site to access your wordpress dashboard .
Click on dashboard in the menu on the left , there will be a number of notifications that you can action or dismiss by clicking on the X in the top right corner , you can amend what's visible on your dashboard by clicking on the screen options , drop down in the top right and checking or uncheck the boxes .
A number of additional plugins will be installed .
You can view these by hovering over plugins in the admin menu on the left and selecting install plugins .
In addition to the standard Wordpress plugins , blue hosts will install Jetpack mojo marketplace opt in monster and WP forms .
You can leave these active or choose to deactivate and delete these plugins .
I'll leave this up to you .
I'll delete mine as I like to use as few plugins as possible .
This can be done in bulk by selecting the check box next to the plugins .
Choosing deactivate from the bulk actions drop down and then clicking apply .
I'll then delete all the selected plugins , then return back to my wordpress dashboard .
If I enter in my domain name , I'll see that wordpress is now installed .
Congratulations .
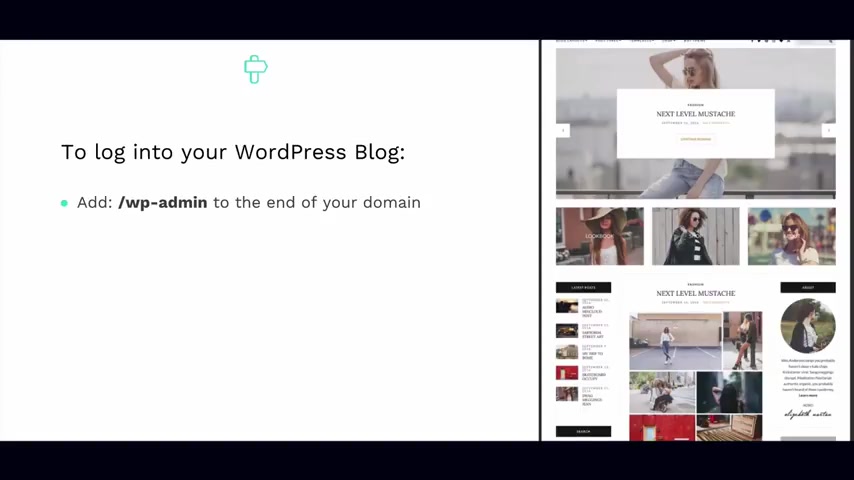
You officially have a blog whenever you want to log in to the back end of your blog , add forward slash WP hyphen admin to the end of your domain and it will take you to the login page for your website .
So for my example , domain of example dot com , I would go to example dot com forward slash WP hyphen admin and enter my login details for your blog , use the login credentials that you've just set up in the prior step to access the back end of your blog .
Alright .
We've gone through the first two steps of registering your domain , setting up hosting and installing wordpress .
Now we can get to the fun part .
I'll give you a crash course in the wordpress fundamentals you need to know about .
We'll then move on to selecting a Wordpress theme , customizing your blog design and publishing your content .
Whenever you log in to your Wordpress website , you're taken to your wordpress dashboard .
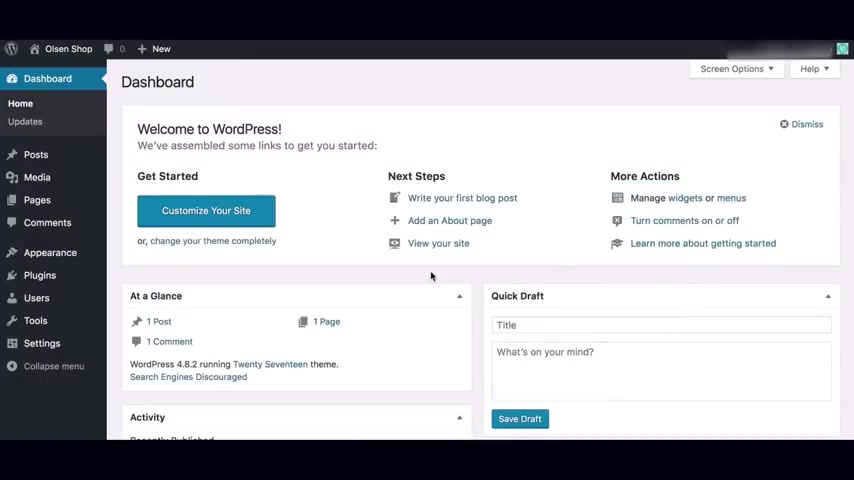
The first time you log in , depending on which hosting provider you went with .
There may be a walk me through it feature or welcome series which you can choose to follow along with or not .
I've installed wordpress in a development environment .
It's a clean Wordpress install .
So it should look the same if it's slightly different though .
Don't worry , the fundamentals will all be the same .
I do a lot of wordpress website and blog development for clients and prefer to work in a staging or development environment before pushing a site live .
However , it isn't always necessary .
And for the purpose of this video , we'll build your website on the live site .
We will be putting together a video shortly on how to install wordpress locally on your computer and the process of taking a site live .
So if that's of interest , subscribe to our youtube channel and check out the video section for more on that .
If you build your website on your live site , I would recommend installing a maintenance mode or coming soon plug in .
I'll provide a link to a video in the description below on how to do that .
Ok .
So the wordpress dashboard or admin panel is broken down into three main sections at the top .
We have the wordpress toolbar .
The menu or admin menu is located on the left hand side and the main admin area is in the middle .
We will do most of our work .
I'll give you a brief overview of each section .
Now if you want to take a deeper look , then check out our introduction to wordpress for beginners , guide and video .
The wordpress toolbar at the top is dynamic and adjust the available options depending on which page you're on .
And if you're viewing the page from the front or the back end , the admin menu located to the left of your dashboard is separated into three main sections .
Those are the dashboard section , the content management section and the site administration section .
The dashboard section provides easy access to the dashboard updates and additional plug-in features .
The content management section is where you create and manage posts , pages , media items , comments and additional plug-in features .
The site administration section is where you configure the design and appearance settings for your website including selecting the active theme for your website , creating and managing menus , widgets and customizing your website's theme .
It's also where we manage plugins , users control global wordpress settings and activate theme and plug-in extensions like seo social sharing theme specific settings and security .
We'll go through some practical examples for each of these in the coming sections .
Once we upload our theme and start working with content , the menu is fully responsive , meaning that as the screen size get smaller , the menu adjusts to remain accessible on all types of devices .
Lastly , the main admin area serves as our primary workspace and adjusts depending on what's selected from the admin menu .
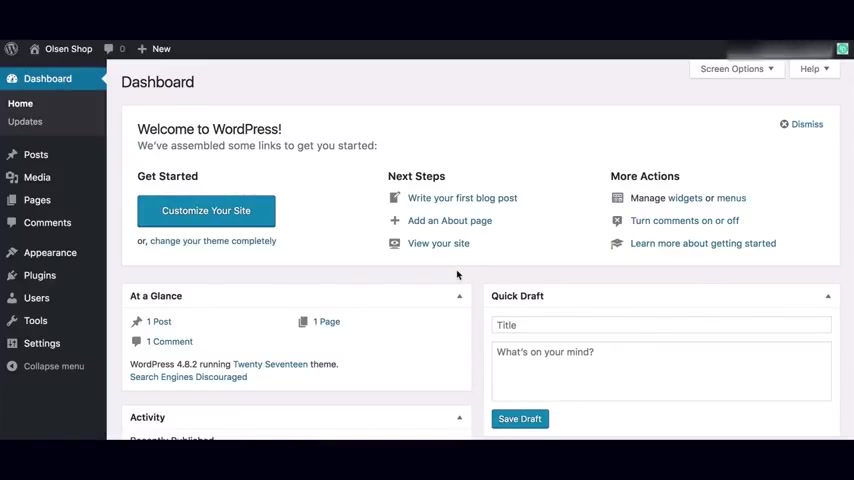
I'll draw your attention to the screen options tab in the top right corner .
When you open this tab , you'll see a list of options and features that are available for display depending on which page you're on .
Similarly , the help tab to the right shows you helpful hints for the page that you're on as well as links to relevant documentation .
For a more detailed overview .
See our introduction to wordpress for beginners , guide or video .
OK .
Now that we've touched on the fundamentals of wordpress , let's move on to choosing and uploading your Wordpress theme .
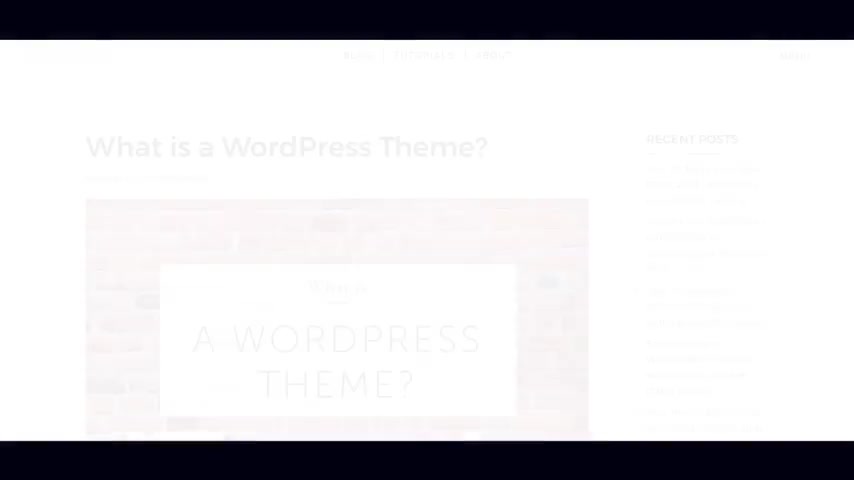
A Wordpress theme is a group of files that work with the underlying Wordpress software to enhance the design and functionality of your wordpress blog .
For a more detailed overview .
Check out out what is a Wordpress theme article on the Oakland blog ?
There are both free themes and premium themes you can use for your blog .
As I alluded to earlier , the main benefits of using a premium theme is access to support the inclusions of more extensive theme , documentation and instructions , extended functionality and access to demo content .
A lot of themes will also include a one click demo content importer which just speeds up the whole process .
Support is important as it's always good to know someone's got your backs , especially when you're new to something .
What you'll find is that every theme is different and knowing where to find what you're looking for may be intuitive to someone that's done .
A lot of this .
But often times even the pros get stumped with any of the premium themes that we recommend .
There is always priority support available theme , documentations or instructions and often demo content to get you up and running quickly on the Ola blog .
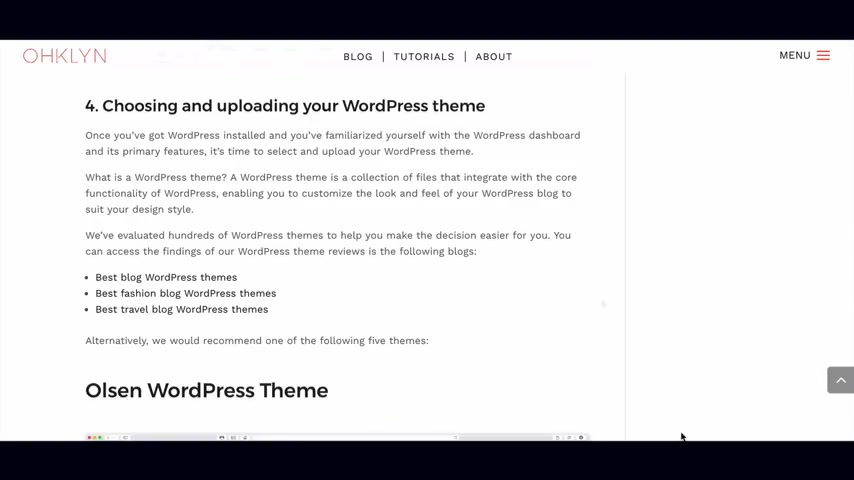
We've analyzed hundreds if not thousands of wordpress themes based on speed design , ease of use , mobile responsiveness and functionality to make this process a whole lot easier .
We've done this by category and you can access these via the Oakland blog under the Wordpress theme reviews category where you'll find a number of articles related to specific niches .
The theme that we'll be working with today is one of the top rated themes .
In regards to installing a Wordpress theme , you can either install a free theme directly from the Wordpress theme repository or you can purchase a theme from a premium wordpress theme provider and upload the theme , which is the option we'll go with today .
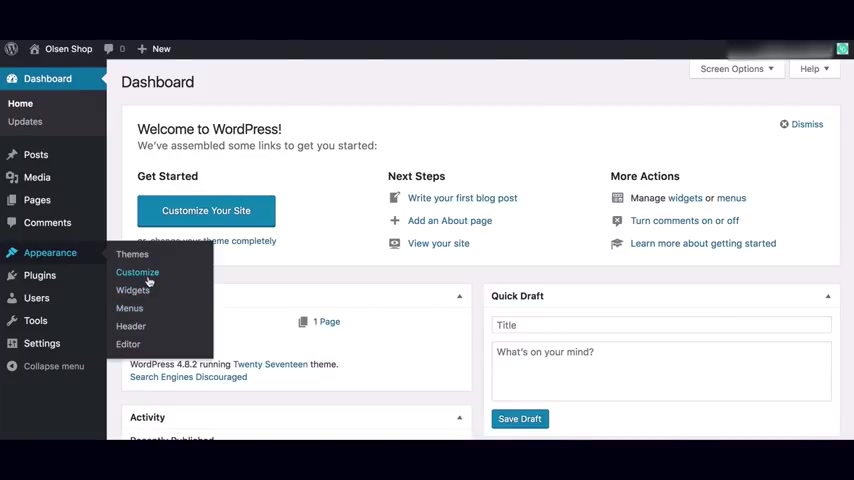
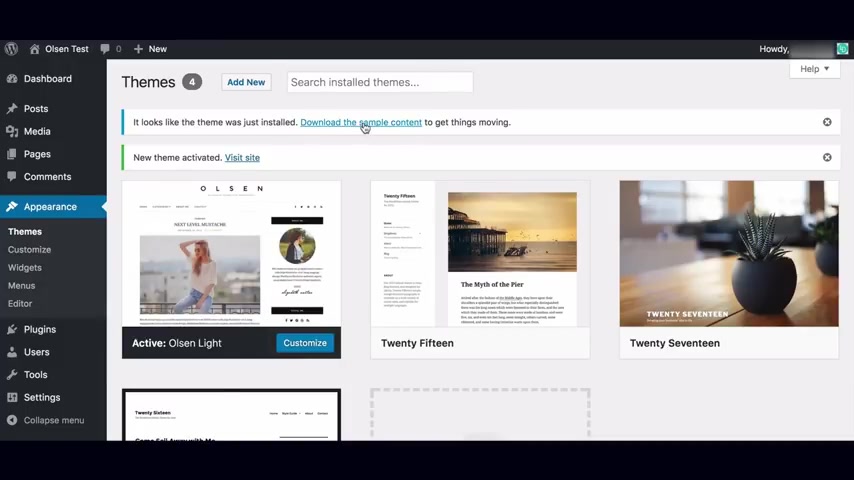
However , if you want to go with the first option , you can access the free Wordpress theme repository from your dashboard by navigating to appearance , then themes , this will show you your currently installed and active themes to add a new theme .
Click on add new , you can browse the wordpress theme library here by category or by using the feature filter to search for themes with the specific features you're looking for .
If you find a theme , you like , you can click on preview to view what your blog would look like with that theme in its default state .
And if you're happy with it , select , install the theme we'll upload .
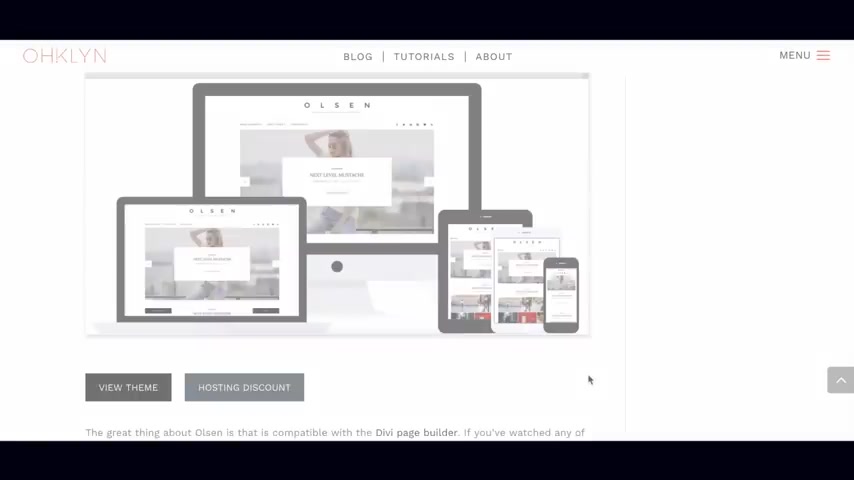
For this example is called Olsen and has both a free and a premium version .
I'll add a link in the description below which will give you access to discounts when they're available .
If you're following along on the Oakland site , you can click on this button here which will take you through to this page .
I'll be using the premium version as it comes with more options , layouts and features as well as priority support which for 50 bucks is well worth it .
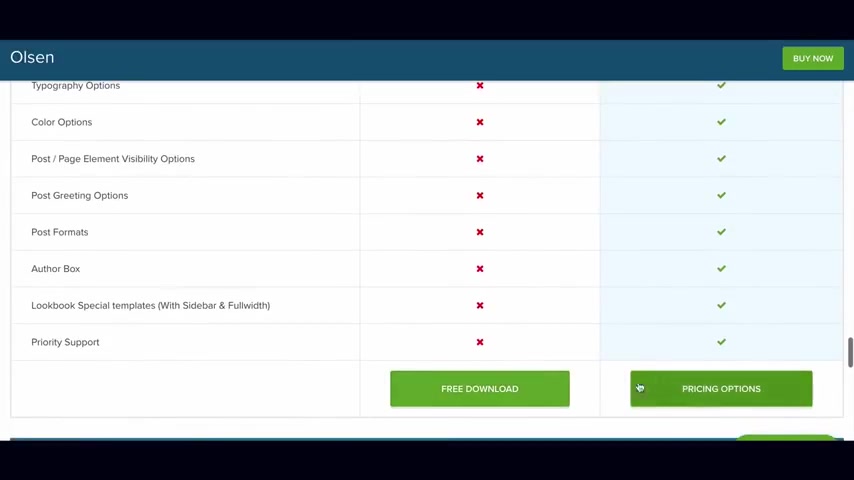
They do offer other options for an extra $20 .
You get access to all of their themes or you can join their lifetime club and access all of their themes updates and support for life , which is the option we went with these guys feel great quality themes .
I couldn't recommend them highly enough .
As you'll see as we go through .
If you want to trial the free version , you can either download the free version here .
Search for the free version within the Wordpress theme repository and select install or pick the package that best suits you to sign up and purchase the premium version .
If you go with the premium option , you'll need to enter your information and payment details to create an account , then log into the back end of your CS S ignited account within the download area .
Find the Olsen premium theme .
Click on wordpress to download the latest version of the Olsen premium wordpress theme .
This will download as a zip file which will upload as is there's no need to unzip this file back in the members area .
You can follow the link to the theme documentation which will provide all the information you'll need to customize the theme .
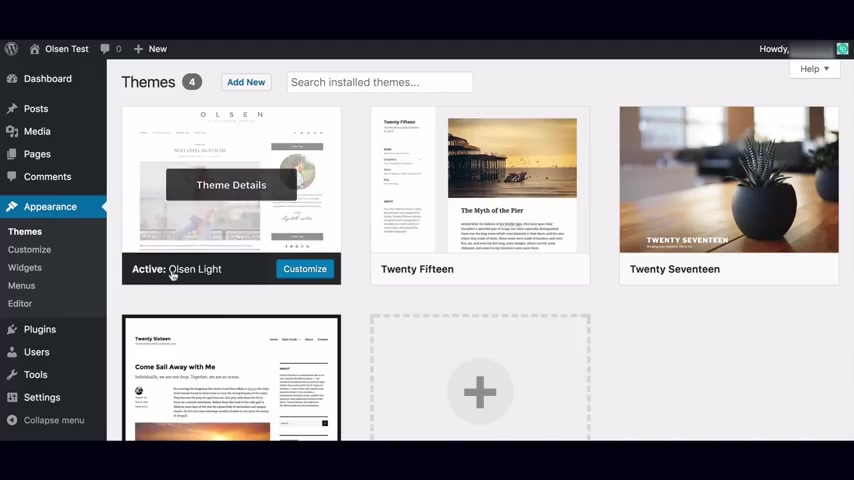
You'll also find the link to download the sample content , which I'd recommend as we'll upload this shortly .
With most free themes , you generally don't get access to demo content , but Olsen is different and you can access this once you install the theme by clicking on the download the sample content link that appears once you install the theme .
However , you will only have access to the one default layout style and you will notice that the functionality and customization options will be limited compared to the premium option .
That being said , it's still a great looking theme .
As I said at the beginning , though , this tutorial isn't a one size fits all .
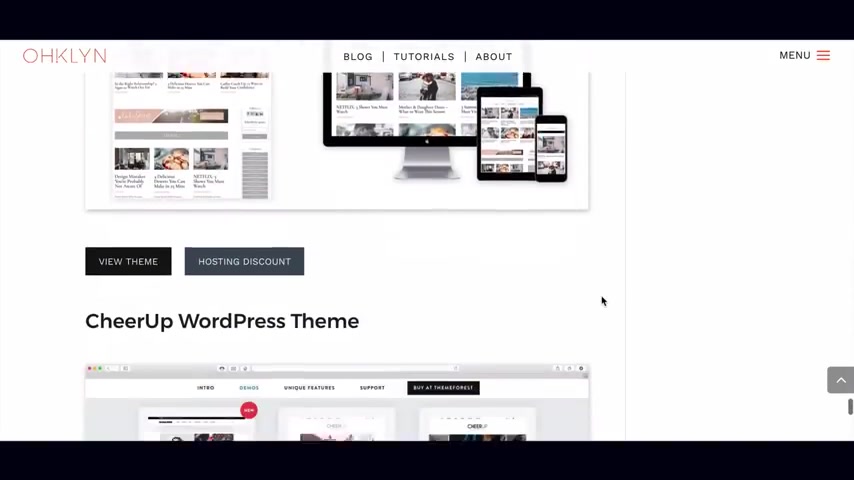
If you don't like the Olsen theme or you prefer to use either an alternative free theme from the Wordpress Repository or one of the premium themes featured in the Oakland wordpress theme review articles .
That's great .
Feel free to select one of those and follow the same process outlined above .
Now that you've chosen your theme , I'll show you how to upload it .
You already know how to install the theme directly from the Wordpress repository .
So if you went with the Olsen Light theme or another free theme , go ahead and do that to upload your premium Wordpress theme , navigate to appearances and then themes , choose , add new and select upload theme .
Click on choose file and navigate to the dot zip file for your theme and select upload .
If you downloaded the demo content for Olsen , just make sure you pick the right Olson dot zip file as one will be the demo content which will need to unzip and the other will be the theme file which will need to remain zipped .
I downloaded the theme file first .
So the second one is the demo content .
So I'll select the Olsen dot zip theme file and hit open , then install now that will do its thing .
And once it's installed successfully , you'll get a confirmation message stating that the theme installed successfully , select activate and you're all set .
If you haven't downloaded the demo content already or you're using the Olsen light theme .
Click on the download the sample content link that appears once you install the theme .
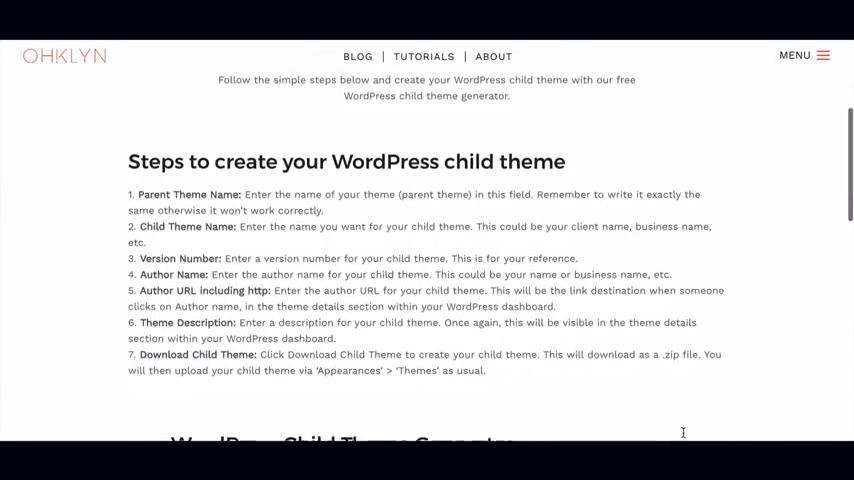
If you want to install a child theme , you can either use our free child theme generator located under the resources menu tab by following the instructions .
Alternatively , you can also use a plug-in called child theme configure to help set this up .
This is best practice but not essential in keeping with our anti one size fits all approach .
We'll now go through the theme documentation for Olsen to finalize the setup process , install any required plugins and upload the demo content .
If you've gone with an alternative theme , find the documentation and go through the same process with most premium themes , you'll get access to the demo content , which is one of the reasons I always use premium themes because it just makes the process so much easier .
The link to the Olsen theme is in the description below and on the Oakland website by clicking on this button from here , you'll find the documentation you'll need under support .
Click on either Olsen for documentation for the premium version or Olsen Light for documentation on the free version .
Alright , so we've already taken care of the theme installation .
It has some information here on the minimum recommended image sizes to be used in the theme to keep everything looking crisp .
Speaking of images , we're putting together an article as we speak on the best free high quality stock image sites to find images for your blog .
So remember to regularly check our blog and subscribe to our newsletter and youtube channel .
A few that will be featured are pixels un splash Pixar Bay .
Just to mention a few , I'll link to these in the description below as they are awesome resources for any blogger .
They all operate on AC C ZERO license , which is a Creative Commons open license , which means you can use the images for whatever you like , which is great with no attribution required .
The next thing we need to do is install some plugins that are leveraged within this theme .
These will vary depending on the theme you're using .
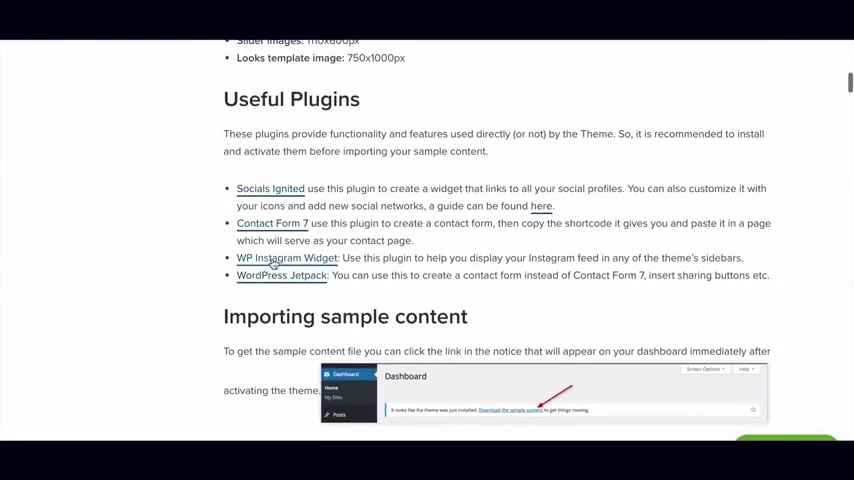
In this case , we'll install socials ignited .
If you want to include a contact form on your website , we'll also install contact form seven , the WP Instagram widget , which will allow us to include an Instagram feed in the sidebar and footer .
We won't need to install jetpack as we'll be using contact form seven for our contact form .
And if we scroll down the page a bit , we see that we'll also need the widget importer and exporter plug-in that we'll use a little later .
The only additional plug-in that I would recommend which is optional is something that limits login attempts , which will be used as a security measure against people trying to brute force attack your blog for this .
I would recommend either server security and limit login attempts by Gregory or word fence security by word fence .
All right .
So let's go and look at how you install plugins from your wordpress dashboard hover over plugins in the admin menu and select add new in the search box .
We'll search for socials ignited , which is by the CS S ignited team with plugins .
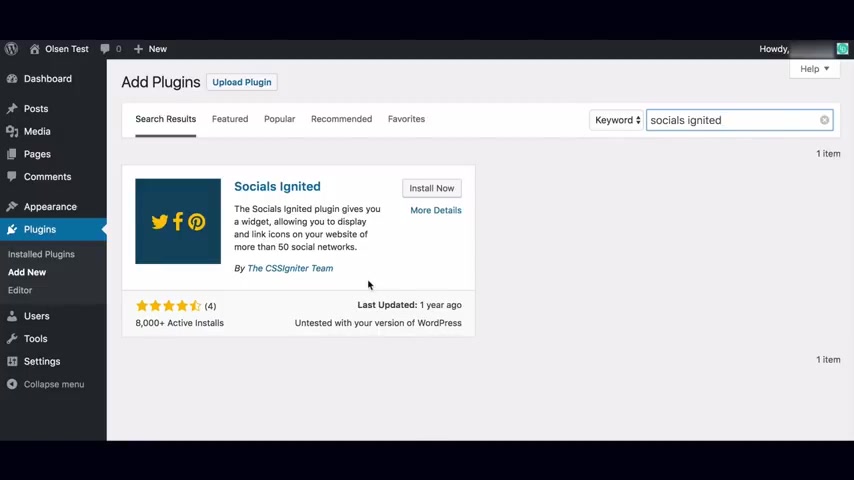
You always want to check the number of active installs , the star rating and the number of reviews when it was last updated .
And if it's compatible with your version of wordpress , everything looks good , but it isn't tested at the moment with the latest version of wordpress .
Generally , if you see this , you should be mindful of what you're installing in this case .
However , I've tested it and it's not going to cause any issues .
So we'll hit install now and then activate that will redirect you to the installed plug-in section .
We'll do this for the rest of the plugins that we need to add from the install plugins page .
Click on the add new button and search for the remaining plugins .
We'll search for contact form seven .
It's by Takayuki Miyoshi .
We'll check the number of active installs , the star rating and number of reviews when it was last updated .
And if it's compatible with your version of wordpress , it all looks good .
So we'll select install now and then activate , select , add new .
We then search for WP Instagram widget .
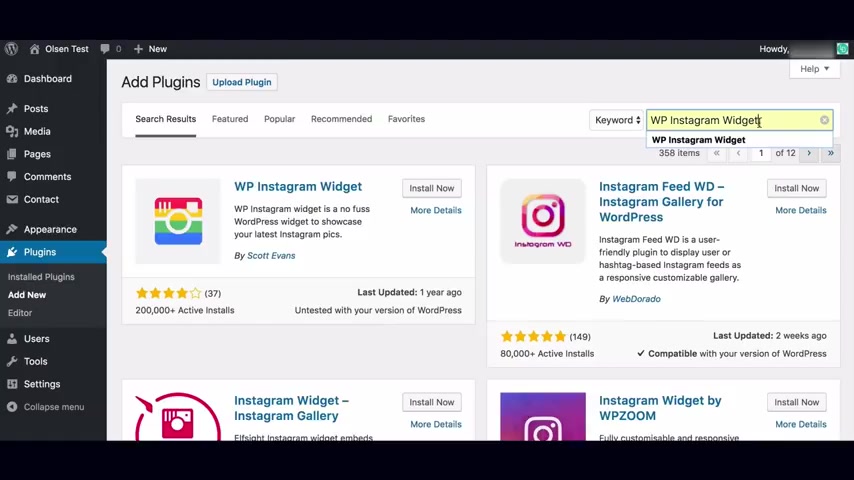
This one's by Scott Evans , everything looks good , but it isn't tested at the moment with the latest version of wordpress in this case .
However , I've tested it and it's not going to cause any issues .
So we're ok to install this plug in , select install now and then activate , select , add new search widget importer and exporter by church themes dot com .
Select install now and hit activate and the last plug in is optional , but I would recommend installing it .
So click on add new search for limit login attempts and we're looking for server security and limit login attempts by Gregory select install now and then activate .
All right , we've now installed all the required plugins and can move on .
It's now time to upload our demo content .
Even though you'll create your own posts , pages , menus and categories .
It's always good to install the demo content so that you can see how everything will work .
You can then choose what you want to amend , delete or save as drafts for later .
We'll go through this together .
You should have your demo content downloaded and ready to go .
If you haven't done this , go back and do this .
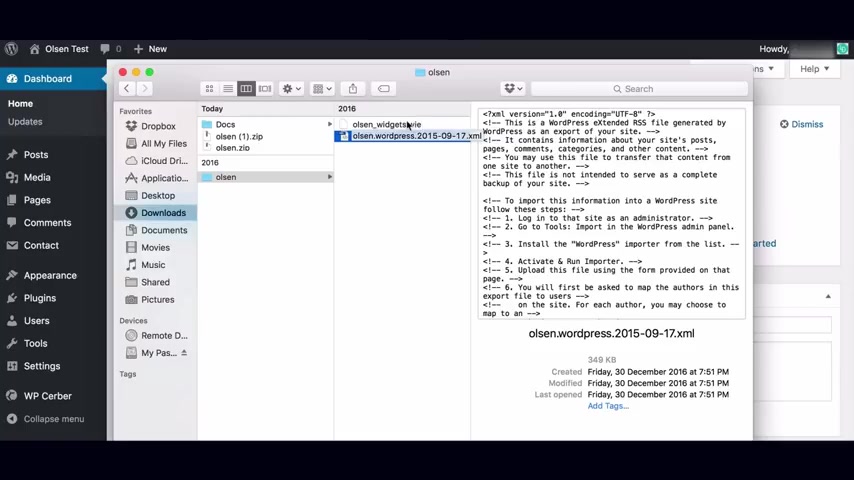
Now , when you're ready , extract the demo content file in there , you will find a dot XML file and a dot wie file .
The dot XML file will pull in all the posts , pages , images , et cetera and the dot wie file imports all the widget settings to import the dot XML file .
Navigate to the admin panel , hover over tools and select import , scroll down until you see the wordpress option and select install .
Now once the importer is installed , select run importer then select choose file .
Navigate to the dot XML file you downloaded and click open .
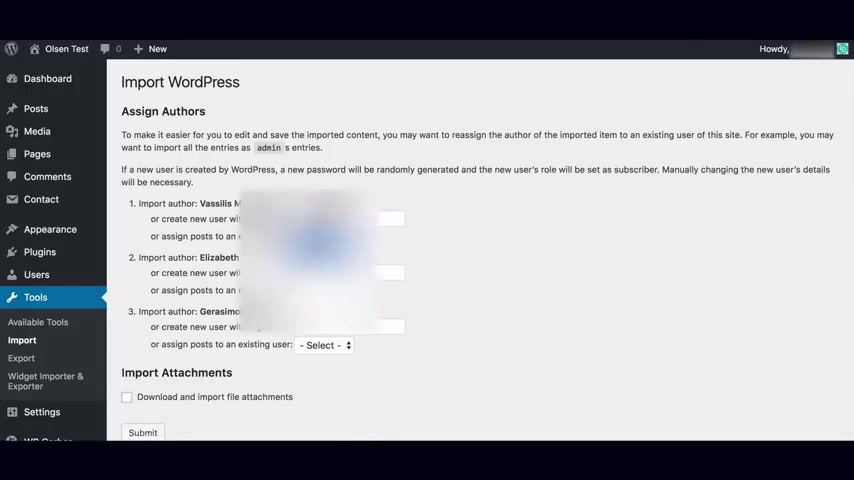
Once you've done that , select upload file and import , you'll be prompted to assign the demo content to an author .
We'll assign this to the admin user we created earlier for now , check the download and import file attachments and hit , submit .
This may take up to a minute or so to import all the demo content .
Once it's imported successfully , you'll see the message saying all done .
Have fun .
If it times out or takes longer than five minutes , just start the process over again .
You may receive notifications that certain content already exists , which is fine .
Once the content is all imported , we'll upload the widget content to do this hover over tools in the admin menu .
If you've installed the widget importer and exporter plug-in , you will see widget importer and exporter as an option .
Click on this option under the import widget section .
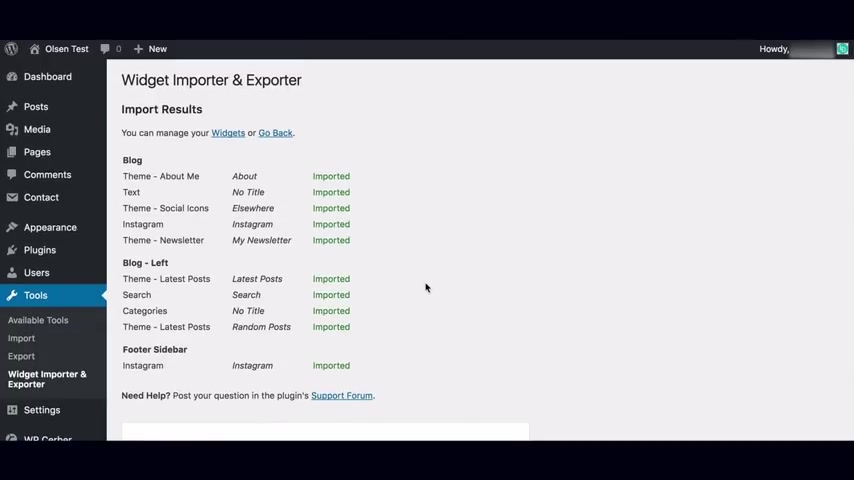
Select choose file , navigate and select the file with the dot wie extension and hit open , then select import widgets .
If you have the premium version , all components will have been imported successfully .
However , if you have the free version , some options will not have imported because there is only one sidebar enabled in the free version .
OK ?
We now have the demo content imported .
Let's move on to customizing your blog and making this thing really pop before we go through all the theme content and start amending posts and pages and deleting the elements you don't want .
Let's go into the theme customizer and amend the global theme settings first , including the widgets .
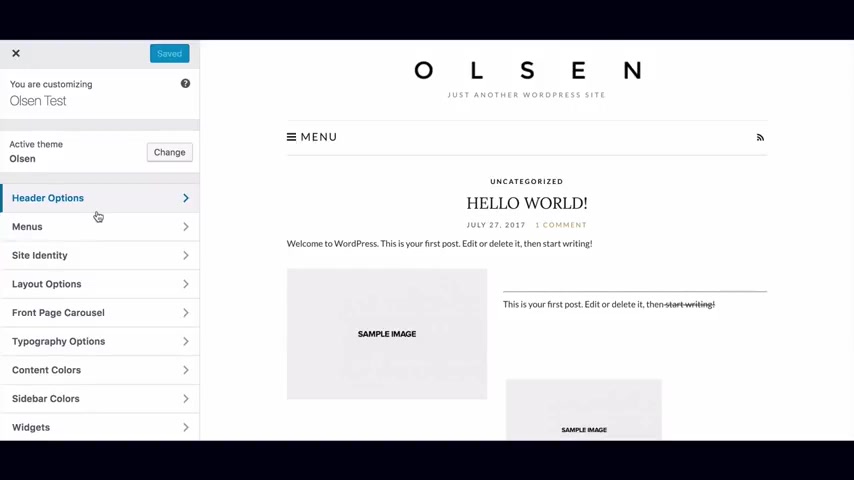
You already know a lot about posts and pages and categories , but I'll walk you through how to amend all that and how to change the posts that are currently live into draft mode so that you can keep the layouts and styling to use in future posts as well as amend , delete and create any new pages you want in your blog to navigate to the theme customizer from your wordpress dashboard , hover over appearance and click on the customize .
This will take you to the theme customizer .
Note that any changes you make in the settings below will be previewed live in the panel on the right hand side of the screen .
However , to commit these changes , you'll need to click save and publish if you make changes , but see the button grayed out or blued out .
In this case , move the cursor out of the input box that you've just changed and the button will then be clickable and allow you to save changes depending on the size of your screen .
You'll either see the desktop normal or desktop small view tablet or mobile view in my case , because I'm working off a 13 inch laptop and the theme options panel is taking up a considerable amount of space .
I'm actually seeing the small desktop view in the bottom left corner .
There is the option to hide the customizer panel which in my case reveals the normal desktop view to un hide the panel .
I click on the toggle here .
I can also switch between the different device setting views to explore the responsiveness of my theme and see how the design responds on mobile and different size devices alternatively , if I go to the front end of the site , which I can do by exiting out of the customizer and selecting visit site from under the site menu option in the wordpress toolbar in the top left , I'll right click and open this in a new tab .
You can see the desktop version , I'll keep this open so we can refer back to it as we commit changes .
Let's head back into the theme customizer .

In the premium version of Olsen , you'll notice that we'll have a few more options available to us , decide if they're important to you and if they are follow the link in the description below or on the Oakland site and upgrade to the premium version .
Remember to follow along with the theme documentation as we go through , especially if you're using a different theme as these options will be different .
If you're using Olsen , I'll provide additional commentary and walk you through each option .
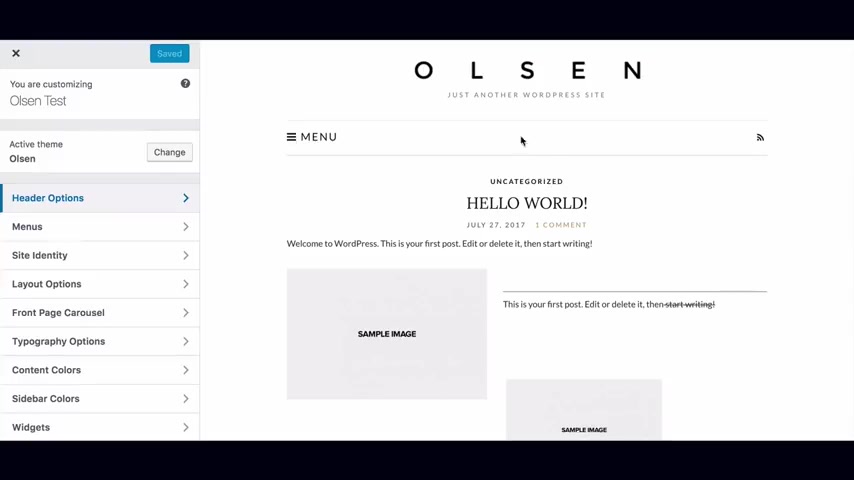
The first option we have is the header options .
So click on header options within there .
You can either choose to show social icons or not over here .
You can see that we only have the RSS feed icon showing down in the social network settings below .
We will be able to select the social media platforms we want to feature and provide the links to your social media platforms .
The next option is whether or not you want to show the search feature within the menu at the top .
If we view what that looks like from the regular desktop view , you can decide if that's something you want to include there or not .
Next is the option for a sticky menu with the sticky menu option selected .

When you scroll down the page , the menu will stick to the top of the page .
Within the Olsen theme .
You can either upload a logo or you can go with a text logo .
We manage the logo settings in the site identity menu which will cover off in a moment .
But here is where you would select the color font size and letter spacing for your text logo .
If you wanted to go with that option , if you've made changes to your site , hit save and publish changes to commit these changes , we head back to the main customizer menu .
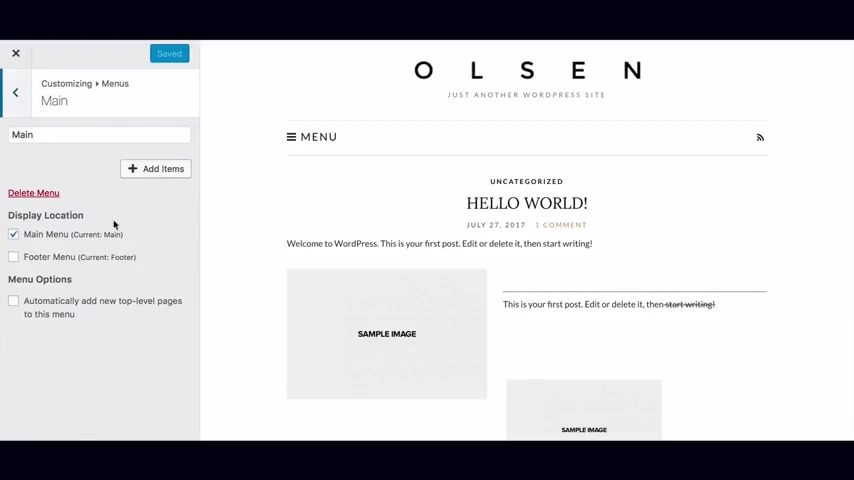
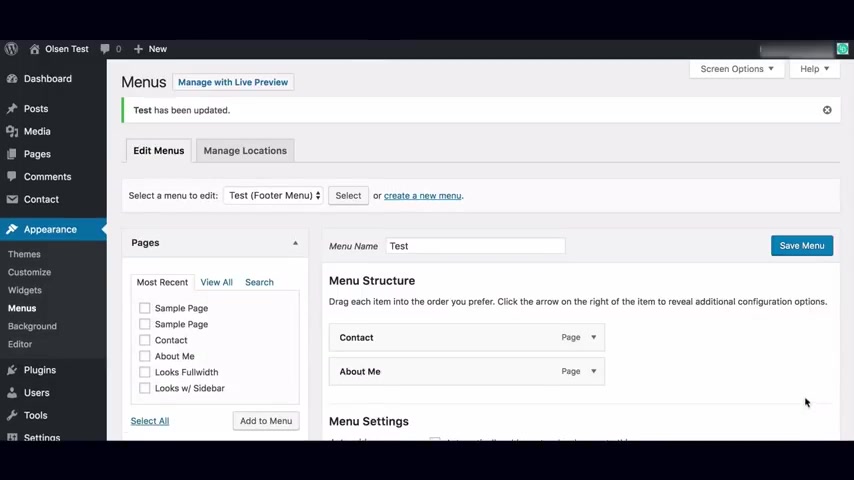
The next option is menus here .
You can create and assign menus for your blog .
If you select menu locations at the top , you'll see the number of menus supported by your theme .
In this case , Olsen supports two menus , the main menu and the footer menu .
The main menu is your primary navigation at the top and your footer menu is the secondary navigation at the bottom of the page .
To set these menus , we'll click on the dropdown menus .
And for the main menu , we'll select main and for the footer menu , we'll select footer .
These were created when we uploaded the demo content .
If you don't have any menus created yet .
You'll need to go back to the menu panel and select , add a menu .
I'll walk you through this in a minute to edit the main menu .
Click on the edit menu button and you'll see the current menu items associated to the main menu to add new items to your menu .
You click on the add items button and this shows you all the pages , posts , categories , tags and formats that can be added as a menu item to your menu to add an item to the menu .
We just click on the item we want to add and it's added to the menu to rearrange its location in the menu .
We click on the new menu item and drag it to where we want it to go .
You can also add custom links and what these allow us to do is add both clickable and unlickable text and image links to our menu .
Say , for example , you wanted to add a store that's hosted on a subdomain or via Shopify , you can simply input the link text and the URL for where you want the link to go .
So you might put the URL at Shopify dot com and set the text to shop .
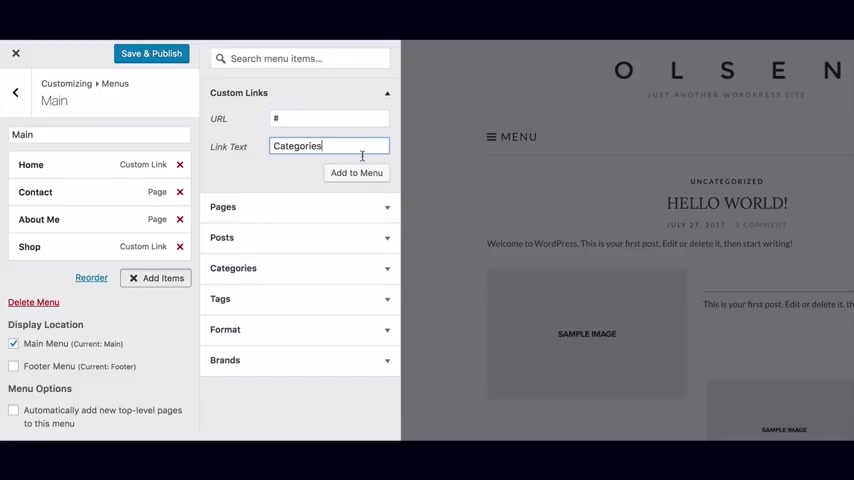
Similarly , if you wanted to add the text categories and list all the categories for your blogs underneath that , you would create a custom link with a URL of a pound sign which takes the user to the page that they're actually on .
You can delete this later on if you like .
In this case , I'll set the link text to categories .
I'll then add this to the menu , then navigate to the categories , drop down and add in all the categories for your blog .
I'll then move them to sit underneath the category , text and save and publish that .
If I go to the front end of the site , I can see that the shop is linking out to Shopify and the categories are now in my menu as well .
Having said that even though you can edit menus via the customizer , my preferred option isn't to edit them here .
Within wordpress .
There is the dedicated section for managing menus to access that close the customizer for now , remember to save changes and we'll come back in in a moment from your dashboard hover over appearances and select menus within here .
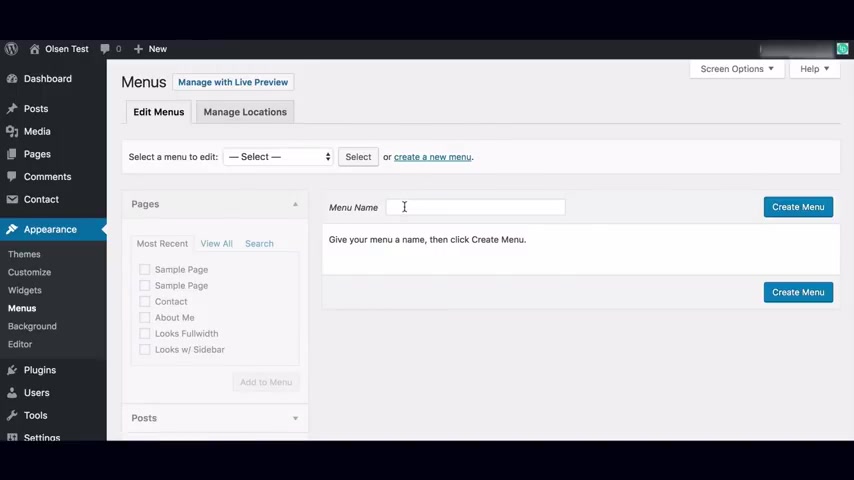
You will see the similar options just laid out differently .
The menu pages is broken down into two tabs , edit menus , which is where you manage the content within your menus and manage locations , which is where you can assign a menu to a specific menu location .
We'll mainly work with the edit menu tab as we can do pretty much everything we need to do from within there .
The first thing you'll notice is the option to select a menu to edit .
In our case , we'll select main menu and hit select here .
You can toggle between the menus that have been created already when we imported the demo content , depending on the theme you're working with .
And if you haven't uploaded the demo content , you may need to create a new menu to do that .
Click on , create a new menu .
Give it a name , pick obviously something that makes sense to you .
Below that , you'll have your menu structure that should look familiar .
If you created a new menu , you'll need to add new menu items like we did before .
The available options are on your left .
You will also need to assign a location for the menu under display location in the menu settings at the bottom .
Now , why I prefer to work with this space when working with menus is that we're able to access additional menu items as well as advanced menu properties from the screen options panel in the top right , you can check the boxes .
You want access to two advanced properties that may be useful are linked target and CS S classes .
Link target adds another option to your menu items that allows you to open a menu item in another tab .
For example , if we wanted to open our shop link in another tab , when we open the shop menu item , we now have the option to check the open link in a new tab box .
Similarly , we can add CS S classes to the menu items so that we can have more control over the styling of individual menu items .
That's a little more advanced for this video , but you can read the documentation if you want to explore any of these options further .
Ok .
So now that you've seen both options , you can decide which area you want to manage menus from .
Once you start uploading content and thinking about navigation .
Let's go back to the customizer and move on to the next option which will be site identity in this tab .
You can modify the site's title and tagline as well as upload your primary logo for a logo and site icon .
If you don't want to upload a logo , you can delete the Olsen logo and use a text logo that will use your site title to upload a logo .
However , click on either change image or select image , either drag or drop your logo into the media library or select upload file and navigate to your logo file .
Once it's uploaded , it's good practice to add an alt text which describes the image .
Then select , choose image .
You can amend the logo padding at the top and the bottom , which is effectively the white space above and below your logo to set a foot , a logo .
Follow the same process and you can upload a side icon which is the icon that appears in the browser tab .
When someone is on your blog , this should be square and at least 512 pixels wide .
Remember to save changes and we'll head back to the main menu .
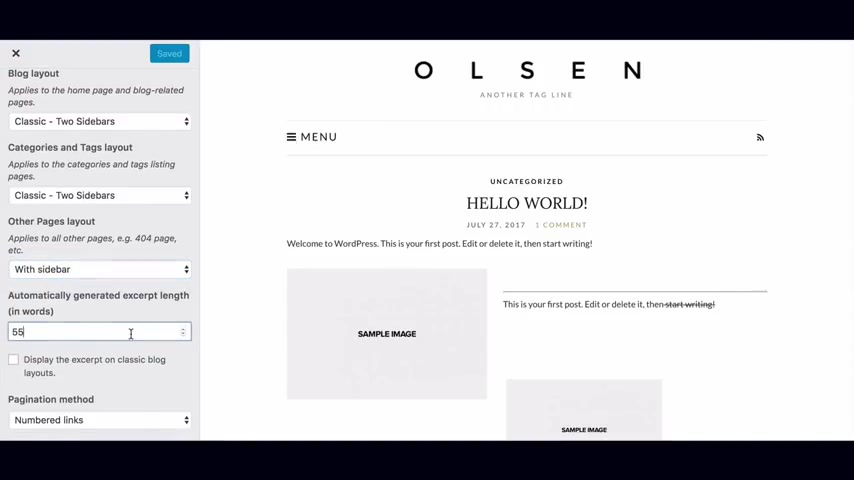
Next , we have layout options here .
You can modify the blog layout you want to use .
If we follow the link in the description to the Olsen theme and click on the view demo button that will take us through to the live demo site .
Under the blog layouts .
Menu option , you will see the various layout options that come with the premium version of this theme such as the classic two sidebars or the more minimalistic small listings , full width option perhaps now is a good time to pause the video and go through the various layout options to pick the layout that best suits you .
Once you pick the layout you want to use , select it from the dropdown list in the blog layout section of the theme customizer .
In the next section , you can choose different layout options for category pages and tag pages of your blog .
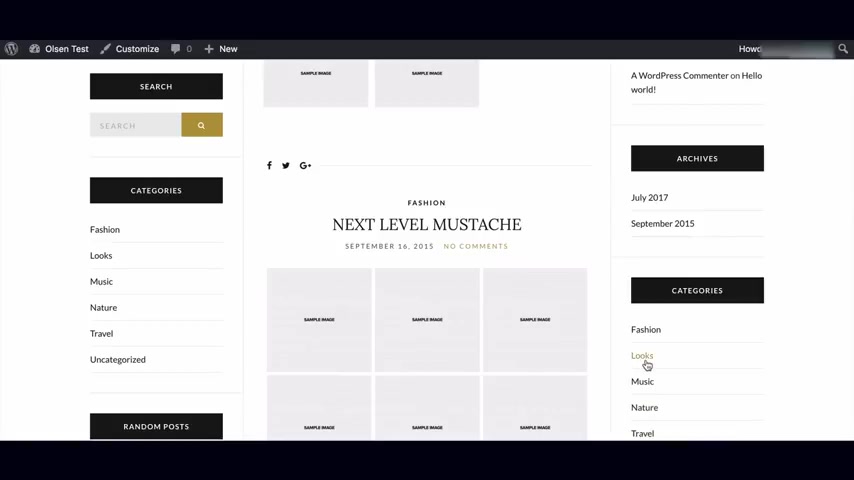
What do I mean by that ?
If we go to the front end of our site , you'll see that the category for each post is listed above the post title as well as in the side by navigation and in the blog categories list that we added to our navigation menu .
When you click on a specific category that will take you through to the category page which shows all the articles posted under that category .
The category and tags layout option controls the layouts of these pages .
So if within the theme customizer , I change it to a different layout and go back and refresh the category page .
You'll see that the layout has now changed .
Once again , take some time to play around with these options to find what works best for you .
The other pages layout option applies to all pages that you don't specifically create .
For example , the 404 page .
What's the 404 page ?
It's effectively the page that loads when a user enters a URL on your website that doesn't exist .
For example , if you go to the front end of your website and add random text to the end of your URL and hit enter , that will take you to the page we're talking about , we can amend the layout for this page here .
Let's go back to the home page and go back to the customizer .
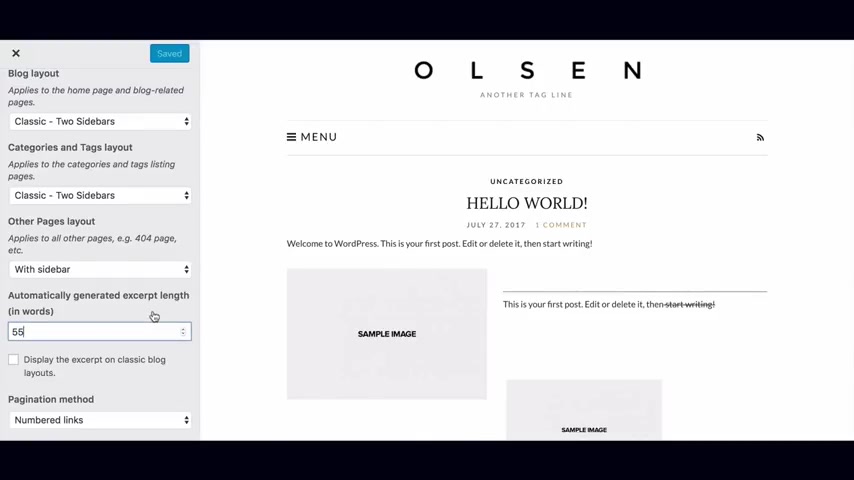
The automatically generated excerpt link allows you to control the default amount of words in the preview of a post on the home page or main blog page and the categories tag pages below .
That is the option for the pageant style .
You can choose between either numbered links or previous next page links .
Remember to save changes and we'll go back to the main customizer menu .
Next we have the front page carousel .
This tab allows you to configure your home page slider .
You can toggle the slider on or off along with the auto slide feature below that you can select the slider source you can choose to show just a specific category or you could create a specific category like featured to use , use for your slider and assign that category as a secondary category to the post you want to include in your slider .
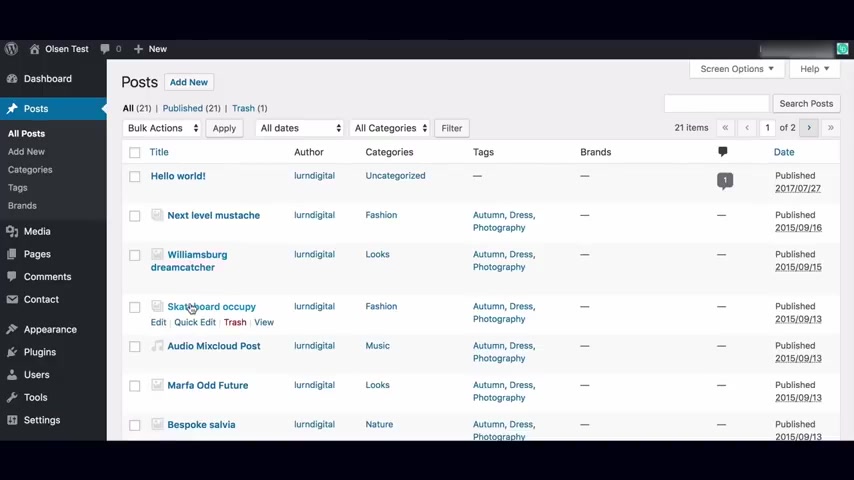
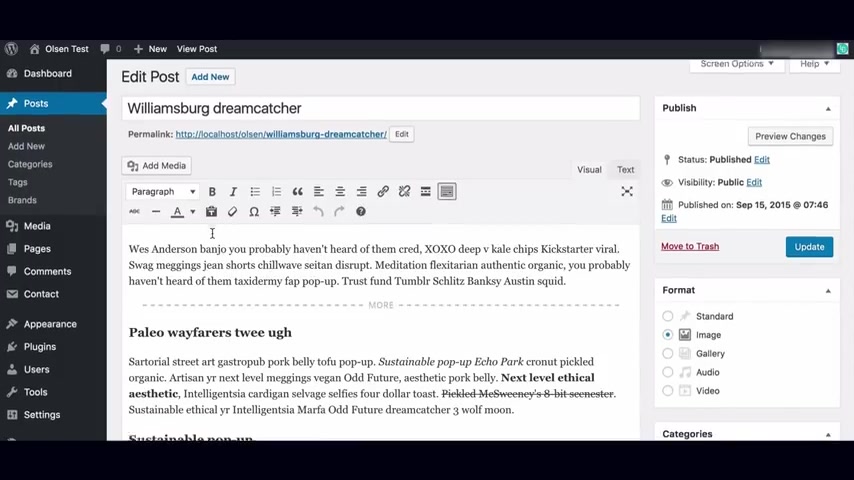
Or you can create a comma separated list of the post I DS for the posts that you want to include in your slider to find the post I DS from your dashboard hover over posts in the admin menu and select all posts from there , simply hover over the post name and in the bottom left corner , you will see the Perma link to the post included within the link will be a post equals number .
That number is the post id by checking show recent posts .
The source for the slider will become the most recent published posts .
The limit post field is where you limit the number of posts shown in the slider .
You can select a slide change effect and below that set the amount of time between slides , it defaults to 3000 milliseconds which is three seconds to change this to five seconds .
You would amend this to 5000 by checking hide post content box , the post content will be removed .
Alright , save your changes and head back to the main customizer menu .
Next , we've got typography options here .
You will find the various options regarding the theme's typography .
You can change heading body , text and widget title sizes and toggle on or off the capitalization of various elements .
I think the default values look great .
But if you want to amend the font sizes , et cetera , this is where you'll do it .
We'll head back next .
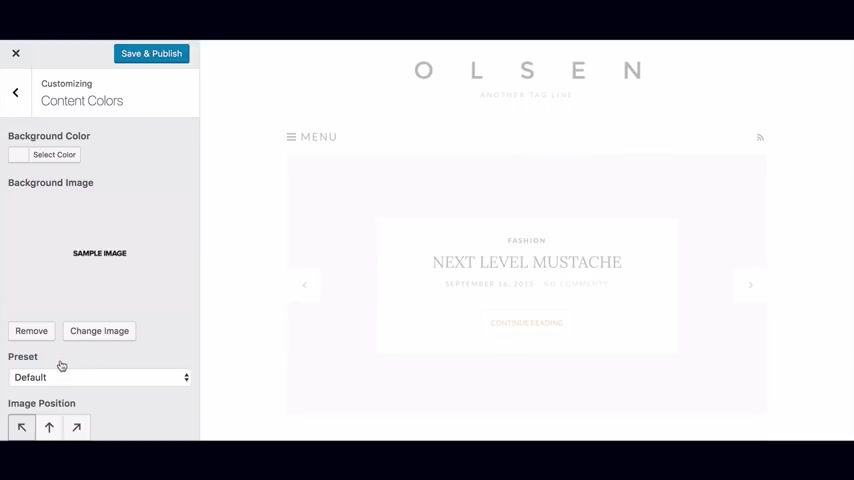
We've got content colors .
If you want to incorporate your brand color or change the color scheme , this is where you'll do it in here .
You can amend the background color by clicking on the select color toggle and either picking a color or entering the hex a decimal color code in here .
You could also upload a background image or texture by clicking on select image , uploading it to the media library , selecting the image and hitting choose image below that .
There are some image options to help improve your design to remove an image .
Click on remove in the same way as we did with the background color , you can amend the text color headings , color link color , link hover color .
So the color , the link changes to when the user hovers over it , the accent color and the default border color once again , save changes and let's head back to the main customizer menu .
Next , we've got sidebar colors .
Similarly in this tab , you can modify the colors of the various sidebar elements .
The same way we did in the content colors panel , I'll leave that up to you to experiment with .
Let's move on widgets like menus have two places where we can amend them .
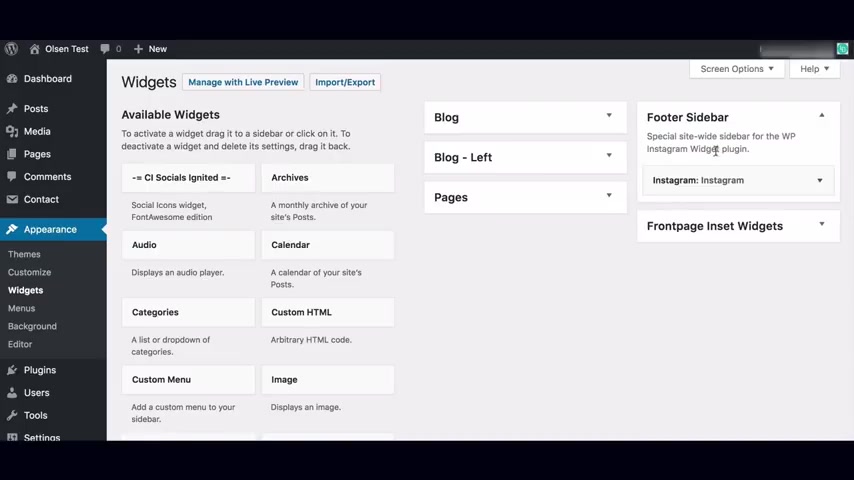
And once again , I prefer to use the dedicated widgets area which can be found from your wordpress dashboard by hovering over appearance and selecting widgets .
We'll make our edits here rather than via the customizer as it's easier to use and provides access to more options .
On the left hand side are all the available widgets on the right hand side are the available widget enabled areas that widgets can be added to .
As you can see .
The premium Olson theme currently features five widget areas .
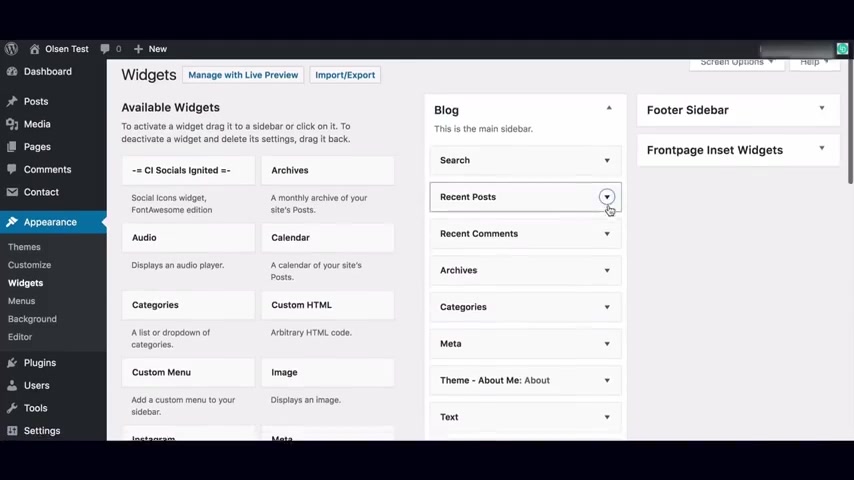
The blog sidebar , the blog left pages , footer side bar and the front page inset widget .
The blog sidebar is the primary sidebar and appears on all posts and pages that have a sidebar .
If you've uploaded the demo content , you'll notice that there are a number of widgets already added to this widget area , navigate to the front end of your site and decide which widgets you want to keep and which ones you want to remove to edit the widgets , click on the dropdown arrow , update the widget information and click save .
Unlike the customizer , any changes you make will automatically be live on your blog to change the order of the widgets drag and drop them into place .
To remove a widget , simply click on delete and to add a new widget drag .
The widget from the left and drop it into the widget areas on the right .
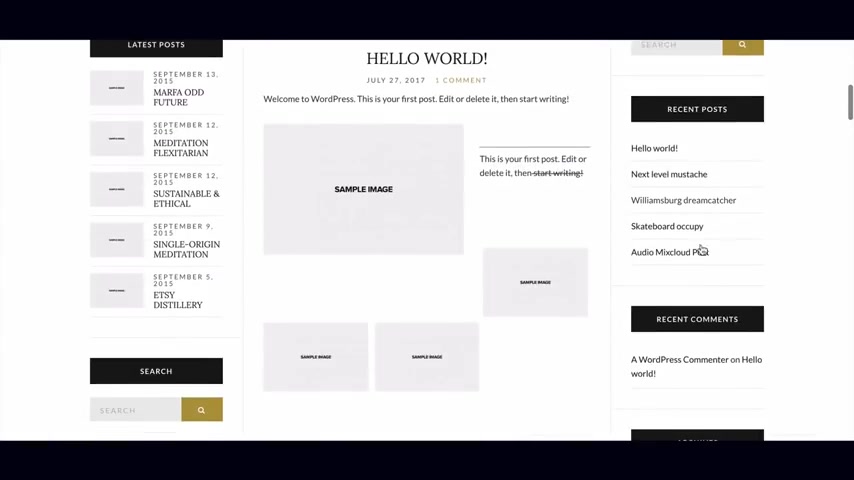
The standard wordpress widgets are the search widget which enables users to search the content of your blog , the recent post widget features recent posts in your sidebar .
You can limit the number of posts that are shown here .
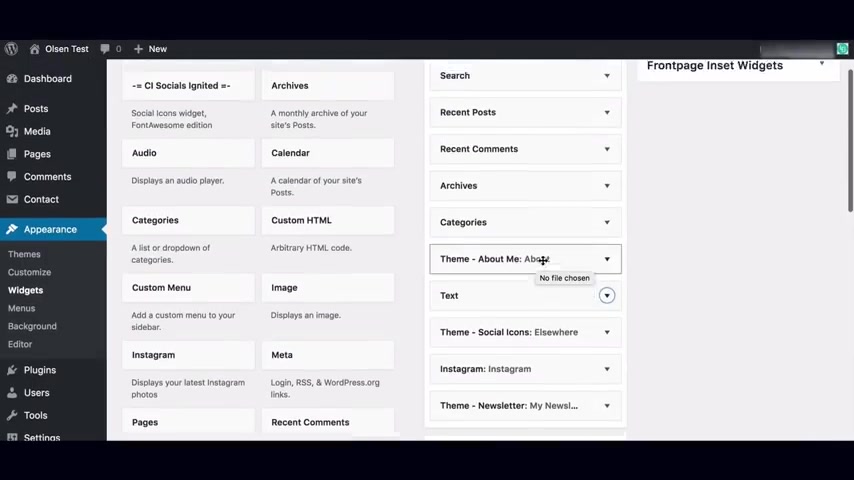
The recent comments , widget , the archives widget , the categories widget , the meta widget and the text widget .
There are a number of other widgets that you should explore and get familiar with .
I recommend adding them to your sidebar and deciding which ones make sense for your blog to learn more about the standard wordpress widgets .
You can view the documentation under the help option at the top .
There are also a number of theme specific widgets such as the theme about me widget , which allows you to insert an image message and upload a signature or sign off the customized social icons widget that allows you to incorporate links to your social accounts , the call to action boxes which will cover off shortly as well as the ability to feature random posts , videos , music and more .
There is also a newsletter signup widget that allows you to embed a newsletter signup form .
The most common provider is likely mailchimp .
So I'll show you how to add the code from mailchimp and remove the styling to match the Olsen theme .
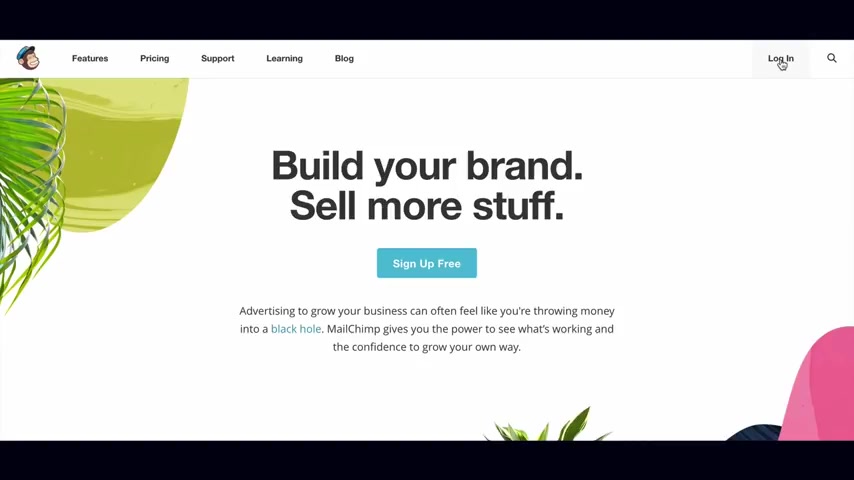
If you use another email marketing or CRM provider , the process will be similar if you use mailchimp , log into your account and create the list .
As usual if you don't know how to do this and would like a tutorial comment below .
And if there's enough interest we'll put a tutorial together , navigate to the sign up form section within the list and select embedded forms .
Then choose the super slim option .
You will leave the default settings as is and all you need to amend is the text that you want to have above the sign up form on the Olsen demo .
It's the text that says enter your email address to subscribe to this blog and receive notifications of new posts by email , change this to suit your style and enter it into the form title film .
Then copy the code from below .
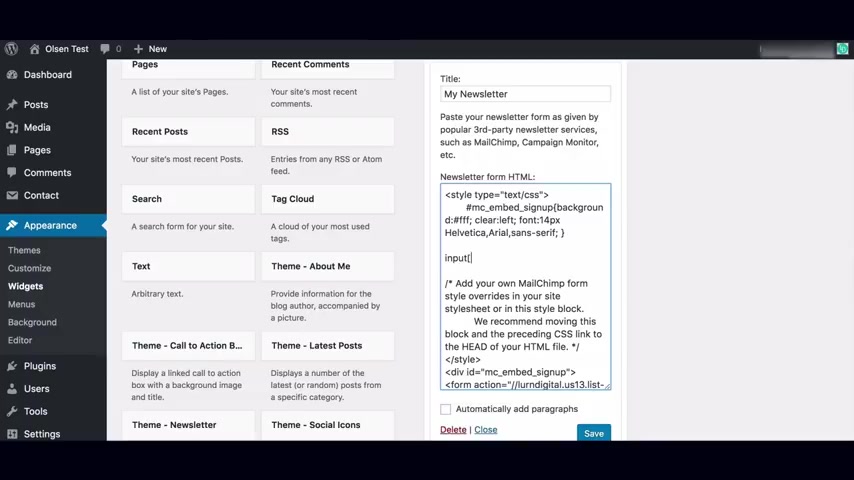
Navigate back to the newsletter widget and paste the code into the newsletter form , html section .
Save that and head back to the front of your site .
You should see that the newsletter form is there but the styling doesn't match the theme .
This is because mailchimp applies its own CS S to the form to match the styling .
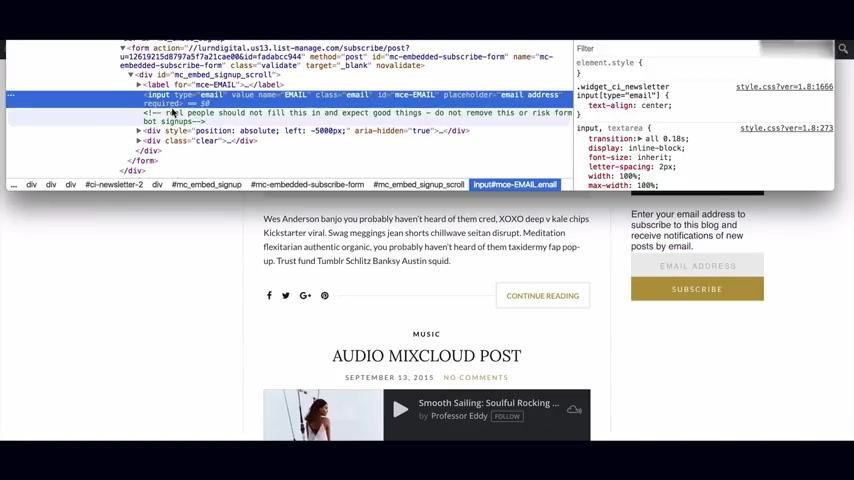
Go back into the newsletter widget and scroll up within the code to the very top where you see link HF equals inverted commas forward slash forward slash CD N , et cetera .
We're going to select that piece of code all the way down until R equals stylesheet type equals text hyphen CS S .
Once you've got that selected , we'll delete that bit of code , save it and head back to the front of your site .
You'll see that the styling looks similar , but we need to add some space between the email input section and the subscribe section to do this .
We use what's called CS S .
We'll be bringing out a CS S fundamentals course for wordpress shortly , which will teach you the fundamentals of how to do this sort of thing to learn more and get access to a discount , head to courses dot learn digital lurn digital dot com and sign up to our newsletter to create the space we want .
I'll right click on the element to inspect the code .
Although this looks confusing .
At first after you've done the course , this will all make sense .
What we're doing is looking for the CS S selector so that we can add some margin or space to the top of both the email input field which has a selector of input bracket type equals inverted commas , email closing , inverted commas , closing bracket and the subscribe button which has the selector of input square bracket type equals inverted commas , submit closing , inverted commas , closing bracket .
I will add some test CS S in via the browser to make sure that it's the right selector and choose the amount of padding I want to add .
In this case , I'll use 15 pixels .
You can change this amount if you like once I'm happy with how it looks , I'll go back and add the code to the form in the back end within the newsletter html section just above where it says add your own mailchimp form style overrides .
I'll add the code to the description box below just so that you can reference it .
However , what you need to add is the two selectors separated by a comma .
So input bracket type equals inverted commas , email closing , inverted commas , closing bracket , comma space input square bracket type equals inverted commas submit closing inverted commas closing bracket , space , curly bracket margin , hyphen top colon , 15 pixels PX semicolon closing curly bracket .
Now , of course , anything new is gonna be a little bit confusing , but hopefully that you saw some logic there .
Once we've done that , we'll hit save and then take a look at the front end of our site and that should be looking all good .
Now , the other widget areas that you'll manage the same way are the blog left which will display when one of the two sided layouts are selected pages , which allows you to customize the sidebar which displays on static pages of your blog .
The footer side bar , this is the area at the bottom of the page above the footer menu and logo .
This is where we'll add our Instagram slider at the bottom .
Simply add your Instagram user name to pull in the feed and amend the settings to suit you .
The front page inset widget is how you add those custom image links with the text over layers to the front page of your blog that are located here on the demo .
You do this by adding the theme called to Action Box widget to the widget area .
It will automatically size the boxes or images to either fit in 12 or three columns .
Depending on if you add three or less widgets , you can add as many of these as you like by adding the title image and the URL .
OK .
So that's pretty much how widgets work .
Let's head back to the customizer up .
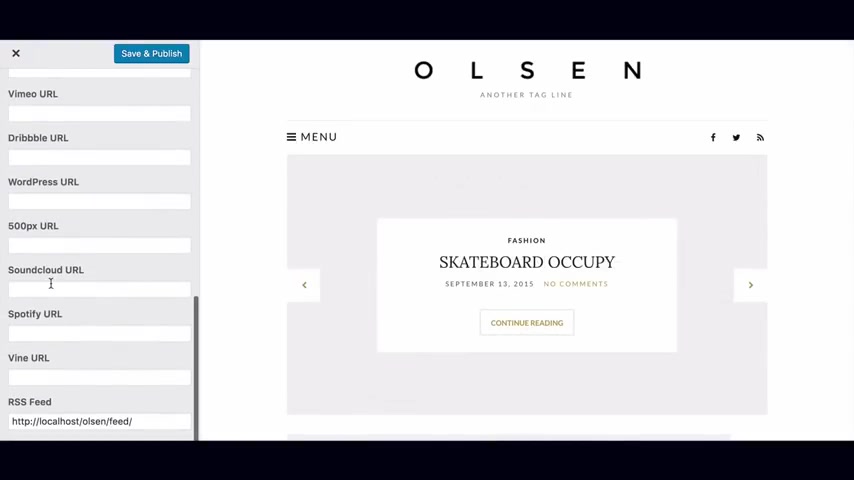
Next is social networks here , you can add the URL S to your various social network accounts that are supported by the theme .
These will appear on the header and footer automatically .
You can also display them in the post page sidebar by adding the theme social icons , widget to the blog or page sidebar up .
Next is the post options here , you can toggle various aspects of single post on or off .
For example , if I click on posts , I can choose to not show the category , for example , or perhaps hide the date or comments if you make any changes , hit , save and publish and head back to the main customizer menu in the page options , tab you're able to toggle on and off the appearance of the signature and social sharing buttons on pages up .
Next is the footer options here .
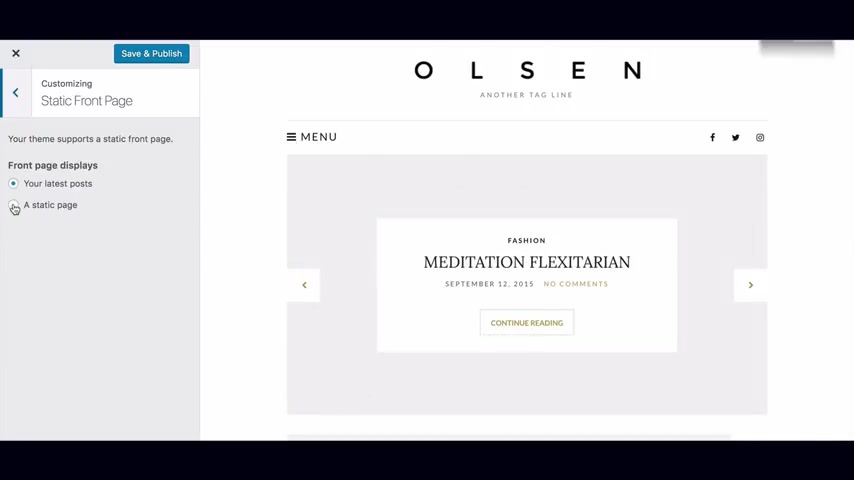
You can customize the theme's footer by changing its color scheme and toggling on and off the tagline social icons and the WP Instagram slideshow as well as amend the transitions beep in the static front page option .
If you don't wish to have the latest posts on your front page and wish to display static content using a normal home page or you want to use the them's looks templates for your front page .
You can do so here by setting your desired page as the static front page .
Remember to save and publish your changes .
Lastly , the other tab , this is where you add custom CS S as well as adding your Google analytics ID to the blog if you want to do that .
OK .
So you should be reasonably familiar with the theme customizer .
Now , the best way to get great at this stuff is just to jump in and play around with the various settings to see what works for your design .
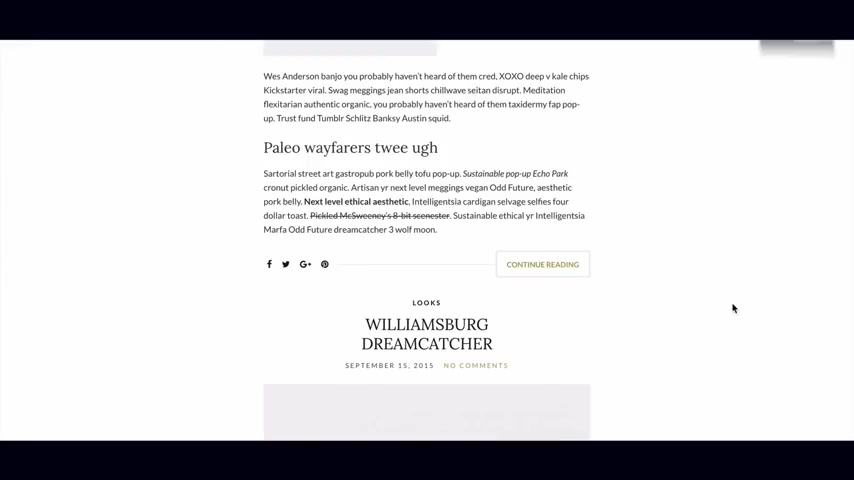
What I would recommend doing is familiarizing yourself with the demo theme content and take inspiration from the layouts and what you can repurpose for your own blog .
I typically create a number of new posts with my own content based on the examples in the demo content .
Once I'm feeling comfortable with how to create and format posts and pages , I then delete or change the status to draft for the demo posts and pages .
The value in keeping them in draft mode is that they won't be visible on your blog , but they're always there .
If you want to refer back to layouts and see how they were formatted , I would then go in and delete any tags or categories that you won't be using for your blog and create new categories that work for you .
Once you've done that , reassess your menus and widgets .
The last thing I'll show you how to do is add a contact form to your blog using contact form seven .
If that's something you want to do , if not , then go ahead and further customize your blog to suit your style and start uploading and publishing content .
If you've liked this video , remember to give it a thumbs up and subscribe to our youtube channel and newsletter .
Feel free to leave us a comment with what you liked , any feedback and what else you would like to see to add a contact form .
You should have installed the contact form seven plug in .
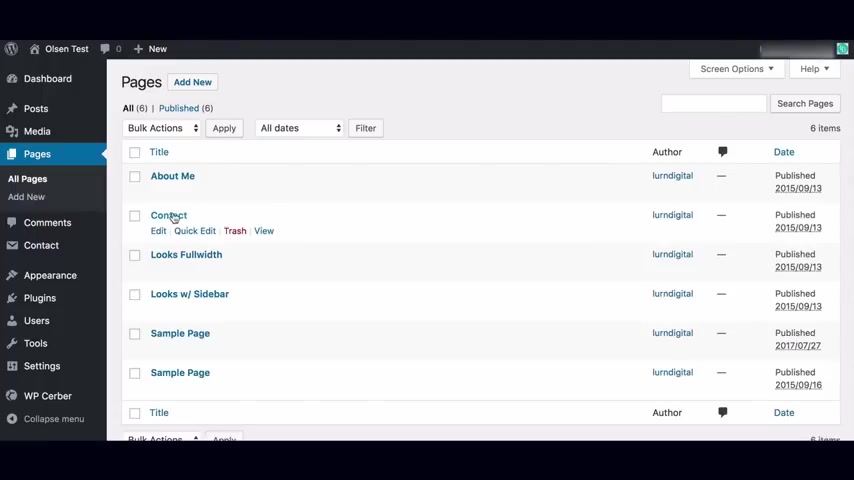
If you haven't done that already , go back and do that first from your wordpress dashboard , you should see a new option in the admin menu called contact , click on the contact forms option .
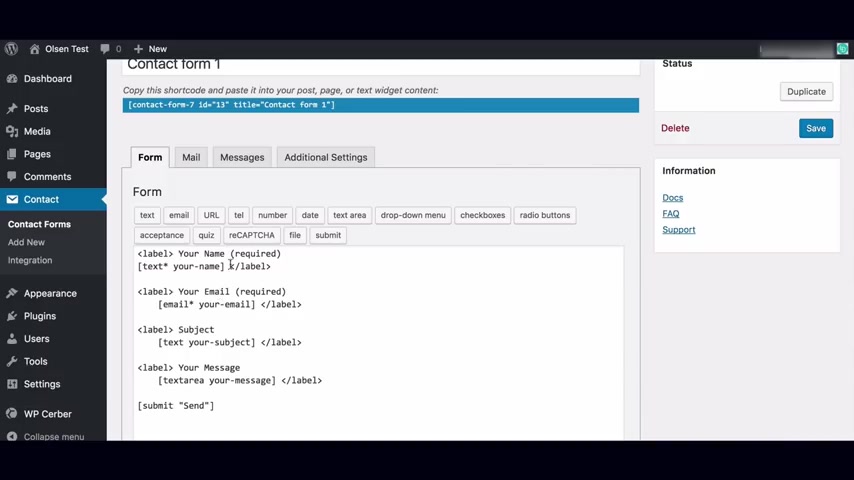
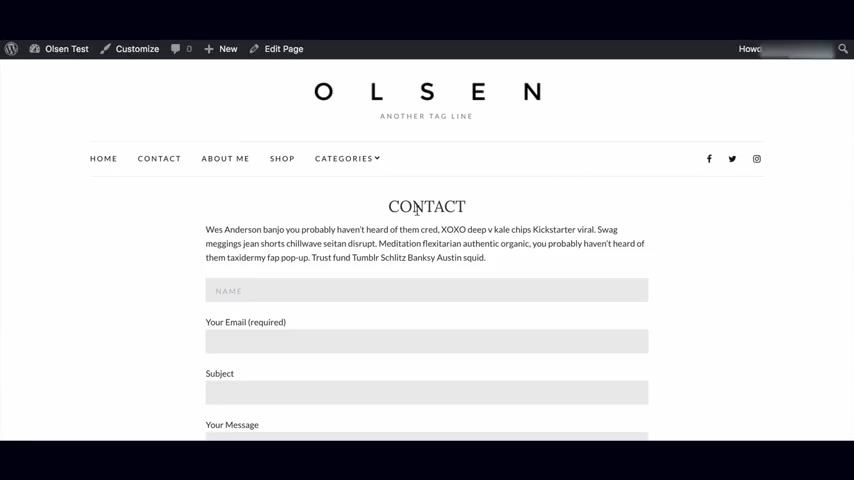
The great thing with contact form seven is that they procreate a form for you and all we need to do is copy what's called the short code , which is this thing here and navigate to the page where we want the contact form on which in this case is the contact page .
We'll go to the text editor tab and paste in the short code where we want the form to go .
Remember , you won't be able to paste this into the visual editor .
Make sure you go to the text editor side .
If we preview the page , you'll see that our form is in there and ready to go .
We now just need to go back to the contact form tab under the contact option and customize the form fields .
We'll click into the form .
And the first tab is how we control our form input fields .
The default fields are your name , your email subject and your message .
The first step is to decide which fields you want to include in your form and which fields are required .
For this example , I want to request their name as a required field .
Email as a required field , phone , not as a required field .
And I want to include an interested in dropdown as a required field with the options , advertising contributing and other plus a message box as a required field and the send button .
If you look at the default form fields , you see that each input field has its own piece of code .
This is the name field .
This is the email field , et cetera .
The first choice you have is whether you want the form input labels to be above the input field like it is in the default here or if you want to use a placeholder that sits within the input field itself to change it to the placeholder option .
We remove the label tags that are wrapping the field as well as the label text .
Instead , what we do is click within the field short code here , hit space and enter placeholder space , inverted comma then enter the placeholder text you want .
So in this case name and then close the inverted comma , I'll save this and refresh our contact page on the front end and you'll see that name is now sitting within the input field as a placeholder .
We'll go back to the contact form editor .
If you prefer that look , then do the same thing for all the other fields .
I prefer the original way .
So I'll change it back but remove the word your .
The next thing we need to do is customize the fields that we want to include .
We want to keep the name and email fields as required fields to make a field required .
You just need to include the asterisk next to the field type here .
I then want to request their phone number which isn't a required field to add a form field .
I put my cursor where I want it and select the option from the tags in the menu above the tag I want is tell I can choose to make this field required or not .
In this case , I don't want to make it required .
So I'll leave the box unchecked .
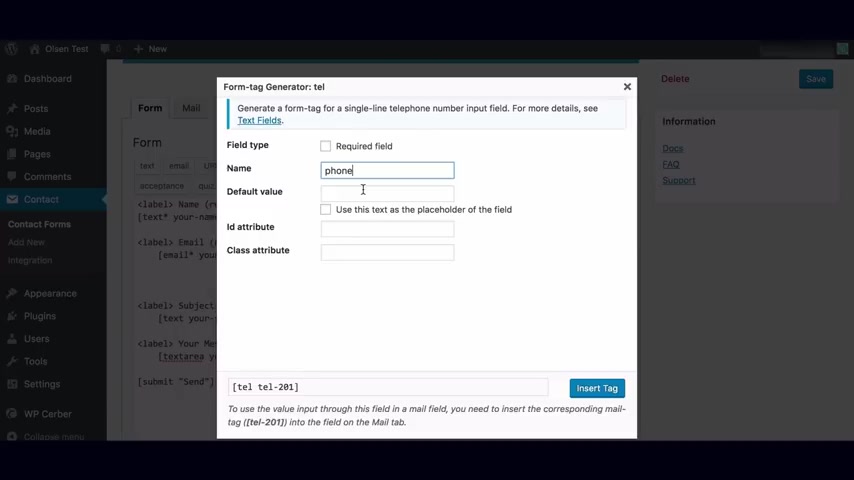
If you wanted to add a placeholder , you would enter the placeholder here and check the use this text as the placeholder box .
In this case , I'll leave this blank and hit insert tag .
This creates our short code field .
We just need to wrap it in a label tag .
We put our opening label tag here and our closing label tag here .
Remember to include the forward slash in the closing tag and then we'll add the label name we want to use .
In this case , we'll just use phone .
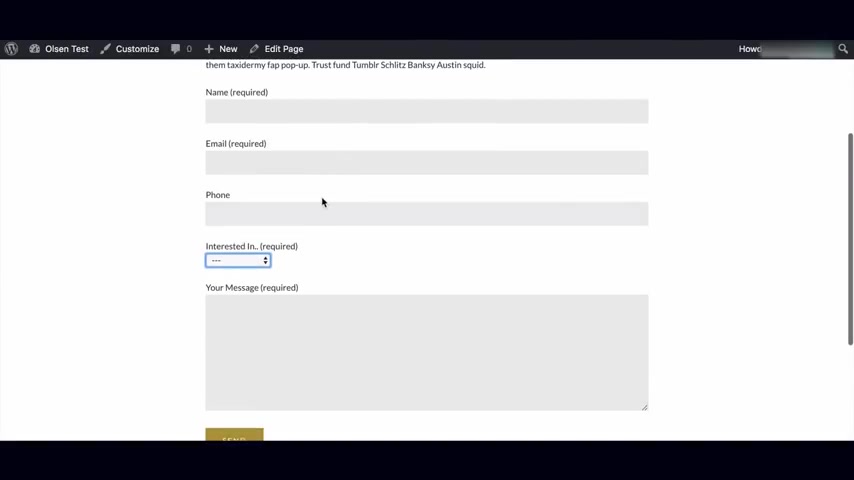
Let's save that and refresh our contact page .
You'll see that we now have a new phone field which isn't a required field .
If you wanted to make it required , you would just need to add an asterisk next to the field type , which is tell if we wanted to keep it that way .
We should add the word required within the label to provide a better user experience .
But we won't do that .
I'll just go back and remove the asterisk .
We'll then add the dropdown box to do this .
We place the cursor where we want it , select the dropdown menu tag from the options above .

We want to make this required .
So we'll check the required box .
Give it a name of interested in , in the options box .
I'll enter the options for the dropdown list , one item per line .
So advertising contributing and other , you can decide if you want to allow multiple selections or if you want to insert a blank item as the first option , I'll enter a blank item , but I won't allow multiple options and select insert tag .
Once again , I'll wrap it in a label tag .
We put our opening label tag here and our closing label tag here .
Remember to include the forward slash on the closing tag and then we'll add the label name that we want to use .
In this case we'll use interested in dot dot And I'll put in required in brackets next to that .
I'll then delete the subject field as I don't need it and add an asterisk and the word required to the message box .
Once I've done that , I'll hit save and refresh my contact form that all looks good .
The only thing is that the styling for the dropdown box doesn't look great .
I've passed this on to the CS S ignited team and I'm sure they'll be updating this as it's an easy fix .
But to style this field the way we want it so that it looks consistent with the other fields .
What we'll need to do is copy the styling from the field above and add the CS S code to the custom CS S section within the theme customizer to do this .
If you're in chrome , right , click on the phone field above and select , inspect where you see input comma text area , select the CS S code below that to check that this will work , right .
Click on the drop down list and select , inspect , make sure you have the select name equals interested in selected and in the right panel at the top , paste the code in that you just copied .
If you follow it along .
That should now look consistent .
What we need to do is commit those changes .
So to do that , we'll navigate to appearance and open customizer in a new tab , scroll to the bottom and select other in the custom CS S panel , we'll type select which is the CS S selector and then an opening curly bracket and a closing curly bracket will then create space between the two of them and paste the code in that we just copied , hit save and publish , then refresh the contact page .
Those changes should now be committed .
And that looks good .
Obviously , if you don't want to use the dropdown list or it's been updated by the time you view this , then you don't need to go and do that .
Once we've customized our form input fields , we then need to amend what gets received via email .
Once someone submits the form , if you click into the mail tab , you can set the email address where the contact form gets submitted to the from email pulls the name from the contact form .
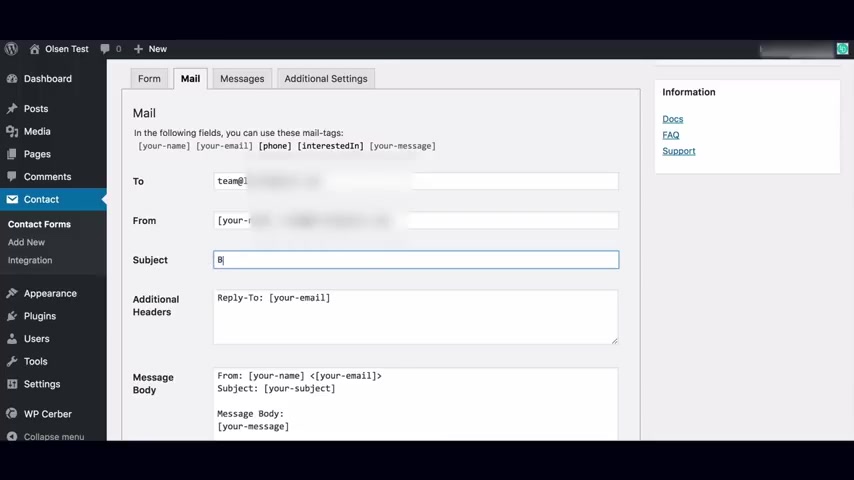
You can leave your email or put a generic email in like inquiry at your domain dot com or use the custom your hyphen email field from the previous page to pull in the email from the contact form , you can tailor the subject line to be something like blog inquiry or whatever makes sense for you .
You can leave additional headers as it is .
And in the message body .
You want to include the label or placeholder and the dynamic form field so that the information inputted into the form gets sent to you via email .
So in our case , we'll delete subject and add phone , the dynamic fields are listed above .
We'll also add interested in and the dynamic field we can then leave the message tab and additional settings .
As is let's hit save , we'll refresh the contact page , complete the form and hit submit and that's all working .
Well , remember to check the designated recipient email address to confirm the information is coming through as expected .

And that brings us to the end of our how to start a Wordpress blog tutorial for 2018 .
Hopefully you've learned a lot and are now up and running .
If you enjoyed this video , remember to give it a thumbs up and subscribe to our youtube channel and newsletter as well as let us know any feedback to get access to exclusive discounts , free tutorials and to stay in the loop on the latest happenings .
Sign up for our newsletter at Oakland ohklyn dot com .
And until next time , happy blogging .
Are you looking for a way to reach a wider audience and get more views on your videos?
Our innovative video to text transcribing service can help you do just that.
We provide accurate transcriptions of your videos along with visual content that will help you attract new viewers and keep them engaged. Plus, our data analytics and ad campaign tools can help you monetize your content and maximize your revenue.
Let's partner up and take your video content to the next level!
Contact us today to learn more.