https://www.youtube.com/watch?v=Tou04bhKstU
How to Install Custom CurseForge Modpack on Your Server - Minecraft Java
What's up ?
My name's Techno here for server pro and welcome to this tutorial for installing custom mod packs on your server pro server .
In a previous video I showed you how to install a mod pack from Curse Forge using server pro's built in changing feature where you can simply pick the type of server from here .
But let's say you want to install a server that isn't on this list over here .
What do we do ?
Well , first of all , let's go ahead and find a mod pack for this .
I'll be using Curse Forge .
If you'd like to learn how to use curse Forge , make sure to check out a previous video that we did by clicking the eye in the top right hand corner or the link in the description down below .
I simply open up Curse Forge , Minecraft browse and we'll pick a mod pack from here .
Sorting by featured one of the mod packs here that isn't on the server pro switcher list is all of the mods six .
It's a huge mod pack , but it's something I may like to host the server for .
First of all , you and every player you expect to play on the server , have to download and install the mod pack themselves .
So I'll click the install button here to install a client side version of this mod pack .
Now that we've got the client side installed , how do we download the server files ?
Well , click the three dots on this page and then simply click download server pack .
Your browser will then open up and more than likely download a zip file .
The next steps vary greatly between mod packs .
So I'll try and keep it as simple as possible .
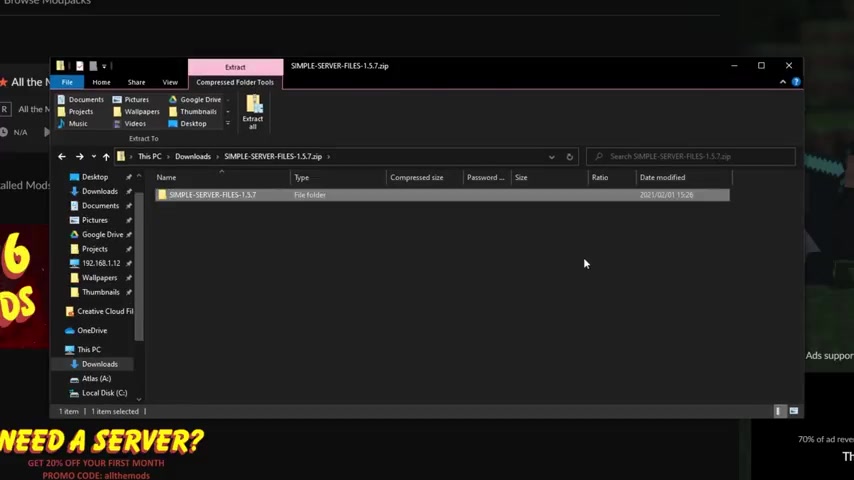
If you open up your mod pack server zip and you see something like this where you have a forge dot jar file and a bunch of other folders such as config mods , et cetera , et cetera .
Then you've successfully downloaded the entire server and more than likely it was a large download .
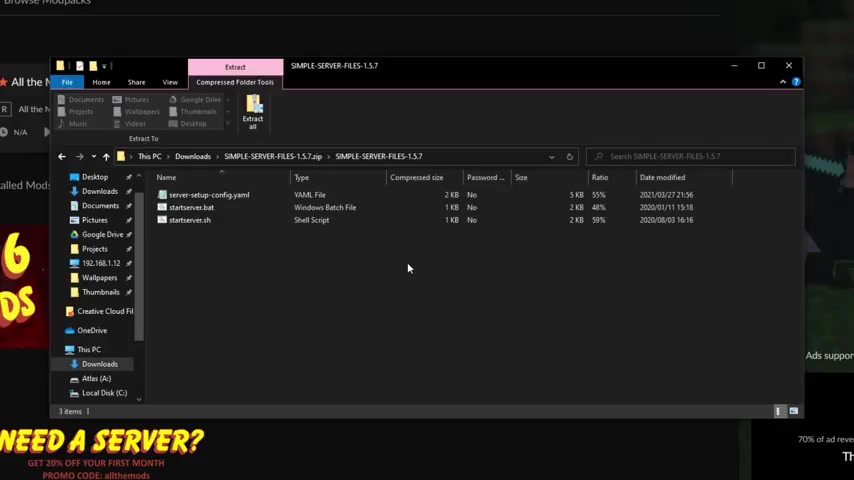
However , if the server zip was incredibly small and quick to download , you may have ended up with something like the on the mods server pack over here , it comes with a single folder with three files inside of it .
When of these two files over here is run , it'll download the rest of the necessary server files .
B the mods folder , forge , etcetera , etcetera .
If the servers that you downloaded was incredibly small and you don't have these files here and it looks something more like this .
Make sure to refer to the mod packs , help sources as you may need extra steps .
From here on top of that , if you're still struggling , you can contact server pro support team .
If you can't find the info .
In this particular case , all I have to do is extract these files and then run one of these over here to download the entire server pack .
However , if you have a zip that has all of the files inside of it , you don't need to unzip it first after this download is completed , you see something similar to the HSIA pack that I gave an example with earlier , we have forge config mods , et cetera , et cetera .
Meaning the mod packs now been successfully fully downloaded from here .
All we have to do is send it up to our server heading across to our Minecraft server pro panel .
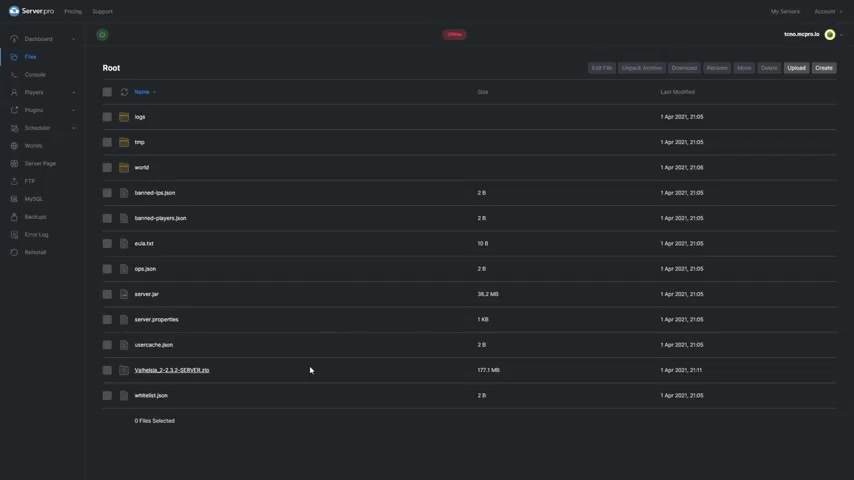
All that we have to do to get ready to upload our files is to go ahead and reset our server back to a vanilla version head across to the file section .
And if you'd like make a backup of the world folder as we'll be clearing this , you can of course make backups of more folders .
If you have specific things on your server that you'd like to keep as we'll be resetting the entire thing .
First , after you've downloaded the necessary files , worlds , etcetera , etcetera .
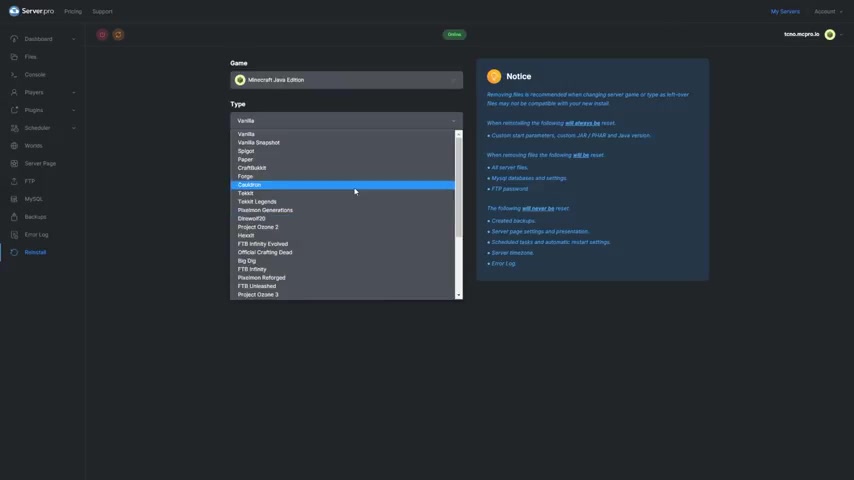
Let's get to resetting the server head across to the dashboard at the very top under server details , click change , then select a vanilla from this dropdown .
Select the correct version that matches the mod pack , which in this case is 1.16 0.5 .
And for remove files , choose .
Yes , then click reinstall and reinstall note , we do recommend to remove files so that this slow conflicts with existing files and new files .
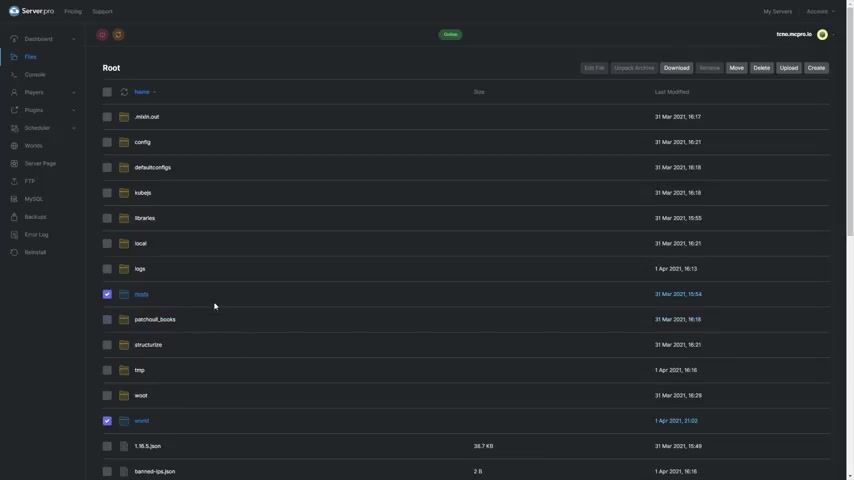
And of course , it will also reduce the chance of crashing and even corruption after it completes your new vanilla server will simply start up and the file section will be a lot more empty at this point .
Turn off your server using the power button in the top left and we'll get to uploading the server files .
Simply click upload in the top right .
And you'll be choosing one of these over here .
If you downloaded a large zip file that has all of the necessary server files in it , click the select a files button , navigate into the correct downloads folder , select the zip you downloaded and then simply click open upload .
And if you're prompted by your browser , click upload again , this of course will take some time as server zips are usually quite large .
And after the server zip has been uploaded , select did then click unpack archive .
But in this particular case , I didn't download a complete server zip .
Instead I had to extract it and run a file to download the rest of the server files .
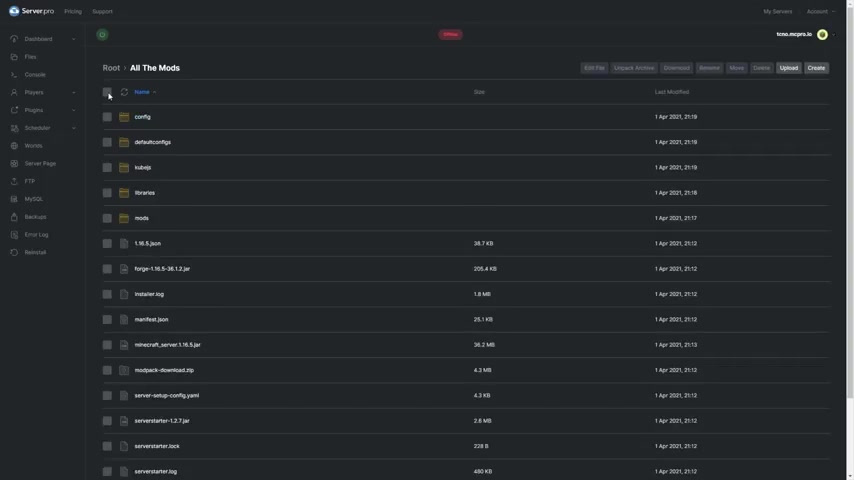
So I'll delete this as this was just an example and I'll upload the folder .
So I'll click upload once again , then select folder on my desktop , I have the on the mods folder with all the server files inside of it .
All they have to do is select the folder , click upload if prompted by my browser upload once again and finally upload on server pro .
Then I'll have to wait for this to complete .
And our server files will be uploaded into our server ready for us to work with .
Once the folder is uploaded , I'll go into the folder , select all of the files , then I'll click , move in the top right .
Move back a folder and click , move .
Then I can head back to the route directory and delete the sub folder .
Here we go .
Now we've successfully uploaded all of the server files , either using the servers app or folder that we had to download more files into next up , configuring the server to configure the server .
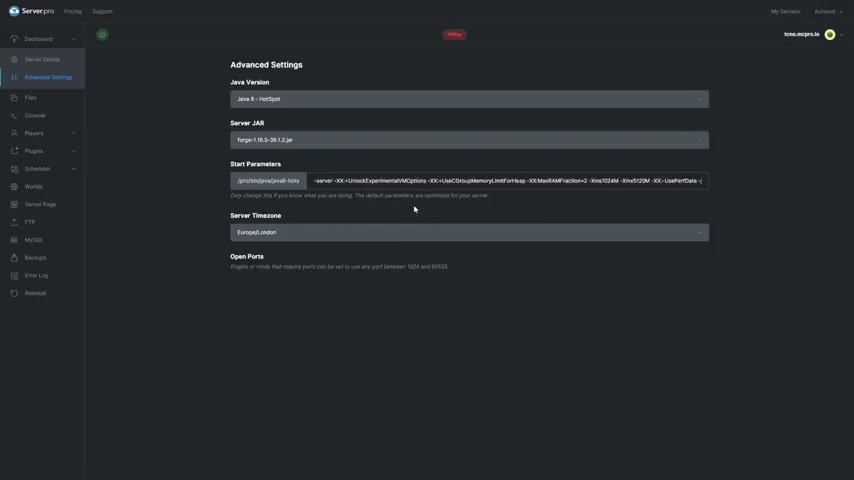
Head over to the dashboard tab at the very top .
Then click advanced settings right below it in here , click the dropdown and serve a jar and select the correct file .
Usually mod packs are run using forge .
But of course , there could be other jar files if you don't have a forge dot jar check mod packs , help files .
Usually if you do have a forge dot Jar simply select it and at this point , you're basically ready to run your server .
You can click save changes and fire up your server .
But if you like the best performance or you're encountering issues later .
It may have something to do with these start parameters over here .
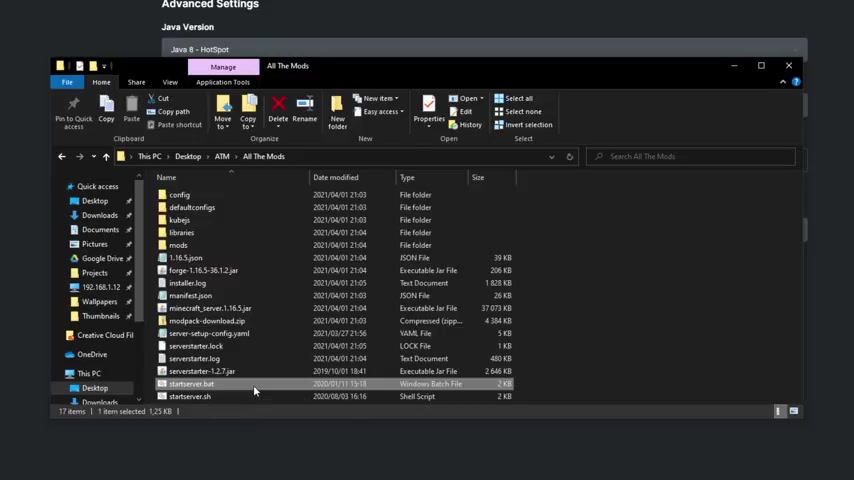
Well , if I head into the mod pack files on my computer , add into the servers starter dot pad or whatever file we run to start the server .
Open it up with say notepad .
We'll usually see something like this .
Basically , it's telling the server to start up Forge dot jam and you'll have a bunch of parameters after it .
All we're gonna do is combine the ones that we have here with the ones that we already have on server pro try not to replace any of the existing ones here as their already optimized for your servers .
So all you'll really be doing is adding new ones from this one over here to this list over here .
However , this mod pack is a bit different .
The actual server starter file here looks more like this at the very bottom .
They're not , in fact starting up forge directly .
They're instead starting up another file that then starts up forge .
In this particular case , these parameters are stored inside of this file over here .
At the very bottom .
Of course , all mo packs are very different .
All I do here is copy these arguments out and add them to the list over here .
That is optional for the best performance .
And if something goes wrong in this case , I'll just be starting up my server and things should work properly immediately .
So I'll click the power button in the top left to start up my server .
And I'll head across to the console tab to make sure that things are going well .
While the actual server is starting up , I'll head back into cursor and launch up my game as well as both the server and my game itself will take some time to load .
And of course , if this is your first time launching up your mod pack after clicking play in the Minecraft launcher , it'll download a couple more files which could take some more time .
I'll skip forward now that they've started up .
Let's connect to my server .
I'll head into the multiplayer section , direct connect and I need to put in my server address here .
You can get this on the server pro dashboard by clicking dashboard and connecting to either the host name over here or the IP address over here .
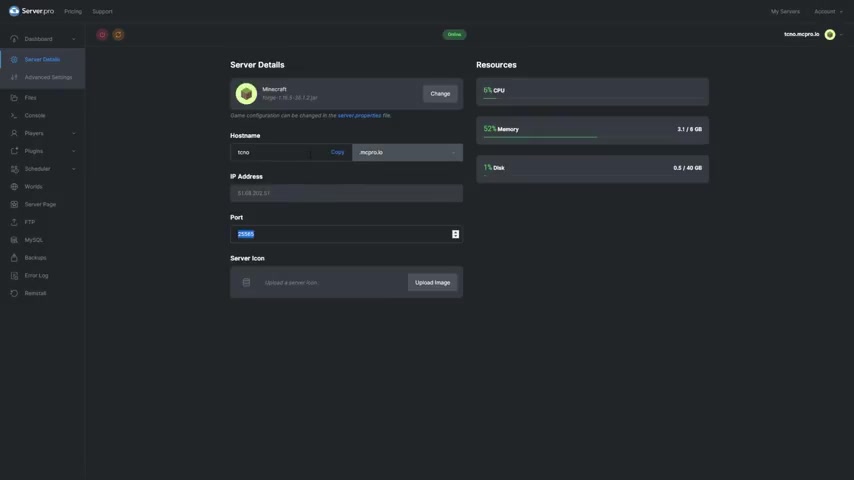
If your port isn't the default 25565 , you need to add colon followed by whenever the port is here to the end of either of these when you're connecting to it .
So in my case , I'll connect to Techno dot mc pro dot IO .
And there we go , I've now connected to my server .
Let's go ahead and give myself so I can test out things heading across to my server pro dashboard .
I'll head into the console section and I'll type in space followed by my user name , Techno upon running this command , I'll then have , and I'll be able to change my game mode in game , I'll change to creative and as you can see on the mods are working as expected , I can spawn in thousands of items and of course play as you'd hope .
But anyways , that's about it for this tutorial .
I hope you found it helpful if you have any video suggestions , leave them in the comments below and if you're having issues with anything , contact our support team .
Thanks for watching and I'll see you all next time .
Chow .
Are you looking for a way to reach a wider audience and get more views on your videos?
Our innovative video to text transcribing service can help you do just that.
We provide accurate transcriptions of your videos along with visual content that will help you attract new viewers and keep them engaged. Plus, our data analytics and ad campaign tools can help you monetize your content and maximize your revenue.
Let's partner up and take your video content to the next level!
Contact us today to learn more.