https://www.youtube.com/watch?v=D2dJp0uKcwQ
Bread and Butter Pickles Recipe with Step by Step Water Bath Canning Tutorial

Today , I want to share with you a bread and butter Pickles recipe .
Plus , if you want to take it one step further , I'm gonna walk you through , step by step , a water bath canning tutorial so that you can make your pickles shelf stable .
But you can also just go right ahead and put them in your refrigerator if you want to skip the water bath canning .
Hi , sweet friends .
I'm Mary and welcome to Mary's Nest where I teach traditional cooking skills for making nutrient dense foods like bone broth , ferment , sour dough and more .
So if you enjoy learning about those things , consider subscribing to my channel and don't forget to click on the little notification bell below .
That will let you know every time I upload a new video .
Well , bread and butter pickles are delicious because they're a little sweet , a little salty , a little spicy .
They have a little bit of everything and they're wonderful , you know , at a barbecue uh with hamburgers and hot dogs , that type of thing .
But they also make a great side dish whenever you just have any sliced cold cuts or even with a hot meal as well .
Because they help aid digestion .
Thanks to all the vinegar in them .
But let's get started and we'll go over the ingredients .
They're basically very easy .
And chances are you have a lot of these things in your pantry .
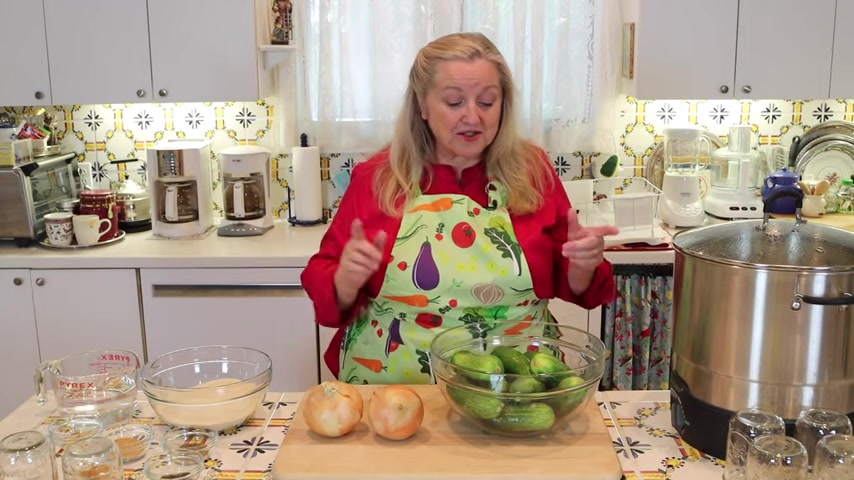
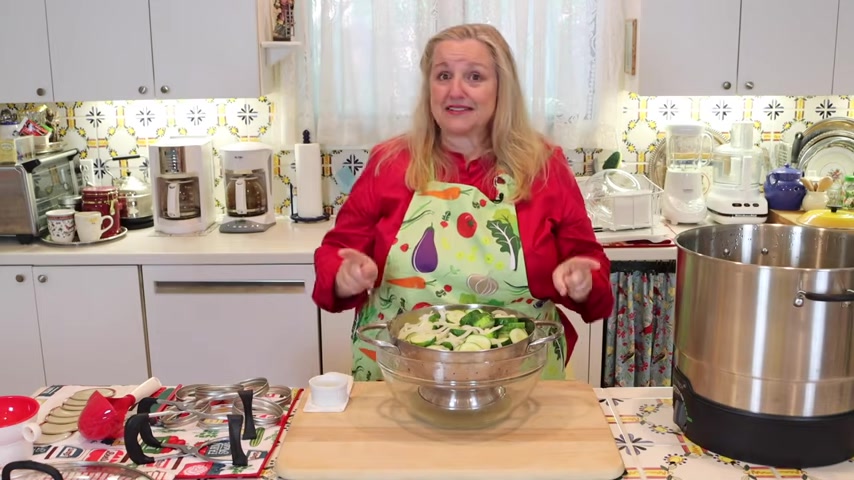
But what you're gonna want to start with are pickling cucumbers .
They're also known as Kirby's Kirby .
Kirby cucumbers .
But don't worry if you can't find Kirby cucumbers , you can also use those long hothouse cucumbers .
Sometimes they're called English cucumbers and sometimes they're even sold in like a little mini version that looks a little more like a Kirby cucumber .
Uh But the bottom line is , you're looking for a cucumber that has a thin skin and not a lot of seeds .
And so your hothouse or English cucumbers also fit that description .

So if you can't find pickling and or Kirby cucumbers , you can definitely substitute with those .
And just in case you're not familiar with the English cucumber , uh both the larger version and the mini version .
I just wanted to show you quickly here , but you've probably seen these in your grocery store a lot and the little ones are often sold in a little bag like this .
So in case you can't find these , you definitely have options .
Now you're gonna want about £4 of cucumbers .
If you're at the grocery store , you can easily weigh those on , you know , the different scales they have in the produce department .
But if you're buying them at the farmers market or even better if you're growing your own , you may not know exactly what £4 looks like if you don't have a scale and you're not able to weigh them .
But basically it's gonna be about 12 pickling or 12 Kirby cucumbers that you're going to need and it's not an exact science .
So , don't worry , um , you know , they can really vary in size .
Some of them can be really large and kind of thick and others can be a little on the smaller side , but basically , you're gonna want about 12 , then you're gonna want £2 of onions and we're gonna slice these very thinly and uh a large onion weighs about a pound .
And so , uh I've got two large onions here and that should be enough that should be about £2 .
Uh If your onions are smaller , you know , medium onions , you're probably gonna need about three , the much smaller onion you'd need about four .
But again , not an exact science .
You can definitely eyeball this next .
You're gonna want a third of a cup of canning and pickling salt .
Now , if you're going to proceed uh with the water bath canning , you definitely want to use this type of salt .
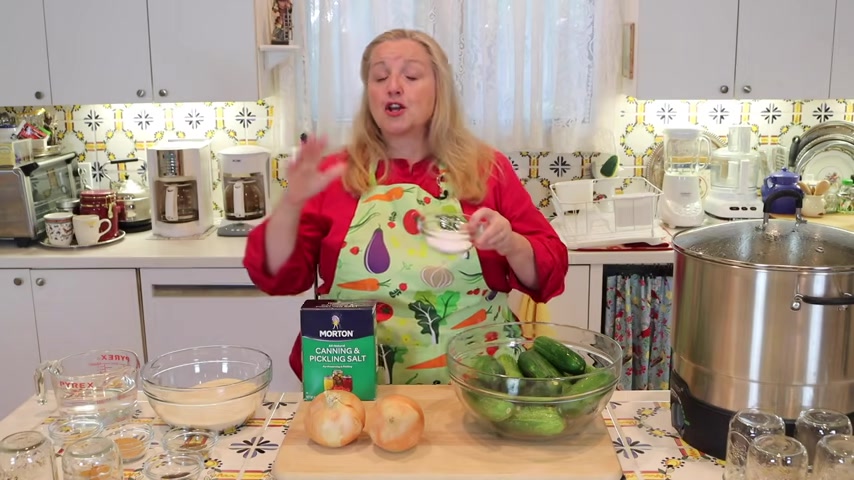
If you're going to put this in your refrigerator , you could replace this salt with um any sea salt that you like or a um the Himalayan pink salt or the Redmond real salt salts like that .
The bottom line is you want something that's just salt .
You don't want the type of table salt that's sold in the little round canisters because they often have anti caking agents and possibly other chemicals in them that don't help keep your pickle crisp and also interfere with overall with the canning process because you'll notice if you look at the ingredients and I'll take an up close picture of this box .
It's the ingredients say just salt and that's really what you want because just salt is going to play a role in keeping your cucumbers crisp .
Once they become pickles , next , you're gonna want two tablespoons of mustard seeds and you can use yellow mustard seeds or brown mustard seeds , whatever you have , then you're going to want two teaspoons of celery seeds .
And then you're gonna want two teaspoons of turmeric .
And then you're gonna want one teaspoon of whole peppercorns .
These are black peppercorns and then you're gonna want one teaspoon of ginger and that's ground ginger .
And then you're also going to need three cups of white sugar .
And this is an organic unbleached white sugar .
But you can use whatever you have on hand .
And then also you're gonna need three cups of vinegar .
And I find for this recipe , white vinegar works best , but you can use apple cider vinegar , but the taste is slightly different .
And what we're trying to do is mimic basically the bread and butter pickles that you can buy at the store .
But the nice thing is making these homemade , you can control what's added to them and you know that they don't have , uh , any chemicals in them .
And even though you're using sugar , you may find a lot of the bread and butter pickles at the store use high fructose corn syrup .
And if you're making the transition from a processed foods kitchen to a traditional foods kitchen , yes , this is a lot of sugar , but it isn't high fructose corn syrup .
And secondly , as you are making that transition and you're trying to introduce for yourself , for your friends or your family , uh foods that are homemade and not store bought .
Sometimes you need to really try to make them taste as close to what you can buy at the store as possible .

Now , the good news is over time , you can decrease the amount of sugar in this recipe .
You can go down to two cups , you can even go down to one cup .
You can even go down to using no sugar .
And I have a recipe where or a video and an accompanying recipe where I show you how to make or basically how to pickle any vegetable , including pickle cucumbers to make pickles .
And I'll be sure to link to that in the IC cards and in the description below and in that video , I show you how if you want to use sugar , great .
But if you don't want to use sugar , how to , how to do that process as well .
So know that over time as you're weaning yourself off from sugar or your family or whatever the case may be , you can decrease this sugar considerably and I'll have all the details as to how to do that in the written recipe .
And so be sure to check the description uh underneath this video , just open up the description and there'll be a link there that'll take you right over to my website , which is Mary's net dot com and it'll uh but the link will take you directly to that recipe that you can read online or print out .
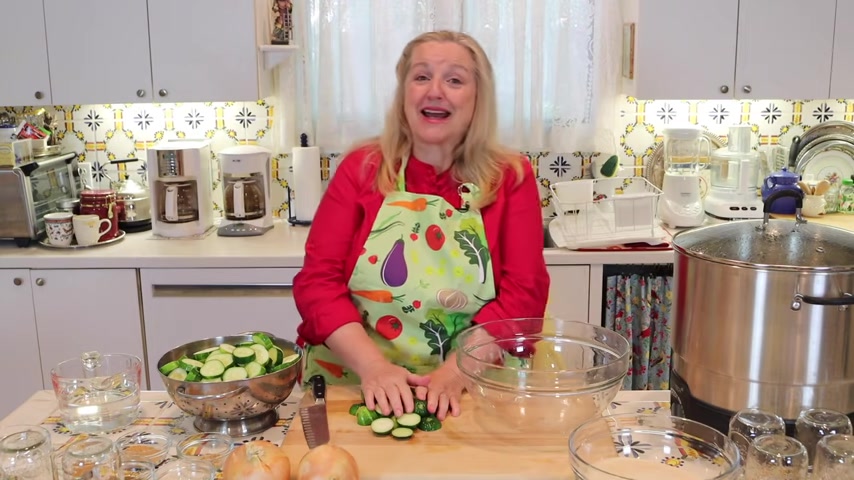
Now , the first thing you wanna do is make sure that you've washed your cucumbers well , and then we're gonna start slicing them into one quarter inch chips and you want to remove the uh stem end and the blossom end and those can just go into your compost pile .
We're not gonna pickle those .
And as you slice up your cucumbers , you just want to transfer them to some type of colander or strainer whatever you have .
Now , I want to mention if you don't have a compost pile and you don't wanna just throw these out .
Another option for your cucumbers scraps is to use these to make vinegar and you're actually going to make vinegar .
It's not like you're just gonna submerge these into white vinegar to give it the cucumber smell .
You're actually going to mix these with some water and a little bit of sugar and you're going to let them ferment over a 30 day process and you're going to have cucumber vinegar .
So that's definitely something to keep in mind .
And I have videos where I show you how to make uh vinegar with strawberry scraps and apple scraps and citrus scraps , things like that and the same principles apply .
And I'll be sure to link to those videos and also a friend of mine , Heidi , I think many of , you know , over at Rain Country Homestead , she also has a lot of videos and I'll be sure to link to her channel uh where she shows you how to make all different kinds of vinegar too , fruit vegetables , even flowers .
So that's a lot of fun .
Next , you want to slice up your onions .
Uh If your onions are smaller , you can certainly just cut them in complete circles .
Um Since my onions are larger , I like to cut them in half and then just cut half moons .
I find that size works better with the cucumber slices .
So that's basically all we're gonna do .
We're just gonna slice it nice and thin and add it right in with our cucumbers .
Alrighty .
Well , I've got all my onions sliced up and my eyes have tiered sufficiently .
But I wanted to mention that when you peel your onions , don't throw away any of your onion scraps .
Save those in a bag and you can put them in your fridge or your freezer depending on what your timeline is uh for making bone broth or broth or stock .
Uh use those onion scraps because they are loaded with nutrition .
Both the little bits of onions that come uh the little bit of onion scraps you have as well as the onion skins .
So be sure to save those .
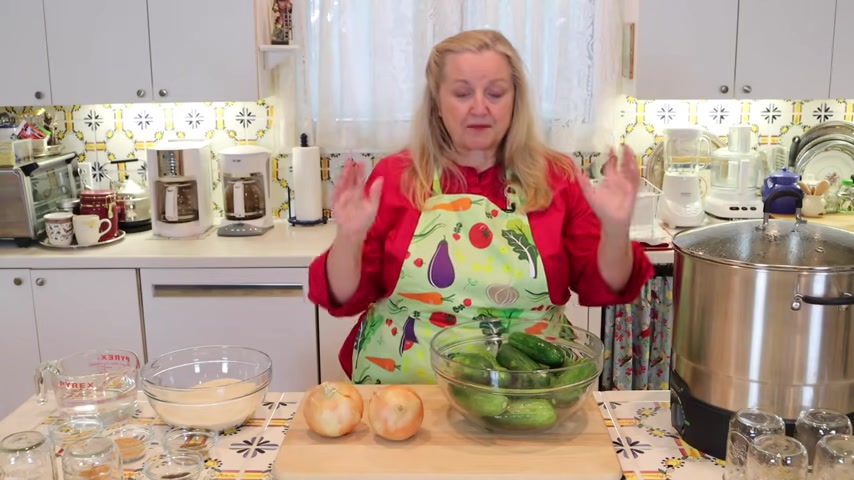
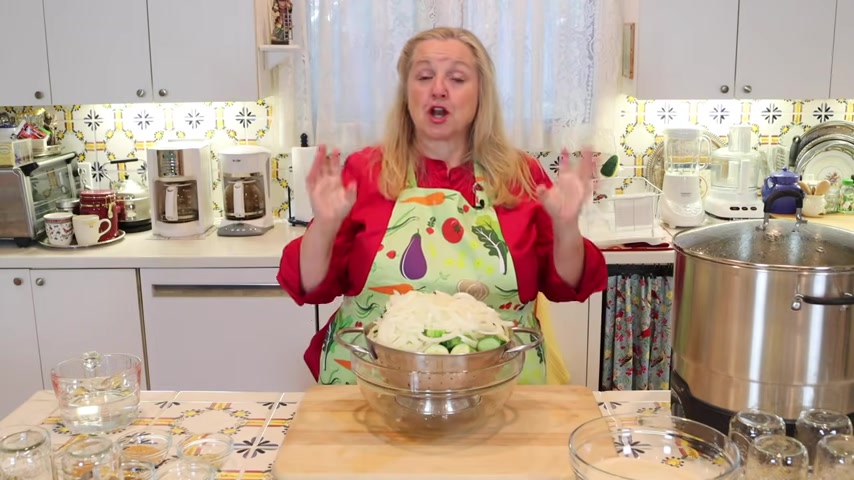
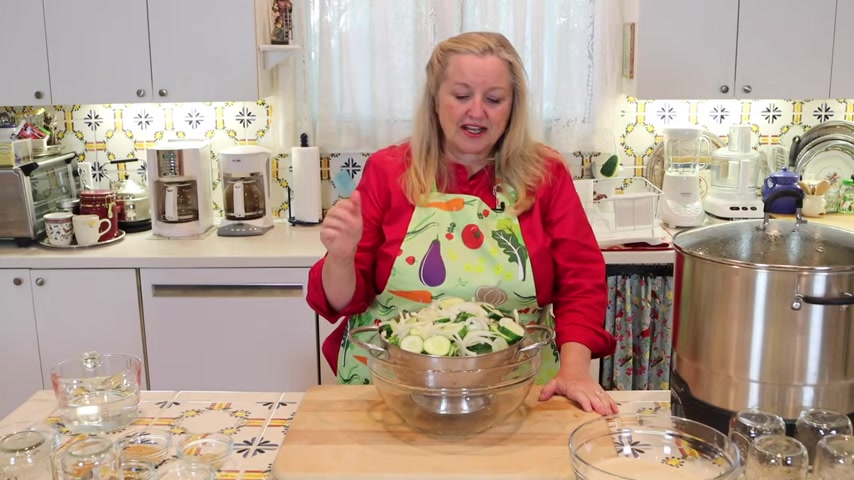
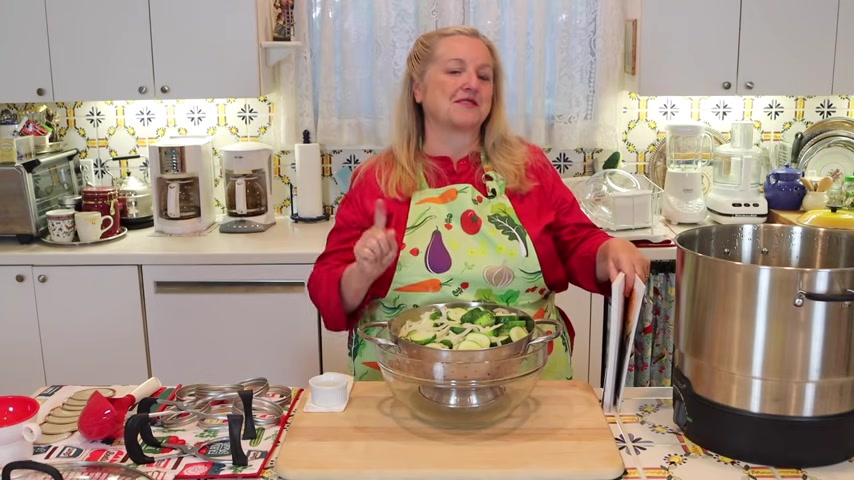
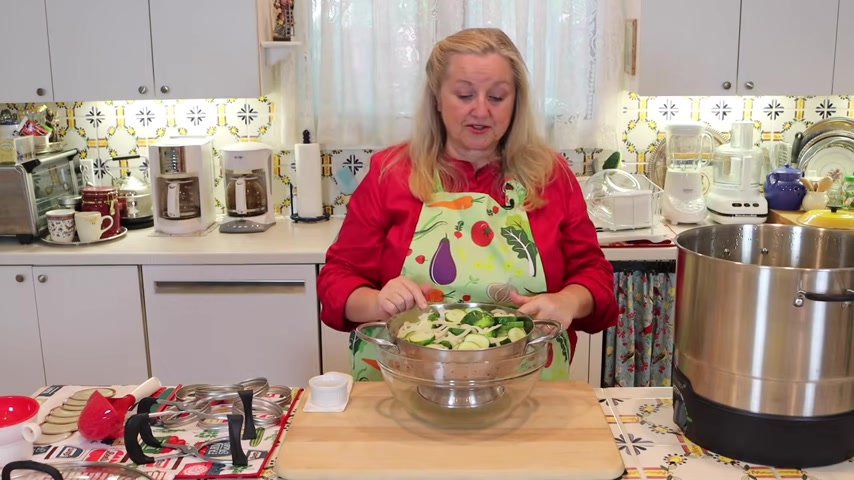
Well , my colander is quite full and now what we need to do is toss all of this with some salt .
So what I'm actually gonna do is put it all back into my bowl .

Now , we'll take that third cup of canning and pickling salt that we talked about and we're just gonna Sprinkle this all over and we're going to just toss everything till it's well coated with the salt .
Now , another thing you could have done when you were putting the things in the colander , you can also put a little salt and then layer , you know , some cucumbers , some salt , some onions , some salt , so on and so forth .
But I always find just giving it a good mix works really well .
Next , you just want to get them back into your colander or a strainer and then just put them over to bowl a bowl to catch the liquid that's going to drain off of them and set them aside for about an hour to an hour and a half .
Now , if you want , you can put ice on top of these , some folks like to do that , they find keeping them cold , keeps them crisp , uh , when you go on to jar them up and , or can them .
But I find that it really doesn't make a significant difference .
So I just leave them as is the other option is you can put them in your refrigerator for three hours and let them drain and that'll keep them nice and cold .
But the various times that I've made these and I haven't used any ice and I haven't put them in the fridge and I've just let them drain .
I really haven't had a problem or I haven't really noticed any difference in crispness .
So , uh , do whatever you like to do now .
Well , those are draining .
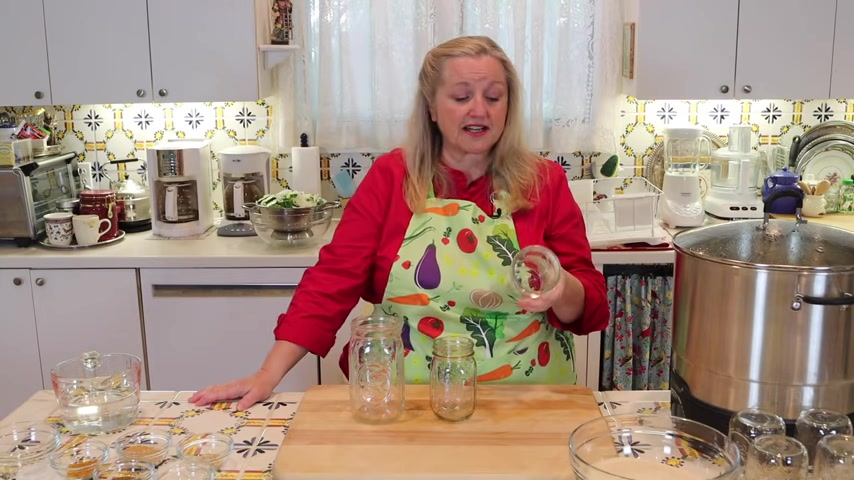
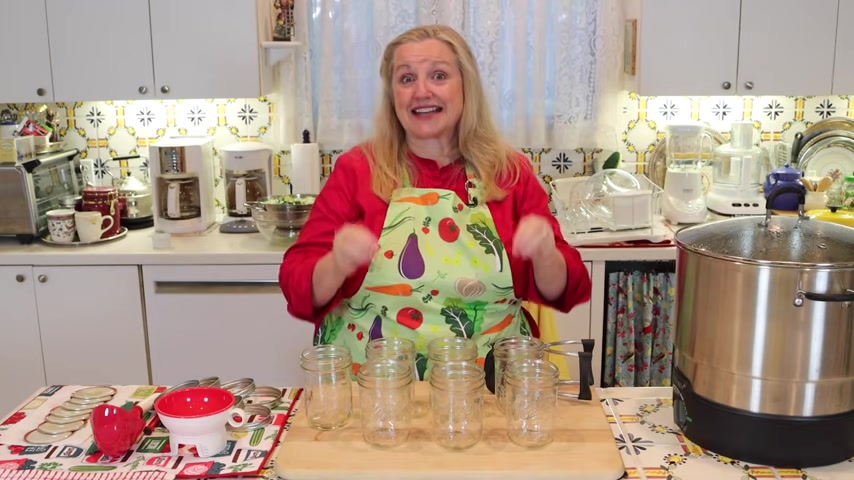
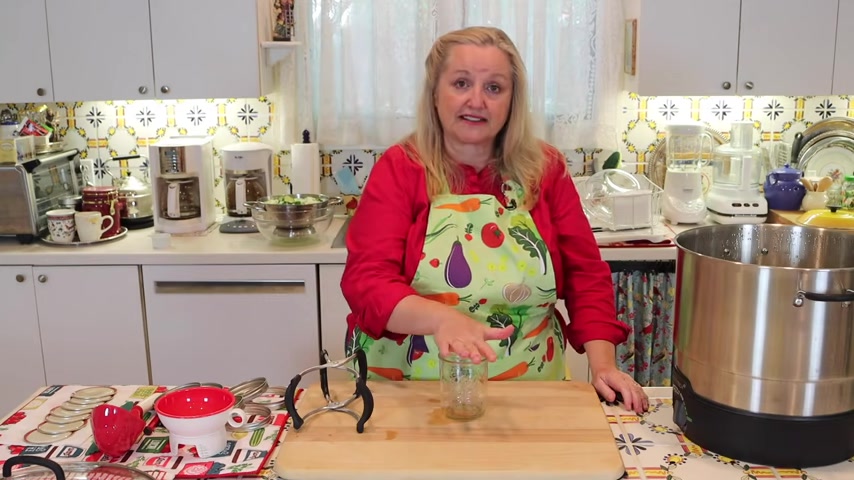
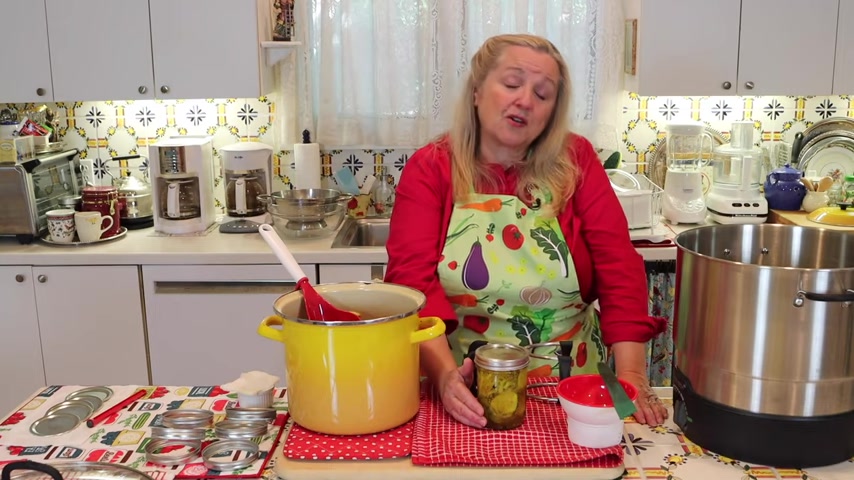
I just want to talk about the jars that you'll want to store these in .
You're going to want something that does have a nice tight screw top lid .
Uh , if you're going to can these , then you're specifically going to need canning jars .
But whatever I'm making , whether I'm making quick pickles that are just going to go into the refrigerator or I'm canning pickles or I'm doing a ferment .
I always like to use canning jars .
They just are very easy to work with .
They can go in the dishwasher to be sterilized .
Um , they'll come with the canning lid and the canning , but you can also buy , uh , storage lids .
They're usually white and once you , if you do can them to make them shelf stable once you open them and then they need to be refrigerated .
You can replace the canning lid and the canning ring with one of those white storage lids , which are easier to work with once you put them in your refrigerator .
But if you're just making these for your refrigerator and you're not going to go through the process of water bath , canning them , then you don't really need to worry .
You can use any recycled jars that you have on hand .
They should work fine .
And basically what I've got here is a wide mouth jar .
This is a wide mouth pint jar , which is 16 ounces .
This is a regular size mouth , um , pint jar also 16 ounces .
And this is a wide mouth quart size jar , which is 32 ounces .
Now , for pickles , I like wide mouth jars .
And the reason is it's just easier to get the pickles out , but you can certainly use regular mouth jars .
And again , whether you're gonna be canning them or just putting them right into your refrigerator , it's really your choice and what you have .
So you can use either wide mouth or regular mouth .
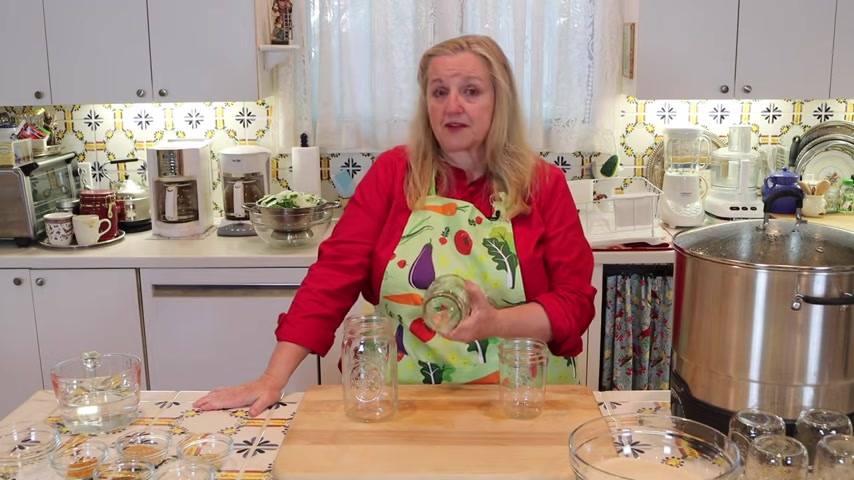
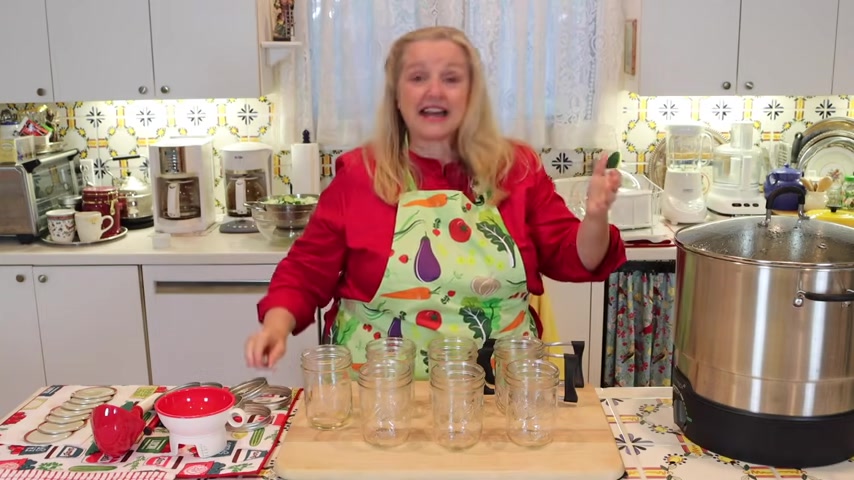
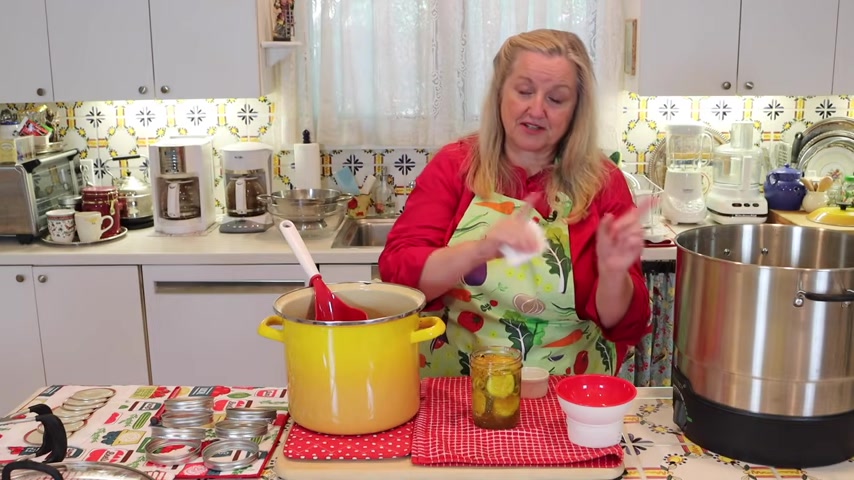
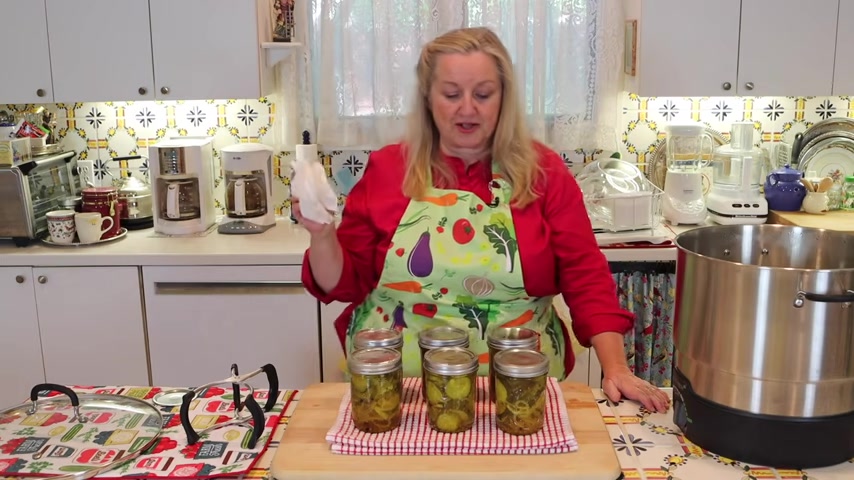
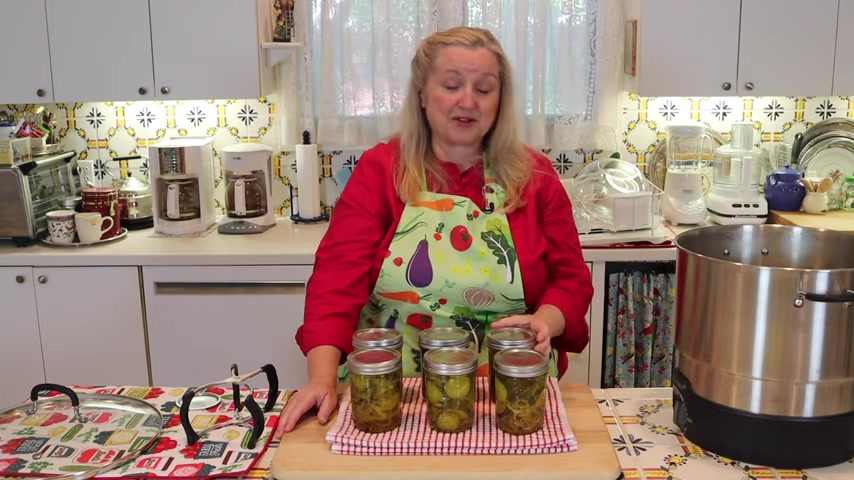
Now , how many jars of pickles are we going to get out of this ?
Well , it's never 100% an exact science , but we're probably gonna get maybe around six jars .
And if you are canning these , um , which I'll go through that process , uh , at the end for you .
After we make the pickles , uh , you're going to wanna make sure you have an extra jar on hand .
Now to make the brine , you're going to want to get a nice large stockpot , something that'll be large enough to hold all of your cucumbers and all of your onions as well as all of the uh brine ingredients .
So , what I'm gonna do is go ahead and add in these three cups of sugar and then we're gonna add in all the different spices .
So I've got the ginger , the mustard seeds , uh the black peppercorns , the celery seeds .
These help to really give it that very nice flavor that's associated with the bread and butter pickles and then the turmeric , which really adds more color if you've ever noticed , um at the store bought bread and butter pickles .
They have like this little yellow or orange , maybe yellow color uh to the brine .
That's usually because turmeric's been added .
Um But the nice thing too is that turmeric is an anti-inflammatory .
So , uh it's , it's a good thing to have uh in our pickles , just want to get that last little bit of the turmeric out and then finally , in goes our three cups of white vinegar .
Now we're gonna bring this over to the stove and bring this up to a boil and allow all the sugar to dissolve .
Now , I just want to start going over some of the canning basics .
Now I will put the time stamp below where you can go ahead and skip this if you're just wanting to see what the next step is for making the pickles .
However , if you are gonna be water bath canning these , you do need to get this step ready before we move on to actually making the pickles to water bath can vegetables or fruits or jams and jellies .
Any of the foods that can be water bath canned , which are usually considered what they call high acid foods .
You need a water bath canner .
Now , it really doesn't need to be anything fancy .
You can just use a stock pot that has a lid .
And if you have some kind of rack , you can put in the bottom of it like a , a cooling rack you might use when you're baking and that can fit in your stock pot that can work great .
You can also just take your canning rings and , and put them together with some twist ties , which I've shown you how to do in previous videos and you can make a rack with that and then you're all set .
That's your water bath canner .
You can also buy stovetop water bath canners .
Uh sometimes at the grocery store or some of your big box stores , they're very common .
They're usually granite .
They're like they look speckled , black and white or blue and white , speckled .
Um The only thing about those is you want to make sure that , uh , the manufacturer of your stove , uh , says that it's safe to use those stove top water bath canners , uh , on your particular type stove because they have a concave bottom , which can make , um , somewhat of a seal on your flat glass top stoves and things like that .
So you just want to check and to be careful about that .
The other type of water bath canner you can use is what I have here .

This is an electric one and I really like this because it frees up my stove that so I have it for other things .
I also have a glass top , a glass top stove .
So if I do water bath canning , I just use the stock pot method .
I don't use the actual stovetop water bath canner .
So this electric water bath canner is terrific .
But as I said , you've got a lot of options .
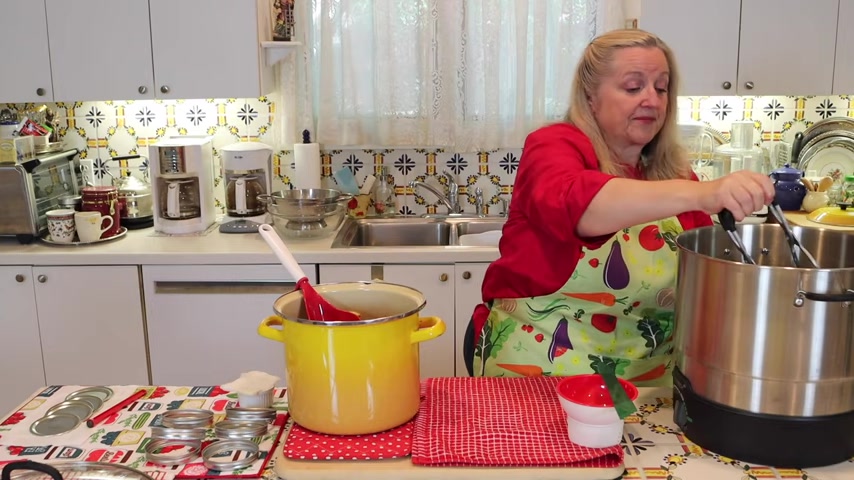
What you want to do is bring the water up to a simmer .
And that's what I've already done here .
I'm opening it away from me because a lot of steam comes out .
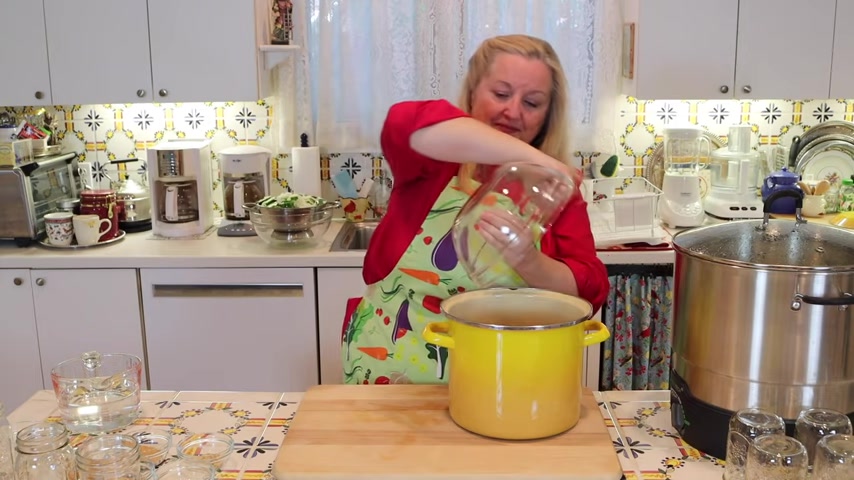
And then we're gonna want to take our canning jars .
And as I shared with you earlier , I'm using wide mouth Pint jars and we're just gonna want to go ahead and submerge them down into this nice simmering water .
Now , these jars are very hot because I wash them in very hot , warm soapy water because I knew I would be putting them in hot water into my canner .
And that's because I've been doing a lot of canning and I didn't want to empty out all the water .
See , there it's cycling , it's gonna start making noise , but generally what I like to do just to be on the safe side .
So as to not give them any kind of shock in terms of temperature change is to put my jars into my canner , fill it with water and then turn the heat up to get it's simmering .
And the reason that we want to put our empty jars into the water bath canner and allow them to simmer uh while we're waiting to finish off our pickles is because we want nice hot jars that will and nice clean hot jars that will be ready to handle , taking the very hot brine liquid along with the pick that we're going to be putting into the jars .
And I'll take a picture so you can see what this looks like once they're all in the canner and regardless of whatever canner you're using , and you just want to be a little careful , you want to make sure that none of them are touching .
You don't want them bumping into each other .
Um The potential for a crack .
Uh You don't want that to happen .
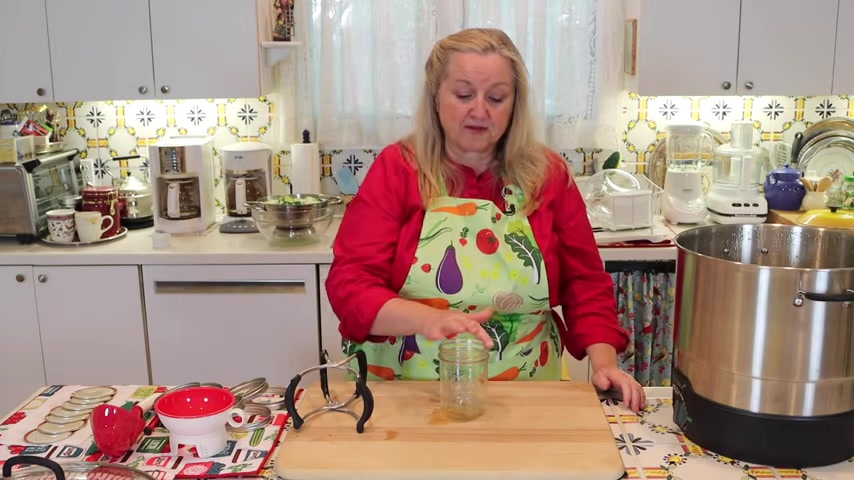
And one other thing I'm actually going to take one out because I want to just mention this to you is that when you've got your jars before you put them into your canner just , and you can actually take a paper towel and I know there are no cracks on this .
Uh You can take a paper towel to do this just to protect your finger .
You just want to run your finger around the rim to make sure there are no chips .
As a matter of fact , I found a chip on one of my jars the other day .
But so you just want to make sure there are no chips and just take a quick look at the jar to make sure there are no cracks .
And the reason it's very important that there are no chips is because in order to get a good seal from your canning lid , you want to make sure that the rim of your jar is in pristine condition .
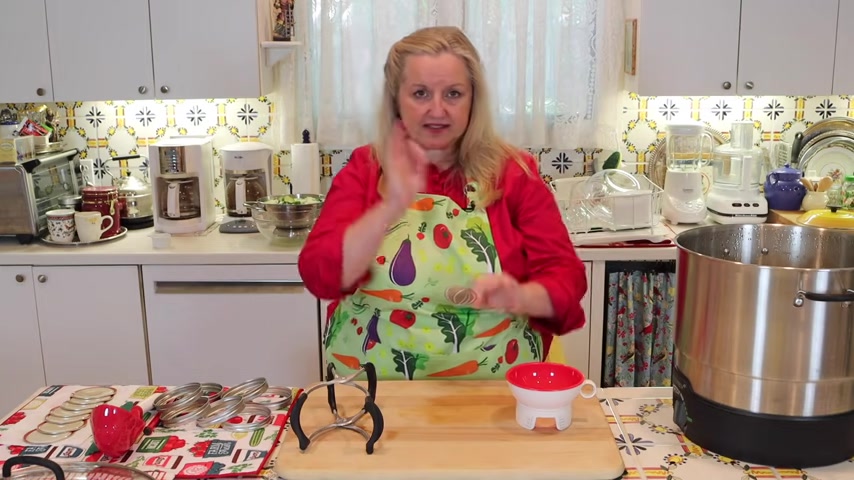
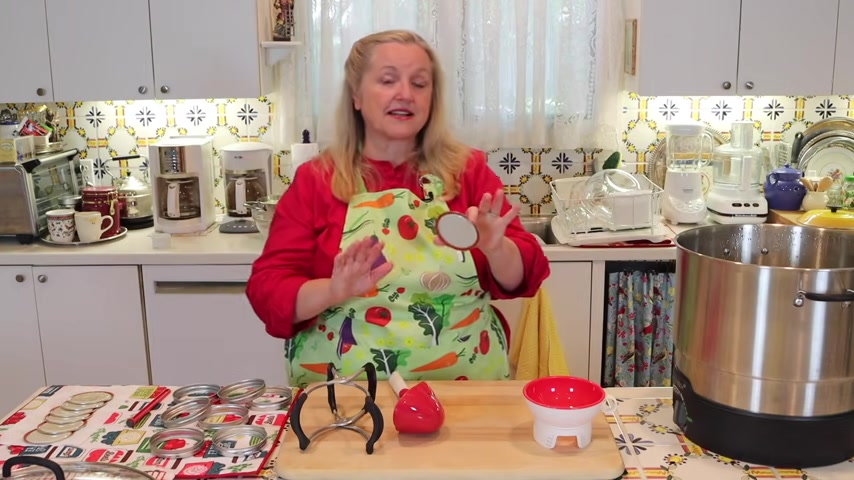
Now , I just want to go over the some of the supplies that you're going to need to do this water bath canning .
In addition to your water bath canner and your jars and your jar lifter , you're also going to want to have some type of funnel and this is a very clever little funnel because it has uh measurements for head space and head space is something that's very important in canning .
Sometimes recipes will tell you to leave a quarter inch head space , sometimes a half inch head space , sometimes an inch head space , so on and so forth .
And what's nice is when you put this over your jar and then you fill the contents , you can and actually see when it hits the right headspace amount .
But don't worry if you don't have a funnel like this and it doesn't , and it has those , it doesn't have those measurements on it .
You're also gonna need something called a de and that's something you're going to , you put , stick into your jar once the contents are in to make sure that there are no bubbles , no air space .
And then sometimes if there's a lot of air space , it'll actually lower your head space and you'll have to add in a little more liquid or whatever the case may be .
But many bubbler today come with this little notched bottom and basically what this is so that you can put this on the side of the jar , you know , inside and measure your head space and it's , it's got a quarter of an inch , an inch , three quarters a half so on and so forth .
And if all else fails , you can just put your little rule or any little plastic or wooden rule you have on the outside of your jar , uh as well to help measure plus the rims on the jar , the threads on the jar um that hold the ring , you know , when you go to screw the ring on .
Uh Also , uh you'll find as you become more familiar with canning and you are using the debugger that's got the graded , uh edge or , or this funnel that has the head space measurements .
The very top one is usually a quarter of an inch .
The , the second one down is usually , you know , of those threads on the top of the bottle of the jar is usually a half inch and then three quarters of an inch and an inch .
So , uh there , there are different ways to , and the next thing you're going to want to have is some kind of ladle .
Any ladle will do .
You're just going to be using this to ladle the hot contents into your jars , using your funnel .
Um , I like this one because if you're using a big stock pot , especially if you're making jam .
Uh , this can be linked right onto the jar uh , onto the pot without sliding in , uh , between each jar that you're filling .
Uh So that's very handy .
Uh Next , you're going to want a little device like this .
It's just oops , just like a little stick and it has a magnet on the end and this is used to pick up your lids that you're going to put on to your canning jars .
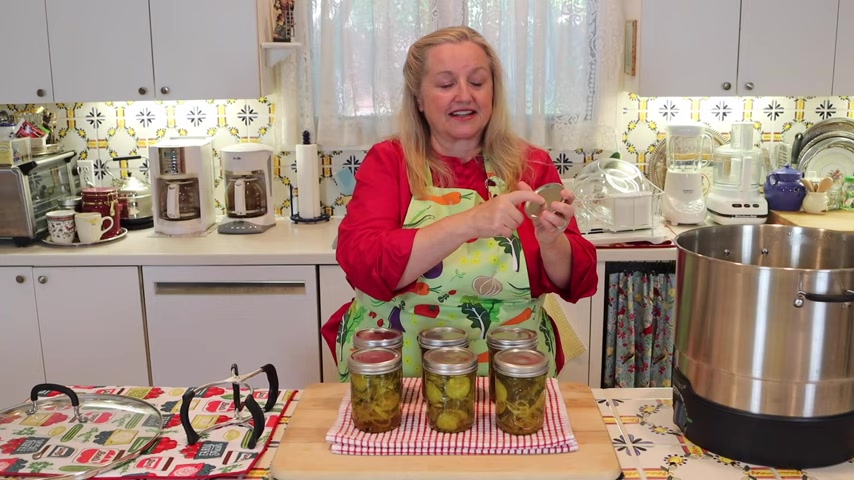
Now , all of that said , let's talk about the lids .
Now , what you want want to do is you always want to use new lids whenever you're canning , the rings can be reused , but not the lids and you'll want to take your lids and wash them in nice warm soapy water and then let them air dry .
There are different schools of thought on this whole process with lids and there were canning rules seem to always be changing and improving .
Um , the way I was taught when I was younger was just to keep them in a little sauce pan of very hot water , but not very long , just for a minute or two to really get them nice and clean .
Uh , but you have to be very careful about that and you never definitely don't want to boil them because there's a rubber rim around the edge here , which is what's going to attach to your jar and create that nice tight seal .
That's going to make your canned goods shelf stable that you can put in your pantry .
They'll keep out all the air .
But the problem is if you boil your lids or if you have them in too hot a water , it can compromise this little rubber ring and then make for a false seal or a difficult seal or a failed seal .
And so , um , now I just wash these in warm soapy water and let them air dry and have them handy for when I'm ready to put on top of my filled jars .
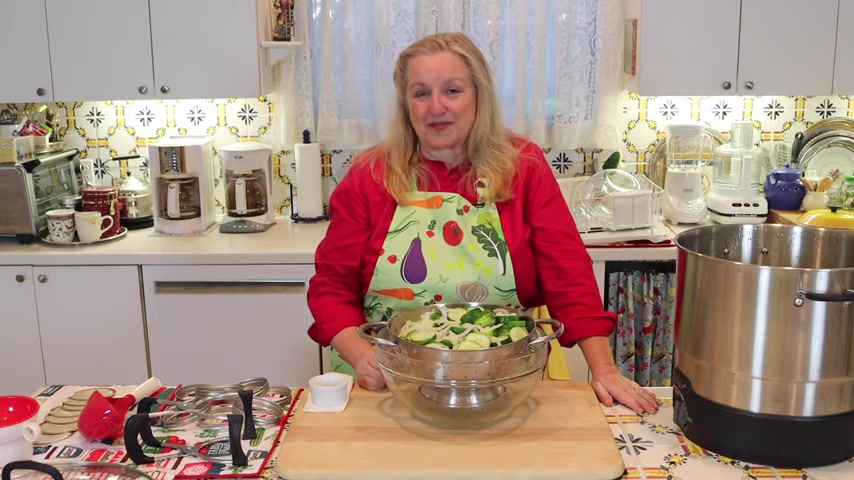
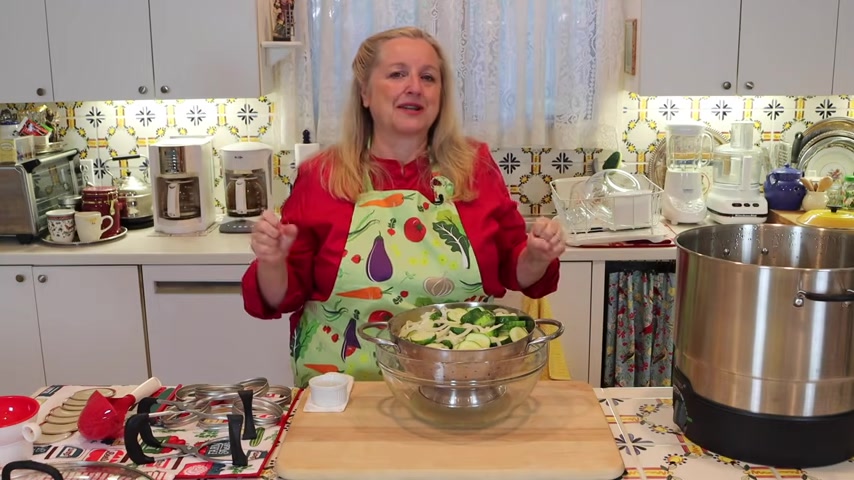
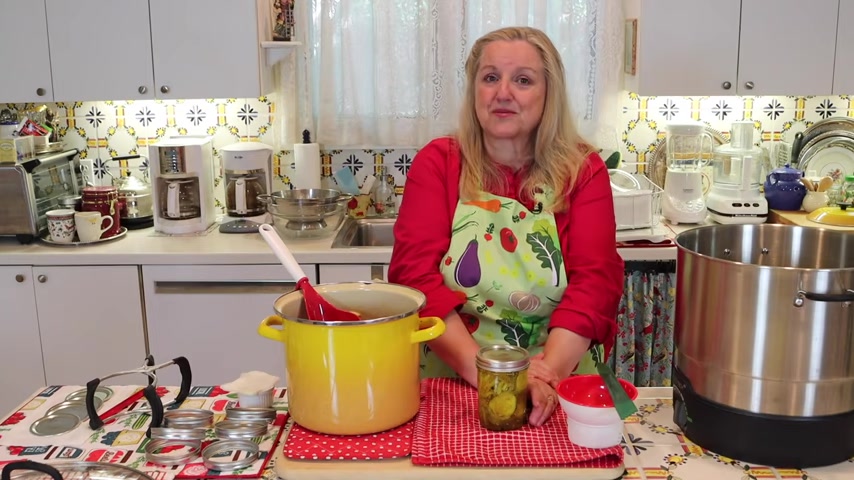
Well , these have drained for about an hour and a half .
So we're ready to move on to the next step and make our pickles .
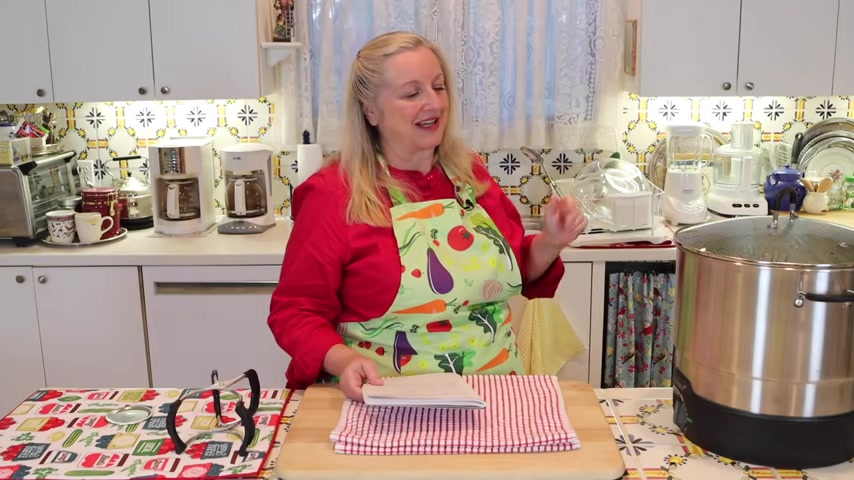
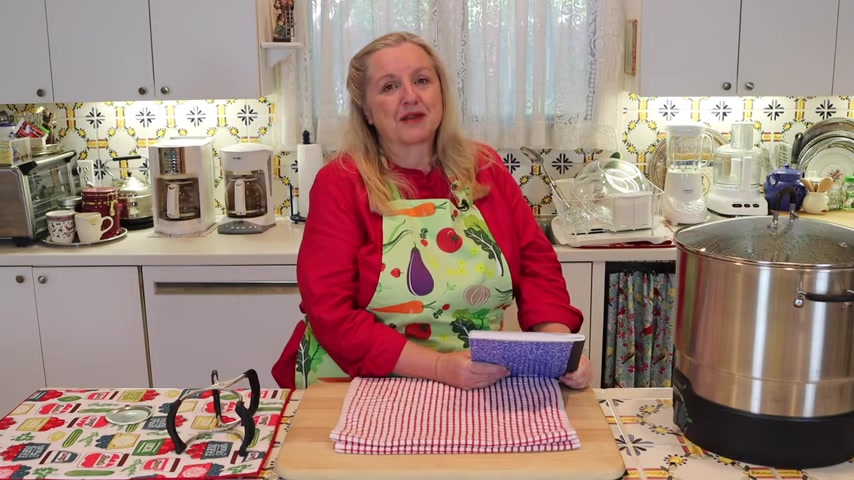
But I just wanted to mention , especially if you're going to be doing the water bath canning and maybe you're new to it .
This is the book that I'm getting this recipe from .
It's the ball canning back to basics , uh , cookbook .
It's a foolproof guide to canning jams Jellies Pickles and more .
And it's really uh great for beginners .
But there's something that I wanna mention that they don't mention in this recipe that I think is an important tip to keep in mind .
Uh , when you're making any type of canned item like this , like the pickles that you'll see , we're going to mix with the brine in the next step .
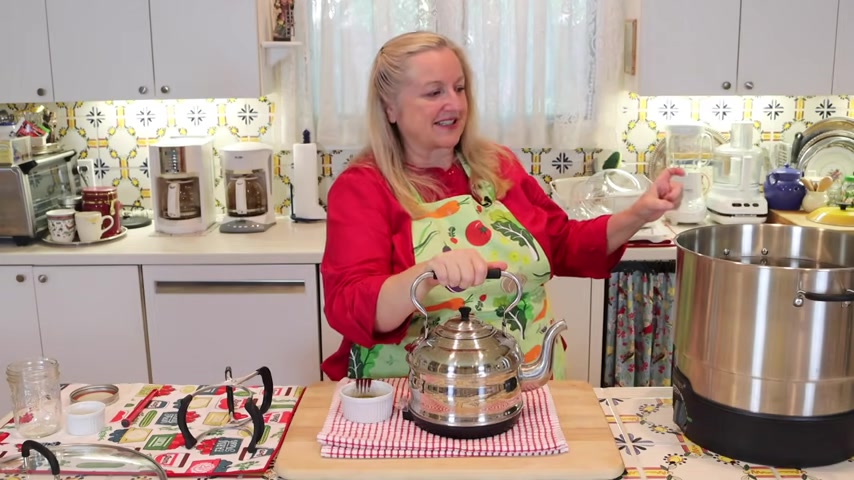
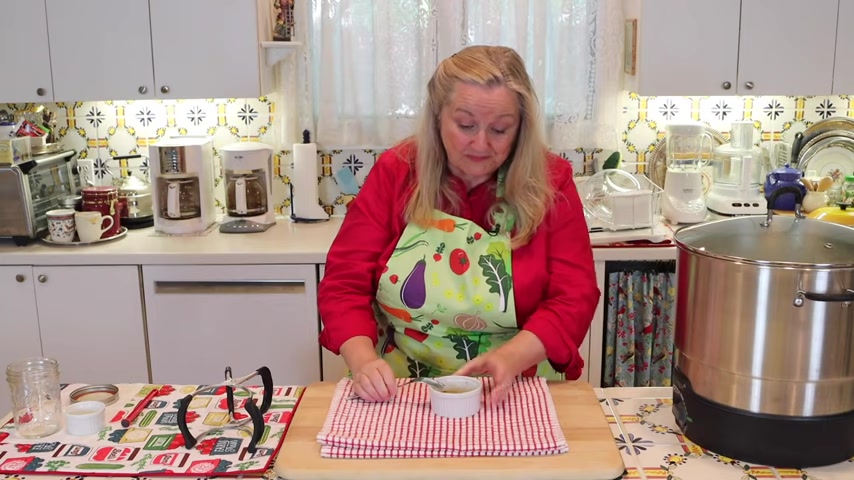
You always want to make sure that you have enough hot liquid for your pickles or whatever uh vegetable , you're pickling in this manner and getting ready to can , you don't want to be in a situation where you run out of a hot brine .
So I recommend keeping either a little extra vinegar on hand that you've heated , uh or just a little hot water right from your tea kettle .
So in the event that you're a little short on brine , you don't have to panic .
You've got a little extra hot water or a little hot vinegar , uh ready to top your jar off to make sure that in the case of pickles , uh which require the half inch head space that you do have enough liquid to get all of your pickles submerged and ready for canning .
And chances are most recipes um , are pretty good .
But , uh , you know , as I said , sometimes you're gonna need that extra jar and yes , you can definitely just go and put those in your refrigerator .
You don't have to can them , but just to be on the safe side to make sure that you have enough hot liquid .
I have found through my own personal experience having that little bit of extra vinegar or having a little hot water on hand , can really save the day and it's not gonna be a lot .
So it's not gonna change the taste significantly .
Now , to rinse or not rinse the cucumber and onion mixture .
I'm of the school of thought that this should not be rinsed .
Plus we should save the liquid that came off of our cucumber onion mixture and add it in with our brine when we go to put all of these on the stove .
Now , there are different schools of thought on this .
Some people will say discard the liquid that's come off and then give these a really good rinsing .
However , I don't like to do that , but I will tell you that the recipe in the cookbook that I just showed you does say to rinse them .
But the recipe doesn't call for any other salt other than the salt that you use during this draining process .
And I find without any salt , the cucumbers are sweet and spicy , but there's no saltiness to offset the sweetness .
And so I have found that not rinsing them leaving them as is Yes , they , they have taken in some of the salt during this draining process , but I don't think they've taken in enough .
I think you do need to not rinse them and you do need to save the drained liquid .
Add it to your brine .
I believe it's going to make a much better tasting bread and butter pickle .
Well , I've got the sugar and vinegar brine mixture over on the stove , which I brought up to a boil , the sugar has dissolved .
And now what we're gonna do is head on over to the stove and add our cucumbers and our onions and the liquid that we've drained off into our stock pot .
Well , I added the cucumbers and the onions along with the drained liquid to the brine that had the vinegar and the sugar dissolved in it and I brought it all up to a boil and then I removed it from the heat .
Now it's nice and hot .
So the next step is we're gonna take our jar lifter .
We're gonna take one of our jars out of the canner and they're nice and hot .
Be very careful .
And then we're gonna get our funnel that has the headspace measurements on it .
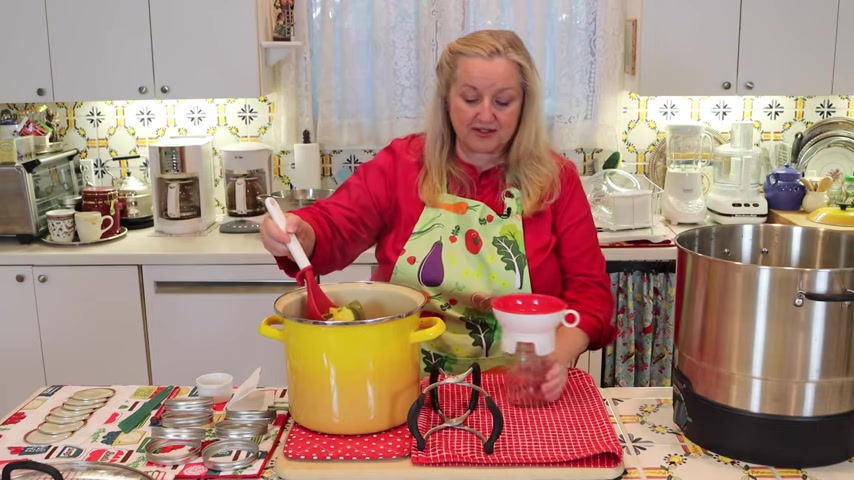
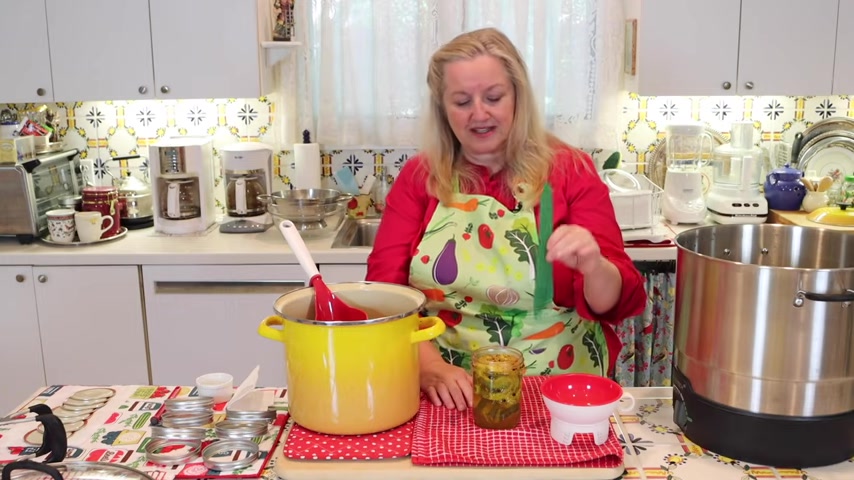
But don't worry if you don't have one , you know , we'll go over measuring for head space and then I'm just gonna go in here with my ladle and I'm gonna start ladling the pickle .
Now , pickles the cucumber onion mix into my jars Now , what you wanna do is you wanna make sure that you ladle in enough pickles , you know , pickles , now cucumber onion mixture because , and make sure they're well compacted because they will float uh at once they're canned .
So now take your debut and just go all around to get any , um any air bubbles out , whatever the case may be .
And then we'll measure for head space and see how we're doing .
Now , I looked at my funnel measurement to make sure that I had got to that half inch head space .
But if you have a bubbler that has one of these little measures , I'm also taking a close up picture so that you can see that it's also this also it with that half inch head space .
So either way will work and if you don't have either of these , and as I said , you have a ruler , I would just recommend you , you don't know if the ruler is food safe or even if it's a plastic one , you may not know if it's food safe or not .
You can just measure from the outside .
And as I talked about before , with these , these rings , the threads of the jar can help you a little too .
The next thing that you want to do is to make sure that the rim of your jar is really clean so that you can get a good seal with your canning lid .
So you want to take a little white vinegar and a little paper towel and you just want to go all around to make sure that that's nice and clean .
And at the same time , you can check for Nick .
Now we checked for Nick before we put them in to the canner to warm up .
Um , you can also do that when you take them out again just in case something happened and then a third time after you get ready to put your canning lid on , but that's basically it .
Uh You'll see , I actually got quite a bit of uh liquid off of that .
So now I know that my jar is nice and clean .
Now we're going to head over here .
We're just gonna get one of our clean lids and we're just going to position that securely on our jar and then we're going to get one of our rings and we're just going to tighten this to the point where it's just finger tight and I'm gonna do a close up so that you can see exactly what I mean .
Now , what you want to do when you put your ring on is what's called finger tight .
And this can be very confusing to folks .
So I wanted to bring you in close so that you can see exactly what I'm doing .
You're just gonna turn your ring until you meet some resistance and then after you meet some resistance , you're just gonna give it another little turn .
That's it .
No brute force .
All the ring is doing is keeping the lid in place .
During the canning process .
You don't want this to be really tight .
And the reason is during the canning process , uh oxygen air is going to be escaping from the jar .
Now the ring is going to keep that lid in place , but it's not gonna be so tight that that extra oxygen , that extra air can't uh seep out of the jar .
And the reason that you want that is during the boiling canning process , all of that air and oxygen come out and then when you take it out , the lid will seal with the change in temperature and it will seal without any air in there , which is what allows this to be shelf stable .
And that's often you may hear canners refer to the term the ping because when you lift it out of the canner , you'll start to hear the jars go ping .
Yeah .
When that little dot in the middle , that's a slight , a little dimple that's slightly raised on top of the jar , it gets sucked down by the change in temperature , thereby sealing your jar beautifully .
What happens is if you tighten this so tight that none of that air can escape ?
Well , first of all , there's air left in there and it's not a well canned product .
Secondly , the build up of pressure can potentially cause the jar to break and then that's big mess .
So remember just until you meet some , you've turned the cap just till you meet resistance and then just a little bit more finger tight .
Now , if you're not water bath canning these , at this point , you can go ahead and just refrigerate your jar regardless of what type of lid you've put on .
And these should stay relatively fresh in your refrigerator .
Thanks to all the vinegar and sugar for at least six months .
Although I think you'll eat them a lot quicker than that .
Some people have told me that in their refrigerator , these can last up to a year .
But I do think after six months , they will start to soften up considerably .
Now , at this point , before we get ready to put this into the canner , I want to mention one ingredient that you could have added before we put the lid in the ring on .
And that's an uh an ingredient that is calcium chloride .
It's sometimes sold under the name Pickle Crisp or other names along those lines .
But I don't like to use calcium chloride .
The reason that it's added to canned pickles is to help with crispness , but I feel it's a chemical that I don't want to add to my home canned goods .
So that's going to be your choice .
You don't add a lot to a jar the size maybe about an eighth of a teaspoon , but I just prefer to leave it out and I find that bread and butter pickles don't need to be super crisp .
They tend to be very flavorful and on the softer side .
Although I do find these stay relatively crisp uh as compared to uh what you can buy at the store only because maybe they've been on the store shelf a lot longer than your home canned good .
Uh But I just want to make , uh I just want to let you know about that so that if you do want to add , if you are worried about crispness , you can go ahead and add that calcium chloride .
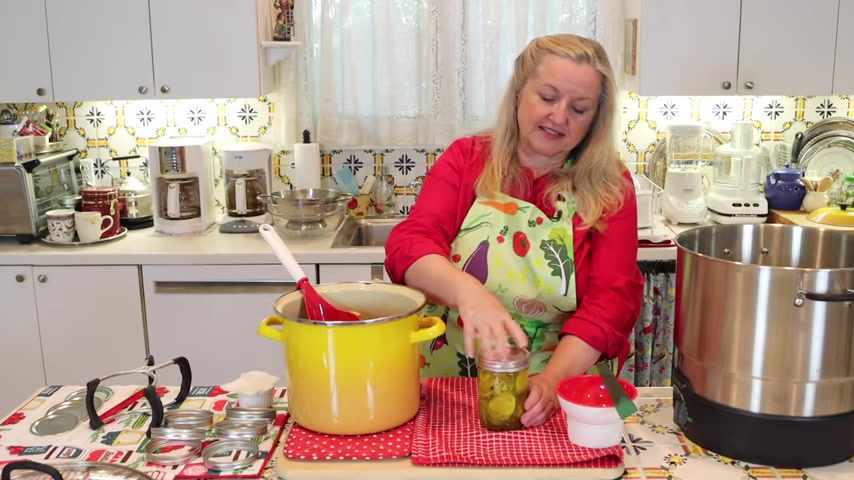
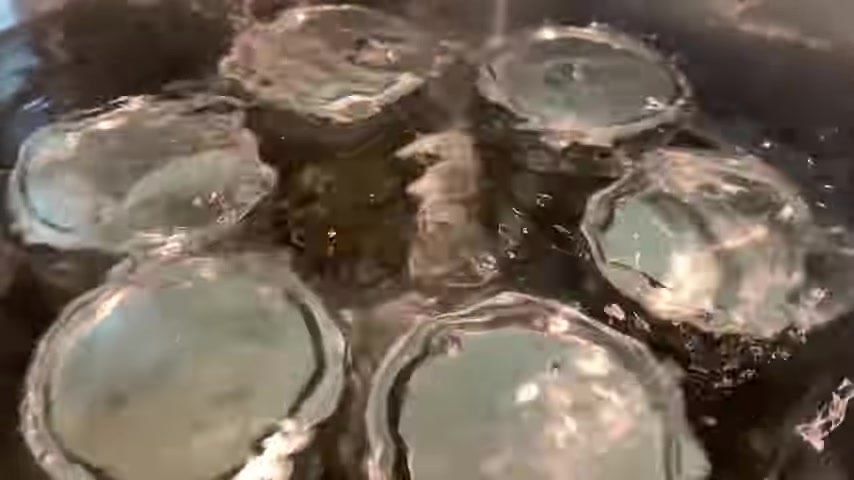
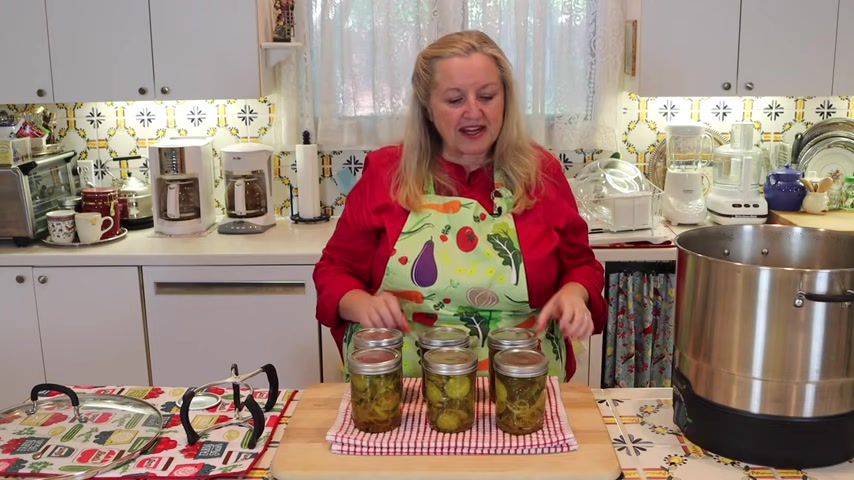
Now , we're gonna go ahead and put this jar that's finished and we're going to that down into our canner just being very careful and then we'll get our next jar and we'll continue filling all of our jars until we're done and then we'll move on to the next step .
Well , I've got my jars in the water bath canner and you want to make sure that when you put them in , there's at least an inch or two of water above your jars and I'll take a picture and overlay it so you can see what I'm talking about , but I just felt I was just a little shy on that .
So I've got some nice hot water from my tea kettle and I'm gonna go ahead and add that in so that I , I generally , I generally like to have , uh , I , I like to allow for about two inches over my canning jar and I've only had about one inch .
So if you find that , once you get your jars in and you wanna add more water , just make sure you add hot water from your tea kettle .
Now , what you wanna do is put the lid on your canner , whatever type canner you're using .
And then you want to bring your water up to a boil and once it comes up to a boil , uh , then you're going to want to boil your jars for 10 minutes .
And then after 10 minutes , we're gonna turn off our heat , let them rest for about five minutes and then we'll take them out and see how we did .
Well , those are coming up to a boil , but I just wanted to show you , I saved two pickles out from the canning jars and I just wanted to give them a taste .
I'll let you know how this recipe is , but they look beautiful .
They really look like bread and butter pickles .
Whoops .
They really look like bread and butter pickles that you would see at a deli or buy in the jar at the grocery store .
Hm .
Oh , they're really tasty .
Very delicious .
And I'm so glad that I left the salt in and I think the salt works perfectly with the sugar and the spices .
However , as I said , the original recipe does call for rinsing them .
So if you are on a restricted diet and you want to give them a good rinse and you don't want to include the drippings , um , from when you were draining them .
That's fine too .
Well , I brought these up to a rolling boil and I'll overlay a picture so you can see exactly what that looks like .
And then I let them boil for 10 minutes and after 10 minutes I turn the heat off and now we're gonna let them sit there for five minutes and then we'll get ready to take them off and I'll , I'll show you what you need to do next .
But I just want to mention that you may have noticed that when I was putting all the water in my canner , I didn't add a little bit of vinegar .
You may have seen some people who can , we add a little vinegar , especially if they have hard water like I do where I live .
Uh But watching and learning from some of the other ladies that I'm friends with here on youtube or canners , they have decided and they're real , you know , their channels have many , many , many canning videos and some of them decided that they weren't going to add vinegar anymore because they found that the vinegar was starting to their rings , the bands and we can reuse those .
It's the lids that we can't .
But the bands you do want to keep in good condition because you can reuse them .
And that way you don't have to buy , keep buying new ones and they found that adding the vinegar to their water was causing the bands , as I said , to degrade .
So they've decided to start leaving the vinegar out .
And so I'm doing that too and I notice that , uh , my hands don't discolor anymore .
They used to , they weren't at a point where they were degrading , but they were starting to discolor and I've noticed that not adding the vinegar is preventing that discoloration now because I have hard water and you may too .
Your jars may when they dry may have a little bit of that milky coating on them .
I think it's a calcium build up , but that's so easy to wash off .
So you don't have to worry about it .
But if you like uh learning about canning and this is water bath canning .
But you also would like to learn about pressure canning .
I just wanted to mention these gals um that I'm friends with here on youtube and one is Linda .
You may know a lot of , you may know her Linda Linda's pantry and then they don't just do cooking and they don't just do canning .
They also do cooking .
And uh the other is Lisa over at Sutton's days and Mandy at more to life and heather at the needy homesteader .
She also does baking and Carol at the thrift chic housewife .
And one actually there's one fellow in the group , Paul over at Paul's rule of thumb , but they , uh they all do a lot of canning and Paul especially , I think almost , oh gosh , a good , good percentage of his videos are canning .
So they are wonderful people to learn about canning both water bath and especially pressure canning from .
Well , it's been five minutes so we'll take our lid off , opening it away from us because a lot of steam does come out .
And what you want to have ready is a very nice cushioned air to put your jars on .
Uh , you may have one of these dish drains that are very well padded or just a couple of folded dish towels are great too .
And now we'll just start to take our jars out very carefully using our jar lifter and not bending and not bending , not tilting our jars .
We just want to bring them straight out .
Perfect .
There we go .
These are bigger jars .
Oh , that was a pen .
The thing .
I'm just taking this paper towel and plotting some of the water off because you don't , uh , you don't want to tilt them when you're taking them out of your canner to get the water off .
You want to just gently plot off some of that water that's on top of your jars .
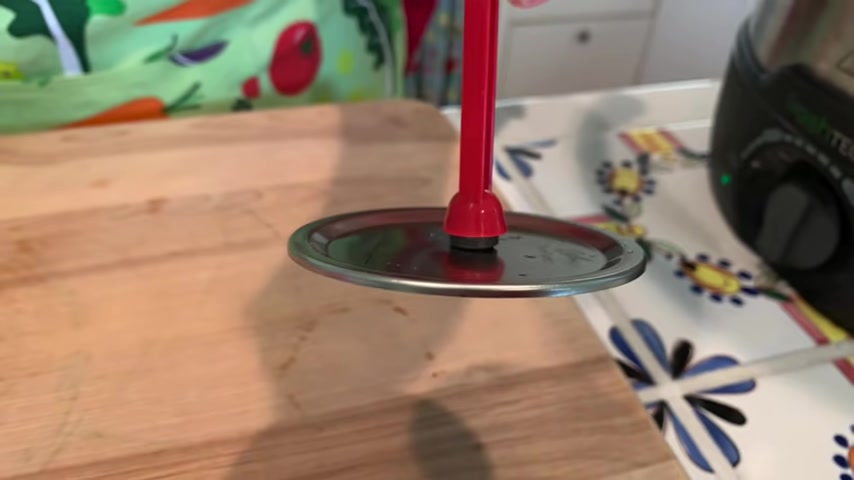
Now , what you'll notice is they start to cool , they'll start to make that sound that ping and that is where the little dimple that I showed you , uh , in an earlier close up shot , but I'll take another close up shot .
Uh , that's slightly raised .
What happens is as the jars cool and oops , as the jars cool , uh , the , and the there's a pressure change so the little , the little button or dimple , the little button will sink down or , or sometimes it'll look just flat or , or slightly sunken down , but it won't be raised anymore .
And that's how , you know that you have a good seal .
Now , I took a close up of the , one of the jars that has pinged and has that slightly flat and slightly depressed , little button dimple and , uh , in , in the video that I'll overlay , I show it , um , in comparison to a lid that still has that button raised .
So hopefully you can see what you're gonna be looking for .
Now , they may ping right as you're bringing them out .
A lot of some sometimes has to do with the size of the jar and how long you've been water bath canning them , but some might ping , right when you're taking them out a little change in temperature , uh , some might take a little longer .
So don't worry , you're gonna wait 24 hours and 24 hours later .
If any of the buttons have not depressed , then they didn't seal correctly .
But that's usually very rare .
If that is the case , then that one that didn't had a broken seal , so to speak , uh will need to be refrigerated , but all the others will be ready and be shelf stable and what you'll want to do is you'll want to remove the ring , remove the band , but leave the lid .

The thing , leave the lid in place and then you can go put that in your pantry and ball who makes these lids claims that this will be shelf stable for 18 months ?
Now , a lot of folks here on youtube who can and just people in general who can , will say that they keep their canned goods longer , their home canned goods longer than that .
So it's really up to you .
But the official word is that these lids , these new versions of lids because they used to just be good for one year .
The new versions of lids will last 18 months .
And the reason that you want to remove the band before you put them up another pig before you put them in storage is because if you leave the band on , and for any reason , the seal were to break me loosen , the ring may cause the lid to reseal itself .
And then that would be a false seal .
And then when you go to open your canned good , you may see that it's gone bad .
There may be mold , you know , various problems .
So you want to make sure that when you go to store them , just remove the lid and then put them in your pantry .
If you'd like to learn more about water bath canning , including how to water bath can tomatoes as well as how to water bath .
Can a homemade marmalade and homemade jams including a low sugar and a no sugar jam .
Be sure to click on this video over here where I walk you through the whole process , step by step and I'll see you over there in my Texas Hill country kitchen love and God bless .
Are you looking for a way to reach a wider audience and get more views on your videos?
Our innovative video to text transcribing service can help you do just that.
We provide accurate transcriptions of your videos along with visual content that will help you attract new viewers and keep them engaged. Plus, our data analytics and ad campaign tools can help you monetize your content and maximize your revenue.
Let's partner up and take your video content to the next level!
Contact us today to learn more.