https://www.youtube.com/watch?v=-wGBMPalDFc
Homemade Dill Pickles and Bread and Butter Pickles
I don't know about you , but I'm a huge pickle fan and believe it or not , they're way easier to make homemade than you may have thought .
I'm gonna show you how to make two different kinds .
So you can load up your favorite sandwich or cheeseburger .
Sound good .
Let's cook to start .
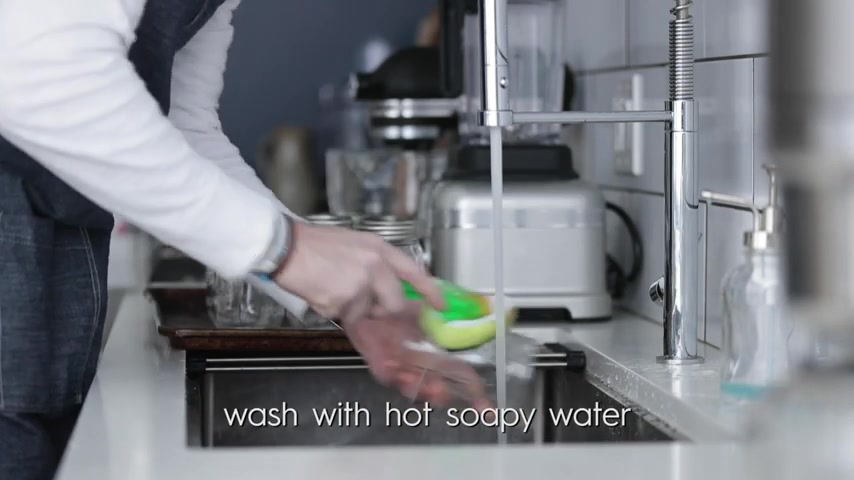
You have to sterilize the mason jars that you've just purchased and no , you can't just wash them in the dishwasher .
So go ahead and go over to your sink and in some very hot water .
And of course , using some soap , you want to scrub the insides and outsides of the jars very , very well .
Please take time to do this .
Do not shortcut it .
Give it a good rinse , set it to the side .
And in addition to this , also , the lids and outer bands need a really good scrubbing as well .
So again , take the time to do all of these little parts of cleaning up these mason jars , set it to the side .
And then in the meantime , what we're gonna do is add a gigantic pot right to our cooktop .

We're gonna fill it up with water about three quarters of the way it needs to be deep enough to be able to submerge these jars completely by a few inches .
So make sure there's plenty of water in there .
Now , go ahead and set in a rack or if you have a calendar that fits in there .
Fantastic and simply add your jars submerge them completely .
Make sure they're full of water .
Crank that heat on high because we need to bring this to a boil .
But this is great timing because in a separate pot , go ahead and add in a little bit of water because we now need to sterilize the lids .
Add those in there .
We're gonna crank the heat onto high and we're gonna bring it to a boil once it is boiling , go ahead and turn the heat down and simmer it for about 10 minutes .
Take it off the burner .
Go over to a very , very clean towel and I like to face them sort of rubber seal side up , spread them out , let them dry out .
Now , head back over to that gigantic pot .
You can see that it's got a nice boil .

We're gonna let it boil for 10 total minutes at this point .
Go ahead and remove your colander or rack using some tongs .
Or if you have the mason jar tongs that's cool , too , dump out the water .
And then what we're gonna do is go right back over to where those lids are and simply place them there .
Let them dry out a little bit .
They are gonna be hot .
So please do not grab them with your fingers or you're gonna be cursing at me .
Now , this is great timing because let's go over to our pickles .
We've got a few different varieties here .
One is a simple pickling pickle known as a Curby .
It's a small version of a normal cucumber that you would grow in your backyard .
They're nice and short .
Got a nice tough skin on the outside , gonna be perfect for pickling .
Now , the ones that I personally like to use are the Persian cucumbers .
These are like mini English or hothouse cucumbers .
Love the flavor .
Great crisp .
The skin isn't as thick as the other ones , but that's OK .
That means it's gonna absorb a ton of flavor and very quickly .

So simply cut off the ends of whatever cucumbers you decide to use because we want them to fit into the jar that we're gonna put them in .
And by the way , we're using 16 ounce jars .
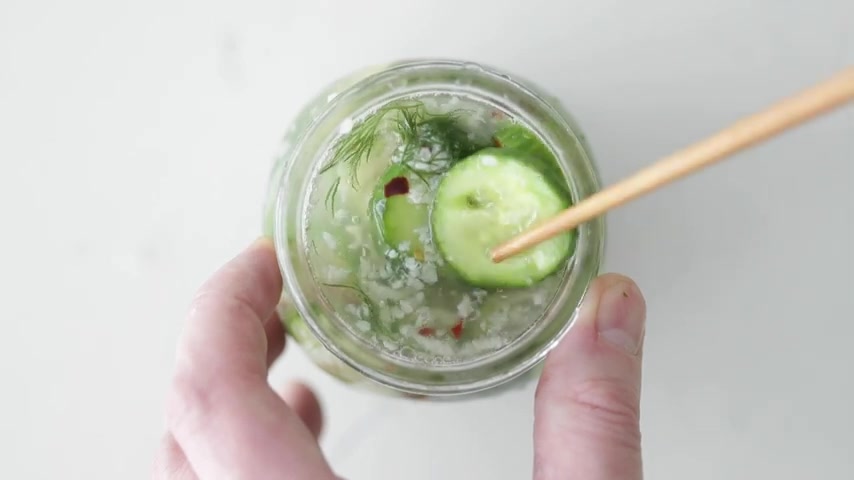
Go ahead and shove those in there , get them packed up tight now because these first ones are gonna be dill pickles .
I'm gonna add in some fresh sprigs of dill and then using some chopsticks or even just a wooden skewer , just jam it in there .
We wanna make sure that the dill is going on all sides for the other cucumbers .
I'm just gonna simply make spears this part .
Think about all the different cuts of pickles that you eat from the grocery store .
So there's those simple chips that go on burgers which are really just a very thin slice .
Next .
You've got those longer sandwich style pickles that I absolutely love .
Load them up in jars .
The same thing .
Put dill in them all around the outsides , jam them in there .
It's gonna provide a ton of awesome flavor .
Now , for the brine , I'm gonna add a pot to the top .
No , it's green just because it's green .

Not because I'm making pickles .
Go ahead and add in some water .
Some white vinegar .
This is just a simple distilled vinegar .
Don't go overboard and spend too much money with this .
Some finally minced garlic .
I'm gonna use a ton because it's really gonna add a lot of great flavor .
Some crushed red pepper flakes for a little bit of zest in here .
Next , I'm gonna be using sea salt .
I highly recommend using sea salt over any salt out there .
We're gonna bring it to a boil or until the salt has dissolved .
Give it a whisk .
Make sure everything is completely incorporated .
And at this point , we're heading right back over to where our pickles are and then using a ladle or if you have a funnel .
Fantastic .
Start ladling in some of that brine .
The goal here is to completely cover the pickles .
So add enough brine in there and you may even need to jam some of the other flavors in there , like the garlic and the crushed red pepper flake .
So again , using a chopstick or a wooden skewer , sort of mix everything around and you can even wait a few minutes and come back maybe after 10 or 15 minutes of them sitting there and mix them up .
And if those pickles are still hanging out of the top , op , put a little quarter cup , measuring cup in there , seems to submerge them perfectly and it's the right size that fits in there .
OK .
Now we've got all of our amazing dill garlic pickles .
It's gonna take about 60 minutes for these to completely cool down to room temperature .
These ones are my favorite , but these next ones have started to grow on me and they're bread and butter pickles and just like the other ones , slice them .
However you'd like , I always seem to see ones that are chips or those long sandwich style pickles when it comes to these , jam them into the jar , just like in the other ones .
And now for this brine , it's a little bit different .
Same pot .
Yes , I washed it .
Hit it with some vinegar .
This is all vinegar based on this one .
Next .
Some apple cider vinegar .

It's gonna provide a lot of great flavor and of course some color to these bread and butter pickles .
Next , we're going to pour in some sugar .
This is where that delicious sweetness comes from in these pickles .
Now , for some more aromatic and flavorings .
Some thinly sliced yellow onions , some garlic for a little kick , some salt because of course , we need to season everything up next .
We're gonna add in some mustard seeds because , well , they have mustard seeds , some celery seed maybe because I'm from Chicago .
I don't know .
Turmeric color and great flavor .
Last but not least .
Some whole cloves , bring it to a boil , make sure the sugar and the salt are completely dissolved .
Give it a whisk , combine all those ingredients .
Now , what we're gonna do is head back over to the countertop where the pickles are and using a ladle just like before .
Go ahead and pour all that delicious brine all over it .
It smells amazing you guys , seriously .
This thing is calling my name for a sandwich .

However , when it comes to these , you've got a lot of onions and bigger ingredients and they're not just spices .
So jam them in there , mix them around .
You may need to do it a little more vigorously than the ones at the dill pickles because , well , you're kind of moving a lot of ingredients around and that's just what you have to do .
Sorry .
And then if you wanted to can it , so it lasts a little bit longer .
Go ahead and put the lid on and then screw the outer band on just for a great point of reference .
If you push it down at this point , it will pop up back and forth .
So , head over to your cooktop where that big large boiling pot of water is put it in the calendar , drop it in .
We're gonna let it cook for 10 minutes at a boil .
What this is gonna do is help sterilize the vegetables in there .
So they are safe to sit at room temperature .
Now , go ahead and try to push the top .
It's not moving .
We know we're in great shape here .
These will last up to one year and can be kept at room temperature .

But for the other ones simply pop a lid on them and because , well , I'm a nerd , go ahead and take your trusty sharpie right out of your pocket and label and date everything .
So if you've got Dill Pickles , put that on there , make sure the dates on there or perhaps you've got your bread and butters .
These are going in the refrigerator and can be eaten within 4 to 6 weeks .
Check out these beauties .
So yeah , they're delicious .
Nothing else to say .
Be sure to like this video .
Subscribe to my channel and I will see you on this next video .
Are you looking for a way to reach a wider audience and get more views on your videos?
Our innovative video to text transcribing service can help you do just that.
We provide accurate transcriptions of your videos along with visual content that will help you attract new viewers and keep them engaged. Plus, our data analytics and ad campaign tools can help you monetize your content and maximize your revenue.
Let's partner up and take your video content to the next level!
Contact us today to learn more.