https://youtu.be/YyUWW04HwKY
GraphQL With React Tutorial - Apollo Client
Hey guys , how's it going ?
I'm back here with another video .
And today I decided to basically create a beginner's video introducing how to work with graph QL for a front end using React .
And we're gonna be using a Polo client which is uh a way to interact with a graph two API and it is a really good library .
So uh in my opinion , it is probably the most the easiest one to start with .
And I'm gonna show you guys exactly how to do that .
So if you didn't see my last video , basically , I went over how to create a graphical API .
It is totally not , not necessary .
If you , if you already have a graphical API , you just want to know how to connect it with the front end .
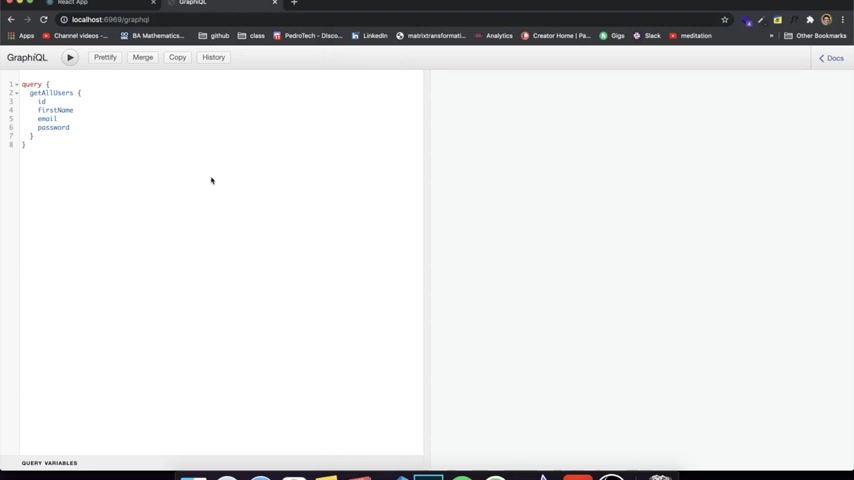
But just to show you guys , this is what I created .
Not this over here , this over here , very simple API .
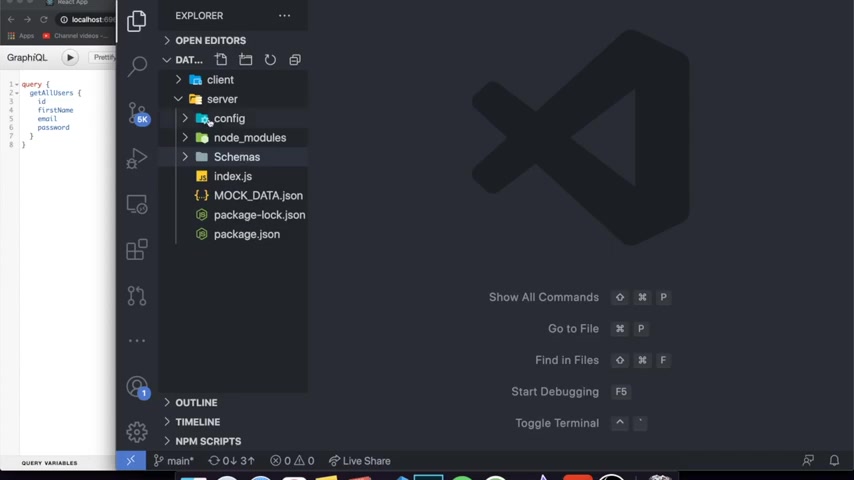
We have um the schemas , the only schema that we have is um a user which contains an ID , a first name , a last name , an email and a password and all of this data since I wanted to make this video fit for everyone not uh like a specific group of people using a specific group of like a specific database .
I'm using just a Jason like data you can see right here .
It's just a , a random data uh like data set containing a bunch of users .
You can see that each user has a first name , a last name and email and a password .
So that's basically what we're gonna be using as our fake database , right ?
So currently we have only 22 things that we can do in our application .
The first one , if you go here to your , to my schemas , the first one is a query and the query just returns to all the users very simple query .
Uh It's called get all users .
It just returns to every , every user and we have a mutation and this mutation specifically is just to create a user .
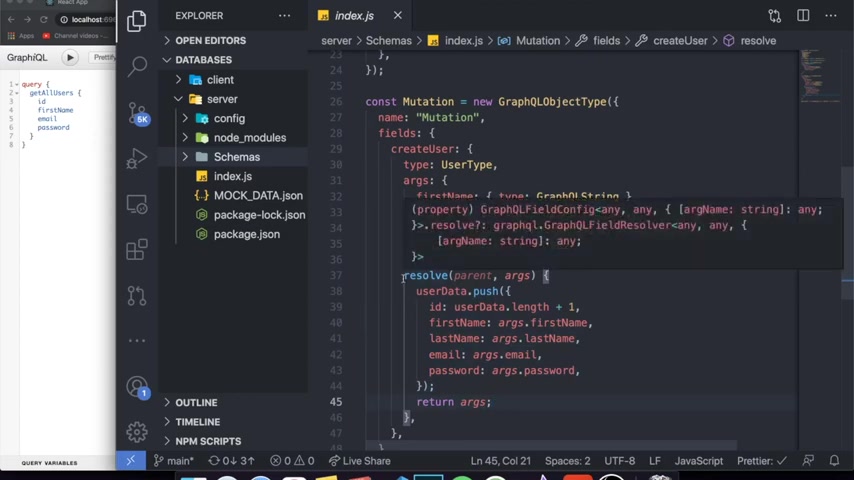
So you basically can see that it adds to the user data , a new user containing the information that we pass in .
And if you're not getting what I'm saying , like if you , if you don't understand uh what I'm showing , uh I'm gonna link up here the first video which basically I go over how to create the graphical API and you can watch that and then come back to this because this over here is really important as well .
So what we're gonna be doing now is we're gonna be implementing everything into a client using react because a lot of people will ask me and it's not , it's not similar to what people are used to do when you're working with the API , where you just make a , like an user request , an API call , a fetch request to , to your API , you need to use a little uh a library .
And in this case , we're gonna be using a Polo client .
So to do that , we're gonna come over here and we're going to basically just install our , our libraries , right ?
I'm going to CD into my , my client folder as you can see .
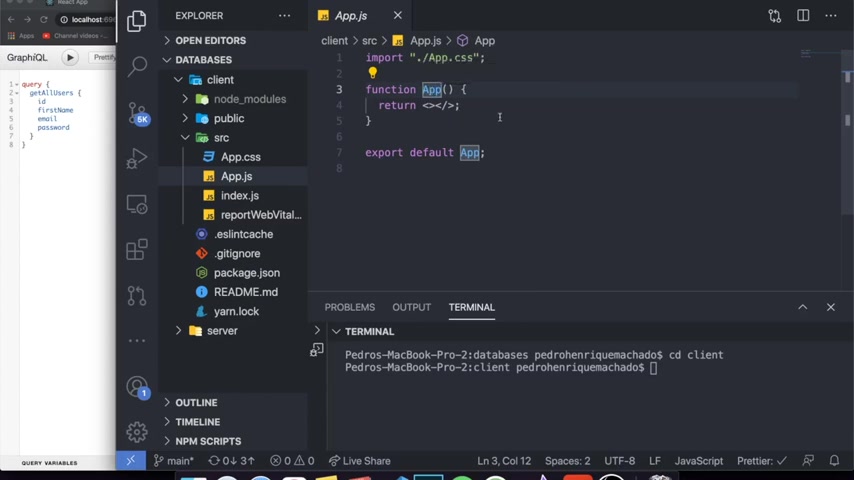
And in my client folder , I already have a React application .
There's nothing in it .
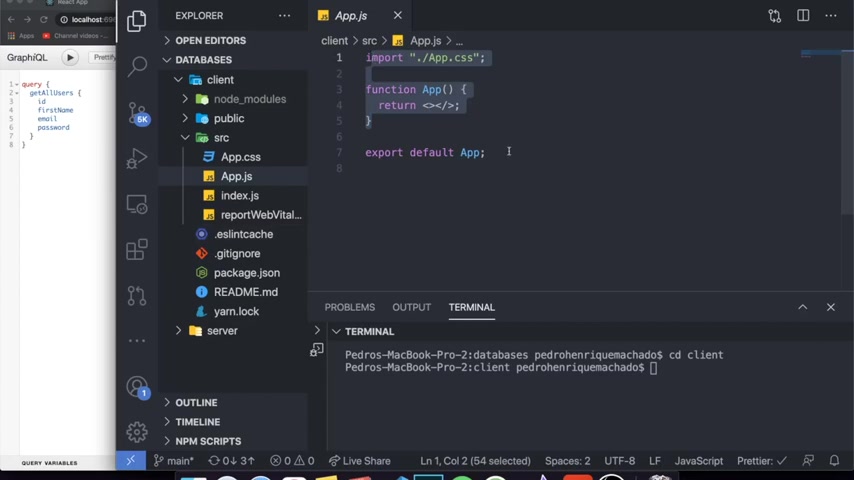
There's only the app dot S and you can see that the app dot S has nothing inside of it .
Uh Just a , just an empty tag and what you wanna do is you want to install two libraries .
So you're an ad .
Um The first one is a Polo slash client like this .
And the other one is Graph QL , just these two libraries .
And if you're using N PM , it is N PM , install Apollo client and N PM , install graph QL .
But uh I'm using yarn .
So it's literally just this , this right here .
Um I already installed it .
Um I'm gonna show you guys in my package dot Jason , it's over here .
Um Let me come here .
Yeah , Apollo client over here .
This is the version I'm using .
So if it's like for in the future .
And for some reason , the Apolo client , it's above uh version three .
So it's a bit different for versions two to less .
So that's important .
But if Apolo client changed in the future , I don't know , this is the version I'm using and you can see graphical is also installed over here .
So what do we actually want to do ?
Well , first of all , let's start creating our application , right ?
So in our app dot GS , what we wanna do is we wanna initially just uh set up our project so that it accepts graph QL .
So the first thing we have to do is we need to import some packages .
So I'm gonna import from Apollo client .
So from , at Apollo client , I wanna import some stuff .
So the first one is Apollo client .
Why ?
Because we're gonna be using that to create our provider and then we're gonna be importing as well in memory cache because we wanna have cash in our , in our application .
We wanna import a Polo provider .
And obviously , if you're a beginner , don't worry about knowing what all of this do do does .
We're just going to be using those to set up our application .
And we're also gonna import something called from .
Uh you'll see why we need to build a link to connect to our API .
So from is just a um it's , it's a method from the Apollo client library which allows us to do that .
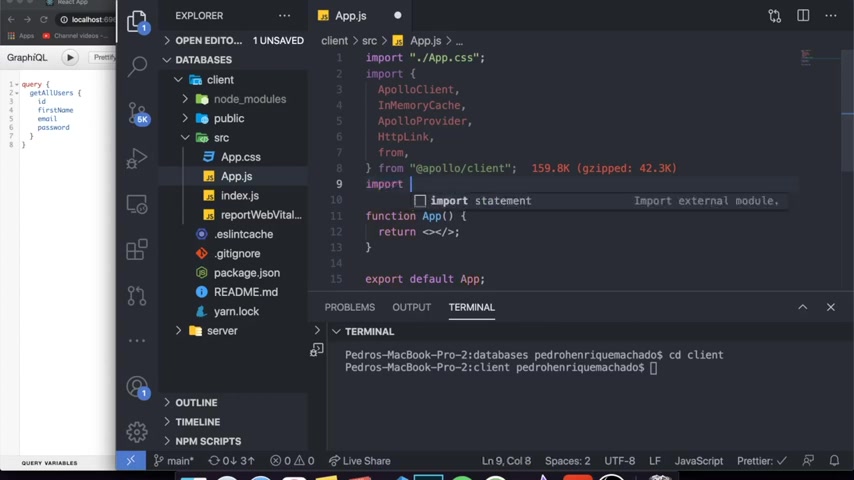
And finally , after we do this , we , we may be , we need to import a method of determining if there was any errors in our API uh we're gonna import it called on error from the packages uh at Apollo client slash um client .
No , it's not , it's not client , it's slash link , right ?
Um slash link .
Yeah , and slash error .
So a polo client contains an error library inside of it which contains ways to determine if to catch errors , right ?
So on error is in my opinion , the easiest way of doing this and I'll show you guys how to build this .
So basically , the fundamental idea of how to make your API work and react using a Polo client is you gotta come over here above your app dot Js in your parent , like your initial component , you have to create something that is the client .
The client will be just a way it , it will be um an instance of the Apollo client .
And this is how we're gonna determine if , if we have a correct connection or not .
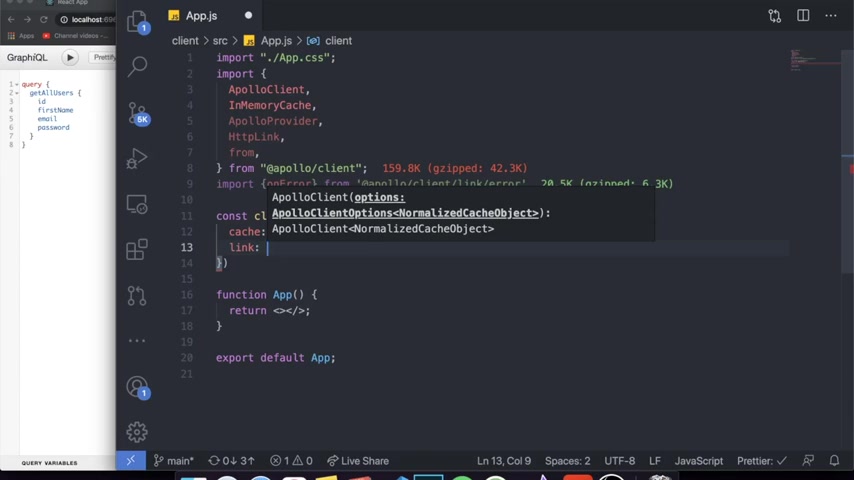
So let's create a variable called the client and it's gonna be a new Apolo not a Polo provider , apolo client .
And inside of it , we have to pass an object containing two things .
First of all , it's a cache and we're gonna , as I mentioned before , we're gonna have um in memory cash .
Um This is not important in the beginning , but you can worry about that later .
And we're gonna have a link and the link will be basically the link to our back end to our server .
And obviously , we , we can't just put here local , not , not obviously , but we can just put the , the , the actual URL for the local host .
We have to make it a diff in a bit like AAA bit of a different way .
And this is why we actually imported the from thing over here .
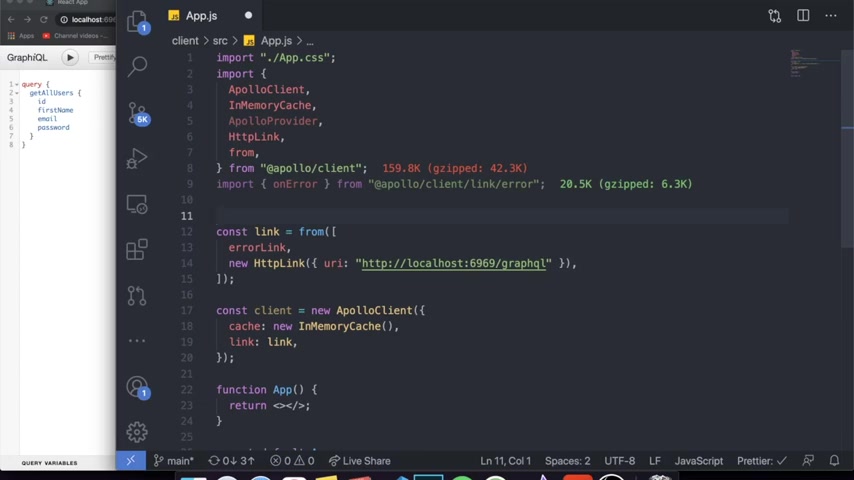
And the HTTP link , we have to build an HTTP link over here .
And let's do that .
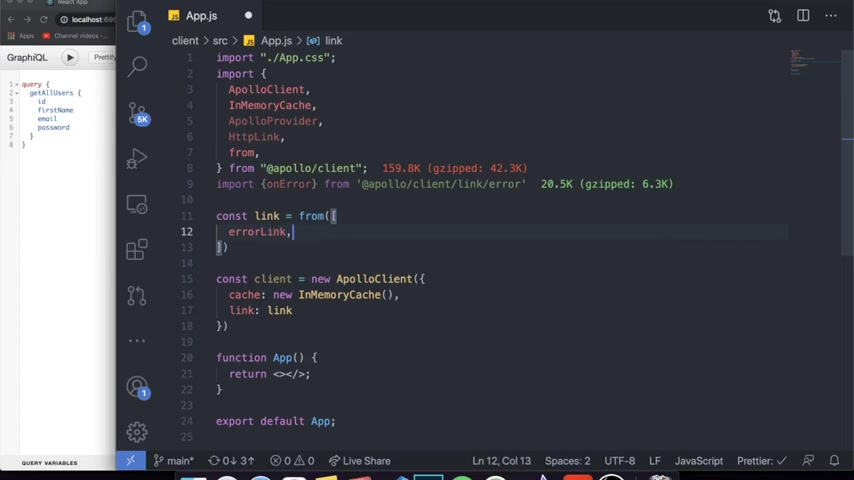
Let's create a link equals to and we're gonna use the from library .
And as I mentioned before , don't worry if you're a beginner and you're confused about this .
I was super confused and it's not very useful to understand everything uh in the beginning and just know that this is a good way to build your , your , basically , you start your graphical API .
So we're gonna use from the the from method and we're gonna pass an error link which we're gonna create , right , right .
Like right after this and then we're gonna pass a new HTTP link and Paz here .
Um The , basically the UR I , which is the URL for our API , which in my case , it is running on , you can see right here it's running on local host 6969 slash FQL .
So let's come over here and say local http , actually two slashes local host .
Let me close this local host , um 6969 slash graph QL .
And this is the link for my uh API , right ?
And why do we actually need an error link ?
Is because if there is any error , if graph QL catches any errors , we need to tell it what , what , like how we wanted it to respond .
I'm gonna show you guys a very simple way to catch errors and very simple way to like build this error catching system .
But this is definitely gonna be more use like in the future .
Uh If you wanna uh uh optimize this , then definitely do it .
This is just a way to not like car carry that much in the beginning .
But we're gonna create an error link .
It's just a link that that tells us like a uh a function that tells us what we want to do if there is any error .
So this is why we're gonna use on error and on error .
We just want to um come over here and grab two things , graph QL errors and network killers .
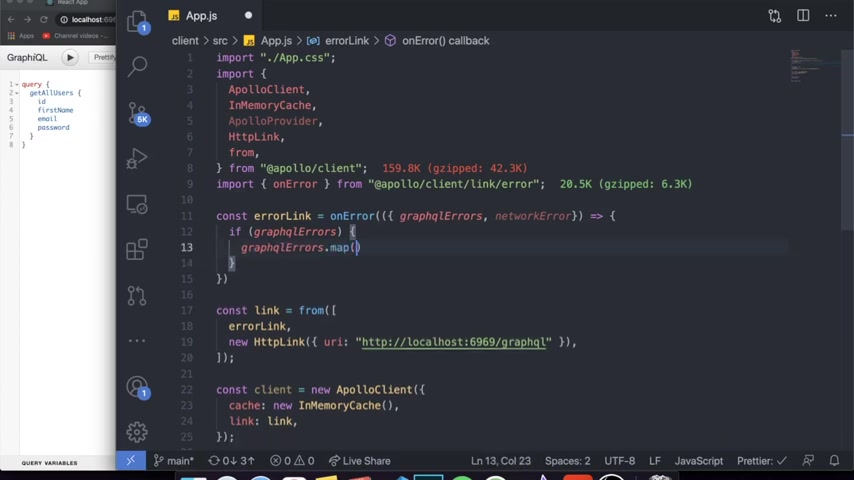
I wanna emphasize that if you're , if you're confused right now um to stick around because this , I honestly recommend just copy and paste this because it is definitely not important in the beginning , but it , it is necessary to start your API work , right .
So then we're gonna basically just ask if graphical errors .
And by the way , this is this sample , I'm I'm getting over here for the arrow link .
Actually , I believe I got this from the graph QL documentation .
So I didn't create this error catching system .
It's the simplest way that they demonstrate it to us .
So graph Q errors , um we're just gonna ask if there was any errors , then we wanna map through all the errors .
And then for every error , we're gonna grab the message , the error message also , maybe we want the location for the error and the path .
So those are the ones we might want .
And then what we wanna do is we wanna just uh for , well , since we're mapping , we want to do something for each of those errors .
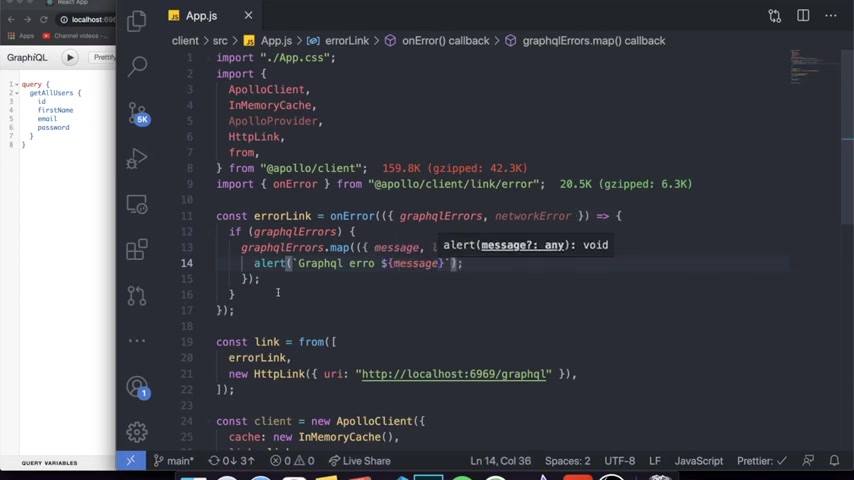
And for now , let's just alert a message saying something like graph QL error and we wanna show it like this .
Let's let's just show the message right now .
So this is the basic idea of our error handling right here .
We're just showing uh any errors , right ?
And for now , I think that that's it .
This should be OK .
Um We can even ask if there was any network errors if you want .
Um I don't think that's totally necessary , but let me just check .
Um Maybe the if statement shouldn't be here .
No , that's correct .
Yeah , that's correct .
I think so .
Actually let's just leave it like this .
I think it's fine .
Um Let's come over here and now we have an error link for our link and we actually started our client .
So this right now , it's done for the setting up the graph uh connection and honestly just skip around after this because it's gonna get a lot more easier .

So now that we have this , we can basically wrap our whole application with an Apollo provider .
And what will this do basically between this Apollo provider tags is where you can reach all the like your , your , your graph API .
So it's gonna be served through these two components .
And we obviously need to pass a client and the client we're gonna pass is the client variable that we created over here .
And now we know that anywhere inside of it , we can easily just make , make requests to our API server .
And now that we have set up all of this , by the way , I need to put error here , I accidentally wrote it wrong now that we did all of this .
Let's create an example , right ?
Let me create a components folder .
I just wanna have two components .
One of them is going to demonstrate how to create a user , how to run a mutation on react .
And the other one is how to run a query on react , right ?
So the first one is gonna be a query .
So let me create a component called get users dot GS .
And I'm gonna use this snippet that I showed you guys in the last video .
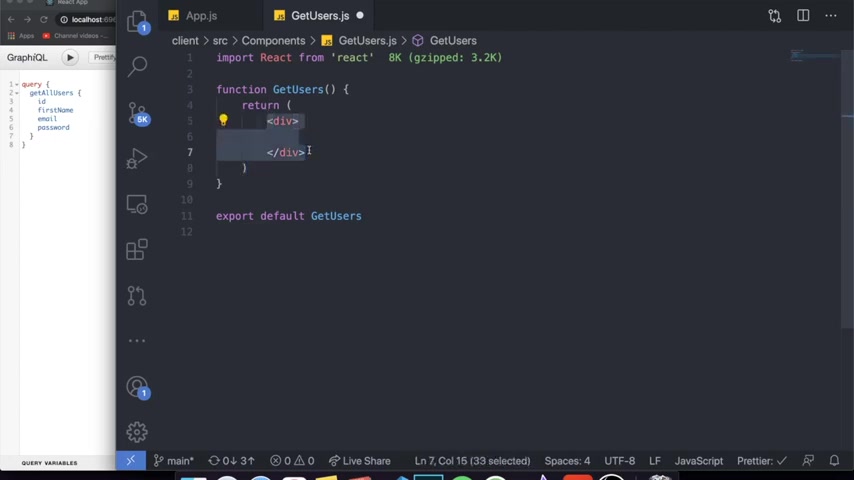
Uh basically just to create everything , just a simple functional component which we just want to use it to render all the users in our application and to do this in and react , you gotta follow a simple recipe .
The recipe basically is that we need to create a folder in our application .
Actually , this isn't the recipe , but you need to create a file for your mutations and a file for a query .
So I like to create a folder called graph QL like this .
And instead of here , I put two files , one for mutations where I'm going to store all of my mutations and one for all my queries .
So this is what I'm gonna do queries dot GS .
And for the queries I wanna put over here , the query that I wanna make .
And what exactly is the query ?
So if you watched my last video , you know that this is a query .
This is the query we're making in our graphical um to , to basically get information from our API .
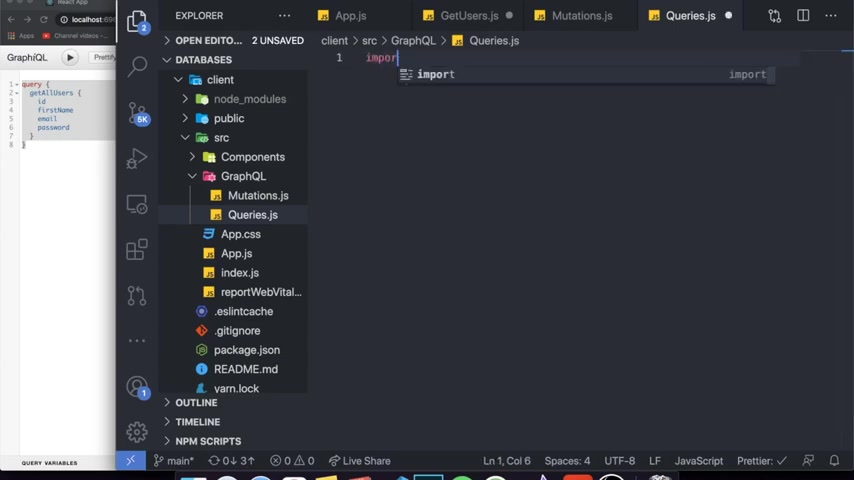
This is exactly what we got to put in our uh queries folder and qu Quri file .
And over here , the only thing we need to do is we need to import graph QL from Apollo client .
I like to call it GQL from an Apollo client .
And this variable right here will allow us to make a query and to make this query , we can just say I want to export this query .
So I wanna act so that I can access this query in whichever file I want to and let's call it , load users .
It's just gonna return all the users and it's gonna be equal to GQL and this GQL query .
Now we can now put inside of here , the whole query that we want .
By the way , I know it's weird to put this to like uh back quotes .
I don't know if you guys can see it clearly .
I'll try to zoom in for just a second .
It's you , you have to put all your query inside of these two quotes right here , which are like , I always forget the name , but they're like back quotes and I don't know why they did it like this .
Uh Honestly , it looks weird in my opinion , but it , this is what we have to do , right ?

And what do we actually put inside of here ?
Well , we put a query that we , that we have , right ?
That I taught you guys in the last video .
So let me put here a query .
Um This query basically says I wanna get all users and uh for each user that I get in my , like my , my data , I just wanna show the ID , the first name and the email and the password .
So this is basic idea of our query and this is fine now that we have our query done .
What do we wanna do is we gonna like actually use that query for something , right ?
So let's come here to our get users and let's start importing some stuff .
So the first thing I wanna import is the use query hook from um Apollo client .
So let's say import um from a Po a Polo client .
And we're gonna have some , some different um hooks that we wanna use , right ?
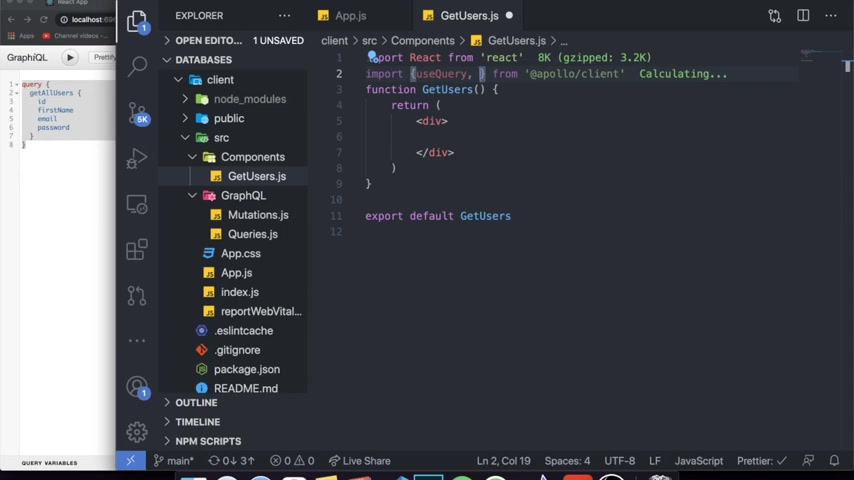
So the first one is use uh it's gonna allow us to get uh information from a query and we also need the graph QL to , to use it in order to actually get the data right .
So after we did that , after we did this , um we can simply come into our function , get users and we can come over here and say , and we can pass all the different information that we want to get from that query .
So if I say use query and I don't wanna get confusing , I don't want it to get confusing right now .
But the idea is you're gonna say constant use use query pass here , the query that you actually want .
So let's import the load users query that we just created .
Um And let's put a link to our graph QL slash queries file .
And over here we're gonna import load query , load users .
And what we wanna pass is load users inside of this use query .
So the use query hook is very simple .
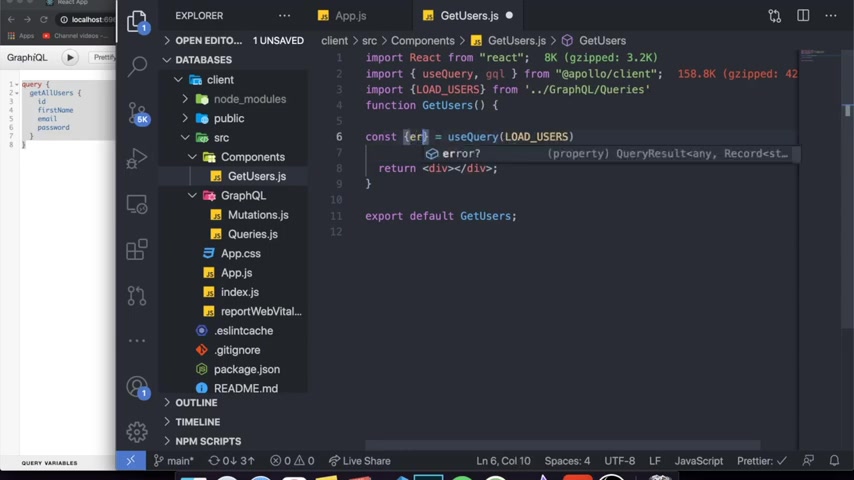
You pass the the query that you wanna uh basically fetch , right , you wanna run , you wanna execute and over here you can get some sort of information , the information that you can get can range from any errors that occur to like if the data is actually just loading .
So it's a state basically , you can get loading to represent like if it's if the data is being fetched , but it hasn't been fetched yet .
And that could be useful sometimes .
But the most useful thing is the actual data .
So data right here will return the data from our query .
So now that we have this , what we have to do is I like to simply create a use effect , which is going to wait for this data to be done to , to be received .
And it's gonna be constantly obviously checking to see if we actually have received the data .
So I'm gonna pass here a news effect and the use effect will run infinitely until we actually there like as as long as there is a change in the data .
This basically if you've never , if you don't get this , I have a video for a full on video on news effect .

Basically , we're gonna wait for this data to change .
It's gonna run once before it actually loads and then when this variable changes , it's gonna run again so that it basically knows that we have new data coming in and now that we have this for now , let's just console dot log data just to see how our data looks like .
Um Let's actually try to , to make this work to do this , we're gonna come here to our Apollo provider .
I'm gonna import the um get users um component and let's make this run right .
So this isn't running .
Let me run your start .
It's gonna run .
Ok .
Something is already running on port 3000 .
Um What exactly is running on 3000 ?
Oh my , my actual project is already running .
Ok , let me close this .
Um Oh , ok .
I I had a different terminal .
Sorry but yeah , this is the terminal you can see that for now .
We have to not only run our our react .
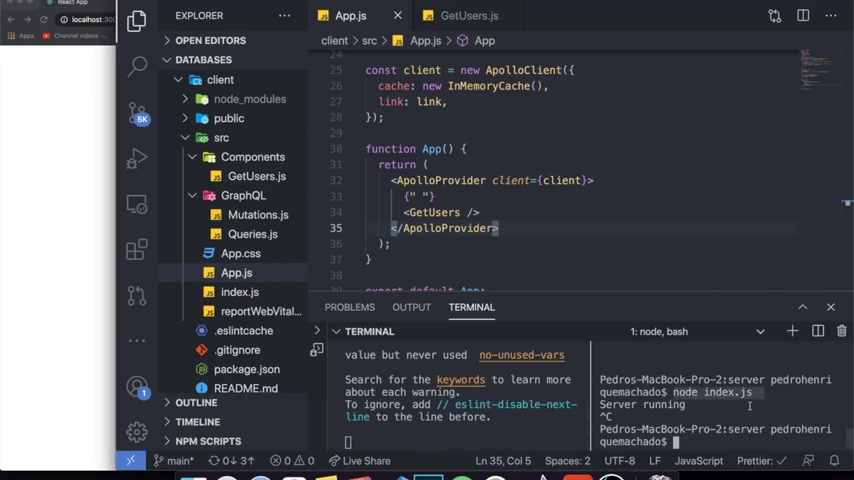
So it's running right now over here on local 3000 , but we also need to run our server .
So I'm running here , node index dot GS .
It says server running .
Let me run that coming in again and now it's running again .
So let's check here .
Um The way we build it , it's , it's , it's supposed to , whenever I run this over here , it's gonna return some data as you can see right here .
So we're returning , get all users .
It's an array of 1000 elements .
And you can see that it's actually an object containing a property called get all users and that contains an array of 1000 objects .
I'm not gonna actually get all the , all the , all the elements .
Should I get them ?
Um No , it's , it's too many , it's , it's too much data to just display it in my screen .
But you can see that we actually got the data from our um API which is awesome , right ?
So what I actually wanna do is I just wanna display like the first .
So let me come over here and I want to create a state and the state will just be a list of users , right ?

Constant um list .
I , I'll just call it users and set users .
It's just a a list of users , it's gonna be equal to use state and it's gonna be an array .
And in order to make our , our actually users appear in our screen , we're just gonna say set users equal to um the data dot get , let , let me look at the console log again , it's an object containing um get all users .
So this is what we need to put dot Get all users and then get all users is an array containing a bunch of arrays and actually just want to get the first one .
So let me just say zero .
And now we can come here to our uh div and we can just say something like um users dot map and I wanna map through every user and let's just grab the value and for each value right here , let me just close this and this .

So you guys can clearly see it for each user .
I just wanna return the name of the user for now .
So let me just return V dot First name because that's something that we have in our application .
So let's see if that works .
Let's refresh our page , um cannot read , get all users of undefined .
OK .
That's because we actually haven't received our data yet .
So let's ask if , if data .
So that's something important .
We're gonna ask if data only if the data has been received , we wanna set all users to be equal to this .
So we gotta wait for the data to actually be received .
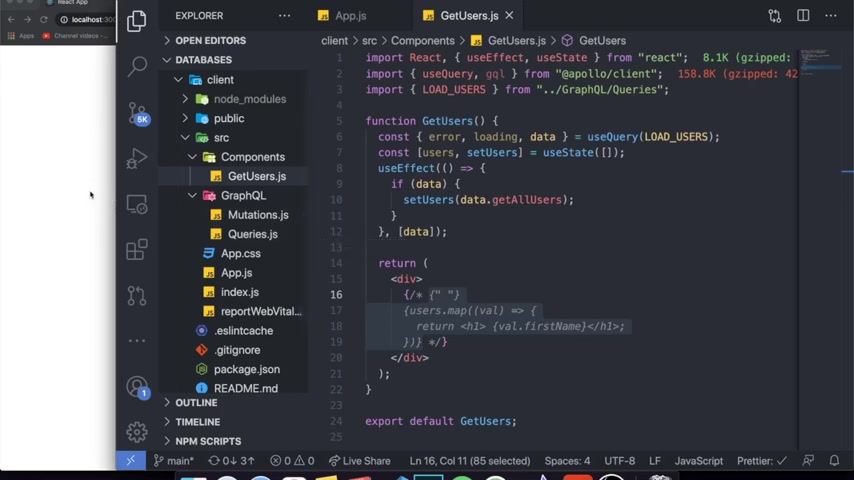
So let's check this and users dot map is not a function .
Why is it not a function ?
This should actually be a function .
Um Let me see what exactly would be console dot log .
Um Get uh data dot get all users zero .
Let me just check to see what exactly is is this ?
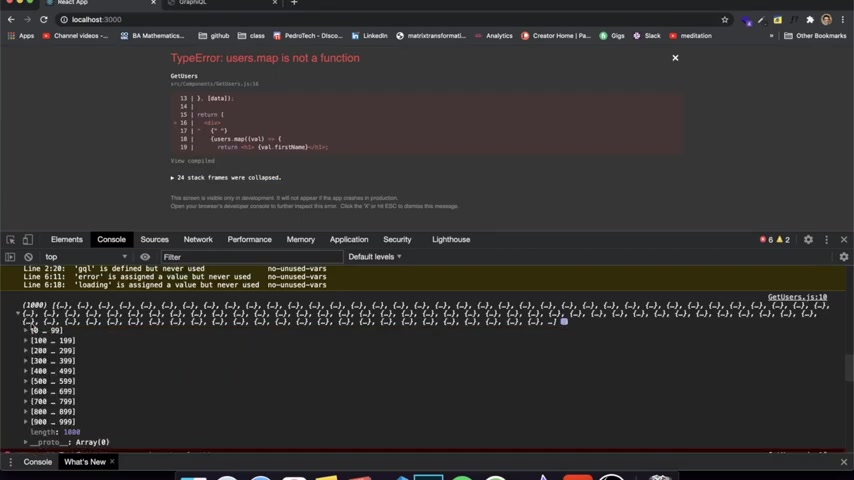
So let's see .
Apparently it is .
Yeah , it's an array , right ?
Oh No , it's not actually an array .
It's just a , it's just AAA person which is weird .
Let me look and get all users .
Um Oh OK .
OK .
It's uh it's not an array of arrays .
It's like it's just that the console log divides it this way .
So what I'm gonna do is I'm just gonna instead of saying console uh get all user zero , I'm gonna just set users to every single user and it's gonna be huge .
But yeah , you can see we have all of our users being displayed here .
We got that from our API .
The API is over here .
You can see that if I run this , we get all the users .
So it's the same users .
And obviously this is 1000 different users being displayed in our screen , which is , yeah , it's , it's OK .
Right .
So now that we have this , I'm actually not gonna not gonna be displaying this , I just wanted to show you guys how to do this .
Um I'm gonna show you guys exactly how to actually work with mutations .
So if I were to have a form where I want to create a new user , how would I actually send that data to our graph QL API ?
And I actually make the run the mutation , right ?
So insert the data into our database or into whatever you can see that the last element here and all the users is called Adrians .
And this is something that I emphasized in the last video because we're gonna be adding and currently the last element is ID 1000 because we have 1000 users .
I'm gonna be adding another user through this mutation and it's gonna be called Pedro , which is my name and it's gonna be of ID 1001 .
If you want to see the , the , the behind the scenes of creating this API mutation on the back end again , watch my last video because I showed exactly how to do that .
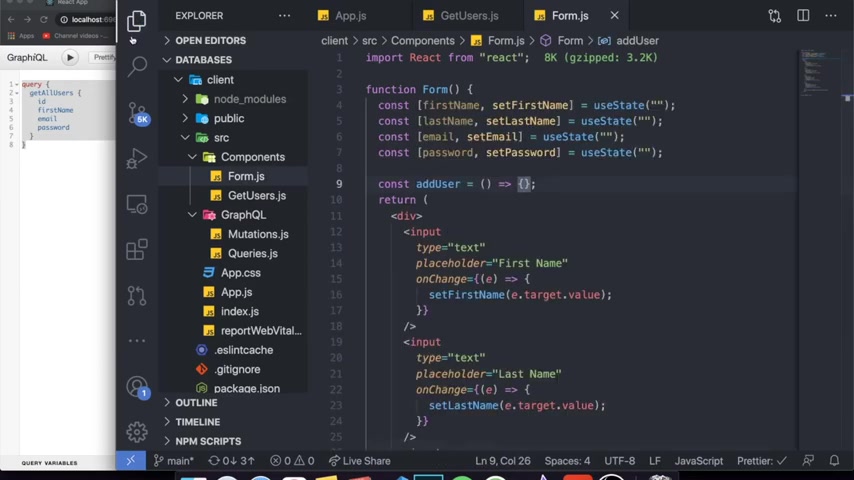
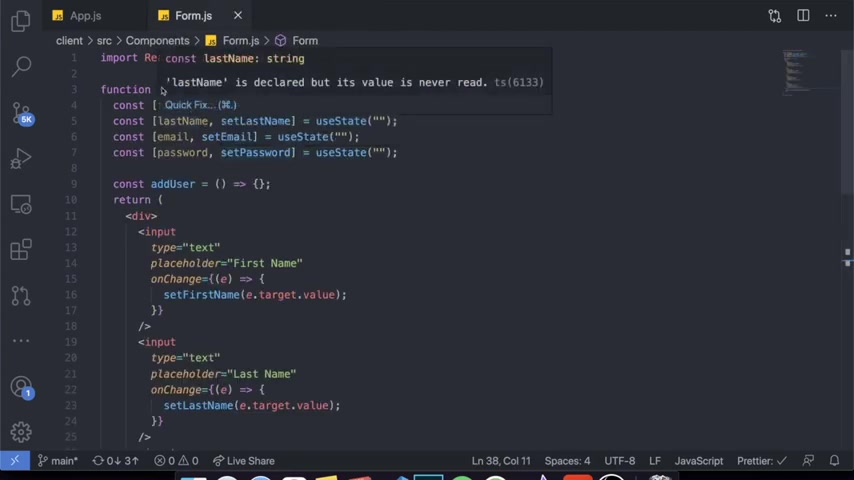
But what I'm gonna do right now is I'm actually going to build a component here , not a , not a folder , a component called form dot GS it's just gonna be a uh uh a simple form um that is going to contain like a way of different inputs , like first name , last name , email , password and a button to send that data .
And I'm gonna come back after I just created the simple form because it , it isn't useful to know how to create a form for this .
The , the , the important information is actually making the form be submitted to our API so I'll be back in a second .
OK , guys .
So I'm back right here .
And you can see that I created a very simple form as you can see nothing to fancy or anything .
I just created a form called that has like inputs , first name , last name , email and password .
I created four states .
Um Over here , one for each input , I also need to import the state and I created one for each input .
And basically what I do is whenever you write on the input , it just sets the value for the state to be the value for the input .
Very simple stuff over here , just making the form work , right ?
And at the bottom I have a button which when you click on it , it says add users .
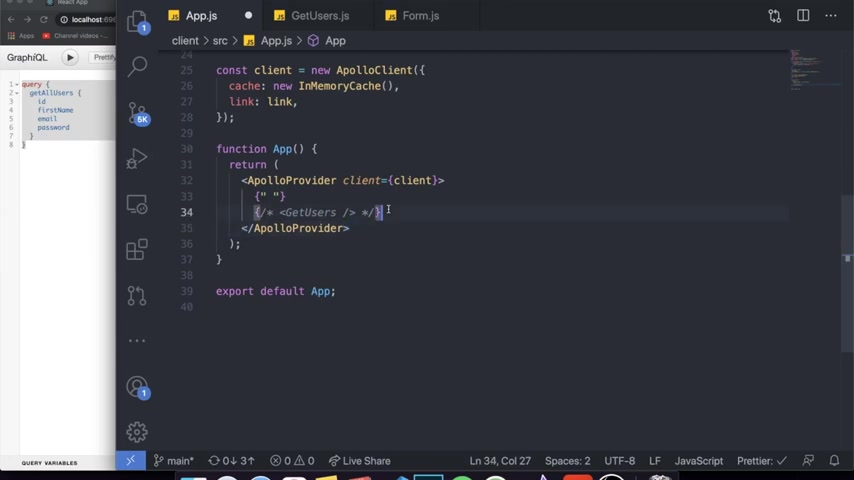
So let's actually import in our app dot GS .
Let's remove , get users because we don't actually want to use that right now .
We just want to use form .
And by the way , when I write form , it's being automatically imported over here .
So you can see get users in form are being imported .
So if you go here to our app react like the the react tab , you can see that the form appears here .
I don't care about it , how it looks .
I just want to make it work .
I'm gonna zoom in .
As you can see , it's a very ugly form , but obviously , uh it's very simple as I mentioned before .
So what do we actually want to do here in our form dot GS to send this data to our graph QL ?
API ?
Well , the first thing we actually wanna do is not even inside of the form dot We wanna come to our graph UL folder and write our whole mutation .
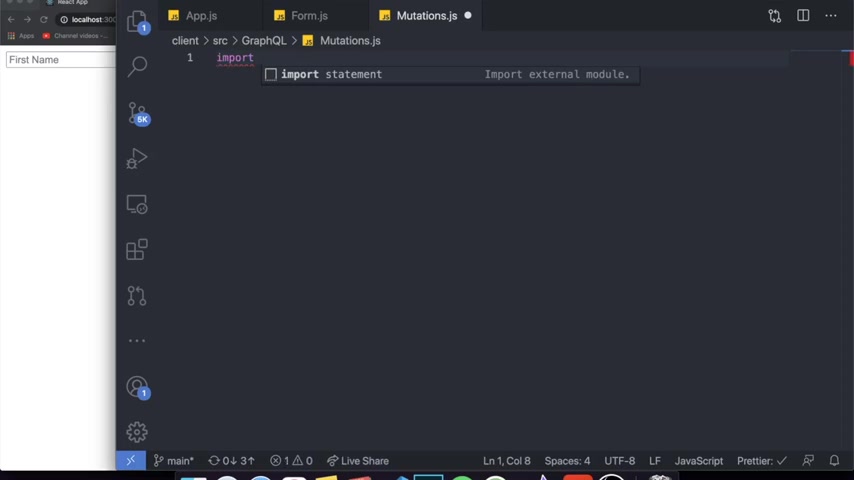
So , so what exact I showed you guys what a mutation looks like in graph QL before it's a bit different from a query , it's a little bit more complicated .
But um instead of just copying and pasting from what I did before , I'm , I'm gonna show you guys how to create it from here because we , I , I didn't save what the last mutation that I showed you guys .
So basically to create a mutation , we're gonna do it very si very similar to what we did with a quri .
We're gonna in export a variable called , let's call it , create um create user mutation , something like this and it's gonna be equal to GQL .
And just like before we're gonna put the back quotes to , to write the mutation inside of here .
And now with the mutation , we gotta write the word mutation like this mu mutation , then the name of the function of our mutation .
So if you recall in our API over here , I'm gonna open up the server folder in our API in uh where , where we defined our mutation .
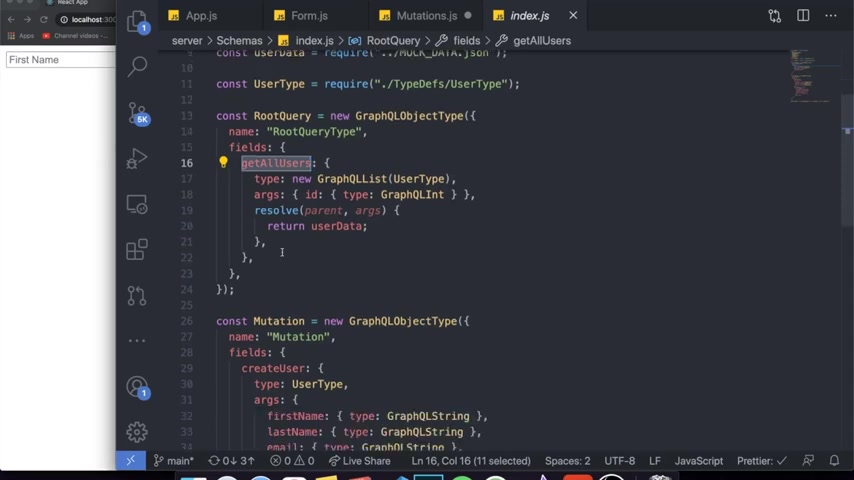
Um There's the name of the function , right ?
Create user just like the name of the query has to be the same .
So ghetto users , we used get our users for a query .
We need to put create users similar to this .
So let me just copy , create user over here .
And the format for a mutation is very simple .
It's very simple .
Basically , it's almost like a function .
You put create user and instead of your , you have to call create user again , but it's a bit different and I'll show you guys why .
And then after the create user again , you need to put again .
Um the the breezes , what happens is at the top here , you have to define the arguments that are gonna receive , right ?
And also the type of the arguments you're gonna receive .
So for example , for a create user , we want to receive a first name .
And for each variable , you have to put a dollar sign or a a money sign and you gotta put first name and you're gonna define that it is a stream like this uh similar to what we did in their back end , we're gonna do it this way .
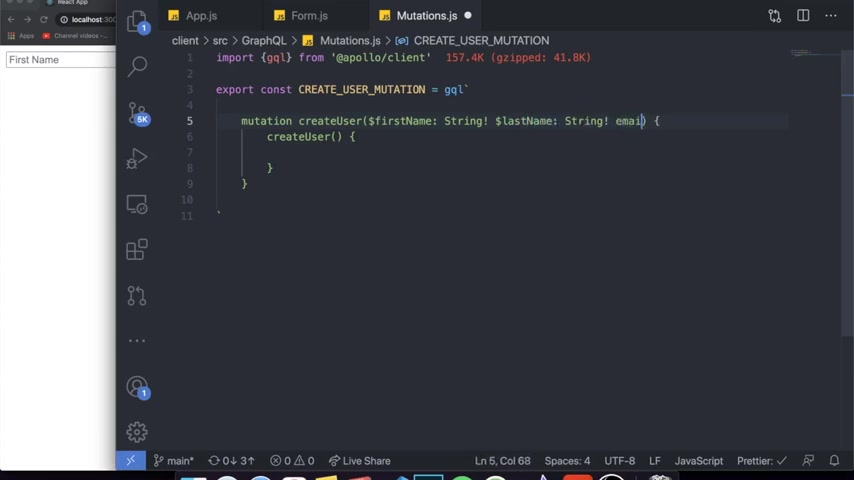
Then we're gonna put the next element uh which is last name , right ?
So I'm gonna come over here and say last name .
It's also a string .
Then email is also a string , um string .
And then let me see .
Oh I forgot to put the , the money sign over here , money sign , then password .
It's also a string .
So this is basically the idea we're just uh defining the types of the variables and the variables itself .
And on the other create user , the one down here , we have to just grab uh the arguments .
So put first name and actually , now we're saying the first name is off type first name and I know this looks super weird .
Um I literally don't know why they do this this way , but this is how it , they actually do it .
So I would just recommend doing it this way and honestly , I would do it .
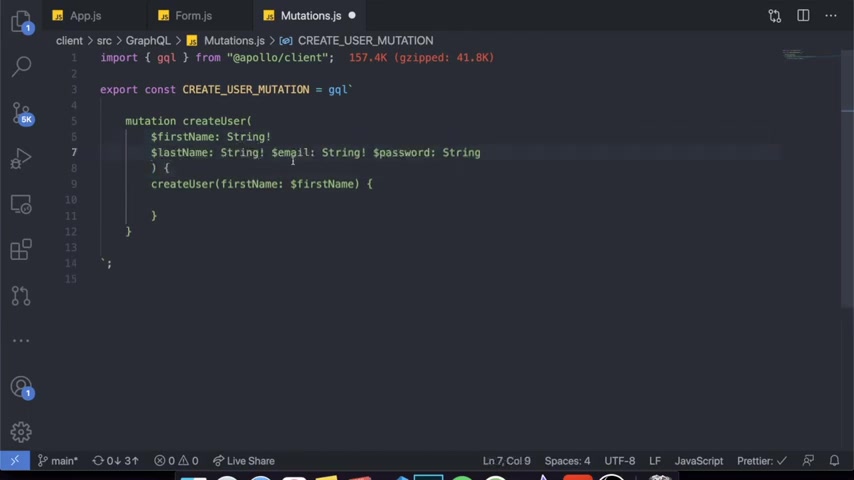
I , I would actually put a like a , a space between stuff um Just so that we have a better view of it .
So like this just put a uh an just press enter for each one of them .
And here for the create user , we're gonna do the same thing .
So for first name , uh it's gonna be like this and then for last name , it's gonna be at last name .
This is quite boring .
But basically this is what you gotta do and email is email and then password is password .
So I have those variables that we wanna actually insert into our database .
And then down here is what happens after the mutation .
So after this right here , right ?
So in instead of these two braces is what happens after the mutation is done .
So we can actually return something , for example , if I just created this user , but I actually want to keep track of their first name , for example .
So let me , let me write first name .
I wanna just receive the first name as a return from the mutation , right ?
Or I can put an ID , I can put whatever I want .
I'm gonna put an ID actually .
So this is the basic idea , this is how you create a mutation in your graph QL uh application in your react , right ?
So after we are done with this mutation , we gotta start working in our form dot GS component by basically start importing this actual mutation .
So let's come over here and say import and again from our graph QL folder .
But this time it's from the mutations file .
We wanna import create user mutation .
And we also need to import the use mutation hook which is different from the use query hook that we had before .
So use mutation from um a Polo client .
It's a hook from a Polo client and we're gonna be using that to actually make the mutation .
So in order to make that mutation .
We're gonna come here somewhere in application before we actually want to insert the data .
So up here , I wanna insert the data in this add user function that we created .
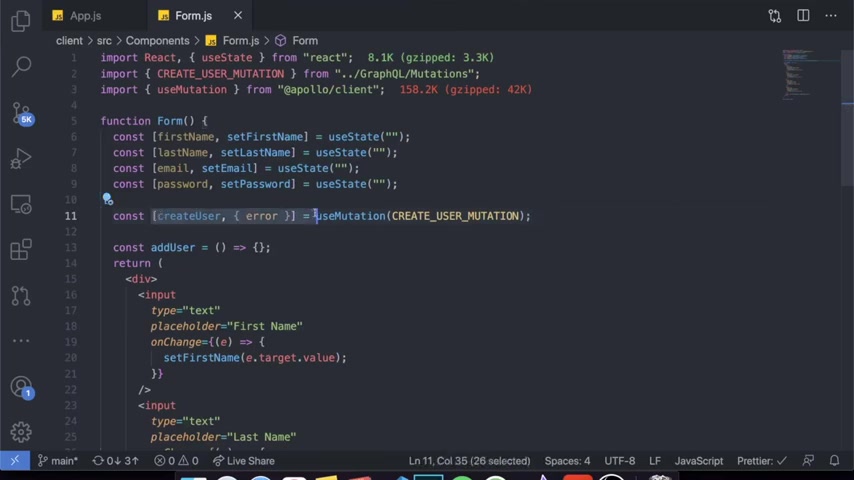
So up here , what I wanna do is I just wanna create um call the user mutation hook like this and pass the create user mutation similar to what we did with the query again .
Right ?
But the arguments that we get from the query from , from the mutation is a bit different .
So the first argument we can get is the actual function that we're gonna be using to create the user called create user .
It has to be the same as the one you put down here uh on your , no , not down here on your um index dot GS .
So create user .
So over here we're gonna say create user and then we can maybe grab some error that occurred in the while creating the mutation .
And this is the actual standard .
So you can see clearly , I don't wanna confuse any of you guys .
It's different from the query .
So it's actually you're using square brackets and to get the error , you would need to put a curly braces .
When with the query , if I come here to get users , it's not square brackets , it's curly braces and then you just put the variables like this .
I have no idea why they made it different .
Um But I'm not gonna like it's just , I don't know why they did it this way .
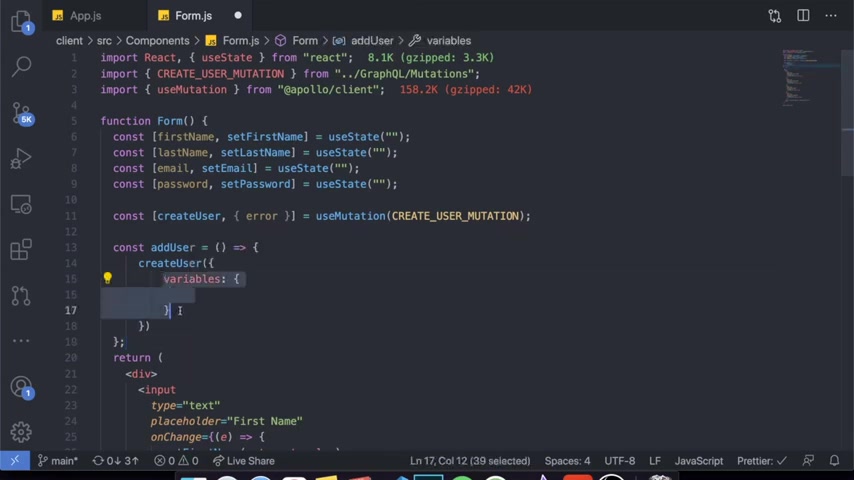
But now that we have the create user function , create user is a function that we can just use and pass in arguments and it's automatically going to make the API call .
So let's come over here instead of our add user , we wanna call create user and create user .
Very simply , you just gotta pass the object containing the variables that you wanna insert .
But it also needs to first grab a , it needs to have an argument called variables .
And then the variables that we want to insert needs to be inside of this variables argument .
So it's an object containing 11 property called variables .
And this variables property contains an object containing all the data that we wanna send .
I know that seems a bit confusing .
But as you work on it , you'll definitely get it .
So the variables we wanna send is first name and we want to give it the value for our input , called first name .
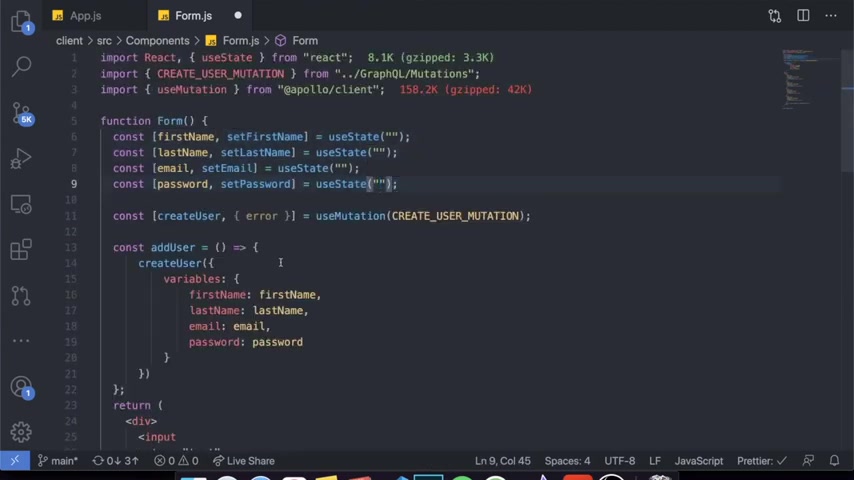
And then we wanna send last name , which is going to be last name , then email , which is going to be email and password , which is going to be password .
So we're just passing exactly the format of our create user variables and we're passing the values for our inputs , which are our states over here that I create it outside of the video because it's not important for this video .
So now that we have this we might also want to check to see if there was any errors .
So to check error , very simple , you can just say if error , right ?
If error , if there was any errors , I wanna pronounce console dot log error .
I don't think there's gonna be any errors , but this is the idea , right ?
And now that we have this done , we can actually test to see if our mutation is working .
So let's come over here .
Um I'm gonna open my inspect , I'm gonna refresh this .
I don't know if there's gonna Yeah , there's no console log , but I just want to open up .
If there is any errors , we can check it immediately .
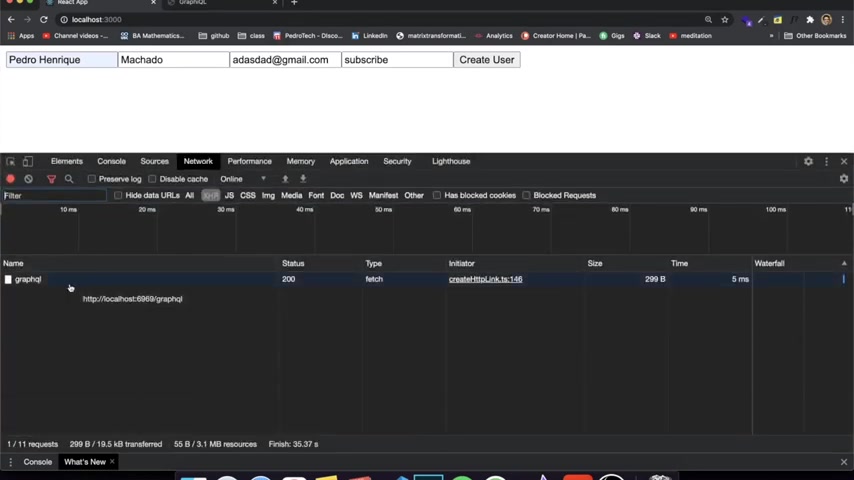
But you can see clearly that when I run the get users query , uh a bunch of users appear here to the right and the last user is called Adrian's of ID 1000 .
Now let's try to run and create a user here .
So I'm gonna create this right here .
Um My shadow and I'm actually gonna put a random email at gmail dot com and the password is gonna be um subscribe .
OK ?
This is the information we put right when I click create user , we don't get anything like immediately because you can obviously do that uh later like what you want , what you want it to happen when you create a user .
But if we come here to our network tab , you can see that there was a graph Q request made , as you can see , it says graph QL and it was actually a mutation which basically just sends the data and it says that the status was 200 .
So let's check if that worked .
Let's come here to our graphical and , and get all users again and see if we actually have a new user in our data .
Let's refresh this .
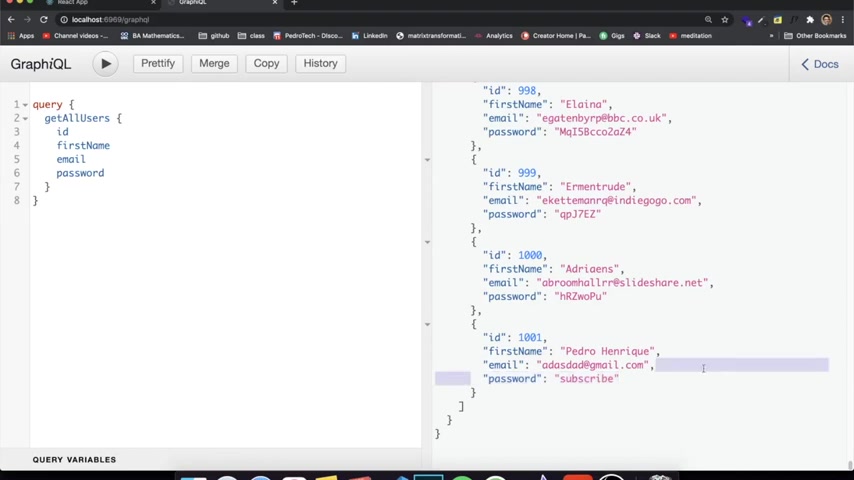
If I go to the last element , you can see clearly that now there's a AAA user of idea 1000 and one called Pedro .
Uh His email is AD D whatever we put and the password is subscribed .
So this is the idea we can add how many users we want .
Uh we're making the request , we didn't get any errors .
And this is the basic idea of making a mutation work .
So that's basically it .
I really hope you guys enjoyed this video because it's a , it was actually a hassle to make this video because I know it's pretty long uh teaching a Polo client and teaching how to work with is really hard in the beginning .
And I'm currently in the midst of like so much work .
That's why I actually didn't post yesterday .
But I really hope you guys enjoyed this video .
Uh If you enjoyed it , please leave a like comment down below .
Uh comment down below and you ask questions you guys ask because if you look at my channel , I answer every single comment .
I try to help everyone have a discord where I help a lot of people .
So if you're interested in that , the link is in the description , subscribe because I'm posting every single day and I see you guys next time .
Are you looking for a way to reach a wider audience and get more views on your videos?
Our innovative video to text transcribing service can help you do just that.
We provide accurate transcriptions of your videos along with visual content that will help you attract new viewers and keep them engaged. Plus, our data analytics and ad campaign tools can help you monetize your content and maximize your revenue.
Let's partner up and take your video content to the next level!
Contact us today to learn more.