
https://youtu.be/s0H5BW-xvkw?si=7Tf0fZnJoKCHDGEX
NEW AI Product Tool! _ Deepbrain AI Studios Review
Hi guys , welcome to my channel .
My name is Tristan Ringer and today I'm going to review Deep Brain A I Studios .
I'm an affiliate with A I studios as I recently purchased the product for today's insight on what it is and how it works .
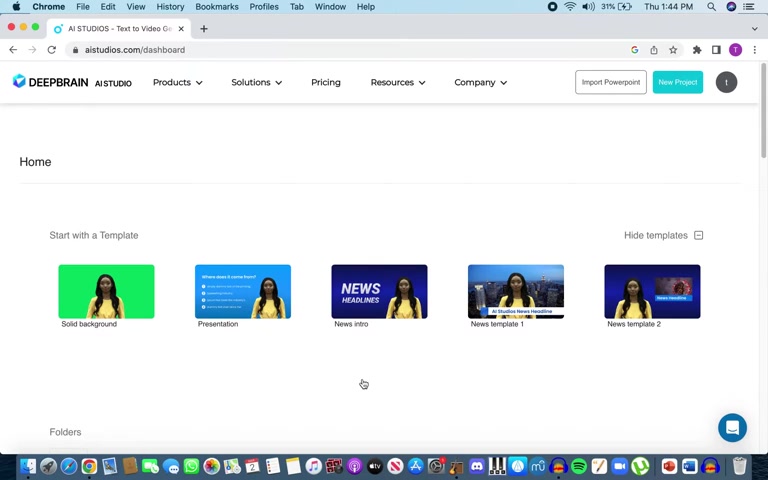
So this is what your dashboard will look like when you log into A I studios .
As you can see , they give you a bunch of different templates to choose from .
But for today's video purpose , we're gonna select presentation .
OK ?
So once you're in the video editor , you'll see a bunch of different options to choose from in the middle .
Of course , is your video preview with your avatar and the different text you write on top , you have the ability to rename the project on the left .
You have the slides in the order they are in underneath that you have layers with the different layers that your um preview consists of .
On the right .

We have a column that shows you your model , text , subtitle , image , background , video , audio , and I don't think you can see this , but it says shapes if you select something , uh last one will appear which is animations .
So a bunch of different things , they give you to edit your video .
We're gonna start with the pop and rename our project .
So we're going to go ahead and call this new project .
First thing we're gonna do is select our avatar as that's probably the main thing that you're here for .
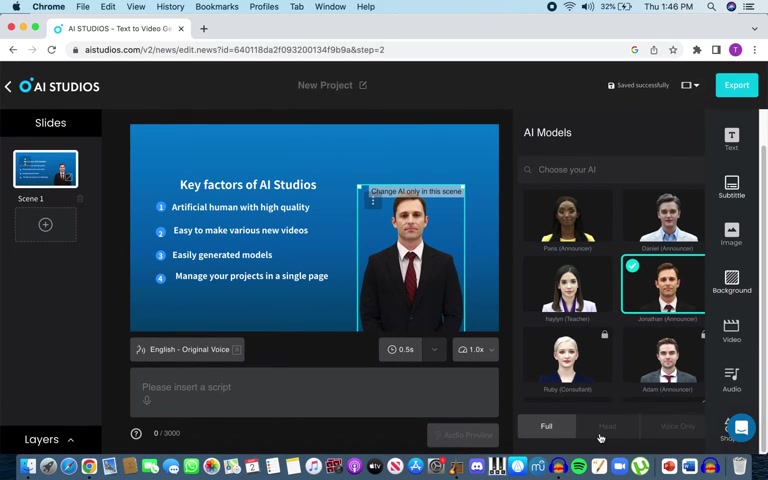
So once you click your avatar , the avatar models will pop up , you can see that they have a bunch of different options to choose from .
Some of these are locked .
I believe that is because they have a premium membership , which the premium membership will allow you to have more avatars .
But they give you a pretty big selection to begin with .
We're gonna select Jonathan .
OK ?
So once we selected that there are ways to edit this , so you can see that underneath your avatars , you can have the full body , you can have only the head or you can just have the voice .
We were like we like the head one .
So we'll choose the head , put it in the top right corner .
One thing I will note about this uh product is that unlike other video or presentation products , there isn't really an align option .
So it's hard to know where you are setting images or texts in your videos .
So just keep note of that .
OK .
So once we have the head , um we'll see that the language right now is English .
It's played at a space of 0.5 seconds and at a speed of one time .

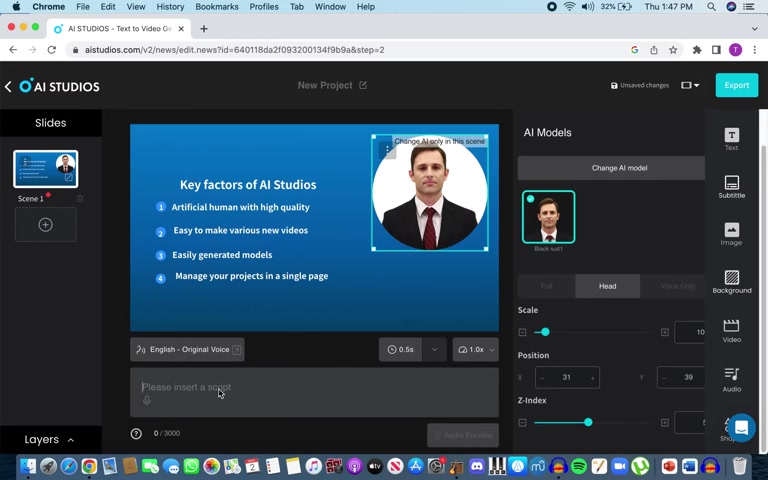
Um So in underneath , you will see that there is a bubble , a bubble for your text and this is what the avatar will speak .
So below it will show you the text to speech bubble .
So we typed in there .
Hi there .
Welcome to A I or sorry .
Hi there .
Welcome to Deep Brain A I Studios and then we can hit preview then takes a moment to synthesize .
Hi there .
Welcome to Deep Brain A I Studios .
So as you can see the avatar was not moving while the text was being uh spoken .
That is because you need to export the video first in order to see the avatar's mouth move .
OK ?
So I'm gonna show you a little bit about the text in the video .
So on here it shows you the bubble that um you would type your t so sample one and then it highlights it here .

You can have different kinds of texts , you can insert headers , titles , main texts and captions , but we'll just stick with what we have here .
Um Like I said before , there isn't the aligning there also isn't uh bullets in the text option , which is kind of annoying .
But as you can see here , you can kind of make it work with different shapes and numbers and uh texts and just rearrange it however you like .
But this is something to keep it , keep mind of .
OK ?
As you can see here , you can change the color of the text .
So we're gonna keep it white for now .
But there is the whole array of different colors .
You can change the font .
And as you can see , there is a bunch of different fonts you can choose from .
We're just gonna stick with .
Actually , we're gonna change it to uh serve pro OK ?

You can see there the text changed , you can scale your text .
So how big you want it ?
You can also position your text in the XY and Z components .
And lastly , you can change the opacity of the text .
So if you want it to be more transparent or more bold , you have the option there underneath is subtitle , which is very handy .
If you are making presentations for a classroom or for a business presentation , you can hit subtitle and it would generate the subtitles to what the text is being spoken .
So the text in your video is not being spoken , but the text uh underneath in your chat bubble is being spoken .


So as you can see there , it shows what the text from the bubble is saying and it will follow um it will follow the same pattern , the same speed that the A I is speaking from .
There are different options for your subtitles , but we'll just keep them normal for now .
Next images .
So if we create a new slide here , then we would make our avatar just the head , only a little bit up it up , we can add new images .
So they give you a preview of images that they have already selected .
You can upload your own image , but we're just gonna choose selected image .
So I like this one .
Put it here .
We can also add an animation at the end to the image .
Oh Yeah , there we go .
So make it slide in on top .
Sorry , I should have spoke about this earlier .
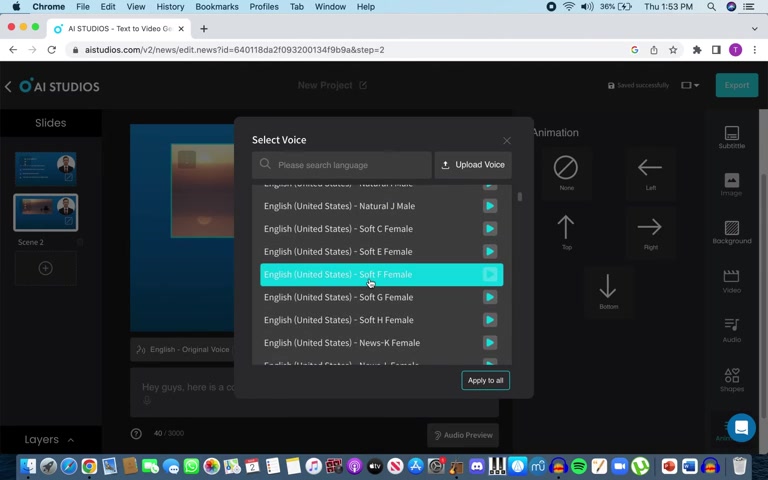
So the different languages , there are a bunch of different languages with different accents that you can choose from .
It , doesn't it ?
One thing to note is that it won't detect what language you write in .
So you're gonna have to translate it to that language for it to be spoken in that language if that makes sense .
So if you wanted it to speak in Spanish , you're gonna have to write your text in Spanish and then select the Spanish voice if that makes sense .
OK .
Moving on .
Um Yeah , this is honestly pretty much the gist of it guys like there are different videos you can select , you can upload your own , you can record , you can change the background color right now .
It's on blue .
Let's change it to a lighter blue .
There we go .
Uh different audio you can add which is cool , you can upload audio , these are for like songs or , or just that background effect noise you want .
Um So yeah , so the text or the A I will be speaking the text that you write , you just have to export it first for that to happen .
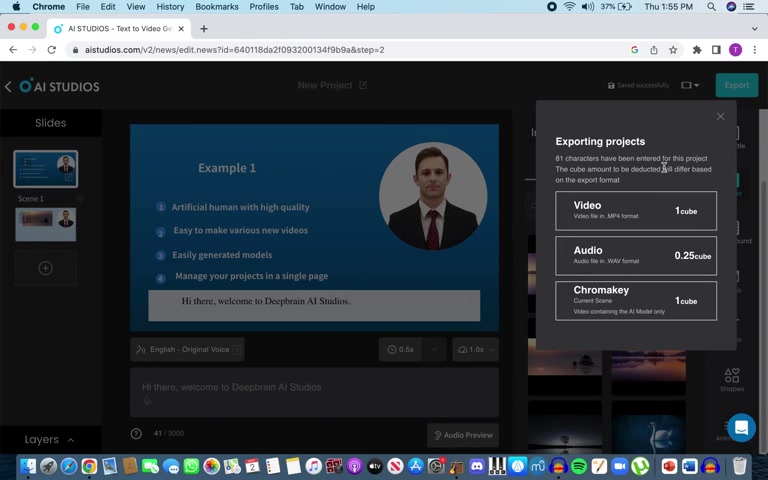
Uh So I'm gonna go ahead and export and we're gonna see what comes up .
So when you have your membership in A I studios , you'll see that your membership consists of 20 cubes per month .
One video is one cube .
And as you can see here , there are different cube rates for different options , but the video will cost you one cube .
So you're allowed up to 20 videos per month , which is pretty sweet .
If you can do 20 videos per month , I think for most people , that'll be more than enough .
But if you're making a lot of videos consistently , you might have to upgrade to the premium , the premium membership .

So we're gonna go ahead and export .
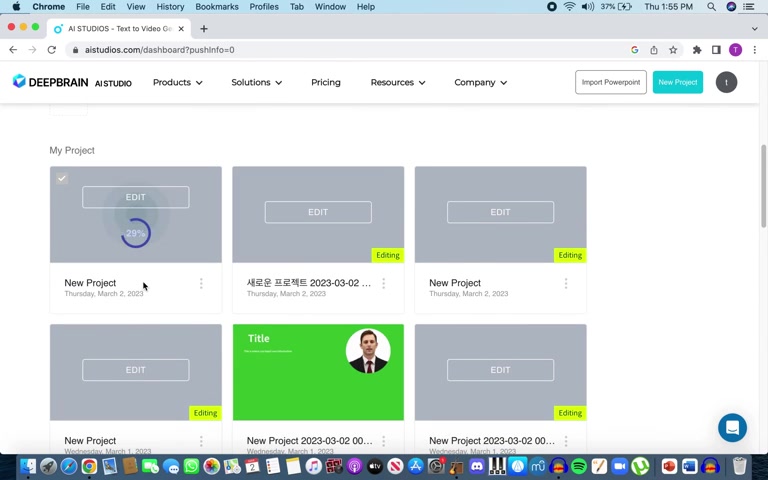
If you scroll down on the bottom of your dashboard , you'll see that it only takes a couple minutes for it to export until you get your final product .
Ok , guys .
So the video is done as you can remember , we wrote just a quick little script at the bottom uh with subtitles .
So you can see how it is played through .
Here we go .
Hi there .
Welcome to Deep Brain A I Studios .
Hey guys , here is a cool rock formation .
Pretty cool guys .
So let me know what you think in the comments below .
Overall .
I think this is a very powerful product .
I think it will save you a bunch of time .
If you were filming yourself before and editing videos , it will save you a bunch of time .
Probably money .
Also .
Um Couple things that I would uh like to see in the future with this product is have more of an alignment with the , the text or the pictures and have more options for the tech .
So like bullet forms points , those kind of things .

But overall , it's a pretty good starter for where it is and it's at a pretty reasonable price .
So thank you guys for watching and I'll catch you in the next video .
Are you looking for a way to reach a wider audience and get more views on your videos?
Our innovative video to text transcribing service can help you do just that.
We provide accurate transcriptions of your videos along with visual content that will help you attract new viewers and keep them engaged. Plus, our data analytics and ad campaign tools can help you monetize your content and maximize your revenue.
Let's partner up and take your video content to the next level!
Contact us today to learn more.